Table of Contents
Table of Contents

Related Manuals for Acer n300


Summary of Contents for Acer n300
- Page 1 Acer n300 Handheld User’s Guide...
- Page 2 Acer and its subsidiaries makes no representations or warranties, either expressed or implied, with respect to the contents hereof and specifically disclaims the implied warranties of merchantability or fitness for a particular purpose. Acer and its subsidiaries assume no responsibility for any damage or loss resulting from the use of this Acer n300 Handheld User’s Guide. NOTES Record the serial number, purchase date, and place of purchase information in the space provided below.
- Page 3 Disposal instructions Disposal instructions Do not throw this electronic device into the trash when discarding. To minimize pollution and ensure utmost protection of the global environment, please recycle. For electronic products containing an LCD/CRT monitor or display: Lamp(s) inside this product contain mercury and must be recycled or disposed of according to local, state or federal laws.
- Page 4 • Connecting your handheld to a computer, a network, or the Internet • Personalizing your handheld with your own preference settings This User’s Guide introduces you to the many ways your Acer n300 can help you organize and manage both business and personal information to make your everyday activities a more productive and satisfying experience.
-
Page 5: Your Guides
We hope you enjoy using your Acer n300 as much as we enjoyed creating it for you. Use your Acer n300 to effectively manage information related to both business and personal tasks. -
Page 6: Package Contents
First things first Package contents Package contents Your Acer n300 comes packed in a cardboard box. Carefully unpack the box and remove the contents. If any of the following items are missing or damaged, contact your dealer immediately: • Acer n300 handheld •... -
Page 7: Resetting Your Acer N300
First things first Maintaining your Acer n300 Resetting your Acer n300 You may have to perform a reset if your handheld no longer responds to the buttons on the screen. Performing a soft reset A soft reset allows your handheld to get a fresh start, similar to rebooting a computer. - Page 8 First things first Maintaining your Acer n300 2. While holding the Today and Messaging buttons (a), using the tip of your stylus, lightly press the reset button inside the hole (b) on the bottom of your handheld. NOTE: When you perform a hard reset, formats, preferences, and other settings including date and time are restored to their factory default settings.
-
Page 9: Table Of Contents
Design and ergonomics ......2 Acer n300 tour ......3 Front view . - Page 10 Using an USB thumb drive ......22 Inserting an USB thumb drive - Through the Cradle ... . 22 Inserting an USB thumb drive - Through the 3-in-1 Sync cable (optional accessory) .
-
Page 11: Getting Started
This chapter will discuss the following topics: • Basic requirements • Feature highlights of your Acer n300 • Acer n300 system tour • Step-by-step procedures on how to prepare your handheld for use • Basic concepts in using your handheld... -
Page 12: Audio
1 Getting started Features summary Audio • Built-in industry standard 3.5 mm stereo earphone jack , 3 ring type • Built-in mono speaker • Built-in mono microphone Proprietary 26-pin I/O connector • USB Host (female) • USB Client (male) • Serial •... -
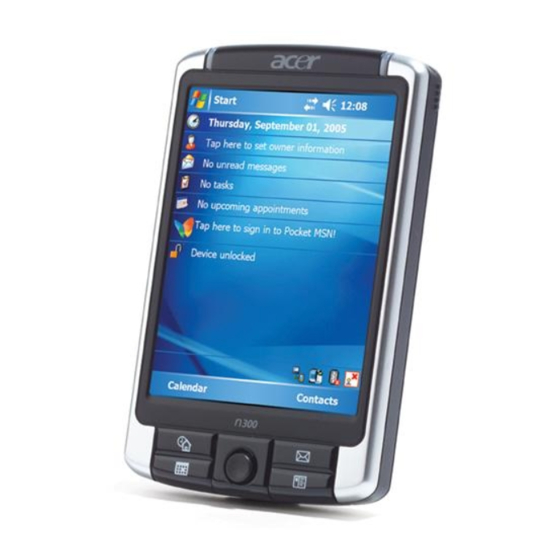
Page 13: Acer N300 Tour
Acer n300 tour Front view Component Description ® Power / Bluetooth Power LED indicator. 802.11b WLAN LED - status description: indicator • Flashing green - Charging • Steady green - Charging complete • Flashing red - Alarm indicator ® Bluetooth / 802.11b WLAN LED indicator. -
Page 14: Left View
1 Getting started Acer n300 tour NOTE: If your handheld is off, pressing any Quick button turns on the handheld and launches the program assigned to that button. Left view Using the backlight If lighting conditions make it difficult for you to see the information on your handheld, use the backlight to illuminate your screen. -
Page 15: Top View
You can also use expansion cards to back up data from your handheld. Earphone jack Connects to audio line-out devices (earphones/headphones). 1 Getting started Acer n300 tour... -
Page 16: Bottom View
1 Getting started Acer n300 tour Bottom view Label Description Proprietary Connects your handheld to a portable or desktop computer and 26-pin I/O DC power supply to an AC wall outlet to charge the battery. connector - USB Host - USB Client... -
Page 17: Rear View
Rear view Preparing to use your Acer n300 Perform the following easy installation tasks to begin using your handheld: • Charge your handheld • Set up your handheld • Install the Microsoft • Connect n300 to your computer • Perform the first ActiveSync operation Charging your Acer n300 For initial use, you need to charge your handheld for four hours. - Page 18 1 Getting started Preparing to use your Acer n300 you can use your handheld for 8 straight hours of operation (backlight inactive) before you need to recharge the battery. To charge your Acer n300 Unlock the battery access latch to open the battery cover battery bay (b), then close the battery cover to lock the battery pack..
- Page 19 If the battery level becomes low in the course of normal use, a status icon appears on the handheld screen indicating low or critical low battery status. Perform an ® ActiveSync operation to back up your data; then recharge the battery. 1 Getting started Preparing to use your Acer n300...
-
Page 20: Setting Up Your Acer N300
1 Getting started Preparing to use your Acer n300 Setting up your Acer n300 After you have initially charged your handheld for four hours, you can now set it up. Refer to the instructions below. To set up your Acer n300 Disable hold switch first. -
Page 21: Installing The Microsoft® Activesync® Software
® installing ActiveSync • Do not copy the ActiveSync the Acer n300 Handheld Getting Started Disk to place the files in their proper locations and to decompress the files. To install the Microsoft Exit any open programs, including those that run at startup, and disable any virus- scanning software. - Page 22 1 Getting started Preparing to use your Acer n300 To connect the computer Via the USB Sync cable Plug the sync cable into the 26-pin I/O connector on the bottom of your handheld. Plug the AC adapter into any AC current outlet.
-
Page 23: Performing The First Synchronization Process
• Set up a partnership so you can synchronize information between your handheld and your computer • Customize your synchronization settings To perform the first synchronization process Connect the sync cable to your handheld. 1 Getting started Preparing to use your Acer n300 ®... - Page 24 1 Getting started Preparing to use your Acer n300 Plug the USB client connector into a USB port on your computer. The 'New Partnership' setup wizard will automatically start on your computer screen. NOTE: If the wizard does not automatically appear, launch ActiveSync by clicking on its icon from Follow the onscreen instructions.
-
Page 25: Command Interface
Command interface Handheld buttons and the stylus Your handheld has hardware buttons that control actions and scroll functions, and a stylus for selecting items and entering information. On your handheld, the stylus replaces the mouse. • Tap. Touch the screen once with the stylus to open items and select options. •... - Page 26 1 Getting started Command interface If you need Help for any specific application, launch the application and then tap >Help for online help. You can use your handheld to exchange information with mobile devices, your computer, a network, or the Internet. If you need more information on Bluetooth Wireless LAN (optional): Bluetooth •...
-
Page 27: Backup And Restore Data
Backup and restore data Backup/Restore enables you to back up data files and applications from your handheld to a storage device and to restore data to your handheld. Advanced security features offer password protection for sensitive documents/applications during Backup and/or Restore operations. The expansion features of your handheld allow you to use any of the following storage devices: •... -
Page 28: Backup Function
When the backup process is completed, a message box appears, saying that backup operation is completed. Restore function You can only restore backup files that are generated by Backup/Restore; file format is *.abk (Acer backup). To perform data restoration Close all running programs except for Backup/Restore. to proceed with the backup process. - Page 29 Select a source storage device from the 'Restore from' pulldown menu. The lower half of the screen will display a list of files contained in the selected storage device. Filename, file size and date when the backup file was created are indicated in the list.
- Page 30 2 Backup and restore data Tap Delete to remove the file.
-
Page 31: Using Expansion Features
The slim and lightweight design of your Acer n300 belies its impressive expansion features . These expansion features include: • SD/MMC slot • USB host port via sync cable or cradle These expansion features allow you to: • Install additional applications •... -
Page 32: Removing An Sd/Mmc Card
Gently remove the card from the slot (b). Using an USB thumb drive Your Acer n300 supports USB host expansion. Via cradle or sync cable, you can access a USB thumb drive directly from your n300. Inserting an USB thumb drive - Through the Cradle Connect the AC adapter cord to the DC-in jack at the back of the cradle. -
Page 33: Appendix A: Regulation & Safety Notices
Appendix A: Regulation & safety notices This appendix lists the general notices of your PDA. FCC notice This device has been tested and found to comply with the limits for a Class B digital device pursuant to Part 15 of the FCC rules. These limits are designed to provide reasonable protection against harmful interference in a residential installation. -
Page 34: Caution
Cet appareil numerique de la classe B est conforme a la norme NMB-003 du Canada. Declaration of Conformity for EU countries Hereby, Acer, declares that this PDA series is in compliance with the essential requirements and other relevant provisions of Directive 1999/5/EC. (Please visit http:// global.acer.com/products/pda/reg-pda/index.htm for complete documents.) -
Page 35: Important Safety Instructions
10 Unplug this product from the wall outlet and refer servicing to qualified service personnel under the following conditions: 11 The Acer PDA uses a lithium battery. Replace the battery with the same type as the product's battery we recommend in the product specification list. -
Page 36: Lcd Pixel Statement
Appendix A: Regulation & safety notices LCD pixel statement 13 To avoid hazard of unexpected electrical shock, use the AC adapter only when the wall socket is properly grounded. 14 Do not use your PDA while exercising. LCD pixel statement The LCD unit is produced with high-precision manufacturing techniques. -
Page 37: List Of Applicable Countries
(RSS-210) Exposure of humans to RF fields (RSS-102) The Acer PDA employs low gain integral antennas that do not emit RF field in excess of Health Canada limits for the general population; consult Safety Code 6, obtainable from Health Canada's website at www.hc-sc.gc.ca/rpb. - Page 38 Appendix A: Regulation & safety notices Exposure of humans to RF fields (RSS-102)
- Page 39 Index ActiveSync® backlight Backup opening Restore function command interface device buttons Today screen copyright expansion features Acer versatile connector attaching expansion sleeve inserting CompactFlash card removing CompactFlash card handheld guides maintenance package contents resetting handheld features audio battery pack install...