Table of Contents
Table of Contents

Related Manuals for Acer CS-5530


Summary of Contents for Acer CS-5530
- Page 1 E NGLISH...
-
Page 2: Fcc Statement
FCC STATEMENT This device complies with Part 15 of the FCC Rules. Operation is subject to the following two conditions: (1) This device may not cause harmful interference, and (2) This device must accept any interference received, including interference that may cause undesired operation. Note: This equipment has been tested and found to comply with the limits for Class B digital devices, pursuant to Part 15 of the FCC rules. -
Page 3: Trademark Information
TRADEMARK INFORMATION Microsoft and Windows ® Corporation. Pentium is a registered trademark of Intel Corporation. ® Macintosh is a trademark of Apple Computer, Inc. is a trademark. Other names and products may be trademarks or registered trademarks of their respective owners. READ THIS FIRST Notice: 1. -
Page 4: Safety Instructions
Safety Instructions Read and understand all Warnings and Cautions before using this product. WARNING If foreign objects or water have entered the camera, turn the power OFF and remove the battery and the AC power adapter. Continued use in this state might cause fire or electric shock. Consult the store of purchase. - Page 5 CAUTION Insert the battery paying careful attention to the polarity (+ or –) of the terminals. Inserting the battery with its polarities inverted might cause fire and injury, or damage to the surrounding areas due to the battery rupturing or leaking. Do not fire the flash close to anyone’s eyes.
-
Page 6: Notes On Battery Usage
Notes on Battery Usage When you use the battery, carefully read and strictly observe the Safety Instructions and the notes described below: Use only the specified battery (3.7V). Avoid using the battery in extremely cold environments as low temperatures can shorten the battery life and reduce camera performance. When you are using the new rechargeable battery or rechargeable battery that has not been used for an extended period of time (the battery that passed the expiry date is an exception) might affect the number of pictures... -
Page 7: Table Of Contents
CONTENTS 9 INTRODUCTION Overview Package Contents 12 GETTING TO KNOW THE CAMERA Front View Rear View Status LED Indicator LCD Monitor Icons 18 GETTING STARTED Attaching the Camera Strap Inserting and Removing the Battery Charging the Battery Inserting and Removing the SD Card Turning the Power On/Off Setting the Date and Time Choosing the Language... - Page 8 40 [ ] PLAYBACK MODE Playing Back Still Images Playing Back Video Clips Playing Back Still Images/Video Clips on a TV Attaching Voice Memos Thumbnail Display Zoom Playback Slideshow Display Protecting Images DPOF Settings ] Erasing Images 54 MENU OPTIONS Still Image Menu (Picture) Still Image Menu (Function) Movie Menu (Picture)
-
Page 9: Introduction
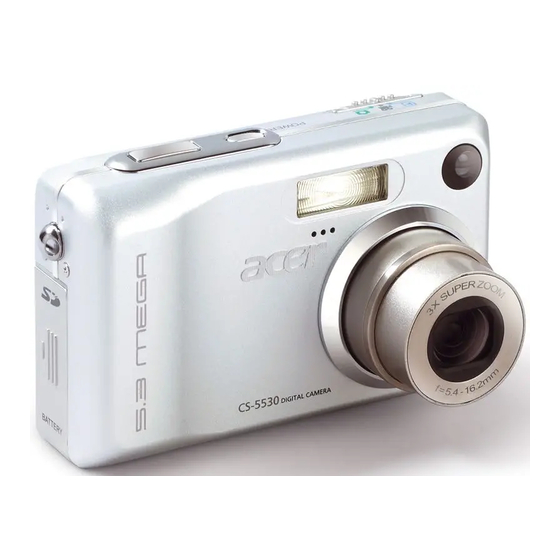
INTRODUCTION Overview Congratulations on your purchase of the new digital camera. Capturing high-quality digital pictures is fast and easy with this state-of-the-art smart camera. Equipped with a 5.2 Mega pixels CCD, this camera is capable of capturing pictures with a resolution of up to 2560 x 1920 pixels. Other cool features provided by the camera include the following: LCD monitor - Recording media -... - Page 10 Voice memo - Camera settings - Thumbnail display - TV and PC connection - DPOF settings - 10-E A voice memo can be recorded once for 30 seconds at photography mode immediately following a still image captured or at playback mode while viewing the picture.
-
Page 11: Package Contents
Package Contents Carefully unpack your camera and ensure that you have the following items. Common Product Components: Digital camera A/V cable User’s manual USB cable Software CD-ROM Camera strap Camera pouch Conversion adapter SD card AC power adapter Rechargeable lithium-ion battery Battery charger E-11... -
Page 12: Getting To Know The Camera
GETTING TO KNOW THE CAMERA Front View Name 1. Shutter button 2. POWER button 3. Flash 4. Mode switch 5. Self-timer LED (AF auxiliary light) taken. 6. Speaker 7. Lens 8. Conversion adapter Allows you to connect the conversion adapter to an AC terminal 9. -
Page 13: Rear View
Rear View Name 1. LCD monitor Display button 3. Status LED Zoom in button Zoom out button Zooms the lens to wide-angle position. 5. MENU button Erase button 7. Strap holder 8. SET /Direction button 9. Battery/SD card cover Allows access to the battery and insert or remove 10. - Page 14 SET /Direction button Name button Focus button button Flash button button Self-timer button button Exposure compensation / Backlight correction button compensation / backlight correction on and 5. SET button 14-E Description Scrolls upwards. Allows you to choose the appropriate focus setting.
-
Page 15: Status Led Indicator
Status LED Indicator This describes the color and state of the status LED. During power Color State The completion of battery charge. Green Battery charging Flashing in progress. Battery charging error. Flashing Orange Flashing During photography AE or AF is locked with the shutter button held halfway. -
Page 16: Lcd Monitor Icons
LCD Monitor Icons Photography mode [ 1. Zoom status 2. Voice memo 3. Remaining battery status Full battery power Medium battery power Low battery power No battery power 4. Flash icon [Blank] Auto ] Red-eye Reduction ] Forced Flash ] Suppressed Flash ] Night Scene 5. - Page 17 Photography mode [ 1. [ ] Movie mode 2. Zoom status 3. Remaining battery status 4. Image size 5. Possible recording time / elapsed time 6. Quality 7. Recording indicator 8. Self-timer icon 9. Focus icon Playback mode [ ] -Still image playback 1.
-
Page 18: Getting Started
GETTING STARTED Attaching the Camera Strap Attach the camera strap as shown in the illustration. 18-E... -
Page 19: Inserting And Removing The Battery
Inserting and Removing the Battery We highly recommend using specified rechargeable lithium-ion battery (3.7V) to fully demonstrate this camera’s function. Charge the battery before using the camera. Make sure that the power of the camera is off before inserting or removing the battery. -
Page 20: Charging The Battery
Charging the Battery Using the AC power adapter may charge the battery or operate the camera as power supply. Make sure that the power of the camera is off and then insert the battery before starting. 1. Insert the conversion adapter into the conversion adapter terminal of the camera as shown in the illustration. - Page 21 This camera must be used with specified AC power adapter. Damage caused by the use of an incorrect adapter is not covered under the warranty. When the charging is not started even if following the above procedure, turn the power on at any mode after LCD monitor turns on, and then turn the power off.
-
Page 22: Inserting And Removing The Sd Card
Inserting and Removing the SD Card Images photographed with this camera will be stored on the SD card. Without inserting the SD card, you cannot take photographs using the camera. Before inserting or removing the SD card, make sure that the power of the camera is off. -
Page 23: Turning The Power On/Off
Turning the Power On/Off Load the battery and insert an SD card before starting. Turning the power on Press the POWER button to turn the power on. The status LED lights green and the camera is initiated. When the power is turned on, the camera will start in the mode that was set. -
Page 24: Setting The Date And Time
Setting the Date and Time The date/time needs to be set if/when: Camera is turned on for the first time. Camera is turned on after leaving the camera without the battery for an extended period of time. When the date and time information is not displayed on the LCD monitor, follow these steps to set the correct date and time. -
Page 25: Choosing The Language
Choosing the Language Specify in which language menus and messages are to be displayed on the LCD monitor. 1. Slide the mode switch to [ 2. Press the MENU button and select [Setup] menu with the button. If no images/video clips are recorded on the SD card, press the MENU button and then [Setup] menu is displayed. -
Page 26: Formatting The Sd Card
Formatting the SD Card This erases all of the images and folders that have been recorded on the SD card. Formatting is not possible when the SD card in the locked condition. 1. Slide the mode switch to [ 2. Press the MENU button. [Setup] menu is displayed. -
Page 27: Setting Image Resolution And Quality
Setting Image Resolution and Quality Resolution and quality settings determine the pixel size (dimension), image file size, and compression ratio for your images. These settings affect the number of images that can be stored on a memory card. As you get to know the camera, it is recommended that you try each quality and resolution setting to get an appreciation for the effects that these settings will have on your images. - Page 28 Possible number of shots (still image) The table shows the approximate shots that you can take at each setting based on an optional SD card. Image size Quality (5M) 2560 x 1920 (3M) 2048 x 1536 (1.2M) 1280 x 960 (VGA) 640 x 480 Possible recording time / sec (video clip)
-
Page 29: Photography Mode
PHOTOGRAPHY MODE ] Still Image Mode Auto photography is a typical method of photography. Photographs can be taken simply because the exposure (the combination of shutter speed and aperture setting) is controlled automatically to suit the photographic conditions. You can use the 2.5" LCD monitor to compose the images. Make sure that the battery and SD card are inserted before taking photographs. -
Page 30: Recording Voice Memos
Recording Voice Memos A voice memo can be recorded once for 30 seconds at still image mode immediately following a still image captured or at playback mode while viewing the picture. 1. Slide the mode switch to [ 2. Press the MENU button, and select the [Function] menu with the [Function] of the still image menu is displayed. -
Page 31: Using The Optical Zoom
Using the Optical Zoom Zoom photography allows you to take zoom photographs up to 3 times the size or wide-angle photography depending on the distance up to the subject. You can also enlarge the center of the screen and take photographs in the digital zoom mode. -
Page 32: Using The Digital Zoom
Using the Digital Zoom Using a combination of 3 times optical zoom and 4.0 times digital zoom permits zoom photography of up to 12 times to suit the subject and the distance. The digital zoom is a compelling feature, the more an image is enlarged (zoomed), the more pixilated (grainer) the image will appear. -
Page 33: Setting The Flash
Setting the Flash Set the flash for taking photographs. The flash firing mode can be set to suit for the photographic conditions. 1. Slide the mode switch to [ 2. Toggle the button to select the desired flash mode. Each press of the icon one step through the sequence and displays it on the screen. - Page 34 The table below will help you choose the appropriate flash mode: Flash mode [ Blank] Auto ] Red-eye Reduction Forced Flash ] Suppressed Flash ] Night Scene In the [ Exp.], the flash mode is fixed to [ The flash cannot be set in the [ 34-E Description The flash fires automatically to suit the...
-
Page 35: Setting The Focus
Setting the Focus Photographs can be taken with the distance to the subject set by auto focus, ] macro or [ ] infinity. The settings will be maintained even when the power is turned off or when Auto OFF is activated. 1. -
Page 36: Setting The Self-Timer
Setting the Self-timer This setting allows photographs to be taken with the self-timer. 1. Slide the mode switch to [ 2. Toggle the button to select the setting. Each press of the icon one step through the sequence and displays it on the screen. OFF [ 10s] 10 sec. -
Page 37: Exposure Compensation/Backlight Correction
Exposure Compensation/Backlight Correction Photographs can be taken with the overall screen intentionally made brighter or darker. These settings are used when a suitable brightness (exposure) cannot otherwise be obtained in circumstance where the difference in brightness between the subject and the background (the contrast) is large, or when the subject that you want to photograph is very small within the screen. - Page 38 Effective Subjects and Set Values + (positive) compensation * Printed matter comprising black text on whitish paper * Backlighting * Bright scenes or strong reflected light such as ski slopes * When the sky accounts for a large area on the screen - (negative) compensation * People illuminated by a spotlight, in particular, against dark background * Printed matter comprising white text on blackish paper...
-
Page 39: Movie Mode
] Movie Mode This mode allows you to record video clips at a resolution of 320 x 240 / 640 x 480 pixels. Voice can also be recorded. 1. Slide the mode switch to [ 2. Compose the picture with the zoom button. 3. -
Page 40: Playback Mode
] PLAYBACK MODE Playing Back Still Images You can play back the still images on an LCD monitor. Insert the SD card into the camera and turn on the power before starting. 1. Slide the mode switch to [ The last image appears on the screen. 2. -
Page 41: Playing Back Video Clips
Playing Back Video Clips You can play back video clips recorded on the camera. You can also play back voice. 1. Slide the mode switch to [ The last image appears on the screen. 2. Select the desired video clip with the 3. -
Page 42: Button Operations
Button Operations During Playback Forward play button Each press of the moves the operation one step in the sequence of 2 times fast forward play, 4 times fast forward play, and regular play. Reverse play Each press of the button moves the operation one step in the sequence of 2 times fast reverse play, 4 times fast... -
Page 43: Playing Back Still Images/Video Clips On A Tv
Playing Back Still Images/Video Clips on a TV You can also playback your images on a TV screen. Before connecting to any devices, make sure to select NTSC / PAL system to match the video output system of the video equipment you are going to connect to the camera, then turn all connected devices off. -
Page 44: Attaching Voice Memos
Attaching Voice Memos A maximum of 30 seconds of audio can be recorded like a memo for photographed still images. The voice memo can be recorded only once. 1. Slide the mode switch to [ The last image appears on the screen. 2. -
Page 45: Thumbnail Display
Thumbnail Display This function allows you to view 9 thumbnail images on the LCD monitor at the same time, which can quickly search for the image that you want. 1. Slide the mode switch to [ The last image appears on the screen. 2. -
Page 46: Zoom Playback
Zoom Playback Images that are being play back can be enlarged and displayed in 2 levels of 2 times and 4 times enlargement. This mode also allows you to enlarge your image on the selected portion of the image to check for small details. 1. -
Page 47: Slideshow Display
Slideshow Display The slideshow function enables you to playback your still images automatically in order one image at a time. 1. Slide the mode switch to [ 2. Press the MENU button. The playback menu is displayed. 3. Select [Slide Show] with the and press the SET button. -
Page 48: Protecting Images
Protecting Images Set the data to read-only to prevent images from being erased by mistake. Protecting Images 1. Slide the mode switch to [ 2. Select the image that you want to protect with the buttons. 3. Press the MENU button. The playback menu is displayed. -
Page 49: Canceling The Protection
Canceling the Protection To cancel protection for only one image, display the image that you want to remove the image protection. 1. Select [Protect] with the the SET button. 2. Select [Single] or [All] with the 3. Select [Cancel Protect] with the The removal of image protection is executed and the camera returns to the play mode. -
Page 50: Dpof Settings
DPOF Settings DPOF is the abbreviation for Digital Print Order Format, which allows you to embed printing information on your memory card. You can select the images to be printed and how many prints to make with the DPOF menu in the camera and insert the memory card to the card compatible printer. - Page 51 9. Select date to [ON] or [OFF] with the button. ON: The date of the photograph will also be printed. OFF: The date of the photograph will not be printed. 10. Select [Print Enable] with the 11. Select [Execute] with the This creates a file containing the DPOF information, and when the operation is finished, the screen returns to the playback screen.
-
Page 52: Erasing Images
] Erasing Images Erasing at Photography Mode (Quick Delete Function) Quick delete function enables you to erase the image during photography. The quick delete menu provides you to directly erase the last image without further settings. 1. Slide the mode switch to [ 2. -
Page 53: Erasing Selected Images
5. Select [Execute] with the To not erase, select [Cancel], and press the SET button. Even if you take photographs after erasing an image, the file number is assigned the next number of the very last one before the image was erased. -
Page 54: Menu Options
MENU OPTIONS Still Image Menu (Picture) This menu is for the basic settings to be used when taking still images. 1. Slide the mode switch to [ 2. Press the MENU button. [Picture] of the still image menu is displayed. 3. - Page 55 Size This sets the size of the image that will be photographed. ] 2560 x 1920: 2560 x 1920 pixels (5M) ] 2048 x 1536: 2048 x 1536 pixels (3M) ] 1280 x 960: 1280 x 960 pixels (1.2M) ] 640 x 480: 640 x 480 pixels (VGA) Quality This sets the quality (compression rate) at which the image is taken.
-
Page 56: White Balance
White Balance This sets the white balance photographing under a variety of lighting conditions and permits photographs to be taken that approach the conditions that are seen by the human eye. [ Blank ] Auto: ] Incandescent: Photography under incandescent lighting. ] Fluorescent 1: Photography under a daylight fluorescent tube with a ] Fluorescent 2: Photography under a daylight white fluorescent tube with ] Day Light:... -
Page 57: Capture Mode
Still Image Menu (Function) 1. Slide the mode switch to [ 2. Press the MENU button, and select the [Function] menu with the [Function] of the still image menu is displayed. 3. Select the desired [Function] option item with the buttons, and press the SET button to enter its respective menu. -
Page 58: Voice Memo
Voice Memo A voice memo can be recorded for 30 seconds immediately following still single image photography. This feature is also available during playback mode. Refer to section in this manual titled "Recording Voice Memos" for further details. ON: Enable voice memo. OFF: Disable voice memo. -
Page 59: Date Print
Quickview This sets whether or not to display the photographed image on the screen immediately after the picture is taken. ON: Displayed when images are being recorded on the SD card. OFF: Does not display. A photographed image is displayed on the LCD monitor for 2 seconds. Pressing the shutter button during quickview cancels the operation. -
Page 60: Movie Menu (Picture)
Movie Menu (Picture) This menu is for the basic settings to be used when recording video clips. 1. Slide the mode switch to [ 2. Press the MENU button. [Picture] of the movie menu is displayed. 3. Select the desired [Picture] option item with buttons, and press the SET button to enter its respective menu. -
Page 61: Movie Menu (Function)
Movie Menu (Function) 1. Slide the mode switch to [ 2. Press the MENU button, and select the [Function] menu with the [Function] of the movie menu is displayed. 3. Select the desired [Function] option item with the buttons, and press the SET button to enter its respective menu. -
Page 62: Playback Menu
Playback Menu In the [ ] mode, set which settings are to be used for playback. 1. Slide the mode switch to [ 2. Press the MENU button. The playback menu is displayed. 3. Select the desired option item with the buttons, and press the SET button to enter its respective menu. -
Page 63: Setup Menu (In Photography Mode)
Setup Menu (In Photography Mode) Set your camera’s operating environment. 1. Slide the mode switch to [ 2. Press the MENU button, and select the [Setup] menu with the [Setup] of the photography menu is displayed. 3. Select the desired [Setup] option item with buttons, and press the SET button to enter its respective menu. -
Page 64: Auto Off
Date/Time This sets the date and the time. Refer to section in this manual titled “Setting the Date and Time” for further details. Auto OFF If no operation is performed for a specific period of time, the power to the camera is automatically turned off. -
Page 65: Setup Menu (In Playback Mode)
Setup Menu (In Playback Mode) 1. Slide the mode switch to [ 2. Press the MENU button. [Setup] of the playback menu is displayed. If images/video clips are recorded on the SD card, press the MENU button is pressed. 3. Select the desired [Setup] option item with buttons, and press the SET button to enter its respective menu. -
Page 66: System Info
File Number This creates a new folder. The photographed images are recorded to the newly created folder from number 0001. Cancel: Does not reset the file number. Execute:Resets the file number and creates a new folder. Card Info. This allows a check of the free capacity of the SD card as well as other information. -
Page 67: Transferring Recorded Images And Videos To Your Computer
TRANSFERRING RECORDED IMAGES AND VIDEOS TO YOUR COMPUTER To transfer images/video clips from the camera to your computer, follow these steps: Step 1: Installing the USB driver (Windows 98 and Mac OS 8.6 users only) Step 2: Connecting the camera to your computer Step 3: Downloading images and video files System Requirements (Windows) Pentium 166 MHz or higher... -
Page 68: Step 1: Installing The Usb Driver
Step 1: Installing the USB Driver Windows 98 computers The USB driver on the CD-ROM is exclusively for Windows 98 computers. Installing the USB driver on computers running Windows 2000/ME/XP is not necessary. 1. Insert the CD-ROM that came with the camera into your CD-ROM drive. The welcome screen appears. -
Page 69: Step 2: Connecting The Camera To Your Computer
Step 2: Connecting the Camera to Your Computer 1. Connect one end of the USB cable to the conversion adapter terminal of the camera. If you use the conversion adapter to connect the USB cable, insert the conversion adapter into the conversion adapter terminal of the camera first, and then connect one end of the USB cable to the USB terminal of the conversion... -
Page 70: Step 3: Downloading Images And Video Files
Step 3: Downloading Images and Video Files When the camera is turned on and connected to your computer, it is considered to be a disk drive, just like a floppy disk or CD. You can download (transfer) images by copying them from the “Removable disk” (“untitled” or “unlabeled” disk on a Macintosh) to your computer hard drive. -
Page 71: Installing Nti Photo Suite
INSTALLING NTI PHOTO SUITE PC users will find that NTI Photo Suite is a very user-friendly image-editing program. With NTI Photo Suite, you can retouch, compose, and organize your images. It includes a variety of templates, such as photo frames, birthday cards, calendars and more. -
Page 72: Other Devices
C O N N E C T I N G T H E C A M E R A T O OTHER DEVICES 72-E... -
Page 73: Camera Specifications
CAMERA SPECIFICATIONS Item Description 1/2.5" CCD sensor Image sensor Total number of pixels: approx. 5.2 mega pixels Number of effective pixels: approx. 4.9 mega pixels2560 x 1920, 2048 x 1536, 1280 x 960, 640 x 480 Image resolution <... - Page 74 Item Flash Flash effective range 0.5 m -2.7 m ISO sensitivity Self-timer Video output Interface Power supply Dimension (WxHxD) Weight *Design and specifications are subject to change without notice. 74-E Description Auto Flash / Red-eye Reduction / Night Scene / Suppressed Flash / Forced Flash Equivalent to ISO 50/100/200/Auto 10 sec.