Table of Contents
Table of Contents

Related Manuals for Honeywell SRX3


Summary of Contents for Honeywell SRX3
- Page 1 SRX3 Headset User Guide...
- Page 2 Disclaimer WARNING Honeywell International Inc. (“HII”) reserves the right to make changes in specifications and other information contained in this document without prior notice, and the reader should in all cases consult HII to determine whether any such changes have been made. The information in this publication does not represent a commitment on the part of HII.
-
Page 3: Table Of Contents
Speech Recognition Headsets Product Use and Care General Safety Guidelines Statement of Agency Compliance Honeywell Battery Safety Chapter 3 - Honeywell Wireless Headsets SRX3 Wireless Headset SRX3 Modular Design Sharing the SRX3 Headset Operator Profiles and Shared Headsets Attaching the SRX3Electronics Module to a Headband... - Page 4 Pairing-related Configuration Parameters Cross Pairing SRX3 Headset Pairing Methods Pairing an SRX3 Headset Pairing an SRX3 Headset with an A700 Device Using TouchConnect™ Auto Pairing an SRX3 Headset with an A500, A700, or A700x Talkman Device 36 SRX3 User Guide - Preliminary...
- Page 5 Manually Pairing an SRX3 Headset with an A500, A700, or A700x Talkman Device Screen-Based Pairing with a Handheld Device Handheld Device Pairing Status Icons Pairing a Headset by VoiceConsole Pairing More about SRX3 Pairing Modes Placing Headsets in Pairing Modes...
- Page 6 Appendix A - Specifications SRX3 Wireless Headset Specifications SRX3 High Noise Headset Specifications SRX3 Hard-Hat Headset Specifications SRX3 Battery Specifications Electrical Specifications Mechanical and Environmental Specifications Battery Notifications SRX3 Headset Battery Charger Specifications Appendix B - Honeywell Regulatory Compliance Statement of Agency Compliance...
-
Page 7: Chapter 1 - Customer Support
Japan and Korea: E-mail: [email protected] Phone: +813 3769 5601 Honeywell - Vocollect Customer Service Contact Honeywell - Vocollect Customer Service for order placement, order status, returns, Return Material Authorization (RMA) status, or other customer service issues: SRX3 User Guide - Preliminary... - Page 8 Japan and Korea: Email: [email protected] Phone: +813 6730 7234 Honeywell - Vocollect RMA To return equipment for repair contact Honeywell - Vocollect RMA to request an RMA number. Email: [email protected] Sales and General Inquiries For sales or any other inquiry, email [email protected]...
- Page 9 You can contact our technical support team directly by filling out our online support form. Enter your contact details and the description of the question/problem. Telephone: www.honeywellaidc.com/locations For our latest contact information, please check our website at the link above. SRX3 User Guide - Preliminary...
-
Page 10: Product Service And Repair
Product Service and Repair Honeywell International Inc. provides service for all of its products through service centers throughout the world. To obtain warranty or non-warranty service, please visit www.honeywellaidc.com and select Support > Contact Service and Repair to see your region's instructions on how to obtain a Return Material Authorization number (RMA #). -
Page 11: Chapter 2 - Introduction
This document includes the following information: Safety information Hardware specifications Installation procedures, and basic operating instructions for Honeywell hardware and/or third party devices that are compatible with Honeywell software Part numbers Regulatory and compliance statements Troubleshooting guidance... -
Page 12: Product Use And Care
Honeywell Vocollect Solutions devices and wireless headsets are designed to be compliant with the rules and regulations in the locations into which they are sold and are labeled as required. Honeywell devices are type approved and do not require the user to obtain license or authorization before using them. -
Page 13: Honeywell Battery Safety
Replace a battery only with another battery that has been authorized by Honeywell for the product you are using. Use of an unqualified battery may present a risk of fire, explosion, leakage, or other hazard. - Page 14 Power off your equipment when not in use. Handling Used Batteries When shipping batteries, place tape or insulating material securely over the battery contacts to avoid accidental contact in transit. Honeywell batteries can be shipped under Special Provision 188 of 49 CFR 172.102 or IATA exception A45.
-
Page 15: Chapter 3 - Honeywell Wireless Headsets
Sealed components to prevent corrosion. Padded, lightweight headbands for increased comfort and personalized fit. Single ear cups that pivot vertically and horizontally and can be worn on either ear. SRX3 User Guide - Preliminary... -
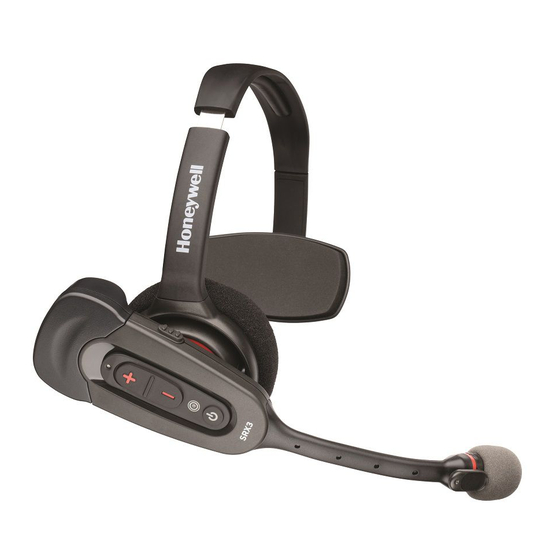
Page 16: Srx3 Wireless Headset
The Bluetooth word mark and logos are owned by the Bluetooth SIG, Inc. and any use of such marks by Honeywell is under license. Other trademarks and trade names are those of their respective owners. SRX3 Wireless Headset... -
Page 17: Srx3 Modular Design
VoiceConsole 4.2 and newer. SRX3 Modular Design The SRX3 Wireless Headsets feature a modular design. The potential for shared use of electronics modules across multiple shifts can lower the cost per user. To avoid passing germs between operators when sharing headsets, Honeywell recommends sharing only the electronics module. -
Page 18: Sharing The Srx3 Headset
Vocollect Voice Software (VoiceClient and VoiceCatalyst), along with VoiceConsole provide a feature called Automatic Operator Load. This feature enables a Honeywell device to recognize and load the profile of the operator who last used the headset, based on the unique ID of the electronics module. -
Page 19: Attaching The Srx3Electronics Module To A Headband
SRX3 Compatibility Honeywell has tested the SRX3 Wireless Headset with the following devices and Vocol- lect Voice Software versions. Support and compatibility of the SRX3 headset is not lim- ited to these products, but the customer assumes risks related to untested configurations. -
Page 20: Charging The Srx3 Headset
Charging SRX3 Wireless Headset Batteries WARNING Once an SRX3 battery is placed on a port in the charger, it must remain in the charger for a minimum of five seconds. This allows the charger sufficient time to analyze the state of the battery. Removing the battery during this five second interval may cause the LED indicator on the charger to display an incorrect battery status. -
Page 21: Inserting A Battery Into The Srx3 Wireless Headset
LED patterns. 6. When the ring LED indicator turns a solid green, the battery is fully charged. Pull the battery off the charger port to insert it into an SRX3 headset electronics module. Inserting a Battery into the SRX3 Wireless Headset 1. -
Page 22: Removing A Battery From An Srx3 Wireless Headset
Removing a Battery from an SRX3 Wireless Headset IMPORTANT Do not remove the battery from the SRX3 headset until the LED indicator on the headset is off. 1. Power off the headset by pressing and holding the Power button on the electronics module for one second. -
Page 23: Wearing An Srx3 Wireless Headset
It should be facing your upper lip, and not touching anything (for example, clothing, skin, or facial hair). Installing the Stability Strap on the SRX3 Wireless Headset 1. Hold the headset so that the earpad faces you and the electronics module faces away. - Page 24 4. Turn the headset so that the t-bar pad faces you. 5. Locate the slot on the end of the headband near the t-bar. 6. Align the knob at the free end of the strap with the slot on the headband. SRX3 User Guide - Preliminary...
-
Page 25: Replacing An Earpad On The Srx3 Headset
Replacing an Earpad on the SRX3 Headset 1. Hold the headset so that the earpad faces you and the electronics module faces away. -
Page 26: Headset Functions And Led Patterns For Srx3
5. Place the new earpad and earpad plate assembly onto the headset earpiece. 6. Rotate the assembly to the right pressing gently into the earpiece until the assembly locks into place. Headset Functions and LED Patterns for SRX3 SRX3 User Guide - Preliminary... - Page 27 Three pairing in Plus (+) pairing mode ascending low power and Minus tones upon mode (-) buttons pairing with a device Switch to No tone With Headset enters high power Rapid flash, then solid green SRX3 User Guide - Preliminary...
- Page 28 Connect Solid blue when plugged in, headset to Update off during update, returns to computer headset Device update solid blue when update running software complete Vocollect SRX3 User Guide - Preliminary...
-
Page 29: Srx3 Hard-Hat Headset
SRX3 Hard-Hat Headset In environments where operators must wear hard hats, the standard over-the- head headset is not a viable option. The SRX3 Hard-Hat headset has a built-in clip that attach the SRX3 earpiece, electronics module, and microphone to most industrial hard hats. -
Page 30: Installing The Srx3 Hard-Hat Clip
Installing the SRX3 Hard-Hat Clip The SRX3 Hard-Hat headset attaches to the side of a hard hat using a clip that must be mounted on the hard hat. Honeywell offers two clip styles, one designed to insert in a hard-hat slot and one that mounts over the side brim of a non-slotted hard hat. -
Page 31: Attaching The Srx3 To A Hard Hat
Attaching the SRX3 to a Hard Hat With an SRX3 Hard-Hat Headset clip mounted on the side of a hard hat, the headset's fork and disk assembly snaps securely onto the hat. 1. Insert the disk into the hard-hat clip from the top. -
Page 32: Wearing The Srx3 Hard-Hat Headset
Wearing the SRX3 Hard-Hat Headset The SRX3 Hard-Hat Headset fork and disk assembly has two lock positions that allow for easy wearing, removing and storing the hard hat with the headset attached. The inner position keeps the earcup snug to the ear; the outer position enables the headset to be swiveled in the clip without causing wear to headset parts or to the hard hat. -
Page 33: Storing The Srx3 Hard-Hat Headset
Storing the SRX3 Hard-Hat Headset Honeywell recommends storing the hard hat with the headset earcup moved up on the side of the hat (see figure below) to reduce the risk of damage. 1. Remove the electronics module from the headset. The electronics module can be used by another worker or stored separately. -
Page 34: Srx3 High-Noise Headset
6. Push sections together until they click into place. SRX3 High-Noise Headset The SRX3 High-Noise headset is a headset with a single ear cup that fits entirely over the operator's ear to allow him or her to hear voice instructions clearly in areas of high environmental noise. -
Page 35: Replacing An Earpad On The Srx3 Hard-Hat Or High-Noise Headset
The high-noise headset has microphone cap storage located on the headband and above the headset earcup. A stability strap is available for this model. Replacing an Earpad on the SRX3 Hard-Hat or High-Noise Headset 1. Remove the electronics module from the earcup. -
Page 36: Options For Hearing Impaired Users
Hearing loss is a medical condition that requires the attention of a qualified audiologist. The audiologist should be made aware of the options that Honeywell products offer with pitch, volume, and sidetone so that he or she can make appropriate recommendations that may benefit the user without possible side effects. -
Page 37: About Pairing Wireless Headsets
Changing these settings without qualified medical supervision could result in additional hearding damage. Honeywell products, and their default options, have been measured and qualified to ensure audio safety for common work flows and for the general population. The default audio parameters should not be changed without explicit direction from a qualified audio professional. -
Page 38: Cross Pairing
SRX3 Headset Pairing Methods After an SRX3 headset enters low or high power pairing mode, it is available to accept a pairing initiated by a Talkman A700-series, Talkman A500, Talkman T5- Series, or other Bluetooth-enabled device. These pairings can be accomplished... - Page 39 Pairing Information About this Pairing Method Method An SRX3 headset and an A700 device can be paired by turning on the device and headset and touching them together. No button presses are required. Recommended for: TouchConnect VoiceCatalyst users on A700 devices and SRX3 headsets...
-
Page 40: Pairing An Srx3 Headset
It accepts connections from any device that was previously paired to it. Pairing an SRX3 Headset with an A700 Device Using TouchConnect™ The A700 device can use TouchConnect to connect to an SRX3 Wireless Headset when: the A700 device is running VoiceCatalyst Bluetooth is enabled... - Page 41 1. Turn on the SRX3 headset. 2. If the headset's LED is blinking blue, it is currently paired to a device. Clear the pairing by pressing the + and - buttons simultaneously on the SRX3 headset. You must first obtain the operator ID by reading the headband: 1.
-
Page 42: Auto Pairing An Srx3 Headset With An A500, A700, Or A700X Talkman Device
Using TouchConnect to Pair an Information from the Headband SRX3 with an A700 Device When the device starts the task, VoiceConsole recognizes the pairing. Auto Pairing an SRX3 Headset with an A500, A700, or A700x Talkman Device Prerequisites: The headset is powered off. -
Page 43: Manually Pairing An Srx3 Headset With An A500, A700, Or A700X Talkman Device
7. Press the Play/Pause button again to begin working. Screen-Based Pairing with a Handheld Device Screen-based pairing is the preferred method for pairing an SRX3 headset with a handheld wireless device or PC. This method allows the user to pick a specific headset from a list of available headset Bluetooth addresses displayed on a screen, and eliminates the problem of unwanted cross pairing. -
Page 44: Handheld Device Pairing Status Icons
The device is in sleep mode — not in use running an application. The device is Bluetooth ready with Bluetooth connection features enabled. 1. Turn on the SRX3 headset. The SRX3 headset starts up in low power pairing mode. NOTE Some handheld devices may require the headset to be in high power pairing mode in order to be discovered in the device's pairing inquiry. -
Page 45: Pairing A Headset By Voiceconsole Pairing
SRX3 headsets support two pairing modes. Low Power Pairing Mode Low power pairing mode is the default pairing mode for SRX3 headsets. In this mode, a headset will answer a Bluetooth device inquiry with a very low power response that transmits within a small area (a few feet or so, depending on the receiving capabilities of the inquiring device). -
Page 46: Placing Headsets In Pairing Modes
TouchConnect You can pair an A700 or A700x device and an SRX3 headset by touching them. This method essentially eliminates the chance of cross pairing and it is quicker and easier than the other methods. -
Page 47: Headset Pairing Faq
Headset Pairing FAQ Q: My device accidentally paired with a different headset. What can I do? A: If you are using an SRX3 headset, press the + and - buttons simultaneously to clear the pairing. Q: The users at my site do not have assigned headsets and devices, so they could get a different headset at every shift. -
Page 48: Supervisor Audio With Srx3 Headsets
Supervisor Audio with SRX3 Headsets Supervisor Audio is a feature that will allow a second party to listen to the conversation between a Bluetooth-enabled device and a user with an SRX3 headset. A supervisor wears a wired headset connected to the operator's device, then walks behind the operator who is wearing a wireless headset paired with the same device. -
Page 49: Headset Parameters
For maximum hygiene, Honeywell discourages sharing headsets among operators. The design of the SRX3 Wireless Headset features an electronics module that can be removed from the headband and windscreen. The electronics module can be shared among operators over multiple shifts, providing some level of hygiene while potentially reducing costs. - Page 50 Always use pads and windscreens with Honeywell headsets to protect the equipment and ensure optimum speech recognition performance. Honeywell recommends changing headset windscreens every 90 days to ensure the best performance. CAUTION Use only a solution of 70% isopropyl alcohol and 30% water to clean the hard plastics on equipment.
-
Page 51: Chapter 4 - Chargers
CHAPTER CHARGERS NOTE The SRX3 headset batteries are charged with the SRX2 battery charger Honeywell offers charger units that can charge one or more batteries individually or while inserted in Talkman devices. Talkman devices should be placed into a charger when not in use. The charger charges the device's battery while linking to the host computer to download new voice applications, reconfigure device settings, and update device software. -
Page 52: Headset Battery Charger
Mounting the Headset Battery Chargers You will need: DIN rail, slotted steel 35 mm X 15 mm, Honeywell Part #CM-1000-20-101 or customer-supplied DIN rail meeting the following specifications: SRX3 User Guide - Preliminary... - Page 53 The arms are parallel to the floor in the unlocked position. 2. Attach the charger to the DIN rail by hanging the two hooks on the back of the unit on the top lip of the rail. SRX3 User Guide - Preliminary...
-
Page 54: About Led Indicators
If the charger LED indicator is red, unplug the charger power supply from the power source, and remove all batteries. Plug the power supply into the power source again. If the LED remains red, the charger may require repair or replacement. Charger Port Indicators SRX3 User Guide - Preliminary... - Page 55 Solid Yellow Battery is charging Blinking Red Charging fault detected Solid Green Solid Red Battery alert condition; fully charged Solid Yellow Solid Red Battery alert condition; charging Blinking Red Solid Red Battery alert condition; fault detected SRX3 User Guide - Preliminary...
- Page 56 SRX3 User Guide - Preliminary...
-
Page 57: Chapter 5 - Troubleshooting Equipment Problems
If none of the listed steps resolve the problem, contact Honeywell to send the equipment back for repair or to speak with a support representative. -
Page 58: About Sending Equipment Back For Repairs
These consumable items slow down the repair process, and units will be shipped back without these consumables installed. Honeywell issues RMAs for all returns regardless of the reason for the return. This guarantees proper tracking of equipment, ensures proper handling, and facilitates a fast return. -
Page 59: Packaging Items For Return To Honeywell
A Honeywell employee at the customer site has determined that the product should go back to Honeywell for some other reason. Exchange — for example, an incorrect item was shipped or the wrong size of belt was ordered. Some Honeywell customers have service contracts with repair depots to perform repairs on Honeywell products. - Page 60 A purchase order number if items are not covered by ESP or Depot Express 3. Include the RMA number on the shipping label, if shipping items to Honeywell. 4. Package the equipment according to the packaging instructions. 5. Address the shipping label as instructed. SRX3 User Guide - Preliminary...
-
Page 61: Appendix A - Specifications
Noise Reduction Not applicable Rating NOTE Packaging varies for product shipments. Generally, packing materials are about 15% of the total shipment weight. SRX3 High Noise Headset Specifications Weight 3.74 ounces (106g) Operating -22°F to 122°F (-30°C to 50°C ) temperature Storage -40°F to 158°F (-40°C to 70°C) -
Page 62: Srx3 Hard-Hat Headset Specifications
24 drops from 6 feet (1.8 m) at varying angles and at minimum and maximum operating temperatures Enclosure rating Meets IP54 Humidity 5-95% condensing Noise Reduction ≥10.5 dB Rating NOTE Packaging varies for product shipments. Generally, packing materials are about 15% of the total shipment weight. SRX3 User Guide - Preliminary... -
Page 63: Srx3 Battery Specifications
The battery pack contains custom electronics that provide performance, temperature, and pack identification to the device. This information is made available to voice management software. Battery Charging: The battery pack must be charged only in a Honeywell designated charger. Mechanical and Environmental Specifications Drop-test specifications: The battery meets the transient drop criteria. -
Page 64: Srx3 Headset Battery Charger Specifications
SRX3 Headset Battery Charger Specifications 20-Bay Charger 6-Bay Charger 8 lbs. (3.63 kg.) with 20 batteries 2.5 lbs. (1.14 kg.) with 6 batteries Weight 6.38 lbs. (2.89 kg.) without batteries 2.1 lbs. (.96 kg.) without batteries Width Approximately 55 cm (21.65 in.) Approximately 26.67 cm (10.5 in.) -
Page 65: Appendix B - Honeywell Regulatory Compliance
Honeywell devices and wireless headsets are designed to be compliant with the rules and regulations in the locations into which they are sold and are labeled as required. Honeywell devices are type approved and do not require the user to obtain license or authorization before using them. Changes or modifications not expressly approved by Honeywell, Inc. - Page 66 The radiated output power of Honeywell™ devices and headsets is far below the FCC/IC/EU radio frequency exposure limits. Nevertheless, Honeywell devices shall be used in such a manner that the potential for human contact with the radio antenna during normal operation is minimized.
-
Page 67: Canadian Compliance
Les appareils suivants contiennent chacun une radio de faible puissance interne: Talkman dispositifs et casque sans fil SRX/SRX2/SRX3/SRX-SL. La puissance de rayonnement des appareils de Honeywell et casques est bien inférieure aux limites d'exposition aux fréquences radio de la FCC/IC/EU. -
Page 68: Ce Marking & European Compliance
(IEEE) and the American National Standards Institute Communications Commission (FCC). The Bluetooth word mark and logos are owned by the Bluetooth SIG, Inc. and any use of such marks by Honeywell is under license. Other trademarks and trade names are those of their respective owners. Honeywell... -
Page 69: Declaration Of Conformity: Rohs
Third Party products sold by Honeywell Honeywell has obtained verification from all suppliers of all third party products that versions of those products shipped by Honeywell as of 22 July 2019 to destinations where the DIRECTIVE 2011/65/EC OF THE EUROPEAN... - Page 70 0.1% Polybrominated biphenyls (PBB) 0.1% Polybrominated diphenyl ethers (PBDE) 0.1% Bis(2-ethylhexyl) phthalate (DEHP) Dibutyl phthalate (DBP) Diisobutyl phthalate (DIBP) or qualify for an exemption to the above limits as defined in the Annex of the RoHS Directive. SRX3 User Guide - Preliminary...