Chapters
Table of Contents

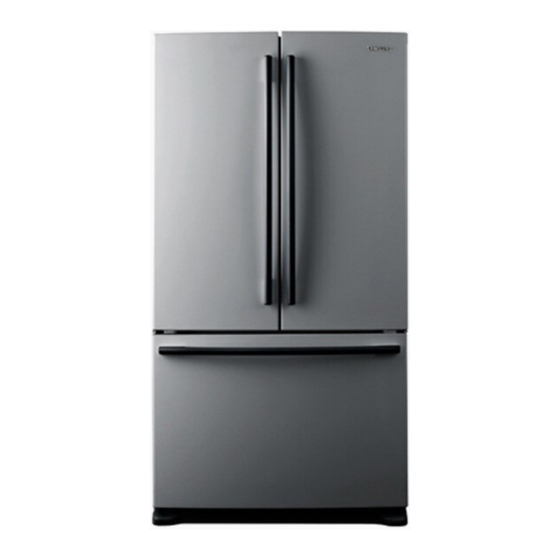
Related Manuals for Samsung RF265ADPN


Summary of Contents for Samsung RF265ADPN
-
Page 1: User Manual
Refrigerator user manual imagine the possibilities Thank you for purchasing your Samsung product. To receive more complete service, please register your product at www.samsung.com/global/register RF265AB RF266AB English... -
Page 2: Key Features
• Bigger & wider space The wide shelf area and pantry provide enough space for larger items such as a pizza box, etc. The wide freezer drawer also provides enough space for 2~3 turkeys. -
Page 3: Safety Information
Do not plug several appliances into the same power receptacle. • Large appliances draw a lot of power. Powering more than one appliance or machine from a single power source could cause overheating and cause a fire. - Page 4 • Improper use of the grounding plug can result in a risk of electric shock. If it is necessary to use an extension cord to power the Refrigerator, use only a 3-wire extension cord that has a 3-blade ground plug and a 3-slot receptacle that will accept the plug on the appliance.
- Page 5 • There is a risk of electric shock or fire. Have the plug looked at by a licensed electrician. never unplug your Refrigerator by pulling on the power cord. • Always grip the power cord firmly and pull straight out from the outlet. Yanking or pulling on the power cord may cause a short-circuit, fire and/or electric shock.
- Page 6 Before you throw away your old Refrigerator or Freezer, make sure that you; • Take off the doors. • Leave all shelves in places so that children may not easily climb inside and shut the door while they are inside.
-
Page 7: Table Of Contents
Contents SETTING UP YOUR FRENCH DOOR REFRIGERATOR OPERATING YOUR SAMSUNG FRENCH DOOR REFRIGERATOR TROUBLESHOOTING WARRANTY CIRCUIT DIAGRAM 08 Getting ready to install the refrigerator 09 Setting up the refrigerator 09 Removing the refrigerator doors 11 Reattaching the refrigerator doors 13 Adjusting the doors 14 Making minor adjustments between doors... -
Page 8: Setting Up Your French Door Refrigerator
If the Refrigerator does not have enough space, the internal cooling system may not work properly. First thing! Make sure that you can easily move your Refrigerator to its final location by measuring doorways (both width and height), thresholds, ceilings, stairways, etc. -
Page 9: Setting Up The Refrigerator
REFRigERAtoR Now that you have your new Refrigerator installed and in place, you are ready to set up and enjoy the features and functions of the appliance. By completing the following steps, your Refrigerator should be fully operational. -
Page 10: Disassemble The Freezer Drawer
Setting up your French Door Refrigerator Disassemble the Freezer drawer 1. Push the upper drawer until it reaches to the cabinet rear wall. 2. Remove the tilting pocket( ) by pulling on both brackets( upward at the same time. 3. Take out the lower basket( ) by lifting the basket up from rail system. -
Page 11: Reattaching The Refrigerator Doors
) to the hinge completely. 2. Place the hole in the bottom of the door( hinge ( Be aware not to miss the hinge cap because it can be easily taken off. 3. Insert the upper hinge shaft( ) into the hole on the... -
Page 12: Assemble The Freezer Drawer
Setting up your French Door Refrigerator AssEMBLE tHE FREEzER DRAwER 1. Pull out the rails to the full length on each side of the cabinet evenly. 2. Hang the freezer door front onto open slots on the sides. 3. Tighten four 10mm hex-head screws completely. -
Page 13: Adjusting The Doors
ADJusting tHE DooRs Now that the doors are back on the Refrigerator, you want to make sure the Refrigerator is level so you can make final adjustments. If the Refrigerator is not level, it will not be possible to get the doors perfectly even. -
Page 14: Making Minor Adjustments Between Doors
Setting up your French Door Refrigerator MAKing MinoR ADJustMEnts BEtwEEn DooRs Remember a level Refrigerator is necessary for getting the doors perfectly even. If you need help, review the previous section on leveling the Refrigerator. When the left door is lower than the right door. -
Page 15: Adjusting The Freezer Drawer
) slightly to loosen the door. ) with a Phillips Example) The slope is about 2mm (0.08inch) as shown below. Slope Reference plane - Rotate the Height Adjuster to +2.0 to reduce the door slope. ) and then screw ( Freezer Drawer Setting Up _1... -
Page 16: Checking The Water Dispenser Line
Under normal conditions, a 170 cc (5.75 oz.) paper cup can be filled in 10 seconds. If the Refrigerator is installed in an area with low water pressure (below 20psi), you can install a booster pump to compensate for the low pressure. -
Page 17: Installing The Water Line
4. Turn water on and check for any leakage. Only connect the water line to a drinkable water source. If you have to repair or disassemble the water line, cut off 1/4“ of the plastic tubing to make sure you get a snug, leak-free connection. - Page 18 This is due to the fact that there is still air in the line. test button In case ice doesn’t come out, pull out the ice bucket and press test button located on the right side of ice CAution maker.
-
Page 19: Operating Your Samsung
Press the ice off button if you want to turn the ice-maker off. Speeds up the time needed to freeze products in the Freezer. It can be helpful if you need to quickly freeze easily spoiled items or if the temperature in the Freezer has warmed dramatically (for example, if ) Power Freeze Button the door was left open). -
Page 20: Using The Digital Display
The filter Indicator will be Red when you have used your water filter for 6 months. After removing the old water filter and installing a new one (see page 30 for instructions on how to do this), reset the indicator by pressing the “Fridge” and “Power Cool” button simultaneously for about 3 seconds. -
Page 21: Controlling The Temperature
This will be reflected in the digital display. The temperature of the Freezer or the Refrigerator may rise from opening the doors too frequently, or if a large amount of warm or hot food is placed in either side. -
Page 22: Parts And Features
Operating your SAMSUNG French Door Refrigerator wherever it appears PARts AnD FEAtuREs Use this page to become more familiar with the parts and features of the Refrigerator. Spill Proof Glass Shelf Vertical Hinged Section Internal Water Dispenser (RF266AB) Vegetable & Fruit... -
Page 23: Storing Food
Bottles should be stored tightly together so that they do not tip and fall out when the Refrigerator door is opened. If you plan to go away for a long time, empty the Refrigerator and turn it off. Wipe the excess moisture from the inside of the appliance and leave the doors open. -
Page 24: Using The Cool Select Pantry
Fruits and vegetables may be damaged when the “chilled” mode is set. Do not store lettuce or other leafy produce in this pantry. Do not store glass bottles in this pantry. If they are frozen, they can break and cause personal injury. CAution using tHE tiLting PoCKEt The Tilting Pocket can be used to store up to a 16”... -
Page 25: Removing The Refrigerator Accessories
1. Door Bins & Dairy Compartment To remove - Simply lift the bin up and pull straight out. To replace - Slide it in above the desired location and push down until it stops. Injury may occur if the door bins are not firmly assembled. -
Page 26: Using The Doors
To remove the divider - Pull the pantry completely out to full extension and raise the front side of the divider to unhook it from the rear wall of the pantry, then lift the divider out. To replace the divider - Hook the back of the divider over the rear wall of the pantry and push the divider down. -
Page 27: Removing The Freezer Drawer Accessories
To remove - Pull the drawer out to full extension. Tilt up rear of drawer and lift straight out. To relocate - Place the drawer onto the rails by tilting it up. Lower the drawer into place until it is horizontal and slide the drawer in. -
Page 28: Cleaning The Refrigerator
Do not spray the Refrigerator with water while it is plugged in, as it may cause an electric shock. Do not clean the Refrigerator with benzene, thinner or car detergent due to risk of fire. -
Page 29: Changing The Interior Lights
CHAnging tHE intERioR LigHts Before changing any of interior lights, unplug the Refrigerator from the power supply. If you are unsure about changing the lights after reading through these directions, contact your service center for help. CAution Replacement bulbs for both freezer and fridge are available from your local home improvement or electronics store. -
Page 30: Changing The Water Filter
The “Filter Indicator” light lets you know when it is time to change your water filter cartridge. To give you preparation time to get a new filter, the red light will come on just before the capacity of the current filter runs out. Changing the filter on time provides you with the freshest, cleanest water from your fridge. -
Page 31: Troubleshooting _1
Try setting it to a lower temperature. • Is the Refrigerator in direct sunlight or located near a heat source? • Is the back of the Refrigerator too close to the wall and therefore keeping air from circulation? the food in the Refrigerator is •... -
Page 32: Warranty
Samsung authorized service center. Samsung will repair or replace any part found to be defective, at our option and at no charge as stipulated herein, with new or reconditioned parts during the limited warranty period specified above. All replaced parts and products become the property of Samsung and must be returned to Samsung. - Page 33 OF THIS PRODUCT, IS NONTRANSFERABLE AND STATES YOUR EXCLUSIVE REMEDY. Some states do not allow limitations on how long an implied warranty lasts, or the exclusion or limitation of incidental or consequential damages, so the above limitations or exclusions may not apply to you. This warranty gives you specific legal rights, and you may also have other rights, which vary from state to state.
-
Page 34: Circuit Diagram
DAMPER-HEATER +12V PBA SMPS CN32 CN10 +12V AC115V 60Hz EMI-FILTER AC115V G/YEL 60Hz F ROOM LAMP BIMETAL-THERMO AC115V 60Hz ICE MAKER WATER VALVE BLDC-M C-FAN MOTOR BLU-BLUE BRN-BROWN RED-RED GRY-GRAY ORG-ORANGE PNK-PINK PRP-PURPLE S/BLU-SKY BLUE WHT-WHITE YEL-YELLOW BLK-BLACK W/BLK-WHITE/BLACK AC115V... - Page 35 MEMO...
- Page 37 Refrigerador Manual de usuario imagine las posibilidades Gracias por adquirir un producto Samsung. Para recibir un servicio más completo, registre su producto en www.samsung.com/global/register RF265AB RF266AB spanish...
- Page 38 El refrigerador y la nevera disponen de evaporadores independientes. Gracias a este sistema de enfriamiento, la nerera y el refrigerador refrigeran de forma más eficiente. Además, este sistema de flujo de aire independiente evita que los olores de los alimentos situados en uno de los compartimentos penetren en el resto.
- Page 39 DE sEguRiDAD Antes de usar su nuevo refrigerador Samsung de tres puertas, lea este manual para asegurarse de que sabe cómo usar de forma segura y eficaz, las características y funciones que ofrece su nuevo electrodoméstico. Como las siguientes instrucciones de funcionamiento están destinadas a varios modelos, las características de su refrigerador pueden diferir ligeramente de las descritas en este manual.
- Page 40 únicamente una alargadera de 3 cables que disponga de un conector de 3 clavijas con toma de tierra y una toma eléctrica de 3 ranuras que acepte el conector del electrodoméstico. El régimen indicado de la alargadera debe ser de 115 V~120 V de CA, 10 A o superior.
- Page 41 • Existe riesgo de choque eléctrico o incendio. Solicite que un electricista autorizado revise el tomacorriente. no desenchufe su refrigerador tirando del cable de alimentación. • Sujete siempre el tomacorriente firmemente y tire de él para extraerlo de la pared. Forzar o tirar del cable de alimentación puede ocasionar un cortocircuito, incendio o choque eléctrico.
- Page 42 PRECAUCIÓN • Desmonte las puertas. • Deje todas las baldas colocadas en su lugar para que los niños no puedan acceder al interior y cerrar la puerta mientras permanecen dentro. Este electrodoméstico no ha sido diseñadopara su uso por niños pequeños o personas discapacitadas sin supervisión adulta.
- Page 43 Índice INSTALACIÓN DE SU REFRIG- ERADOR DE TR ES PUERTAS FUNCIONAMIENTO DE SU REFRIGERADOR SAMSUNG DE TRES PUERTAS SOLUCIÓN DE PROBLEMAS DIAGRAMA DE CIRCUITO 08 Preparativos para instalar el refrigerador 09 Ajuste del refrigerador 09 Desmontaje de las puertas del refrigerador 11 Montaje de las puertas del refrigerador 13 Ajuste de las puertas 14 Realización de ajustes menores entre puertas...
-
Page 44: Preparativos Para Instalar El Refrigerador
• No instale el refrigerador en un emplazamiento donde la temperatura pueda ser inferior a 10º C (50º F). • Se puede producir condensación en la zona de la puerta de la doble puerta al usar su refrigera dor por primera vez. -
Page 45: Herramientas Necesarias
AJustE DEL REFRigERADoR Ahora que tiene su nuevo refrigerador instalado y en su sitio, está preparado para ajustarlo y disfrutar de todas las características y funciones de las que dispone el electrodoméstico. Completando los siguientes pasos, su refrigerador deberá estar totalmente operativo. - Page 46 Instalación de su refrigerador de tres puertas Montar la gaveta de la nevera 1. Empuje la gaveta superior hasta que alcance la pared posterior de la carcasa. 2. Extraiga la compartimento inclinable ( soportes ( ) al mismo tiempo. 3. Saque la cesta inferior ( ) levantándola del sistema de...
-
Page 47: Montaje De Las Puertas Del Refrigerador
( ) y los dos pernos de cabeza hexagonal ( bisagra. 2. Haga coincidir el orificio de la base de la puert a ( la bisagra inferior ( Asegúrese de no perder la tapa de la bisagra que es muy fácil de quitar. - Page 48 Instalación de su refrigerador de tres puertas MontAR LA gAVEtA DE LA nEVERA 1. Extraiga de forma uniforme los raíles de cada lado de la carcasa por completo. 2. Sujete el frontal de la puerta de la nevera sobre los orificios abiertos de los lados.
-
Page 49: Ajuste De Las Puertas
Introduzca un destornillador plano dentro de una ranura del pie de nivelación derecho y gírelo en sentido horario u antihorario para nivelar la puerta derecha. Recomendamos no realizar pequeños ajustes en los pies de nivelación. En lugar de eso, examine la siguiente página para descubrir la mejor forma de realizar ajustes menores en las puertas. Pie de nivelación Pie de nivelación... -
Page 50: Realización De Ajustes Menores Entre Puertas
Instalación de su refrigerador de tres puertas REALizACión DE AJustEs MEnoREs EntRE PuERtAs Recuerde que es necesario que el refrigerador esté nivelado para lograr que las puertas estén igualadas de forma uniforme. Si necesita ayuda, revise las secciones anteriores relativas a la nivelación del refrigerador. -
Page 51: Ajuste Del Nivel De La Gaveta De La Nevera
2. Afloje el perno de control ( ) con un destornillador Phillips. 3. Busque el mejor nivel de ajuste para la inclinación de la puerta. Después del ajuste, en primer lugar apretar el tornillo ( ) en la gaveta de la nevera. -
Page 52: Chequeo De La Toma De Agua Del Dispensador
En condiciones normales, un vaso de papel de 170 cc (5,75 onzas) debe poder llenarse en 10 segundos. Si la zona de instalación del refrigerador dispone de una presión baja de agua (por debajo de 20 psi), puede instalar una bomba auxiliar para compensar la falta de presión. - Page 53 2. Apriete la tuerca de compresión (B) sobre el racor de compresión de 1/4”. - Si está usando tubo de cobre, deslice la tuerca de compresión (B) (no incluida) y la férula (no incluida) por el tubo de cobre (no incluido) como se indica.
- Page 54 Esto significa que aún queda aire en la toma. Botón de prueba PRECAUCIÓN En caso de que el hielo no salga, extraiga el de pósito de hielo y pulse el botón de prueba situado al lado derecho de la máquina de hielo. 1_ Instalación Cubierta del filtro.
-
Page 55: Uso Del Panel De Control
Acelera el tiempo necesario para congelar productos en la nevera. Puede ser útil si necesita congelar ) Botón Power Freeze rápidamente artículos que se estropeen deprisa o si la temperatura de la nevera fuese muy alta (por (Congelación rápida) ejemplo, si la puerta se ha dejado abierta). -
Page 56: Funcionamiento Del Refrigerador
El indicador del filtro pasará a iluminarse en rojo cuando lo lleve usando 6 meses. Tras extraer el viejo filtro de agua e instalar el nuevo (examine la página 33 para obtener las instrucciones), reinicie el indicador manteniendo pulsado el botón “Ice/Water” (Hielo/Agua) durante 3 segundos. -
Page 57: Control De La Temperatura
C (4º F). La pantalla de visualización de temperatura se moverá secuencialmente de -26º C a -13º C (-14° F a 8° F). Cuando la pantalla de visualización alcance los -13º C (8° F), lo hará de nuevo a los -26º C (-14º F). Cinco segundos después de que la nueva temperatura se ajuste, en pantalla se mostrará... -
Page 58: Partes Y Funciones
Funcionamiento de su refrigerador SAMSUNG bajo cualquier circunstancia PARtEs y FunCionEs Use esta página para familiarizarse con las partes y funciones del refrigerador. Bandeja de cristal resistente a las manchas Sección con bisagras vertical Dispensador de agua interno (RF266AB) Gaveta para fruta y verdura Máquina de hielo... -
Page 59: Almacenaje De Alimentos En El Refrigerador
Coloque verduras y frutas en la gaveta que tienen asignado para evitar que se congelen. Si los alimentos se congelasen en su refrigerador, ajústelo a una temperatura más alta. -
Page 60: Uso Del Cool Select Pantry
Las frutas y verduras pueden dañarse al escoger el modo “chilled” (helado). No guarde lechuga u otros productos similares en este compartimento. No almacene botellas de cristal en este compartimento. Si se congelasen, podrían romperse y provocar lesiones físicas. PRECAUCIÓN... -
Page 61: Desmontaje De Los Accesorios Del Refrigerador
Para volver a colocarla - Introduzca la gaveta en los rieles del marco y empújela hacia atrás hasta su posición. La balda de cristal sobre la gaveta no está firmemente asegurada. - Page 62 Para volver a colocar la división - Enganche la parte de atrás de la división sobre la parte posterior de uso DE LAs PuERtAs Las puertas del refrigerador garantizan el cierre y sellado completo del mismo.
-
Page 63: Desmontaje De Los Accesorios De La Nevera
Para extraerla - Retire la gaveta todo lo posible. Incline hacia la parte posterior de la gaveta y elévela directamente. Para volver a colocarla - Sitúe la gaveta dentro de los raíles inclinándola hacia arriba. Haga descender la gaveta hasta que se encuentre en posición horizontal y... -
Page 64: Limpieza Del Refrigerador
Por riesgo de incendio, no limpie el refrigerador con benceno, disolvente o detergente para vehículos. Limpieza detrás del refrigerador Para mantener cables y partes expuestas libres de polvo y acumulación de suciedad, aspire la parte de detrás del electrodoméstico una o dos veces al año. - Page 65 REEMPLAzo DE FoCos intERioREs Antes de reemplazar cualquier foco interior, desenchufe el refrigerador de la toma de pared. Si no está seguro de cómo reemplazar los focos tras leer estas instrucciones, póngase en contacto con su centro PRECAUCIÓN de asistencia para obtener ayuda.
-
Page 66: Reemplazo Del Filtro De Agua
Asegúrese de enjuagar a fondo el dispensador, de lo contrario el agua podría gotear. Esto significa que aún queda aire en la toma. NO use el dispensador de agua o hielo sin un cartucho de filtro de agua instalado, ya que la toma de agua podría bloquearse. -
Page 67: Solución De Problemas
Intente ajustarlo a una temperatura inferior. • ¿Está instalado el refrigerador bajo la luz directa del sol o junto a una fuente de calor? • ¿Está la parte posterior del refrigerador demasiado pegada a la pared y, por tanto, impidiendo la circulación del aire? - Page 68 Para recibir prestación de servicios in situ, el producto debe estar despejado y ser accesible al nivel del piso por parte del personal de servicio. Si durante la prestación de servicios in situ, no pudiera completarse la reparación, podría ser necesario el traslado, reparación y devolución posterior del producto.
- Page 69 AL COMPRADOR ORIGINAL DE ESTE PRODUCTO, ES INTRANSFERIBLE Y ESTIPULA SU SOLUCIÓN EXCLUSIVA. Ciertos estados no permiten limitaciones en relación a la duración de una garantía implícita o la exclusión o limitación de daños accidentales o indirectos, de tal forma que las mencionadas limitaciones o excepciones pueden no ser pertinentes.
-
Page 70: Diagrama De Circuito
DAMPER-HEATER +12V PBA SMPS CN32 CN10 +12V AC115V 60Hz EMI-FILTER AC115V G/YEL 60Hz F ROOM LAMP BIMETAL-THERMO AC115V 60Hz ICE MAKER WATER VALVE BLDC-M C-FAN MOTOR BLU-BLUE BRN-BROWN RED-RED GRY-GRAY ORG-ORANGE PNK-PINK PRP-PURPLE S/BLU-SKY BLUE WHT-WHITE YEL-YELLOW BLK-BLACK W/BLK-WHITE/BLACK AC115V... - Page 71 MEMO...
- Page 72 MEMO...
- Page 73 MEMO...
- Page 74 MEMO...
- Page 75 MEMO...
- Page 76 COUNTRY CALL OR VISIT US ONLINE AT WRITE 800-SAMSUNG Samsung Electronics America, Inc. 400 Valley www.samsung.com (800-726-7864) Road Suite 201 Mt. Arlington, NJ 07956 Samsung Electronics Canada Inc. Customer 800-SAMSUNG CANADA www.samsung.com/ca Service, 55 Standish Court Mississauga, Ontario (800-726-7864) L5R 4B2 Canada Code No. DA68-01812B REV(0.1)