Table of Contents
Quick Links
Table of Contents

Related Manuals for Toshiba AC028A2CA


Summary of Contents for Toshiba AC028A2CA
- Page 1 Microwave Convection Oven Instruction AC028A2CA...
- Page 3 Welcome to the world of TOSHIBA BEFORE OPERATING THIS PRODUCT, READ, UNDERSTAND, AND FOLLOW THESE INSTRUCTIONS. BE SURE TO SAVE THIS BOOKLIST FOR FUTURE REFERENCE CONTENTS PRECAUTIONS TO AVOID POSSIBLE EXPOSURE TO EXCESSIVE MICROWAVE ENERGY IMPORTANT SAFETY INSTRUCTIONS GROUNDING INSTRUCTIONS...
- Page 4 HINGES AND LATCHES (broken or loosened) c. DOOR SEALS AND SEALING SURFACE The oven should not be adjusted or reparied by anyone except properly qualified service personnel. Specifications Model: AC028A2CA Rated Voltage: 120V~ 60Hz 1500 W Rated Input Power(Microwave): Rated Output Power(Microwave):...
- Page 5 IMPORTANT SAFETY INSTRUCTIONS WARNING To reduce the risk of burns, electric shock, fire, injury to persons or exposure to excessive microwave oven energy when using your appliance, follow basic safety precautions, including the following: 1. Read all instructions before using the appliance. 2.
- Page 6 IMPORTANT SAFETY INSTRUCTIONS WARNING 16. To reduce the risk of fire in the oven cavity: 1). Do not overcook food. Carefully attend appliance when paper, plastic, or other combustible materials are placed inside the oven to facilitate cooking. 2). Remove wire twist-ties from paper or plastic bag before placing bag in oven. 3).
- Page 7 IMPORTANT SAFETY INSTRUCTIONS WARNING 18. Oversized food or oversized metal utensils should not be inserted in a microwave/ toaster oven as they may create a fire or risk of electric shock. 19. Do not clean with metal scouring pads. Pieces can burn off the pad and touch electrical parts involving a risk of electric shock.
- Page 8 GROUNDING INSTRUCTIONS DANGER Electric Shock Hazard Touching some of the internal components can cause serious personal injury or death. Do not disassemble this appliance. This appliance must be grounded. In the event of an electrical short circuit, grounding reduces the risk of electric shock by providing an escape wire for the electric current. To protect against electrical shock, this appliance is equipped with a cord having a 3 prong grounding-type plug for insertion into a proper grounding-type receptacle.
- Page 9 GROUNDING INSTRUCTIONS Consult a qualified electrician or serviceman if the grounding instructions are not completely understood or if doubt exists as to whether the appliance is properly grounded. If it is necessary to use an extension cord, use only a 3-wire extension cord that has a 3-pronged grounding plug , and a 3-slot receptacle that will accept the plug on the appliance.The marked rating of the extension cord shall be equal to or greater than the electrical rating of the appliance.
- Page 10 GROUNDING INSTRUCTIONS RADIO INTERFERENCE Operation of the microwave oven may cause interference to your radio, TV or similar equipment. When there is interference, it may be reduced or eliminated by taking the following measures: Clean door and sealing surface of the oven. Reorient the receiving antenna of radio or television.
- Page 11 GROUNDING INSTRUCTIONS UTENSILS CAUTION Electric Shock Hazard Tightly-closed utensils could explode. Closed containers should be opened and plastic pouches should be pierced before cooking. See the instructions on "Materials you can use in microwave oven or to be avoided in microwave oven."...
- Page 12 MATERIALS YOU CAN USE IN MICROWAVE OVEN UTENSILS REMARKS Follow manufacturer’s instructions.The bottom of browning dish Browning dish must be at least 3/16 inch (5mm) above the turntable. Incorrect usage may cause the turntable to break. Microwave-safe only. Follow manufacturer’s instructions. Do not Dinnerware use cracked or chipped dishes.
- Page 13 MATERIALS TO BE AVOIDED IN MICROWAVE OVEN UTENSILS REMARKS Aluminum tray May cause arcing. Transfer food into microwave-safe dish. Food carton with May cause arcing. Transfer food into microwave-safe dish. metal handle May cause arcing and could cause a fire in the oven. Metal twist ties May cause a fire in the oven.
- Page 14 SETTING UP YOUR OVEN NAMES OF OVEN PARTS AND ACCESSORIES Remove the oven and all materials from the ca rton and oven cavi ty. Your oven comes with the following accessories: Glass tra Turntable ring Instruction Manual Air Fry Crispy Brown Weight/ Low Temp.
- Page 15 SETTING UP YOUR OVEN TURNTABLE INSTALLATION Hub (underside) Glass tray Turntable shaft Turntable ring a. Never place the glass tray upside down. The glass tray should never be restricted. b. Both glass tray and turntable ring must always be used during cooking. c.
- Page 16 SETTING UP YOUR OVEN COUNTERTOP INSTALLATION Remove all packing material and accessories. Examine the oven for any damage such as dents or broken door. Do not install if oven is damaged. Cabinet: Remove any protective film found on the microwave oven cabinet surface. Do not remove the light brown Mica cover that is attached to the oven cavity to protect the magnetron.
- Page 17 SETTING UP YOUR OVEN INSTALLATION 2. Plug your oven into a standard household outlet. Be sure the voltage and the frequency is the same as the voltage and the frenquency on the rating label. WARNING Do not install oven over a range cooktop or other heat-producing appliance. If installed near or over a heat source, the oven could be damaged and the warranty would be avoided.
- Page 18 DESCRIPTION OF DISPLAY ICONS ICON Description ICON Description Microwave Function Convection Function Grill Function Defrost Child Lock Auto Menu Weight Temperature Progress Bar EN-16...
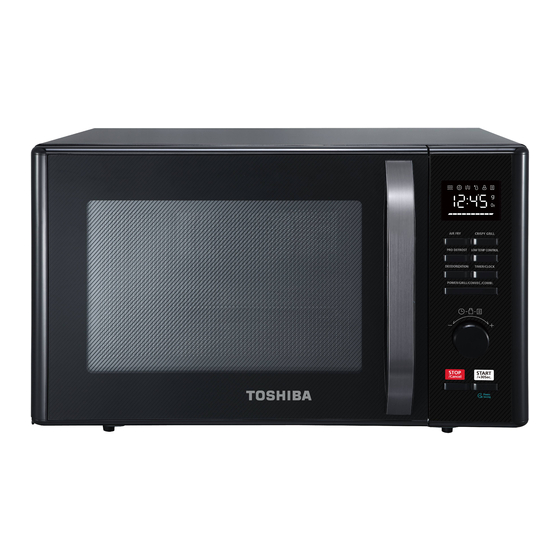
- Page 19 OPERATION CONTROL PANEL AND FEATURES Air Fry Crispy Brown Weight/ Time Defrost Lo w Temp. Control Deodorization Timer/Clock Micro./Grill/Convec./Combo TIMER-WEIGHT -MENU (Rotate the time weight knob to choose menu START/+30SEC. (Begin cooking time or add time to cooking) STOP/Cancel (Before cooking starts, press to clear all previous settings;...
- Page 20 OPERATION 1.CLOCK SETTING In standby mode, TIMER/CLOCK For example, time is 10:12 now, input “10” at this step. TIMER/CLOCK For example, time is 10:12 now, input “12” at this step. TIMER/CLOCK STOP /Cancel 2.KITCHEN TIMER In standby mode, TIMER/CLOCK START /+30Sec. The kitchen timer is not a clock, it is a counting down timer.
- Page 21 OPERATION 3.MICROWAVE COOKING will light. MICRO./GRILL/CONVEC./COMBO START /+30Sec. MICRO./GRILL/CONVEC./COMBO START /+30Sec. START /+30Sec. 1)When turning knob to adjust the cooking time, time increments for different time zones are as follows: 3)Grilling rack and grilling pan can’t be used in microwave cooking mode. 4.GRILL COOKING will light.
- Page 22 OPERATION 5.CONVECTION COOKING(With preheating function) as you do with will light. MICRO./GRILL/CONVEC./COMBO MICRO./GRILL/CONVEC./COMBO flashes and lights. START /+30Sec. START /+30Sec. START /+30Sec. When reaching the set preheating temperature, the buzzer will beep twice to remind you to put the food into the oven, the preheated temperature is displayed and flashes.
- Page 23 OPERATION 7.COMBINATION COOKING will light. MICRO./GRILL/CONVEC./COMBO MICRO./GRILL/CONVEC./COMBO “G-2” or “G-3” or “C-1” is displayed. START /+30Sec. START /+30Sec. 8.MULTI-STAGE COOKING Two stages can be set at maximum levels. WEIGHT/ TIME DEFROST MICRO./GRILL/CONVEC./COMBO START /+30Sec. START /+30Sec. START /+30Sec. EN-21...
- Page 24 OPERATION 9.SPEEDY COOKING START /+30Sec. START /+30Sec. 10.AUTO MENU “A1”, “A2” , “A3” , ,“A11”, “A12” will be displayed in turn. “A4” ,“A5” , “A6” , “A7” , “A8” , “A9” , “A10” START /+30Sec. START /+30Sec. EN-22...
- Page 25 OPERATION Accessories No use of grilling rack and grilling pan No use of grilling rack and grilling pan No use of grilling rack and grilling pan No use of grilling rack and grilling pan No use of grilling rack and grilling pan No use of grilling rack and grilling pan...
- Page 26 OPERATION 11.DEFROST BY WEIGHT/TIME WEIGHT/ TIME DEFROST START /+30Sec. 12.DEFROST BY TIME WEIGHT/ TIME DEFROST START /+30Sec. 13.AIR FRY AIR FRY START /+30Sec. Frozen French Fries Frozen Potato Croquettes Frozen Seafood Frozen Onion Rings Frozen Chicken Nuggets Breaded Meat Shrimp Vegetables Chicken Wings Note:...
- Page 27 OPERATION 14.CRISPY BROWN CRISPY BROWN CRISPY BROWN START /+30Sec. START /+30Sec. EN-25...
- Page 28 OPERATION 15.LOW TEMP CONTROL LOW TEMP CONTROL LOW TEMP CONTROL START /+30Sec. START /+30Sec. START /+30Sec. Display Slow cook keep warm for food Dehydration Yogurt Warmer Compartment 16.DEODORIZATION Oven fan will work for 5minutes to DEODORIZATION vent the smell out from cavity. T his function helps to keep the oven clean. 17.SPEEDY MICROWAVE COOKING START /+30Sec.
- Page 29 OPERATION 18.LOCK-OUT FUNCTION FOR CHILDREN STOP /Cancel STOP /Cancel 19.SPECIFICATION beep START /+30Sec. START /+30Sec. beeps beep 20.INQUIRING FUNCTION TIMER/CLOCK MICRO./GRILL/CONVEC./COMBO 21.SOUND ON/OFF START /+30Sec. STOP /Cancel beep beep START /+30Sec. STOP /Cancel beep 22.POWER SAVING FUNCTION STOP /Cancel power saving power saving EN-27...
- Page 30 MAINTENANCE TROUBLESHOOTING EN-28...
- Page 31 If service is required during the warranty period, properly pack your unit. We recommend using the original carton and packing materials. If additional assistance is needed, please contact customer assistance at: [email protected] 855-204-5313 Midea Am erica Corp 5 Sylvan Way,...
- Page 32 Customer Assistance: 855- -53 3 13 Midea America Corp 5 Sylvan Way, Parsippany, NJ 07054 PN.:16170000A72877...