
Related Manuals for Huawei Iris Hellas SUN2000 Series


Summary of Contents for Huawei Iris Hellas SUN2000 Series
- Page 1 SUN2000-(175KTL-H0, 185KTL-INH0, 185KTL-H1 User Manual Issue Date 2020-08-30 HUAWEI TECHNOLOGIES CO., LTD.
- Page 2 Notice The purchased products, services and features are stipulated by the contract made between Huawei and the customer. All or part of the products, services and features described in this document may not be within the purchase scope or the usage scope. Unless otherwise specified in the contract, all statements, information, and recommendations in this document are provided "AS IS"...
-
Page 3: About This Document
Indicates a potentially hazardous situation which, if not avoided, could result in equipment damage, data loss, performance deterioration, or unanticipated results. NOTICE is used to address practices not related to personal injury. Issue 05 (2020-08-30) Copyright © Huawei Technologies Co., Ltd. - Page 4 Added C Domain Name List of Management Systems. Issue 03 (2019-09-10) Updated 5.7 Installing the DC Input Power Cable. Updated Troubleshooting. Added B String Access Detection. Issue 02 (2019-06-05) Updated Appearance. Issue 05 (2020-08-30) Copyright © Huawei Technologies Co., Ltd.
- Page 5 SUN2000-(175KTL-H0, 185KTL-INH0, 185KTL-H1 User Manual About This Document Issue 01 (2019-05-15) This issue is used for first office application (FOA). Issue 05 (2020-08-30) Copyright © Huawei Technologies Co., Ltd.
-
Page 6: Table Of Contents
4.3.1 Environment Requirements............................21 4.3.2 Space Requirements................................. 23 4.4 Installing the Mounting Bracket............................25 4.4.1 Support-mounted Installation............................26 4.4.2 Wall-mounted Installation............................. 27 4.5 Installing the Inverter................................28 5 Electrical Connections......................31 5.1 Precautions....................................31 Issue 05 (2020-08-30) Copyright © Huawei Technologies Co., Ltd. - Page 7 8.4 Replacing a Fan..................................86 8.5 Troubleshooting..................................89 9 Handling the Inverter......................98 9.1 Removing the SUN2000..............................98 9.2 Packing the SUN2000................................98 9.3 Disposing of the SUN2000..............................98 10 Technical Data........................99 Issue 05 (2020-08-30) Copyright © Huawei Technologies Co., Ltd.
- Page 8 SUN2000-(175KTL-H0, 185KTL-INH0, 185KTL-H1 User Manual Contents A Securing Y-Branch Connectors..................103 B String Access Detection..................... 106 C Domain Name List of Management Systems...............109 D Grid Code..........................110 E Acronyms and Abbreviations....................114 Issue 05 (2020-08-30) Copyright © Huawei Technologies Co., Ltd.
-
Page 9: Safety Information
The "NOTICE", "CAUTION", "WARNING", and "DANGER" statements in this document do not cover all the safety instructions. They are only supplements to the safety instructions. Huawei will not be liable for any consequence caused by the violation of general safety requirements or design, production, and usage safety standards. -
Page 10: Personnel Requirements
Do not touch the energized equipment, as the enclosure is hot. 1.2 Personnel Requirements ● Personnel who plan to install or maintain Huawei equipment must receive thorough training, understand all necessary safety precautions, and be able to correctly perform all operations. -
Page 11: Electrical Safety
Do not connect or disconnect power cables with power on. Transient contact between the core of the power cable and the conductor will generate electric arcs or sparks, which may cause fire or personal injury. Issue 05 (2020-08-30) Copyright © Huawei Technologies Co., Ltd. -
Page 12: Installation Environment Requirements
Ensure that the ladder is securely positioned. The recommended angle for a ladder against the floor is 75 degrees, as shown in the following figure. An angle rule can be used to measure the angle. Issue 05 (2020-08-30) Copyright © Huawei Technologies Co., Ltd. -
Page 13: Commissioning
When the equipment is powered on for the first time, ensure that professional personnel set parameters correctly. Incorrect settings may result in inconsistency with local certification and affect the normal operation of the equipment. Issue 05 (2020-08-30) Copyright © Huawei Technologies Co., Ltd. -
Page 14: Maintenance And Replacement
If the equipment is faulty, contact your dealer. ● The equipment can be powered on only after all faults are rectified. Failing to do so may escalate faults or damage the equipment. Issue 05 (2020-08-30) Copyright © Huawei Technologies Co., Ltd. -
Page 15: Overview
This document involves the following product models: ● SUN2000-175KTL-H0 ● SUN2000-185KTL-INH0 ● SUN2000-185KTL-H1 Figure 2-1 Model description (SUN2000-185KTL-INH0 is used as an example) Table 2-1 Model description Meaning Value Series SUN2000: three-phase grid-tied PV string inverter Issue 05 (2020-08-30) Copyright © Huawei Technologies Co., Ltd. - Page 16 1500 V DC input voltage NO TE The SUN2000-175KTL-H0 is applicable only to the Chinese mainland. For other countries or regions, Huawei does not provide quality assurance. Network Application The inverter applies to grid-tied PV systems for commercial rooftop PV plants and large PV plants.
-
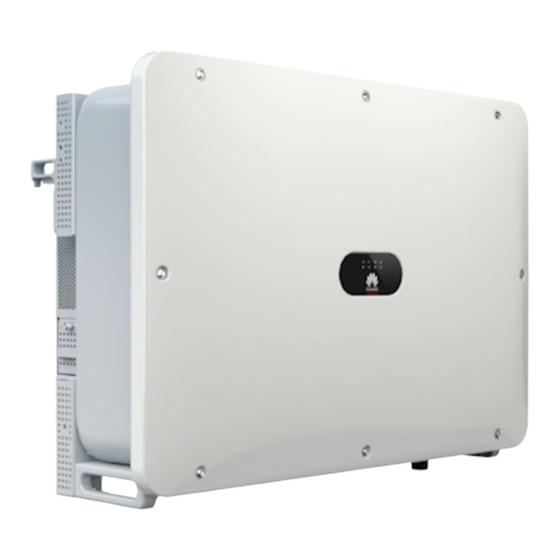
Page 17: Appearance
The SUN2000 can also apply to the AC power system with the neutral point grounding of the step-up transformer. The SUN2000 itself does not connect to any neutral wire. Figure 2-4 AC power system with the neutral point grounding 2.2 Appearance Dimensions Issue 05 (2020-08-30) Copyright © Huawei Technologies Co., Ltd. - Page 18 The test on the cable connection of PV strings is complete, cables are incorrectly connected, and the buzzer buzzes. Blinking An environmental fault occurs at DC side. green at short intervals Issue 05 (2020-08-30) Copyright © Huawei Technologies Co., Ltd.
- Page 19 Blinking green at long In local maintenance or shuts down over a intervals command. Blinking green at short Local maintenance fails. intervals No alarm is generated, and no local maintenance operations are performed. Issue 05 (2020-08-30) Copyright © Huawei Technologies Co., Ltd.
-
Page 20: Label Description
(11) Power cable port for the tracking system 2.3 Label Description 2.3.1 Label Description Symbol Name Meaning Running warning Potential hazards exist after the inverter is powered on. Take protective measures when operating the inverter. Issue 05 (2020-08-30) Copyright © Huawei Technologies Co., Ltd. - Page 21 Fan replacement warning Before replacing a fan, disconnect its power connectors. Inverter ESN label Indicates the inverter serial number. Weight label The inverter needs to be carried by four persons or using a pallet truck. Issue 05 (2020-08-30) Copyright © Huawei Technologies Co., Ltd.
-
Page 22: Product Nameplate
MPPT circuits inside the inverter to track the maximum power point of the PV strings. The DC power is then converted into three-phase AC power through an inverter circuit. Surge protection is supported on both the DC and AC sides. Issue 05 (2020-08-30) Copyright © Huawei Technologies Co., Ltd. -
Page 23: Working Modes
SUN2000-(175KTL-H0, 185KTL-INH0, 185KTL-H1 User Manual 2 Overview Figure 2-6 Inverter conceptual diagram 2.4.2 Working Modes The SUN2000 can work in Standby, Operating, or Shutdown mode. Issue 05 (2020-08-30) Copyright © Huawei Technologies Co., Ltd. - Page 24 ● In Standby or Operating mode, the SUN2000 enters Shutdown mode after detecting a fault or shutdown command. ● In Shutdown mode, the SUN2000 enters Standby mode after detecting a startup command or that the fault is rectified. Issue 05 (2020-08-30) Copyright © Huawei Technologies Co., Ltd.
-
Page 25: Solar Inverter Storage
● Do not tilt the package or place it upside down. ● To avoid personal injury or device damage, stack inverters with caution to prevent them from falling over. Issue 05 (2020-08-30) Copyright © Huawei Technologies Co., Ltd. - Page 26 Figure 3-2 Maximum number of pile-up layers allowed ● If the solar inverter has been stored for more than two years, it must be checked and tested by professionals before being put into use. Issue 05 (2020-08-30) Copyright © Huawei Technologies Co., Ltd.
-
Page 27: Installation
You are advised to remove the packing materials within 24 hours before installing the inverter. Package Contents After unpacking the inverter, check that the contents are intact and complete. If any damage is found or any component is missing, contact your supplier. Issue 05 (2020-08-30) Copyright © Huawei Technologies Co., Ltd. -
Page 28: Preparing Tools
Installation Wire stripper Flat-head Rubber mallet Utility knife tools screwdriver Head: 0.6 mm x 3.5 Cable cutter Vacuum cleaner Crimping tool Removal wrench Model: Model: 13001462; 32.6020-22100-HZ; manufacturer: manufacturer: Staubli Staubli Issue 05 (2020-08-30) Copyright © Huawei Technologies Co., Ltd. -
Page 29: Determining The Installation Position
Do not install the inverter in areas with flammable materials. ● Do not install the inverter in areas with explosive materials. ● Do not install the inveter in areas with corrosive materials. Issue 05 (2020-08-30) Copyright © Huawei Technologies Co., Ltd. - Page 30 The inverter will be corroded in salt areas. Before installing the inverter outdoors in salt areas, consult Huawei. A salt area refers to the region within 500 meters from the coast or prone to sea breeze. The regions prone to sea breeze vary with weather conditions (such as typhoons and monsoons) or terrains (such as dams and hills).
-
Page 31: Space Requirements
600 mm and 730 mm. If you have any question about the clearance, consult the local technical support engineers. Issue 05 (2020-08-30) Copyright © Huawei Technologies Co., Ltd. - Page 32 When installing multiple inverters, install them in horizontal mode if sufficient space is available and install them in triangle mode if no sufficient space is available. Stacked installation is not recommended. Figure 4-6 Horizontal installation mode (recommended) Issue 05 (2020-08-30) Copyright © Huawei Technologies Co., Ltd.
-
Page 33: Installing The Mounting Bracket
User Manual 4 Installation Figure 4-7 Triangle installation mode (recommended) Figure 4-8 Stacked installation mode (not recommended) 4.4 Installing the Mounting Bracket Installation Precautions Figure 4-9 shows the inverter mounting bracket dimensions. Issue 05 (2020-08-30) Copyright © Huawei Technologies Co., Ltd. -
Page 34: Support-Mounted Installation
Before installing the mounting bracket, remove the security torx wrench from the mounting bracket and set it aside. Figure 4-10 Removing a security torx wrench 4.4.1 Support-mounted Installation Support-mounted Installation Step 1 Install the mounting bracket. Issue 05 (2020-08-30) Copyright © Huawei Technologies Co., Ltd. -
Page 35: Wall-Mounted Installation
● Level the head of the expansion sleeve with the concrete wall after removing the bolt, spring washer, and flat washer. Otherwise, the mounting bracket will not be securely installed on the wall. Issue 05 (2020-08-30) Copyright © Huawei Technologies Co., Ltd. -
Page 36: Installing The Inverter
Before installing the inverter, take it out from the packing case and move it to the installation position. NO TE Handles are packed in a fitting bag and are not delivered with the inverter. Figure 4-13 Taking out and moving the inverter Issue 05 (2020-08-30) Copyright © Huawei Technologies Co., Ltd. - Page 37 Figure 4-14 Lifting positions Installing the Inverter Step 1 Mount the inverter on the mounting bracket. Step 2 Tighten the two screws at the bottom of the inverter. Issue 05 (2020-08-30) Copyright © Huawei Technologies Co., Ltd.
- Page 38 SUN2000-(175KTL-H0, 185KTL-INH0, 185KTL-H1 User Manual 4 Installation Figure 4-15 Installation ----End Supplementary Notes If the inverter is installed in a high position, you can hoist it. Figure 4-16 Hoisting the inverter Issue 05 (2020-08-30) Copyright © Huawei Technologies Co., Ltd.
-
Page 39: Electrical Connections
If a copper-clad aluminum cable is used, use copper wiring terminals. ● If an aluminum alloy cable is used, use copper-aluminum transition wiring terminals, or aluminum wiring terminals along with copper-aluminum transition spacers. Issue 05 (2020-08-30) Copyright © Huawei Technologies Co., Ltd. - Page 40 Ensure that the aluminum sides of spacers are in contact with aluminum wiring terminals, and copper sides of spacers are in contact with the AC terminal block. Figure 5-1 Requirements for the OT/DT terminal Issue 05 (2020-08-30) Copyright © Huawei Technologies Co., Ltd.
- Page 41 ● When using a heat gun, protect devices from being scorched. Figure 5-2 Crimping an OT terminal (1) Cable (2) Core (3) Heat shrink tubing (4) OT terminal (5) Hydraulic pliers (6) Heat gun Issue 05 (2020-08-30) Copyright © Huawei Technologies Co., Ltd.
-
Page 42: Opening The Maintenance Compartment Door
● Do not leave unused screws in the maintenance compartment. Procedure Step 1 Partially loosen the two screws on the maintenance compartment door. Step 2 Open the maintenance compartment door and install a support bar. Issue 05 (2020-08-30) Copyright © Huawei Technologies Co., Ltd. - Page 43 For some models, a three-hole rubber plug is bound in the maintenance compartment. After removing the rubber plug, save it properly for future use Figure 5-5 Removing the accessories from the maintenance compartment (1) Crimping modules ----End Issue 05 (2020-08-30) Copyright © Huawei Technologies Co., Ltd.
-
Page 44: Optional) Replacing The Crimping Module
2.5 m. ● Connect the power cable of the tracking system before the AC output power cable. Otherwise, reworking will be caused. Issue 05 (2020-08-30) Copyright © Huawei Technologies Co., Ltd. -
Page 45: Connecting The Ac Output Power Cable
The inverter is integrated with a comprehensive residual current detection unit to distinguish fault current from residual current. Upon detecting that the residual current exceeds the threshold, the inverter immediately disconnects from the power grid. Issue 05 (2020-08-30) Copyright © Huawei Technologies Co., Ltd. - Page 46 ● Multi-core cable: 24– 50–240 mm 66 mm Copper-clad aluminum ● Multi-core cable: 70– ● Single-core cable: 14– cable and aluminum 240 mm 32 mm alloy cable ● Single-core cable: 70– 240 mm Issue 05 (2020-08-30) Copyright © Huawei Technologies Co., Ltd.
- Page 47 Step 2 (Optional) Apply silica gel or paint on the ground terminal to protect it against corrosion. ----End Connecting the AC Output Power Cable (Multi-core) Step 1 Connect the AC cable to the terminal block. Issue 05 (2020-08-30) Copyright © Huawei Technologies Co., Ltd.
- Page 48 PE cable when the AC output power cable bears pulling force due to force majeure. Figure 5-9 Cable connection ----End Connecting the AC Output Power Cable (Single-core) Step 1 Connect the AC cable to the terminal block. Issue 05 (2020-08-30) Copyright © Huawei Technologies Co., Ltd.
-
Page 49: Installing The Dc Input Power Cable
● The polarities of electric connections are correct on the DC input side. The positive and negative terminals of a PV module connect to corresponding positive and negative DC input terminals of the inverter. Issue 05 (2020-08-30) Copyright © Huawei Technologies Co., Ltd. - Page 50 Requirements for selecting DC input terminals: Evenly distribute the DC input power cables on the DC input terminals controlled by the three DC switches. Maximize the number of connected MPPT circuits. Issue 05 (2020-08-30) Copyright © Huawei Technologies Co., Ltd.
- Page 51 Wiring Description of Y-branch Connectors NO TICE ● Y-branch connectors can be purchased from Huawei or the manufacturers based on the following recommended models: If the rated current of the fuse of the Y-branch connector is 15 A, the recommended model is 904095944 (Luxshare) or A040959443039 (Comlink);...
- Page 52 MPPT4, MPPT5, MPPT7, MPPT8, MPPT6, MPPT7, and MPPT9 MPPT8, and MPPT9 MPPT1, MPPT2, MPPT3, MPPT4, MPPT5, MPPT6, MPPT7, MPPT8, and MPPT9 Figure 5-12 Connecting Y-branch connectors to the PV strings (recommended) Issue 05 (2020-08-30) Copyright © Huawei Technologies Co., Ltd.
- Page 53 PV cable that meets the 4–6 4.7–6.4 1500 V standard NO TICE Cables with high rigidity, such as armored cables, are not recommended, because poor contact may be caused by the bending of cables. Issue 05 (2020-08-30) Copyright © Huawei Technologies Co., Ltd.
-
Page 54: Installing The Communications Cable
Remove some PV modules. Figure 5-15 Cable connection ----End 5.8 Installing the Communications Cable Precautions When routing communications cables, separate communications cables from power cables to prevent communication from being affected. Issue 05 (2020-08-30) Copyright © Huawei Technologies Co., Ltd. - Page 55 SmartLogger. PE, shielding ground PE, shielding ground RS485-2 RS485A, RS485 RS485B, RS485 Used for connecting differential signal+ differential signal– to RS485 slave devices. Procedure Step 1 Install the communications cable. Issue 05 (2020-08-30) Copyright © Huawei Technologies Co., Ltd.
- Page 56 SUN2000-(175KTL-H0, 185KTL-INH0, 185KTL-H1 User Manual 5 Electrical Connections Figure 5-17 Cable connection (4–8 mm four-hole rubber plug) NO TICE Block unused cable holes using plugs and tighten cable glands. Issue 05 (2020-08-30) Copyright © Huawei Technologies Co., Ltd.
-
Page 57: Closing The Maintenance Compartment Door
● Block unused cable holes using plugs and tighten cable glands. ----End 5.9 Closing the Maintenance Compartment Door Procedure Step 1 Adjust the support bar, close the maintenance compartment door and tighten the two screws on the door. Issue 05 (2020-08-30) Copyright © Huawei Technologies Co., Ltd. - Page 58 SUN2000-(175KTL-H0, 185KTL-INH0, 185KTL-H1 User Manual 5 Electrical Connections Figure 5-19 Closing the door ----End Issue 05 (2020-08-30) Copyright © Huawei Technologies Co., Ltd.
-
Page 59: System Commissioning
● If the solar inverter has not been running for more than half a year after being mounted, it must be checked and tested by professionals before being put into operation. Issue 05 (2020-08-30) Copyright © Huawei Technologies Co., Ltd. - Page 60 1, the inverter reports a fault about abnormal shutdown. The inverter can start normally after the fault is automatically cleared. Step 2 Turn the DC switches at the bottom of the inverter to ON. ----End Issue 05 (2020-08-30) Copyright © Huawei Technologies Co., Ltd.
-
Page 61: Man-Machine Interactions
● Over a USB data cable: The USB 2.0 port is supported. Use the USB data cable delivered with the mobile phone. ● Mobile phone operating system: Android 4.0 or later. ● Recommended phone brands: Huawei and Samsung. Issue 05 (2020-08-30) Copyright © Huawei Technologies Co., Ltd. - Page 62 NO TE ● Configurable parameters vary depending on the grid code. The actual screen prevails. ● The parameter names, value ranges, and default values are subject to change. The actual display prevails. Issue 05 (2020-08-30) Copyright © Huawei Technologies Co., Ltd.
-
Page 63: Downloading And Installing The App
You can also scan the QR code to download the installation package. ● SUN2000 app: Log in to Huawei AppGallery (https://appstore.huawei.com), search for SUN2000, and download the app installation package. You can also scan the QR code (https://solar.huawei.com/~/media/Solar/APP/ SUN2000.apk) to download the installation package. - Page 64 (Scenario in which the SUN2000 is connected to the FusionSolar hosting cloud) Run the FusionSolar app and access the Device Commissioning screen. Figure 7-3 Selecting a connection mode (with network access) Issue 05 (2020-08-30) Copyright © Huawei Technologies Co., Ltd.
- Page 65 Run the SUN2000 app and access the operation screen. Figure 7-5 Selecting a connection method Step 2 Select a login user and enter the login password to access the quick settings screen or the main menu screen. Issue 05 (2020-08-30) Copyright © Huawei Technologies Co., Ltd.
-
Page 66: Operations Related To The Advanced User
Settings on the main menu screen. ----End 7.1.4 Operations Related to the Advanced User If you log in to the app asAdvanced User, you can set grid parameters, protection parameters, and feature parameters for the SUN2000. Issue 05 (2020-08-30) Copyright © Huawei Technologies Co., Ltd. -
Page 67: Setting Grid Parameters
If the detected value is less than the preset value, the inverter does not connect to the grid. Issue 05 (2020-08-30) Copyright © Huawei Technologies Co., Ltd. -
Page 68: Setting Feature Parameters
MPPT scanning at regular intervals to locate the maximum power. MPPT multi-peak Specifies the MPPT scanning This parameter is displayed scan interval (min) interval. when MPPT multi-peak scanning is set to Enable. Issue 05 (2020-08-30) Copyright © Huawei Technologies Co., Ltd. - Page 69 PID compensation. Power quality If this parameter is set to Enable, optimization mode the inverter output current harmonics will be optimized. Issue 05 (2020-08-30) Copyright © Huawei Technologies Co., Ltd.
- Page 70 ● When PV strings connect to one another in parallel outside the inverter and then connect to it independently (All PV strings connected), set this parameter to All PV strings connected. Issue 05 (2020-08-30) Copyright © Huawei Technologies Co., Ltd.
- Page 71 After unstable at dawn or dusk due to the PV power supply recovers poor sunlight. and the activation conditions are met, the inverter automatically activates the upgrade. Issue 05 (2020-08-30) Copyright © Huawei Technologies Co., Ltd.
-
Page 72: Operations Related To The Special User
If you log in to the app as Special User, you can set grid parameters, protection parameters, feature parameters, and power adjustment parameters for the SUN2000. 7.1.5.1 Setting Grid Parameters Procedure Step 1 ChooseFunction Menu > Settings > Grid Parameters to access the parameters setting screen. Issue 05 (2020-08-30) Copyright © Huawei Technologies Co., Ltd. - Page 73 (V) for grid connection, if the power grid voltage is lower than Startup voltage lower threshold of grid connection, the inverter is not allowed to connect to the grid. Issue 05 (2020-08-30) Copyright © Huawei Technologies Co., Ltd.
- Page 74 (%) Reactive power Specifies the voltage threshold for exiting reactive power compensation (cosφ-P) exit compensation based on the cosφ-P curve. voltage (%) Issue 05 (2020-08-30) Copyright © Huawei Technologies Co., Ltd.
-
Page 75: Setting Protection Parameters
Specifies the 10-minute overvoltage protection duration (ms) duration. Level-N overvoltage protection Specifies the level-N grid overvoltage protection threshold (V) threshold. Level-N overvoltage protection Specifies the level-N grid overvoltage protection duration (ms) duration. Issue 05 (2020-08-30) Copyright © Huawei Technologies Co., Ltd. -
Page 76: Setting Feature Parameters
Specifies the level-N grid underfrequency protection protection duration (ms) duration. 7.1.5.3 Setting Feature Parameters Procedure Step 1 ChooseFunction Menu > Settings > Feature Parameters to access the settings screen. Figure 7-12 Feature parameters (special user) ----End Issue 05 (2020-08-30) Copyright © Huawei Technologies Co., Ltd. - Page 77 Threshold of LVRT zero-current mode during LVRT, the zero current mode is used. Otherwise, the mode configured in LVRT mode is used. Issue 05 (2020-08-30) Copyright © Huawei Technologies Co., Ltd.
- Page 78 10% during HVRT. Grid voltage Specifies whether to shield the undervoltage This parameter is protection protection function during LVRT or HVRT. displayed when LVRT shield during or HVRT is set to Enable. Issue 05 (2020-08-30) Copyright © Huawei Technologies Co., Ltd.
- Page 79 If this parameter is set to Enable, the inverter ON due to automatically starts after communication communicati recovers. If this parameter is set to Disable, the on resumed inverter needs to be started manually after communication recovers. Issue 05 (2020-08-30) Copyright © Huawei Technologies Co., Ltd.
-
Page 80: Setting Power Adjustment Parameters
(min) 7.1.5.4 Setting Power Adjustment Parameters Procedure Step 1 ChooseFunction Menu > Settings > Power Adjustment to go to the parameter setting screen. Issue 05 (2020-08-30) Copyright © Huawei Technologies Co., Ltd. - Page 81 0% power limit command. If this parameter is set to Disable, the inverter does not shut down after receiving the 0% power limit command. Issue 05 (2020-08-30) Copyright © Huawei Technologies Co., Ltd.
- Page 82 This parameter is used with Plant active power gradient. Power factor Specifies the power factor of the inverter. Reactive power Specifies the reactive power output compensation (Q/S) by the inverter. Issue 05 (2020-08-30) Copyright © Huawei Technologies Co., Ltd.
- Page 83 Q-U power, in percentage. When the scheduling actual apparent power of the inverter is greater than the value of this parameter, the Q-U characteristic curve scheduling function is enabled. Issue 05 (2020-08-30) Copyright © Huawei Technologies Co., Ltd.
-
Page 84: Operations With A Usb Flash Drive
FusionSolar APP and SUN2000 APP User Manual . Import the boot script file to a PC. (Optional) The boot script file can be opened as a .txt file. Figure 7-14 Boot script file Issue 05 (2020-08-30) Copyright © Huawei Technologies Co., Ltd. - Page 85 There is an operation with a USB flash drive. Blinking green fast An operation with a USB flash drive has failed. Steady green An operation with a USB flash drive is successful. Issue 05 (2020-08-30) Copyright © Huawei Technologies Co., Ltd.
-
Page 86: Importing Configurations
SUN2000 app or entering the Device Commissioning screen on the FusionSolar app. Otherwise, the user account will be locked for 10 minutes after the USB flash drive is inserted for five consecutive times. Issue 05 (2020-08-30) Copyright © Huawei Technologies Co., Ltd. -
Page 87: Exporting Data
SUN2000 app or entering the Device Commissioning screen on the FusionSolar app. Otherwise, the user account will be locked for 10 minutes after the USB flash drive is inserted for five consecutive times. Issue 05 (2020-08-30) Copyright © Huawei Technologies Co., Ltd. -
Page 88: Upgrading
SUN2000 app or entering the Device Commissioning screen on the FusionSolar app. Otherwise, the user account will be locked for 10 minutes after the USB flash drive is inserted for five consecutive times. Issue 05 (2020-08-30) Copyright © Huawei Technologies Co., Ltd. - Page 89 After the restart, the indicator is blinking green slowly for 1 minute and then it becomes steady green, which indicates that the upgrade is successful. Issue 05 (2020-08-30) Copyright © Huawei Technologies Co., Ltd.
-
Page 90: Maintenance
Step 3 Set the three DC switches to OFF. ----End 8.2 Power-Off for Troubleshooting Context To prevent personal injury and equipment damage, perform the following procedure to power off the solar inverter for troubleshooting or replacement. Issue 05 (2020-08-30) Copyright © Huawei Technologies Co., Ltd. - Page 91 AC terminal block and the ground. Ensure that the AC side of the solar inverter is disconnected. Step 6 Turn off all DC input switches of the solar inverter. Figure 8-1 Power-off for maintenance Issue 05 (2020-08-30) Copyright © Huawei Technologies Co., Ltd.
-
Page 92: Routine Maintenance
If necessary, remove the baffle of the air intake vent. ● Fans ● Check whether the fans produce abnormal sounds during operation. Issue 05 (2020-08-30) Copyright © Huawei Technologies Co., Ltd. - Page 93 6 months after the initial commissioning. From then on, the interval can be 6 or 12 months. Removing the baffle of the air intake vent Figure 8-2 Removing the baffle Issue 05 (2020-08-30) Copyright © Huawei Technologies Co., Ltd.
-
Page 94: Replacing A Fan
Figure 8-3 Pulling out fan tray (1) Step 2 Remove the cable ties shared by the cables, unscrew the connectors, and disconnect the cables. Figure 8-4 Disconnecting cables Step 3 Pull out the fan tray. Issue 05 (2020-08-30) Copyright © Huawei Technologies Co., Ltd. - Page 95 Figure 8-7 Removing the FAN 2 cable ties ● FAN 3 Faulty Figure 8-8 Removing the FAN 3 cable ties Step 5 Remove the faulty fan (FAN 1 is used as an example). Figure 8-9 Removing the fan Issue 05 (2020-08-30) Copyright © Huawei Technologies Co., Ltd.
- Page 96 Binding positions for fan 3 Figure 8-13 Binding the FAN 3 cables Step 8 Push the fan tray into the slot until the fan baffle plate aligns with the inverter chassis. Issue 05 (2020-08-30) Copyright © Huawei Technologies Co., Ltd.
-
Page 97: Troubleshooting
Major: The inverter is faulty. As a result, the output power decreases or the grid-tied power generation is stopped. ● Minor: Some components are faulty without affecting the grid-tied power generation. Issue 05 (2020-08-30) Copyright © Huawei Technologies Co., Ltd. - Page 98 If yes, wait until the Cause ID 1–18: PV strings PV string current drops below 1–18 0.5 A. Then, set all DC switches to OFF and correct the PV string connection. Issue 05 (2020-08-30) Copyright © Huawei Technologies Co., Ltd.
- Page 99 2. Check whether the AC 2. The AC circuit is circuit is disconnected or disconnected or the AC the AC switch is off. switch is off. Issue 05 (2020-08-30) Copyright © Huawei Technologies Co., Ltd.
- Page 100 SmartLogger, or NMS. 3. Check whether the peak grid voltage exceeds the upper threshold. Issue 05 (2020-08-30) Copyright © Huawei Technologies Co., Ltd.
- Page 101 If not, contact the local power operator. If yes, modify the grid overfrequency protection threshold through the mobile app, SmartLogger, or NMS with the consent of the local power operator. Issue 05 (2020-08-30) Copyright © Huawei Technologies Co., Ltd.
- Page 102 2. If the alarm occurs frequently, check whether the power grid frequency is within the acceptable range. If not, contact the local power operator. Issue 05 (2020-08-30) Copyright © Huawei Technologies Co., Ltd.
- Page 103 2. If the alarm occurs frequently or persists, check whether the impedance between the PV string and the ground is too low. Issue 05 (2020-08-30) Copyright © Huawei Technologies Co., Ltd.
- Page 104 Warning Cause ID=1 1. Apply for a new license. 1. The privilege license 2. Load a new license. has entered the grace period. 2. The privilege feature will be invalid soon. Issue 05 (2020-08-30) Copyright © Huawei Technologies Co., Ltd.
- Page 105 Huawei technical support. NO TE If you cannot rectify faults with the measures listed in troubleshooting suggestions, contact your dealer or Huawei technical support. Issue 05 (2020-08-30) Copyright © Huawei Technologies Co., Ltd.
-
Page 106: Handling The Inverter
9.3 Disposing of the SUN2000 If the SUN2000 service life expires, dispose of it according to the local disposal rules for electrical equipment waste. Issue 05 (2020-08-30) Copyright © Huawei Technologies Co., Ltd. -
Page 107: Technical Data
1500 V voltage Maximum input 26 A current (per MPPT) Maximum short- 40 A circuit current (per MPPT) Maximum backfeed current to the PV array Lowest 500 V/550 V operating/startup voltage Issue 05 (2020-08-30) Copyright © Huawei Technologies Co., Ltd. - Page 108 50 Hz/60 Hz 50 Hz/60 Hz grid frequency Maximum output 140.7 A 134.9 A 134.9 A current Power factor 0.8 leading and 0.8 lagging Maximum total < 3% harmonic distortion (rated power) Issue 05 (2020-08-30) Copyright © Huawei Technologies Co., Ltd.
- Page 109 (RCMU) Overvoltage PV II/AC III category Display and Communication Technical SUN2000-175KTL SUN2000-185KTL SUN2000-185KTL Specifications -INH0 Display LED indicator, Bluetooth module+app, USB data cable+app, and WLAN module+app RS485 Supported MBUS Supported Supported Issue 05 (2020-08-30) Copyright © Huawei Technologies Co., Ltd.
- Page 110 Highest 5000 m (derated when the altitude is greater than 4000 m) operating altitude Humidity 0%–100% RH Input terminal MC4 EVO2 Output terminal Waterproof terminal+OT/DT terminal IP rating IP66 Topology Transformerless Issue 05 (2020-08-30) Copyright © Huawei Technologies Co., Ltd.
-
Page 111: A Securing Y-Branch Connectors
Prepare a tray based on the base size of the solar inverter and the cabling of the Y-branch connectors. ● Material: outdoor corrosion-resistant material ● Bearing capacity: ≥ 10 kg Figure A-1 Recommended dimensions Step 1 Install a tray. Issue 05 (2020-08-30) Copyright © Huawei Technologies Co., Ltd. - Page 112 Figure A-3 Placing Y-branch connectors ----End Method 2: Using a Beam Prepare a beam based on the base size of the solar inverter and the cabling of the Y-branch connectors. ● Material: outdoor corrosion-resistant material Issue 05 (2020-08-30) Copyright © Huawei Technologies Co., Ltd.
- Page 113 Bearing capacity: ≥ 10 kg Figure A-4 Recommended dimensions Step 1 Install a beam. Figure A-5 Installing a beam Step 2 Bind the Y-branch connectors on the beam. Figure A-6 Binding Y-branch connectors ----End Issue 05 (2020-08-30) Copyright © Huawei Technologies Co., Ltd.
-
Page 114: B String Access Detection
In these cases, the user is liable for any loss caused to the PV plant. Step 2 Choose Function Menu > Maintenance > String Access Detection to go to the parameter setting screen. Issue 05 (2020-08-30) Copyright © Huawei Technologies Co., Ltd. - Page 115 When the current of a PV string reaches for 2 in 1 Startup current for 2 in 1 detection, the detection PV string is automatically identified as 2 in You are advised to use the default value. Issue 05 (2020-08-30) Copyright © Huawei Technologies Co., Ltd.
- Page 116 You are advised to retain the default value. If the value is incorrectly set, the PV string access type may be incorrectly identified and alarms may be generated by mistake for the PV string connection status. Issue 05 (2020-08-30) Copyright © Huawei Technologies Co., Ltd.
-
Page 117: C Domain Name List Of Management Systems
The list is subject to change. Table C-1 Domain names of management systems Domain Name Data Type Scenario intl.fusionsolar.huawei.co Public IP address FusionSolar hosting cloud NOTE The domain name is compatible with cn.fusionsolar.huawei.com (Chinese mainland). Issue 05 (2020-08-30) Copyright © Huawei Technologies Co., Ltd. -
Page 118: D Grid Code
France medium-voltage Supported MV800 power grid Chile-MV800 Chile medium-voltage power Supported grid EN50438-TR-MV800 Turkey medium-voltage Supported power grid TAI-PEA-MV800 Thailand PEA medium-voltage Supported power grid Philippines-MV800 Philippines medium-voltage Supported power grid Issue 05 (2020-08-30) Copyright © Huawei Technologies Co., Ltd. - Page 119 General medium-voltage Supporte Supported MV800-60HZ power grid Pakistan-MV800 Pakistan medium-voltage Supported power grid BRASIL-ANEEL-MV800 Brazil medium-voltage power Supported grid CEI0-16-MV800 Italy medium-voltage power Supported grid ZAMBIA-MV800 Zambia medium-voltage Supported power grid Issue 05 (2020-08-30) Copyright © Huawei Technologies Co., Ltd.
- Page 120 Supported grid PO12.3-MV800 Spain medium-voltage power Supported grid Vietnam-MV800 Vietnam medium-voltage Supported power grid CHILE-PMGD-MV800 Chile PMGD medium-voltage Supported power grid (800 V) GHANA-MV800 Ghana medium-voltage Supported power grid (800 V) Issue 05 (2020-08-30) Copyright © Huawei Technologies Co., Ltd.
- Page 121 Oman-PDO-MV800 Oman PDO medium-voltage Supported power grid TAI-MEA-MV800 Thailand medium-voltage Supported power grid NO TE The grid codes are subject to change. The listed codes are for your reference only. Issue 05 (2020-08-30) Copyright © Huawei Technologies Co., Ltd.
-
Page 122: E Acronyms And Abbreviations
E Acronyms and Abbreviations Acronyms and Abbreviations California Energy Commission Concentrated Photovoltaics technology light emitting diode MBUS monitoring bus maximum power point MPPT maximum power point tracking potential induced degradation photovoltaic Issue 05 (2020-08-30) Copyright © Huawei Technologies Co., Ltd. - Page 123 SUN2000-(175KTL-H0, 185KTL-INH0, 185KTL-H1 User Manual E Acronyms and Abbreviations RCMU residual current monitoring unit WEEE waste electrical and electronic equipment Issue 05 (2020-08-30) Copyright © Huawei Technologies Co., Ltd.