Samsung HT-DM150 Instruction Manual
Hide thumbs
Also See for HT-DM150:
- Manual (90 pages) ,
- Manual de instrucciones (66 pages) ,
- Instruction manual (48 pages)
Table of Contents
THIS APPLIANCE IS MANUFACTURED BY:
AH68-01324B
DIGITAL HOME
CINEMA SYSTEM
HT-DM150
HT-DM160
Instruction Manual
COMPACT
COMPACT
DIGITAL AUDIO
DIGITAL VIDEO
V I D E O
TV DVD RECEIVER
OPEN/CLOSE
TV/VIDEO
MODE
DIMMER
DVD
TUNER
AUX
BAND
EZ VIEW
SLOW
SUBTITLE
NTSC/PAL
MO/ST
STEP
DSP/EQ
REPEAT
TUNING/CH
VOLUME
PL II
PL II
MODE
EFFECT
ENTER
RDS DISPLAY
TA
TEST TONE
PTY–
PTY SEARCH
PTY+
SOUND EDIT
TUNER
MEMORY
SLEEP
CANCEL
ZOOM
LOGO
SLIDE MODE
DIGEST
REMAIN
Table of Contents

Related Manuals for Samsung HT-DM150


Summary of Contents for Samsung HT-DM150
- Page 1 THIS APPLIANCE IS MANUFACTURED BY: DIGITAL HOME CINEMA SYSTEM HT-DM150 HT-DM160 Instruction Manual V I D E O AH68-01324B TV DVD RECEIVER OPEN/CLOSE TV/VIDEO MODE DIMMER TUNER BAND EZ VIEW SLOW SUBTITLE NTSC/PAL MO/ST STEP DSP/EQ REPEAT TUNING/CH VOLUME PL II PL II MODE EFFECT...
-
Page 2: Safety Warnings
Safety Warnings Use of controls, adjustments or performance of procedures other CLASS 1 LASER PRODUCT than those specified herein may result in hazardous radiation KLASSE 1 LASER PRODUKT exposure. LUOKAN 1 LASER LAITE KLASS 1 LASER APPARAT PRODUCTO LASER CLASE 1 CAUTION-INVISIBLE LASER RADIATION WHEN OPEN AND INTERLOCKS DEFEATED, AVOID EXPO- SURE TO BEAM. -
Page 3: Table Of Contents
Features Multi-Disc Playback & AM/FM Tuner The HT-DM150, HT-DM160 combines the convenience of multi-disc playback capability, including DVD, VCD, CD, MP3-CD, CD-R, CD-RW, and DVD-RW, with a sophisticated AM/FM tuner, all in a single player. Built-in 5.1-Channel Amplifier The HT-DM150, HT-DM160 comes with a built-in 5.1-channel amplifier, allowing you to enjoy dynamic sound. -
Page 4: Notes On Discs
Notes on Discs DVD (Digital Versatile Disc) offers fantastic audio and video, thanks to Dolby Digital surround sound and MPEG-2 video compression technology. Now you can enjoy these V I D E O realistic effects in the home, as if you were in a movie theater or concert hall. DVD players and the discs are coded by region. -
Page 5: Description
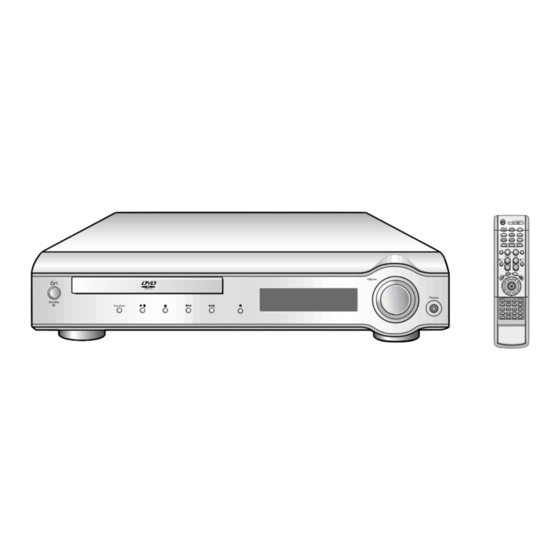
Description —Front Panel— Function button Play/Pause ( ) button Power ( ) button Stop ( ) button Disc Tray Open/Close button Standby indicator Tuning Down & Skip ( ) buttons Tuning Up & Skip ( ) buttons TUNER indicator DTS Disc indicator INFO indicator NEWS MPEG indicator... -
Page 6: Remote Control
Description —Remote Control— TV DVD RECEIVER DVD POWER button TV/VIDEO, DIMMER button OPEN/CLOSE TV/VIDEO MODE OPEN/CLOSE button DIMMER TUNER BAND EZ VIEW SLOW SUBTITLE EZ VIEW, NTSC/PAL button NTSC/PAL MO/ST STEP DSP/EQ REPEAT STEP button DSP/EQ button TUNING/CH VOLUME PL II PL II MODE EFFECT... -
Page 7: Connecting The Speakers
Connecting the Speakers Before moving or installing the product, be sure to turn off the power and disconnect the power cord. Position of the DVD Player Selecting the Listening Position • Place it on a stand or cabinet shelf, or under The listening position should be located about 2.5 to 3 the TV stand. -
Page 8: Connecting The Video To Tv
Connecting the Speakers HT-DM160 Front Speaker (L) Center Speaker White Green Gray Purple Blue Subwoofer Rear Speaker (L) Rear Speaker (R) Connecting the Video to TV (Cont.) Front Speaker (R) Composite Video (Good Quality) Connect the supplied video cable from the VIDEO OUT jack on the back panel of the system to the VIDEO IN jack on your television. -
Page 9: Connecting External Components
Connecting External Components Connecting an External Digital Component Example: Digital signal components such as a DVD or CD Recorder. Optical Cable (not included) DIGITAL OUT Connect the Digital Input (OPTICAL) to the Digital Output on the external digital component. Press AUX on the remote control to select ‘DIGITAL IN’. •... -
Page 10: Connecting The Antennas
Connecting the Antennas FM antenna connection FM Antenna (supplied) Connect the FM antenna supplied to the FM 75 COAXIAL terminal as a temporary measure. Slowly move the antenna wire around until you find a location where reception is good, then fasten it to a wall or other rigid surface. •... -
Page 11: Before Using Your Dvd Player
• Buttons Enabled for TV Operation: POWER, CHANNEL, VOLUME, TV/VIDEO and Numeric (0-9) buttons. • By default, the remote control is set to work with Samsung TVs. See page 61 for more information on the operation of the remote control. -
Page 12: Disc Playback
Disc Playback Press OPEN/CLOSE button to Load a discs. open the disc tray. • Place a disc gently into the tray with the disc’s label facing up. Press OPEN/CLOSE button to close the disc tray. To stop playback, press STOP during playback. •... -
Page 13: Fast/Slow Playback
Fast/Slow Playback Fast Playback Press and hold • Each time the button is held down during playback, the playback speed changes as follows: Slow Playback Press SLOW button. • Each time the button is pressed during playback, the playback speed changes as follows: •... -
Page 14: Repeat Playback
Repeat Playback Repeat playback allows you to repeatedly play a chapter, title, track (song), or directory (MP3 file). JPEG Press REPEAT button. • Each time the button is pressed during playback, the repeat playback mode changes as follows: JPEG To Select a Repeat Playback Mode in the Disc Information Screen Press INFO button twice. -
Page 15: Angle Function
Angle Function This function allows you to view the same scene in different angles. Press Cursor Press INFO button. button to move to ANGLE display. Press Cursor buttons or numeric buttons to select the desired angle. • Each time the button is pressed, the angle changes as follows: Note •... -
Page 16: Selecting Audio/Subtitle Language
Selecting Audio/Subtitle Language Audio Language Selection Function Press Cursor Press INFO button buttons or numeric twice. buttons to select the desired audio language. • Depending on the number of languages on a DVD disc, a different audio language (KOREAN, ENGLISH, JAPANESE, etc.) is selected each time the button is pressed. -
Page 17: Jpeg File Playback
JPEG File Playback Images captured with a digital camera or camcorder, or JPEG files on a PC can be stored on a CD and then played back with this DVD player. Slide Mode Place the JPEG disc on the disc tray. Press the OPEN/CLOSE button. -
Page 18: Using Disc Menu
Using Disc Menu You can use the menus for the audio language, subtitle language, profile, etc. DVD menu contents differ from disc to disc. Press Cursor Press MENU buttons to move to button. ‘DISC MENU’ and then press ENTER button. •... -
Page 19: Setting The Language
Setting the Language OSD language is set to English by default. Press RETURN button to return to the previous level. Press MENU button to exit the setup screen. Press Cursor Press ENTER button to move to button. ‘Setup’ and then press ENTER button. -
Page 20: Setting Tv Screen Type
Setting TV Screen type Press MENU button. Press Cursor button to move to ‘TV DISPLAY’ and then press ENTER button. Press RETURN button to return to the previous level. Press MENU button to exit the setup screen. Adjusting the TV Aspect Ratio (Screen Size) Press Cursor button to move to The horizontal to vertical screen size ratio of conventional TVs is 4:3, while that of wide screen and high... -
Page 21: Setting Parental Controls (Rating Level)
Setting Parental Controls (Rating Level) Use this to restrict playback of adult or violent DVDs you do not want children to view. Press MENU button. Press Cursor Press Cursor button to move to button to move to ‘PARENTAL’ and then ‘Setup’... -
Page 22: Setting The Password
Setting the Password You can set the password for the Parental (rating level) setting. Press MENU button. Press Cursor button to Press Cursor move to ‘PASSWORD’ button to move to and then press ENTER ‘Setup’ and then button. press ENTER button. Press ENTER Enter the password and then press... -
Page 23: Setting The Wallpaper
Press Cursor button to move to ‘USER’ and then press ENTER button. Select this to set the Select this to set the desired Samsung Logo image as image as your wallpaper. your wallpaper. JPEG Press LOGO Press MENU button. button. -
Page 24: Setting The Speaker Mode
Setting the Speaker Mode Press Cursor button to move to Press MENU button. ‘Audio’ and then press ENTER button. Press Cursor In the Speaker , buttons to move Setup, press the to the desired ENTER button again. speaker and then press ENTER button. -
Page 25: Setting The Delay Time
Setting the Delay Time Press MENU button. Setting up the Speaker Delay Time When 5.1CH Surround Sound is played, you can enjoy the best sound if the distance between you and each speaker is the same. Since the sounds arrive at the listening position at different times depending on the placement of speakers, you can adjust this difference by adding a delay effect to the sound of the Center Speaker and Surround Speakers. -
Page 26: Setting The Audio Quality
Setting the Audio Quality You can adjust the balance and level for each speaker. When adjusting the audio quality using the setup screen Method 1 Press MENU button. Press Cursor button to move to ‘SOUND EDIT’ and then press ENTER button. Press RETURN button to return to the previous level. -
Page 27: Setting The Drc (Dynamic Range Compression)
Setting the DRC (Dynamic Range Compression) You can use this function to enjoy Dolby Digital sound when watching movies at low volume at night. Press Cursor Press MENU button. move to ‘Audio’ and then press ENTER button. Press Cursor button to Press Cursor move to ‘DRC’... -
Page 28: Dolby Pro Logic Ii Mode
Dolby Pro Logic II Mode You can select the desired Dolby Pro Logic II audio mode. Press PL II MODE button. • Each time the button is pressed, the mode changes as follows. PRO LOGIC PRO LOGIC PRO LOGIC PRO LOGIC PRO LOGIC Note •... -
Page 29: Listening To Radio
Listening to Radio You can listen to the chosen band (FM, MW, LW broadcast stations) by using either the automatic or manual tuning operation. Remote Control Unit Press TUNER/ Tune in to the desired station. BAND button. • Automatic Tuning 1 When is pressed, a The selection toggles back... -
Page 30: About Rds Broadcasting
About RDS broadcasting Using the RDS (Radio Data System) to receive FM stations RDS allows FM stations to send an additional signal along with their regular program signals. For example,the stations send their station names,as well as information about what type of program they broadcast, such as sports or music,etc. -
Page 31: Convenient Functions
Convenient Functions Sleep Timer Function You can set the time that the DVD player will shut itself off. Press SLEEP button. • "SLEEP" will be displayed. Each time the button is pressed the preset time changes as follows: 10 OFF. TITLE CHAP PRGM RDS RT To confirm the sleep timer setting, press SLEEP button. -
Page 32: Operating The Tv With The Remote Control
TV. • If you do not set the remote control with the code for your brand of TV, the remote control will work on a Samsung TV by default. TV Brand Code List Brand... -
Page 33: Before Calling For Service
Refer to the chart below when this unit does not function properly. If the problem you are experiencing is not listed below or if the instruction below does not help, turn off the unit, disconnect the power cord, and contact the nearest authorized dealer or Samsung Electronics Service Center. Symptom Check/Remedy Disc tray does not open. -
Page 34: Cautions On Handling And Storing Discs
Cautions on Handling and Storing Discs Small scratches on the disc may reduce sound and picture quality or cause breaks in playback. Be especially careful not to scratch discs when handling them. Handling discs Do not touch the playback side of the disc. Hold the disc by the edges so that fingerprints will not get on the surface. -
Page 35: Notes On Terminology
Specifications (Cont.) HT-DM150 5.1ch speaker system Speaker system Front/Center/Rear speaker Impedance 6 x 5 Frequency range 100Hz~18KHz Output sound pressure level 87dB/W/M Rated input Maximum input 120 x 186 x 130 mm Front/Rear Dimensions (W x H x D) 300 x 139 x 121 mm Center 1.1 Kg Front/Rear...