Table of Contents
Quick Links
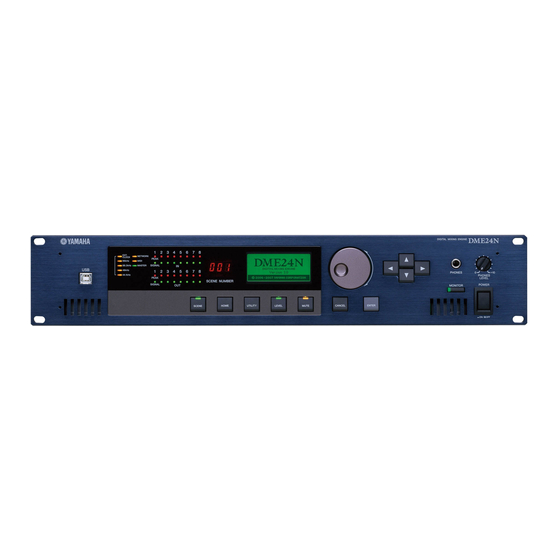
DME Setup Manual
This manual describes the process of setting up a DME system, from making the initial DME unit settings (DME64N /
DME24N / DME8i-C / DME8o-C / DME4io-C / DME8i-ES /DME8o-ES / DME4io-ES) to synchronizing with the DME
Designer application installed on a computer.
• For more details regarding a specific DME unit, please refer to the manual supplied with the unit in question, and for more details regarding the DME Designer application, please refer to the DME Designer manual (pdf).
• Please note that, within this document, the term "DME" refers to the DME64N and DME24N, while the term "DME Satellite" refers to the DME8i-C, DME8o-C, DME4io-C, DME8i-ES, DME8o-ES, and DME4io-ES
This sections covers procedures for either connecting a single DME unit to a computer or connecting multiple DME units to
2. Basic Setup
Connecting
a single DME unit
directly to a computer via USB cable
Setting up DME cards
●
(only when expansion cards will be used)
Configuring components and Writing configurations
●
Going Online and Checking sound output
●
4. In-depth Information on DME Units
Connecting to
External Devices
This section covers connection to
remote controllers via Ethernet
or GPI.
Appendix:
Detailed DME-N Network Driver settings
1. Installing the Software
1-1. Install DME Designer and DME-N Network Driver
1-2. Install the USB-MIDI Driver
Connecting Computer and DME unit
a computer within the same subnet.
Setting up DME64N/24N
Networks via
page
13
Panel Operations
This section explains how to setup networks directly
from a DME64N/24N.
3. Advanced Setup
Connecting
multiple DME units
to a computer via Ethernet cables
page
04
DME setup
●
Changing the computer's IP address settings
●
Setting the DME-N Network Driver
●
Connecting with DME Designer
●
page
13
Troubleshooting & Tips Chart
page
14
This chart serves as a quick guide to the steps that should be taken to
ensure correct operation of DME units.
page
02
Related web site on DME
Units and peripherals
This section serves as a guide to online
information on Speaker Processor Components
library data, optional cards, and touch-panel
controllers (AMX/Creston).
page
08
page
13
page
16
Table of Contents

Related Manuals for Yamaha DME Series


Summary of Contents for Yamaha DME Series
- Page 1 DME Setup Manual This manual describes the process of setting up a DME system, from making the initial DME unit settings (DME64N / DME24N / DME8i-C / DME8o-C / DME4io-C / DME8i-ES /DME8o-ES / DME4io-ES) to synchronizing with the DME Designer application installed on a computer.
-
Page 2: Installing The Software
Begin by downloading the DME Designer Combo Installer and the USB-MIDI Driver from the “Downloads” page on the Yamaha Pro Audio website (http://www.yamahaproaudio.com/downloads/firm_soft/index.html). The following items must be downloaded in order that DME Series devices can be connected to a computer and put to practical use. DME Designer Combo Installer ■... - Page 3 WindowsVista. When Windows 2000 or Windows XP is used, please set (advanced).]. up similarly according to directions of a screen. For the latest information about DME Designer System Requirements, visit the Yamaha Pro Audio website: http://www.yamahaproaudio.com/ Troubleshooting & Tips Precaution regarding USB ports and driver installation On computers featuring multiple USB ports, drivers are installed individu- ally for each port.
-
Page 4: Basic Setup
2. Basic Setup 3. Advanced Setup 4. In-depth information Appendix: Detailed 1. Installing the Software on DME Units DME-N Network Driver Settings (via USB cable) (via Ethernet cables) 2. Basic Setup Connecting a single DME unit directly to a computer via USB cable This section covers the most basic configuration –... -
Page 5: Configuring Components
2. Basic Setup 3. Advanced Setup 4. In-depth information Appendix: Detailed 1. Installing the Software on DME Units DME-N Network Driver Settings (via USB cable) (via Ethernet cables) 2-2. Setting up DME cards The following settings are required only when expansion cards will be used with the DME24N, or DME64N. -
Page 6: Creating Scenes
2. Basic Setup 3. Advanced Setup 4. In-depth information Appendix: Detailed 1. Installing the Software on DME Units DME-N Network Driver Settings (via USB cable) (via Ethernet cables) When the Synchronization window is displayed, the text "Select IP 2-4. Creating scenes Address"... - Page 7 Possible cause #2 and corrective action: The USB-MIDI Driver Thru ON/OFF parameter is not set to “OFF”. Select [Start] → [Control Panel] → [Yamaha USB-MIDI Driver] and ensure that the [Thru ON/OFF] parameter is set to “OFF”. Possible cause #3 and corrective action: The same USB ports have been selected for DME Designer and other MIDI applications.
-
Page 8: Dme Setup
2. Basic Setup 3. Advanced Setup 4. In-depth information Appendix: Detailed 1. Installing the Software on DME Units DME-N Network Driver Settings (via USB cable) (via Ethernet cables) 3. Advanced Setup Connecting multiple DME units to a computer via Ethernet cables When to connect via Ethernet cables: N o t e If a company or office network is to be used... - Page 9 2. Basic Setup 3. Advanced Setup 4. In-depth information Appendix: Detailed 1. Installing the Software on DME Units DME-N Network Driver Settings (via USB cable) (via Ethernet cables) DME4io-C Settings N o t e The computer can be connected to the device group master using a USB cable.
- Page 10 2. Basic Setup 3. Advanced Setup 4. In-depth information Appendix: Detailed 1. Installing the Software on DME Units DME-N Network Driver Settings (via USB cable) (via Ethernet cables) 3-2. Changing the computer's IP address settings Open the Control Panel, and then select "View network status and tasks". N o t e If your computer is being used DME4io-C...
- Page 11 2. Basic Setup 3. Advanced Setup 4. In-depth information Appendix: Detailed 1. Installing the Software on DME Units DME-N Network Driver Settings (via USB cable) (via Ethernet cables) 3-5. Connecting with DME Designer N o t e In our example, the IP addresses of the first, second, and third devices Launch DME Designer and place each of the currently connected devices are 192.168.0.2, 192.168.0.3, and 192.168.0.4, respectively.
- Page 12 2. Basic Setup 3. Advanced Setup 4. In-depth information Appendix: Detailed 1. Installing the Software on DME Units DME-N Network Driver Settings (via USB cable) (via Ethernet cables) Troubleshooting & Tips Over-the-counter security software Problem: A compile error occurs during synchronization. Possible cause #1 and corrective action: If antivirus, anti-spyware, or any other type of Internet security application is DSP total resource consump-...
- Page 13 ● The latest information about DME units and applications can be ● Library data for DMEseries Speaker Processor Components is available downloaded from the Yamaha Pro Audio website. from the”Downloads” page of the Yamaha Pro Audio website: http://www.yamahaproaudio.com http://www.yamahaproaudio.com/downloads/documents/index.html ● The latest version of the DME unit firmware can be downloaded from ●...
- Page 14 2. Basic Setup 3. Advanced Setup 4. In-depth information Appendix: Detailed 1. Installing the Software on DME Units DME-N Network Driver Settings (via USB cable) (via Ethernet cables) Appendix: Detailed DME-N Network Driver Settings DME-N Network Driver Window [Remove] button Select [Start] →...
- Page 15 2. Basic Setup 3. Advanced Setup 4. In-depth information Appendix: Detailed 1. Installing the Software on DME Units DME-N Network Driver Settings (via USB cable) (via Ethernet cables) 3. [Advanced Settings] Button 1. Detect from Click [Advanced Settings] to display the Advanced Settings window. For These fields are used to specify the start IP address for automatic more details regarding the advanced settings that can be made using this detection.
- Page 16 Troubleshooting and Tips Chart at a Glance This chart serves as a quick guide to the steps that should be taken to ensure correct operation of DME units. P os s i b l e Cau s es & Ope r a t io n Ca t eg o r y S ubje ct or Pr oble m Co r rec ti v e Ac ti o n s Precaution regarding USB ports and driver installation...