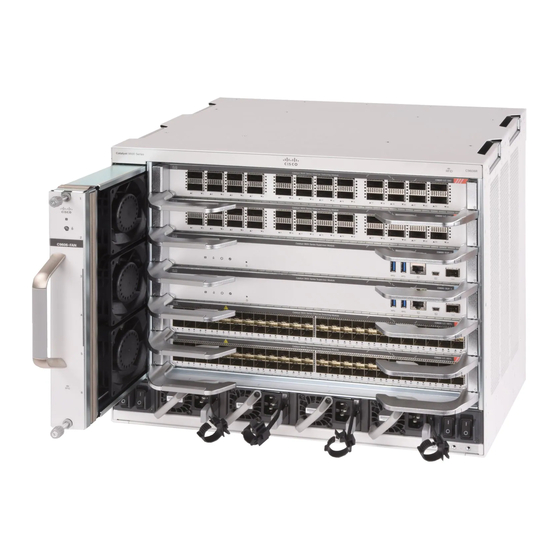
Cisco Catalyst 9600 Manual
Installing the fan tray
Hide thumbs
Also See for Catalyst 9600:
- Hardware installation manual (110 pages) ,
- Installation note (18 pages) ,
- Installation manual (34 pages)
Table of Contents
Quick Links
Installing the Fan Tray
•
•
•
•
Guidelines for Removing and Installing a Fan Tray
Before removing or installing a fan tray ensure you read and follow the guidelines and safety warnings listed
here.
Warning
When removing the fan tray, keep your hands and fingers away from the spinning fan blades. Let the fan
blades completely stop before you remove the fan tray. Statement 258
Warning
Only trained and qualified personnel should be allowed to install, replace, or service this equipment. Statement
1030
Warning
No user-serviceable parts inside. Do not open. Statement 1073
Warning
Installation of the equipment must comply with local and national electrical codes. Statement 1074
Removing a Fan Tray
The following sections explain the steps to remove a fan tray in a Cisco Catalyst 9600 Series switches.
Guidelines for Removing and Installing a Fan Tray, on page 1
Removing a Fan Tray, on page 1
Installing a Fan Tray, on page 8
Verifying Fan Tray Installation, on page 11
Installing the Fan Tray
1
Table of Contents

Summary of Contents for Cisco Catalyst 9600
- Page 1 Installation of the equipment must comply with local and national electrical codes. Statement 1074 Removing a Fan Tray The following sections explain the steps to remove a fan tray in a Cisco Catalyst 9600 Series switches. Installing the Fan Tray...
-
Page 2: Information About Replacing A Fan Tray
Installing the Fan Tray Information About Replacing a Fan Tray Information About Replacing a Fan Tray Online Insertion and Removal While the fan tray is designed to be removed and installed while the system is operating (powered on) without presenting an electrical hazard or damage to the system, there is a time constraint when you remove and replace the fan tray in a system that is powered on. -
Page 3: Removing The Fan Tray From The Front Of The Chassis
Installing the Fan Tray Removing the Fan Tray from the Front of the Chassis Device#test platform hardware chassis fantray service-mode on fantray service mode on The system automatically turns off the service mode after 10 minutes. This cools down the chassis sufficiently for the service duration. - Page 4 Installing the Fan Tray Removing the Fan Tray from the Front of the Chassis Figure 1: Detaching the Connector from the Fan Tray Captive installation screws on the front of Fan tray the fan tray assembly The connector in the rear, separated from the fan tray The connector is not used or replaced when installed from the front.
-
Page 5: Removing The Fan Tray From The Rear Of The Chassis
Installing the Fan Tray Removing the Fan Tray from the Rear of the Chassis Figure 2: Removing the Captive Installation Screws Captive installation screws on the front of the fan tray assembly in the chassis Step 3 Grasp the fan tray handle and slide the fan tray half-way out of the bay. Gently move it from side to side, if necessary, to unseat it from the backplane. - Page 6 Installing the Fan Tray Removing the Fan Tray from the Rear of the Chassis Before you begin • Read Guidelines for Removing and Installing a Fan Tray, on page • Enable the service mode on the chassis, if you are performing this task in a system that is powered on. •...
- Page 7 Installing the Fan Tray Removing the Fan Tray from the Rear of the Chassis Figure 3: Fan Tray with the Connector Fan tray with the connector Step 2 Proceed with removing the fan tray from the chassis. Loosen the two captive installation screws on the rear panel of the fan tray.
-
Page 8: Installing A Fan Tray
Set the removed fan tray aside and proceed with installing the replacement or spare fan tray. Installing a Fan Tray The following sections provide information about installing a fan tray in Cisco Catalyst 9600 Series switches. Installing the Fan Tray... -
Page 9: Installing The Fan Tray From The Front Panel Of The Chassis
Installing the Fan Tray Installing the Fan Tray from the Front Panel of the Chassis Installing the Fan Tray from the Front Panel of the Chassis Before you begin • Read Guidelines for Removing and Installing a Fan Tray, on page •... -
Page 10: Installing The Fan Tray From The Rear Of The Chassis
Installing the Fan Tray Installing the Fan Tray from the Rear of the Chassis What to do next Verify that you have installed the fan tray correctly. See Verifying Fan Tray Installation, on page Installing the Fan Tray from the Rear of the Chassis Before you begin •... -
Page 11: Verifying Fan Tray Installation
If after several attempts the fans do not operate, or if you experience trouble with the installation (for instance, if the captive installation screws do not align with the chassis holes), contact the Cisco TAC for assistance. Installing the Fan Tray... - Page 12 Installing the Fan Tray Verifying Fan Tray Installation Installing the Fan Tray...


