Samsung iDCS 500 Technical Manual
Hide thumbs
Also See for iDCS 500:
- Programming manual (533 pages) ,
- User instruction (140 pages) ,
- General description manual (128 pages)
Table of Contents
Quick Links
iDCS 500 Release 2 / OfficeServ
TECHNICAL MANUAL
T A B L E
I N S TA L L AT I O N S E C T I O N
PART
DESCRIPTION
1
2
2.1
2.2
2.3
2.4
2.5
2.6
2.7
2.8
2.9
3
3.1
3.2
3.3
3.4
3.5
3.6
3.7
3.8
3.9
3.10
3.11
3.12
O F
............................................................................1.1
UNPACKING AND INSPECTION ................................................ 2.1
TWO CABINET INSTALLATION-FLOOR MOUNT ....................... 2.2
THREE CABINET INSTALLATION-FLOOR MOUNT ................... 2.3
ADDING AN iDCS 500 EXPANSION CABINET ........................... 2.4
RACK MOUNTING AN iDCS 500 CABINET ................................ 2.4
GROUNDING .............................................................................. 2.5
POWER CONNECTIONS ............................................................ 2.7
MDF CABLING ............................................................................ 2.8
MCP2 CARD ............................................................................... 3.1
SCP2 CARD ................................................................................ 3.5
LCP2 CARD ................................................................................ 3.6
ESM BOARD ............................................................................... 3.7
MISC BOARD .............................................................................. 3.7
SCM BOARD ............................................................................... 3.7
MFM BOARD ON PROCESSOR CARD ...................................... 3.8
RCM BOARD .............................................................................. 3.8
MODEM BOARD ......................................................................... 3.9
IOM BOARD ................................................................................ 3.9
TRUNK B CARD .......................................................................... 3.9
TRUNK B1 CARD ........................................................................ 3.9
Home Page
TABLE OF CONTENTS MARCH 2004
C O N T E N T S
Table of Contents
INSTALLATION
PAGE
Table of Contents

Related Manuals for Samsung iDCS 500


Summary of Contents for Samsung iDCS 500
-
Page 1: Table Of Contents
SINGLE CABINET INSTALLATION–WALL OR FLOOR MOUNT . 2.1 TWO CABINET INSTALLATION–FLOOR MOUNT ....... 2.2 THREE CABINET INSTALLATION–FLOOR MOUNT ....2.3 ADDING AN iDCS 500 EXPANSION CABINET ......2.4 RACK MOUNTING AN iDCS 500 CABINET ........ 2.4 GROUNDING ................2.5 POWER CONNECTIONS ............2.7 MDF CABLING ................ - Page 2 Home Page Table of Contents iDCS 500 Release 2 / OfficeServ INSTALLATION TECHNICAL MANUAL TABLE OF CONTENTS MARCH 2004 3.13 TRUNK C1 CARD ................ 3.9 3.14 GTRK CARD................3.9 3.15 DID CARD ................. 3.10 3.16 E & M CARD................3.10 3.17...
- Page 3 Home Page Table of Contents iDCS 500 Release 2 / OfficeServ INSTALLATION TECHNICAL MANUAL TABLE OF CONTENTS MARCH 2004 E&M TIE LINES ................5.1 OFF PREMISE EXTENSIONS ............. 5.1 T1 CIRCUIT ................. 5.2 BRI CIRCUIT ................5.2 CONNECTING STATION EQUIPMENT SAFETY PRECAUTIONS .............
- Page 4 DATABASE MANAGEMENT ............9.1 ADDING CARDS TO THE SYSTEM 10.1 ADDING STATION AND TRUNKS ..........10.1 10.2 GRADING THE iDCS 500 FOR DTMF RECEIVERS ....10.1 10.3 INSTALLING AA CARD IN EXISTING SYSTEM ......10.2 SVMi-8/SVMi-16E SET UP 11.1 INTRODUCTION ............... 11.1 11.2...
-
Page 5: Site Requirements
PART 1 MARCH 2004 PART 1. SITE REQUIREMENTS When you are planning the installation of the iDCS 500 Release 2 system, choose a site that meets the following requirements: • Select a location for the iDCS 500 system that has enough space for easy... - Page 6 Home Page Table of Contents iDCS 500 Release 2 / OfficeServ INSTALLATION TECHNICAL MANUAL PART 1 MARCH 2004 11.81" 22.32" 19.76" 59.28" 39.52" KEY SERVICE UNIT DIMENSIONS FIGURE 1–1...
-
Page 7: Installing Single Cabinet And Multiple Cabinet Configurations
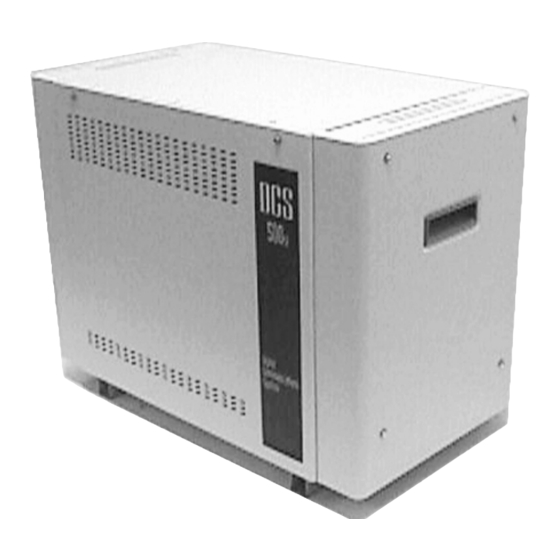
MULTIPLE CABINET CONFIGURATIONS 2.1 UNPACKING AND INSPECTION The iDCS 500 can be configured as a single cabinet, a dual cabinet system or a three cabinet system. A iDCS 500 single cabinet system may be wall, floor, or rack mounted while multiple cabinets systems may only be floor or rack mounted. -
Page 8: Two Cabinet Installation-Floor Mount
• Cards required to make the iDCS 500 system functional. i.e., power supply, central processor, station and trunk cards 1. Mount the legs or castors to one of the iDCS 500 cabinets as the floor mounted base cabinet. Prepare both of the iDCS 500 Cabinets by removing the side and front covers of both cabinets prior to installation to avoid damaging the covers and to allow access to the interior. -
Page 9: Three Cabinet Installation-Floor Mount
• Cards required to make the iDCS 500 system functional. i.e., power supply, central processor, station and trunk cards 1. Mount the legs or castors to one of the iDCS 500 cabinets as the floor mounted base cabinet. Prepare all of the iDCS 500 Cabinets by removing the side and front covers of the three cabinets prior to installation to avoid damaging the covers and to allow access to the interior. -
Page 10: Adding An Idcs 500 Expansion Cabinet
ESM is a daughter board that installs on the MCP2 card. 2.6 RACK MOUNTING an iDCS 500 Cabinet Prepare all of the iDCS 500 cabinets by removing the side and front covers of the cabinets prior to installation to avoid damaging the covers and to allow access to the interior. -
Page 11: Grounding
(see below) earth ground be connected to the system. This is the preferred method of grounding the iDCS 500. It has been observed that the third wire ground may be inferior or can contain noise that may prevent the digital data bus from canceling out noise. This may result in erratic operation of the iDCS 500. - Page 12 500 system. The iDCS 500 system has two ground reference points. One point is via the green wire in the power cord connected to the AC power outlet. This ground connection is provided to meet local electrical codes when the AC ground is required to be common with the earth ground.
-
Page 13: Power Connections
National Electrical Code to the iDCS 500 system ground bar. This is a more secure ground connection, which can only be disconnected intentionally. These precautions are taken... -
Page 14: Mdf Cabling
(MDF). Each interface card (with the exception of the TEPRI, MGI, E911 cards) is connected to the MDF using a 25 pair female amphenol-type cable. These cables can be routed into the iDCS 500 cabinet(s) from below or on the right side of the cabinet. - Page 15 Home Page Table of Contents iDCS 500 Release 2 / OfficeServ INSTALLATION TECHNICAL MANUAL PART 2 MARCH 2004 Two #10 screws in 5/8" plywood backboard. NOTE: Leave screws approximately 1/8" proud of backboard 16" iDCS 500 WALL MOUNTING FIGURE 2–1...
- Page 16 Home Page Table of Contents iDCS 500 Release 2 / OfficeServ INSTALLATION TECHNICAL MANUAL PART 2 MARCH 2004 MOUNTING SCREWS FRONT BOTTOM LEFT SIDE ATTACHING LEGS FIGURE 2–2 TO MAIN CABINET...
- Page 17 Home Page Table of Contents iDCS 500 Release 2 / OfficeServ INSTALLATION TECHNICAL MANUAL PART 2 MARCH 2004 GROUND BAR LEFT SIDE OF CABINET SYSTEM GROUNDING FIGURE 2–3...
- Page 18 Home Page Table of Contents iDCS 500 Release 2 / OfficeServ INSTALLATION TECHNICAL MANUAL PART 2 MARCH 2004 Power Input Location iDCS 500 POWER INPUT LOCATION FIGURE 2–4...
- Page 19 Home Page Table of Contents iDCS 500 Release 2 / OfficeServ INSTALLATION TECHNICAL MANUAL PART 2 MARCH 2004 SIO1 SIO2 SIO3 SIO4 PSU-B PSU-B PSU-B/PSU60 PSU-B/PSU60 SLOT1 SLOT1 SLOT2 SLOT2 SLOT3 SLOT3 SLOT4 SLOT4 SLOT5 SLOT5 SLOT6 SLOT6 SLOT7 SLOT7...
- Page 20 Home Page Table of Contents iDCS 500 Release 2 / OfficeServ INSTALLATION TECHNICAL MANUAL PART 2 MARCH 2004 SETTING VOLTAGE ON PSU-60 FIGURE 2–6 AND PSU-60B...
- Page 21 Home Page Table of Contents iDCS 500 Release 2 / OfficeServ INSTALLATION TECHNICAL MANUAL PART 2 MARCH 2004 WHITE (+) BLACK ( – ) CONNECT TO EITHER A OR B – – – – – – – – – –...
- Page 22 Home Page Table of Contents iDCS 500 Release 2 / OfficeServ INSTALLATION TECHNICAL MANUAL PART 2 MARCH 2004 Bracket Screws Bracket Ground Bar Bracket Screws Bracket SIDE COVER MOUNTING BRACKETS FIGURE 2–8...
- Page 23 Home Page Table of Contents iDCS 500 Release 2 / OfficeServ INSTALLATION TECHNICAL MANUAL PART 2 MARCH 2004 Mounting Screw Holes Mounting Screw Holes SECURING CABINET IN A RACK FIGURE 2–9...
-
Page 24: Installing Printed Circuit Cards
3.1 MCP2 (see Figure 3–2) The iDCS 500 Main Control Processor (MCP2) controls the system operation. The MCP2 installs in the MCP/LCP slot in the first cabinet of the system. The MCP2 is required for all system configurations. The MCP2 has a 512 time slot switch matrix and positions for 3 daughter boards. - Page 25 Home Page Table of Contents iDCS 500 Release 2 / OfficeServ INSTALLATION TECHNICAL MANUAL PART 3 MARCH 2004 LED INDICATIONS FOR L VERSION SYSTEM • MP OFF indicates the MCP2 card is powered down ON indicates the MCP2 card is booting Flicker Indicates normal operation.
- Page 26 Home Page Table of Contents iDCS 500 Release 2 / OfficeServ INSTALLATION TECHNICAL MANUAL PART 3 MARCH 2004 There are several daughter boards that can mount on the MCP2 (see Figure 3−2). The daughter boards have offset pin connectors which prohibits improper installation of the Daughter board(s).
- Page 27 Home Page Table of Contents iDCS 500 Release 2 / OfficeServ INSTALLATION TECHNICAL MANUAL PART 3 MARCH 2004 DIP SWITCH USE on the iDCS 500 MCP2 ON (left) OFF (right) 4 DIGIT STATION NUMBERS 3 DIGIT STATION NUMBERS 4 DIGIT STATION GROUPS...
-
Page 28: Mcp2 Card
In a multiple cabinet system the SCP2 becomes the processor for the first iDCS 500 cabinet and communicates via a high speed data link to the MCP2. The SCP2 installs in the ninth (9) slot in the first cabinet. The SCP2 can have three daughter boards installed as indicated by the table below. -
Page 29: Lcp2 Card
The iDCS 500 Local Control Processor (LCP2) is used when the system is expanded to more than one cabinet. The LCP2 is the processor for the second and or third iDCS 500 cabinet(s) and communicates via a high-speed data link to the MCP2. The LCP2 installs in the MCP/LCP slot in the second or third cabinets of a multiple cabinet system. -
Page 30: Esm Board
Home Page Table of Contents iDCS 500 Release 2 / OfficeServ INSTALLATION TECHNICAL MANUAL PART 3 MARCH 2004 • LCP2: LCP2 Processor Status OFF indicates that power is OFF ON indicates that the LCP2 is booting Flicker indicates normal operation. -
Page 31: Mfm Board On Processor Card
Home Page Table of Contents iDCS 500 Release 2 / OfficeServ INSTALLATION TECHNICAL MANUAL PART 3 MARCH 2004 detection. To install the SCM board remove the two (2) screws holding the MCP2 protective casing together (see Figure 3–7) or remove the 4 screws holding the SCP2 case together (see Figure 3–9) -
Page 32: Modem Board
Home Page Table of Contents iDCS 500 Release 2 / OfficeServ INSTALLATION TECHNICAL MANUAL PART 3 MARCH 2004 connectors, taking care to properly line them up and press gently on the back of the board to seat it. The MCP2/LCP2/SCP2 case can now be reassembled if all required daughter boards have been installed. - Page 33 Home Page Table of Contents iDCS 500 Release 2 / OfficeServ INSTALLATION TECHNICAL MANUAL PART 3 MARCH 2004 3.15 DID CARD (see Figure 3–17) This card has no selectable options. Insert DID cards into any available slot numbers (see Figure 3–1).
- Page 34 Home Page Table of Contents iDCS 500 Release 2 / OfficeServ INSTALLATION TECHNICAL MANUAL PART 3 MARCH 2004 3.19 SLI CARD (see Figure 3–17) There are no options to select on this card. Insert as many SLI cards as are needed...
- Page 35 Home Page Table of Contents iDCS 500 Release 2 / OfficeServ INSTALLATION TECHNICAL MANUAL PART 3 MARCH 2004 will share the system resources. If in a medium to high concentration of 16SLI cards or traffic, a MFM daughter board or boards should be added to a processor card or cards to relieve congestion.
- Page 36 3.25 TEPRI CARD (see Figure 3–18) The TEPRI card installs in slots 1, 2 or 3 of any cabinet. The iDCS 500 TEPRI supports either T1 or ISDN PRI service. The first four LEDs on the front of the card provide the status of the service (Sync, AIS, Loss and Layer 2 Active states).
- Page 37 Home Page Table of Contents iDCS 500 Release 2 / OfficeServ INSTALLATION TECHNICAL MANUAL PART 3 MARCH 2004 right then second cabinet, left to right, then third cabinet, left to right. The clock priority can be changed by using MMC 826. The primary and secondary clock sources should be mounted in the bottom cabinet to ensure stable reception of clocking from the primary and secondary sources.
- Page 38 The 8 WLI card is installed in slot 1, 2 or 3 of any cabinet. Only one 8 WLI can be installed in a iDCS 500 system and it counts as 32 stations of the power supply rating. Check that the cabinet power switch is in the OFF position. Next, position the 8WLI card in the grooves of the card guide and gently slide the card in until it makes contact with the connector.
- Page 39 The SVMi-8/SVMi-16E card is installed in any universal slot of any cabinet. Only one SVMi-8 can be installed in a iDCS 500 system and it counts as eight (8) stations of the power supply rating. Only one SVMi-16E can be installed in an iDCS 500 system as well, but the Station Equivalent Power Units (SEPU) are as follows: an SVMi-16E with 8 ports = 8 SEPU, with 12 ports = 10 SEPU, and with 16 ports = 12 SEPU.
- Page 40 Home Page Table of Contents iDCS 500 Release 2 / OfficeServ INSTALLATION TECHNICAL MANUAL PART 3 MARCH 2004 LED Name Function Status • On: Power to the MGI card. Displays the power status. • Off: No power to the MGI card •...
- Page 41 Home Page Table of Contents iDCS 500 Release 2 / OfficeServ INSTALLATION TECHNICAL MANUAL PART 3 MARCH 2004 MGI 2 LED Indication after booting: 3.30 MEDIA GATEWAY INTERFACE 3 (MGI3) (see Figure 3-- - 23) The card has eight (8) LEDs on its faceplate to indicate the status of the card. These indications are described below.
- Page 42 Home Page Table of Contents iDCS 500 Release 2 / OfficeServ INSTALLATION TECHNICAL MANUAL PART 3 MARCH 2004 LED Name Function Status • Off: All channels are not in use. • Blinking (400ms): 1 to 7 channels are in use.
- Page 43 Home Page Table of Contents iDCS 500 Release 2 / OfficeServ INSTALLATION TECHNICAL MANUAL PART 3 MARCH 2004 LED Name Function Status Green – OK Card Status Off: Card Not Ready Off: OK Card Alarm Status On: Call In Progress...
- Page 44 Home Page Table of Contents iDCS 500 Release 2 / OfficeServ INSTALLATION TECHNICAL MANUAL PART 3 MARCH 2004 MCP LOCATION FIGURE 3–1...
- Page 45 Home Page Table of Contents iDCS 500 Release 2 / OfficeServ INSTALLATION TECHNICAL MANUAL PART 3 MARCH 2004 Smart Media Memory Backup Switch MCP2 CARD FIGURE 3–2...
- Page 46 Home Page Table of Contents iDCS 500 Release 2 / OfficeServ INSTALLATION TECHNICAL MANUAL PART 3 MARCH 2004 SCP CARD FIGURE 3–3...
- Page 47 Home Page Table of Contents iDCS 500 Release 2 / OfficeServ INSTALLATION TECHNICAL MANUAL PART 3 MARCH 2004 LCP CARD FIGURE 3–4...
- Page 48 Home Page Table of Contents iDCS 500 Release 2 / OfficeServ INSTALLATION TECHNICAL MANUAL PART 3 MARCH 2004 ESM BOARD FIGURE 3–5...
- Page 49 Home Page Table of Contents iDCS 500 Release 2 / OfficeServ INSTALLATION TECHNICAL MANUAL PART 3 MARCH 2004 MCP-D3 MCP CARD FIGURE 3–6...
- Page 50 Home Page Table of Contents iDCS 500 Release 2 / OfficeServ INSTALLATION TECHNICAL MANUAL PART 3 MARCH 2004 Screw Locations PROCESSOR CARD FIGURE 3–7 SCREW LOCATION...
- Page 51 Home Page Table of Contents iDCS 500 Release 2 / OfficeServ INSTALLATION TECHNICAL MANUAL PART 3 MARCH 2004 MISC BOARD FIGURE 3–8...
- Page 52 Home Page Table of Contents iDCS 500 Release 2 / OfficeServ INSTALLATION TECHNICAL MANUAL PART 3 MARCH 2004 Screw Locations SCP CARD FIGURE 3–9 SCREW LOCATION...
- Page 53 Home Page Table of Contents iDCS 500 Release 2 / OfficeServ INSTALLATION TECHNICAL MANUAL PART 3 MARCH 2004 SCM BOARD FIGURE 3–10...
- Page 54 Home Page Table of Contents iDCS 500 Release 2 / OfficeServ INSTALLATION TECHNICAL MANUAL PART 3 MARCH 2004 MFM BOARD FIGURE 3–11...
- Page 55 Home Page Table of Contents iDCS 500 Release 2 / OfficeServ INSTALLATION TECHNICAL MANUAL PART 3 MARCH 2004 SCREWS EJECTOR TABS SCREW LOCATION FIGURE 3–12...
- Page 56 Home Page Table of Contents iDCS 500 Release 2 / OfficeServ INSTALLATION TECHNICAL MANUAL PART 3 MARCH 2004 RCM BOARD FIGURE 3–13...
- Page 57 Home Page Table of Contents iDCS 500 Release 2 / OfficeServ INSTALLATION TECHNICAL MANUAL PART 3 MARCH 2004 MODEM BOARD FIGURE 3–14...
- Page 58 Home Page Table of Contents iDCS 500 Release 2 / OfficeServ INSTALLATION TECHNICAL MANUAL PART 3 MARCH 2004 Mounting Screws Mounting Screws Line up holes when installing modem MODEM IOM BOARD FIGURE 3–15...
- Page 59 Home Page Table of Contents iDCS 500 Release 2 / OfficeServ INSTALLATION TECHNICAL MANUAL PART 3 MARCH 2004 CABINET/SLOT NUMBERS FIGURE 3–16...
- Page 60 Home Page Table of Contents iDCS 500 Release 2 / OfficeServ INSTALLATION TECHNICAL MANUAL PART 3 MARCH 2004 TRUNK B CARD TRUNK B1 CARD TRUNK C1 CARD GTRK CARD DID CARD E&M CARD DLI CARD 16DLI CARD SLI CARD 8SLI CARD...
- Page 61 Home Page Table of Contents iDCS 500 Release 2 / OfficeServ INSTALLATION TECHNICAL MANUAL PART 3 MARCH 2004 TEPRI CARD FIGURE 3–18...
- Page 62 Home Page Table of Contents iDCS 500 Release 2 / OfficeServ INSTALLATION TECHNICAL MANUAL PART 3 MARCH 2004 AAUCD CARD FIGURE 3–19...
- Page 63 Home Page Table of Contents iDCS 500 Release 2 / OfficeServ INSTALLATION TECHNICAL MANUAL PART 3 MARCH 2004 NOT AVAILABLE YET! 8WLI FIGURE 3–20...
- Page 64 Home Page Table of Contents iDCS 500 Release 2 / OfficeServ INSTALLATION TECHNICAL MANUAL PART 3 JANUARY 2004 SVMi-8 SVMi-16E SVMi-8 / SVMi-16E FIGURE 3–21...
- Page 65 Home Page Table of Contents iDCS 500 Release 2 / OfficeServ INSTALLATION TECHNICAL MANUAL PART 3 MARCH 2004 MGI2 CARD FIGURE 3–22...
- Page 66 Home Page Table of Contents iDCS 500 Release 2 / OfficeServ INSTALLATION TECHNICAL MANUAL PART 3 MARCH 2004 MGI3 CARD FIGURE 3–23...
- Page 67 Home Page Table of Contents iDCS 500 Release 2 / OfficeServ INSTALLATION TECHNICAL MANUAL PART 3 MARCH 2004 E911 CARD FIGURE 3–24...
- Page 68 Home Page Table of Contents iDCS 500 Release 2 / OfficeServ INSTALLATION TECHNICAL MANUAL PART 3 MARCH 2004 DIP SWITCH 1 DIP SWITCH 2 DIP SWITCH 3 DIP SWITCH 4 4 BRI DIP SWITCH LOCATIONS FIGURE 3–25...
- Page 69 PART 4. POWER UP PROCEDURES 4.1 DETERMINING POWER SUPPLY Each cabinet on the iDCS 500 has two power supply slots the first of which must contain a PSU B and can supply up to 56 station devices or Station Equivalent Power Units (SEPU).
- Page 70 Home Page Table of Contents iDCS 500 Release 2 / OfficeServ INSTALLATION TECHNICAL MANUAL PART 4 MARCH 2004 enable a card the system will partially enable certain cards to maximize the capacity of the power supply. The following table lists the cards that will be partially enabled.
- Page 71 Home Page Table of Contents iDCS 500 Release 2 / OfficeServ INSTALLATION TECHNICAL MANUAL PART 4 MARCH 2004 Verify that the AC voltage at the dedicated electric outlet is in the range of 88–132 VAC or 210–230 VAC. Verify that the AC voltage selection switch on the PSU is set for the proper voltage—110 or 220 VAC...
- Page 72 PART 4 MARCH 2004 not light, unplug the expansion cabinet and change power supplies. This will probably solve the problem. If it does not, contact Samsung Technical Support. 4.3 PROCESSOR CARD INDICATIONS After verifying proper operation of the power supply, visually check the processor card indications.
- Page 73 Home Page Table of Contents iDCS 500 Release 2 / OfficeServ INSTALLATION TECHNICAL MANUAL PART 4 MARCH 2004 NOTE: Newly added station or trunk cards come up without directory numbers. The above examples describe a system using a three digit numbering scheme. If the DIP switches on the MCP2 are changed then the default numbers may be four digits.
- Page 74 Home Page Table of Contents iDCS 500 Release 2 / OfficeServ INSTALLATION TECHNICAL MANUAL PART 4 MARCH 2004 SETTING VOLTAGE ON PSU-60 FIGURE 4–1...
- Page 75 Home Page Table of Contents iDCS 500 Release 2 / OfficeServ INSTALLATION TECHNICAL MANUAL PART 5 MARCH 2004 PART 5. CONNECTING TELCO CIRCUITS 5.1 SAFETY PRECAUTIONS To limit the risk of personal injury, always follow these precautions before connecting TELCO circuits: a.
- Page 76 5.8 BRI CIRCUIT Connect the BRI facility to the “U” interface side of the customer provided NT-1 Unit. Then connect the S/T side of the NT-1 unit to the BRI interface card in the iDCS 500 system as shown in Figure 5–8.
- Page 77 Home Page Table of Contents iDCS 500 Release 2 / OfficeServ INSTALLATION TECHNICAL MANUAL PART 5 MARCH 2004 25 PAIR CABLE WITH FEMALE CONNECTOR TO ANY TRK-B OR TRK-B1 CARD FUNCTION CIRCUIT TERM COLOR C.O. TIP W-BL C.O. RING BL-W C.O.
- Page 78 Home Page Table of Contents iDCS 500 Release 2 / OfficeServ INSTALLATION TECHNICAL MANUAL PART 5 MARCH 2004 25 PAIR CABLE WITH FEMALE CONNECTOR TO ANY TRK-C1 CARD FUNCTION CIRCUIT TERM COLOR W-BL C.O. TIP BL-W C.O. RING C.O. TIP C.O.
- Page 79 Home Page Table of Contents iDCS 500 Release 2 / OfficeServ INSTALLATION TECHNICAL MANUAL PART 5 MARCH 2004 25 PAIR CABLE WITH FEMALE CONNECTOR TO ANY GTRK CARD FUNCTION CIRCUIT TERM COLOR C.O. TIP W-BL C.O. RING BL-W C.O. TIP C.O.
- Page 80 Home Page Table of Contents iDCS 500 Release 2 / OfficeServ INSTALLATION TECHNICAL MANUAL PART 5 MARCH 2004 25 PAIR CABLE WITH FEMALE CONNECTOR TO ANY DID CARD FUNCTION CIRCUIT TERM COLOR DID RING W-BL DID TIP BL-W DID RING...
- Page 81 Home Page Table of Contents iDCS 500 Release 2 / OfficeServ INSTALLATION TECHNICAL MANUAL PART 5 MARCH 2004 25 PAIR CABLE WITH FEMALE CONNECTOR TO ANY E & M CARD FUNCTION CIRCUIT TERM COLOR W-BL C.O. TIP BL-W C.O. RING...
- Page 82 Home Page Table of Contents iDCS 500 Release 2 / OfficeServ INSTALLATION TECHNICAL MANUAL PART 5 MARCH 2004 25 PAIR CABLE WITH FEMALE CONNECTOR TO ANY SLI CARD FUNCTION CIRCUIT TERM COLOR SLT TIP W-BL SLT RING BL-W SLT TIP...
- Page 83 Home Page Table of Contents iDCS 500 Release 2 / OfficeServ INSTALLATION TECHNICAL MANUAL PART 5 MARCH 2004 TRANSMIT PAIR RECEIVE PAIR CUSTOMER PROVIDED MALE RJ 45 ENDED CABLE CUSTOMER-PROVIDED CUSTOMER SERVICE UNIT TELCO T1 SPAN MDF CONNECTIONS FIGURE 5–7...
- Page 84 Home Page Table of Contents iDCS 500 Release 2 / OfficeServ INSTALLATION TECHNICAL MANUAL PART 5 MARCH 2004 MDF CONNECTIONS TO BRI CARD PAIR FUNCTION CIRCUIT TERM COLOR TX TIP W-BL TX RING BL-W RCV TIP RCV RING TX TIP...
- Page 85 CAUTION: To reduce the risk of fire, use only No. 26 AWG or larger telecommu- nication line cord. NOTE: Because the iDCS 500 is a self-configuring system, if you connect a 12 button keyset to a DLI port that previously had a 24 button keyset installed, the existing data will be rewritten with 12 button keyset default data (MMC 723).
- Page 86 Home Page Table of Contents iDCS 500 Release 2 / OfficeServ INSTALLATION TECHNICAL MANUAL PART 6 MARCH 2004 6.4 SINGLE LINE TELEPHONES Using one pair twisted #24 AWG or #26 AWG jumper wire, cross-connect each single line telephone to the SLI port, 8SLI port, 8MWSLI, 16SLI or 16MWSLI port of your choice (see Figures 6–3a, 6–3b, 6-3c, 6–3d, and 6–3e)
- Page 87 Home Page Table of Contents iDCS 500 Release 2 / OfficeServ INSTALLATION TECHNICAL MANUAL PART 6 MARCH 2004 Use screw holes 4 and 5 if you are mounting on dry wall with a hole in the middle for cable access.
- Page 88 Home Page Table of Contents iDCS 500 Release 2 / OfficeServ INSTALLATION TECHNICAL MANUAL PART 6 MARCH 2004 6.8 ATTACHING DCS 32 BUTTON AOM AND DCS 64B MODULES WITH MASTER STATION These new Ultra Base Wedges allow a connector clip (packaged with 64B Modules and AOMs) to be connected to the underside of the new style wedge and attach AOM(s) or 64B module(s) together with the main or “master”...
- Page 89 PART 6 MARCH 2004 6.11 ISDN BRI STATIONS The iDCS 500 uses an S/T type interface so if the BRI station equipment requires a U type circuit then an NT1 must be connected between the iDCS 500 and the station equipment.
- Page 90 Home Page Table of Contents iDCS 500 Release 2 / OfficeServ INSTALLATION TECHNICAL MANUAL PART 6 MARCH 2004 25 PAIR CABLE WITH FEMALE CONNECTOR TO ANY DLI CARD COLOR TERM CIRCUIT FUNCTION W-BL DLI TIP DLI RING BL-W DLI TIP...
- Page 91 Home Page Table of Contents iDCS 500 Release 2 / OfficeServ INSTALLATION TECHNICAL MANUAL PART 6 MARCH 2004 25 PAIR CABLE WITH FEMALE CONNECTOR TO ANY 16DLI CARD COLOR TERM CIRCUIT FUNCTION W-BL DLI TIP BL-W DLI RING DLI TIP...
- Page 92 Home Page Table of Contents iDCS 500 Release 2 / OfficeServ INSTALLATION TECHNICAL MANUAL PART 6 MARCH 2004 25 PAIR CABLE WITH FEMALE CONNECTOR TO ANY DLI CARD COLOR TERM CIRCUIT FUNCTION W-BL DLI TIP DLI RING BL-W DLI TIP...
- Page 93 Home Page Table of Contents iDCS 500 Release 2 / OfficeServ INSTALLATION TECHNICAL MANUAL PART 6 MARCH 2004 25 PAIR CABLE WITH FEMALE CONNECTOR TO ANY 16DLI CARD COLOR TERM CIRCUIT FUNCTION W-BL DLI TIP BL-W DLI RING DLI TIP...
- Page 94 Home Page Table of Contents iDCS 500 Release 2 / OfficeServ INSTALLATION TECHNICAL MANUAL PART 6 MARCH 2004 25 PAIR CABLE WITH FEMALE CONNECTOR TO ANY SLI CARD COLOR TERM CIRCUIT FUNCTION W-BL SLT TIP BL-W SLT RING SLT TIP...
- Page 95 Home Page Table of Contents iDCS 500 Release 2 / OfficeServ INSTALLATION TECHNICAL MANUAL PART 6 MARCH 2004 25 PAIR CABLE WITH FEMALE CONNECTOR TO ANY 8SLI CARD COLOR TERM CIRCUIT FUNCTION SLT TIP W-BL SLT RING BL-W SLT TIP...
- Page 96 Home Page Table of Contents iDCS 500 Release 2 / OfficeServ INSTALLATION TECHNICAL MANUAL PART 6 MARCH 2004 25 PAIR CABLE WITH FEMALE CONNECTOR TO ANY 8MWSLI CARD COLOR TERM CIRCUIT FUNCTION SLT TIP W-BL SLT RING BL-W SLT TIP...
- Page 97 Home Page Table of Contents iDCS 500 Release 2 / OfficeServ INSTALLATION TECHNICAL MANUAL PART 6 MARCH 2004 25 PAIR CABLE WITH FEMALE CONNECTOR TO ANY 16SLI CARD COLOR TERM CIRCUIT FUNCTION W-BL SLT TIP BL-W SLT RING SLT TIP...
- Page 98 Home Page Table of Contents iDCS 500 Release 2 / OfficeServ INSTALLATION TECHNICAL MANUAL PART 6 MARCH 2004 25 PAIR CABLE WITH FEMALE CONNECTOR TO ANY 16MWSLI CARD COLOR TERM CIRCUIT FUNCTION W-BL SLT TIP BL-W SLT RING SLT TIP...
- Page 99 Home Page Table of Contents iDCS 500 Release 2 / OfficeServ INSTALLATION TECHNICAL MANUAL PART 6 MARCH 2004 25 PAIR CABLE WITH FEMALE CONNECTOR TO ANY DLI CARD COLOR TERM CIRCUIT FUNCTION W-BL DLI TIP DLI RING BL-W DLI TIP...
- Page 100 Home Page Table of Contents iDCS 500 Release 2 / OfficeServ INSTALLATION TECHNICAL MANUAL PART 6 MARCH 2004 25 PAIR CABLE WITH FEMALE CONNECTOR TO ANY 16DLI CARD COLOR TERM CIRCUIT FUNCTION W-BL SLT TIP BL-W SLT RING SLT TIP...
- Page 101 Home Page Table of Contents iDCS 500 Release 2 / OfficeServ INSTALLATION TECHNICAL MANUAL PART 6 MARCH 2004 HOLES FOR MOUNTING SCREWS NOTE: THE DIRECTORY CARD SLIDE TRAY IS NOT USED WHEN THE KEYSET IS WALL-MOUNTED. WALL-MOUNTING A KEYSET FIGURE 6-7...
- Page 102 Home Page Table of Contents iDCS 500 Release 2 / OfficeServ INSTALLATION TECHNICAL MANUAL PART 6 MARCH 2004 USED FOR ATTACHING AOM OR 64B MODULE WITH CONNECTOR CLIP HOLES FOR MOUNTING SCREWS NOTE: THE DIRECTORY CARD SLIDE TRAY IS NOT USED WHEN THE KEYSET IS WALL-MOUNTED.
- Page 103 Home Page Table of Contents iDCS 500 Release 2 / OfficeServ INSTALLATION TECHNICAL MANUAL PART 6 MARCH 2004 WALL-MOUNTING FIGURE 6-7 FIGURE 6–6a AN iDCS KEYSET...
- Page 104 Home Page Table of Contents iDCS 500 Release 2 / OfficeServ INSTALLATION TECHNICAL MANUAL PART 6 MARCH 2004 ATTACHING 24B/12B TO 64BM FIGURE 6-7 FIGURE 6–7...
- Page 105 Home Page Table of Contents iDCS 500 Release 2 / OfficeServ INSTALLATION TECHNICAL MANUAL PART 6 MARCH 2004 ATTACHING 24B/12B TO AOM FIGURE 6-7 FIGURE 6–8...
- Page 106 Home Page Table of Contents iDCS 500 Release 2 / OfficeServ INSTALLATION TECHNICAL MANUAL PART 6 MARCH 2004 7B / SINGLE LINE ULTRA BASE WEDGE AOM ULTRA BASE WEDGE METAL CONNECTOR CLIP 7B/SINGLE LINE ULTRA BASE WEDGE 64BM ULTRA BASE WEDGE...
- Page 107 Home Page Table of Contents iDCS 500 Release 2 / OfficeServ INSTALLATION TECHNICAL MANUAL PART 6 MARCH 2004 ATTACHING FIGURE 6-7 FIGURE 6–10 iDCS 64 BUTTON MODULE TO AN iDCS KEYSET...
- Page 108 Home Page Table of Contents iDCS 500 Release 2 / OfficeServ INSTALLATION TECHNICAL MANUAL PART 6 MARCH 2004 REMOVE KNOCKOUTS CONNECT RIBBON CABLE ATTACHING iDCS 14 BUTTON FIGURE 6-7 FIGURE 6–11 MODULES TO AN iDCS KEYSET...
- Page 109 Home Page Table of Contents iDCS 500 Release 2 / OfficeServ INSTALLATION TECHNICAL MANUAL PART 5 MARCH 2004 MDF STATION CONNECTIONS TO BRI CARD PAIR FUNCTION CIRCUIT TERM COLOR TX TIP W-BL TX RING BL-W RCV TIP RCV RING TX TIP...
- Page 110 Society of Composers, Authors and Publishers (ASCAP) or another similar organization if copyrighted music is transmitted through the Music on Hold feature. Samsung Telecommunications America hereby disclaims any liability arising out of failure to obtain such a license. Each C.O. line (trunk) can be programmed to receive a music source, system- generated tone or NO MUSIC when it is put on hold.
- Page 111 Home Page Table of Contents iDCS 500 Release 2 / OfficeServ INSTALLATION TECHNICAL MANUAL PART 7 MARCH 2004 The page voice pair is 600 ohm impedance. When the amplifier page input is not 600 ohm, use an impedance matching transformer. The paging contact pairs are for control of low voltage circuits or amplifier output.
- Page 112 Figure 7–5 and Figure 7–6 for the required pins. When the printer or optional call accounting device needs to be more than 15 feet away from the iDCS 500 use shielded computer cable. Connect the customer-provided equipment to the serial interface port selected.
- Page 113 Home Page Table of Contents iDCS 500 Release 2 / OfficeServ INSTALLATION TECHNICAL MANUAL PART 7 MARCH 2004 feet of the KSU. Use the factory-supplied wire harness with 36” white and black leads to connect batteries (see Figure 7-8). Observe the following precautions when installing batteries: a.
- Page 114 Home Page Table of Contents iDCS 500 Release 2 / OfficeServ INSTALLATION TECHNICAL MANUAL PART 7 MARCH 2004 MISC 1 PINS 4 & 5 8 CONDUCTOR PLUG CUSTOMER PROVIDED MISC 2 MUSIC SOURCE 1 CUSTOMER PROVIDED MUSIC SOURCE 2 PINS 2 & 7 MDF CONNECTIONS FIGURE 7–1...
- Page 115 Home Page Table of Contents iDCS 500 Release 2 / OfficeServ INSTALLATION TECHNICAL MANUAL PART 7 MARCH 2004 MISC 1 (VOICE) PINS 3 & 6 8 CONDUCTOR PLUG CUSTOMER PROVIDED AMPLIFIER MISC 2 FOR PAGING 6 CONDUCTOR PLUG CUSTOMER PROVIDED AMPLIFIER FOR LOUD BELL OUTPUT PINS 1 &...
- Page 116 Home Page Table of Contents iDCS 500 Release 2 / OfficeServ INSTALLATION TECHNICAL MANUAL PART 7 MARCH 2004 6 CONDUCTOR MISC 1 PLUG CONNECT TO MISC 1 CONNECTOR ON A MISCELLANEOUS BOARD 8 CONDUCTOR IN CABINET 1, 2 OR 3.
- Page 117 Home Page Table of Contents iDCS 500 Release 2 / OfficeServ INSTALLATION TECHNICAL MANUAL PART 7 MARCH 2004 SIO PORT LOCATIONS FIGURE 7–4...
- Page 118 Home Page Table of Contents iDCS 500 Release 2 / OfficeServ INSTALLATION TECHNICAL MANUAL PART 7 MARCH 2004 IOM BOARD PRINTER RXD 2 TXD 3 GND 5 DTR 4 PIN CONNECTIONS FOR IOM FIGURE 7–5 BOARD TO PRINTER IOM BOARD...
- Page 119 Home Page Table of Contents iDCS 500 Release 2 / OfficeServ INSTALLATION TECHNICAL MANUAL PART 7 MARCH 2004 25 PAIR CABLE WITH FEMALE CONNECTOR TO ANY SLI OR 8SLI CARD COLOR TERM CIRCUIT FUNCTION W-BL SLT TIP SLT RING BL-W...
- Page 120 Home Page Table of Contents iDCS 500 Release 2 / OfficeServ INSTALLATION TECHNICAL MANUAL PART 7 MARCH 2004 WHITE (+) BLACK ( – ) CONNECT TO EITHER A OR B – – – – – – – – – –...
- Page 121 Home Page Table of Contents iDCS 500 Release 2 / OfficeServ INSTALLATION TECHNICAL MANUAL PART 8 MARCH 2004 PART 8. INSTALLING KEYSET DAUGHTERBOARDS 8.1 iDCS KDB-DIGITAL LINE INTERFACE (FKDBD) This is a daughterboard that can be installed only in the 18 or 28 button keyset. The FKDBD will provide one additional DLI circuit for the connection of any digital station device such as a keyset, add-on module or DPIM.
- Page 122 Home Page Table of Contents iDCS 500 Release 2 / OfficeServ INSTALLATION TECHNICAL MANUAL PART 8 MARCH 2004 that no damage occurs to the keyset PCB. Reattach the base to the keyset and test to ensure normal keyset operation. 8.5 KDB-SLI This daughterboard can be installed only in the DCS 12 or DCS 24 button keyset.
- Page 123 Home Page Table of Contents iDCS 500 Release 2 / OfficeServ INSTALLATION TECHNICAL MANUAL PART 8 MARCH 2004 SECURING SCREWS REMOVE KNOCKOUTS • Place the keyset face down on a flat surface. • Remove the base pedestal by placing your thumbs over the attachment clips and press outward while simultaneously pressing down on the keyset body with your fingertips.
- Page 124 Home Page Table of Contents iDCS 500 Release 2 / OfficeServ INSTALLATION TECHNICAL MANUAL PART 8 MARCH 2004 RETAINING SCREWS RETAINING SCREWS KEYSET BASE FIGURE 8–2...
- Page 125 Home Page Table of Contents iDCS 500 Release 2 / OfficeServ INSTALLATION TECHNICAL MANUAL PART 8 MARCH 2004 MOUNTING SCREWS RIBBON CABLE CONNECTOR INSTALLING KBD-DLI FIGURE 8–3 DAUGHTERBOARD...
- Page 126 Home Page Table of Contents iDCS 500 Release 2 / OfficeServ INSTALLATION TECHNICAL MANUAL PART 8 MARCH 2004 OUTPUT JACK KEYSET DAUGHTERBOARD FIGURE 8–4 OUTPUT JACK...
- Page 127 Home Page Table of Contents iDCS 500 Release 2 / OfficeServ INSTALLATION TECHNICAL MANUAL PART 8 MARCH 2004 HOOK PLUG RIBBON CABLE FROM DAUGHTERBOARD INTO RIBBON CABLE CONNECTOR P7 CONNECTING KEYSET FIGURE 8–5 DAUGHTERBOARD TO KEYSET PCB...
- Page 128 Home Page Table of Contents iDCS 500 Release 2 / OfficeServ INSTALLATION TECHNICAL MANUAL PART 8 MARCH 2004 RIBBON CABLE CONNECTOR MOUNTING SCREWS INSTALLING KDB-SLI FIGURE 8–6 DAUGHTERBOARD...
- Page 129 Home Page Table of Contents iDCS 500 Release 2 / OfficeServ INSTALLATION TECHNICAL MANUAL PART 8 MARCH 2004 LINE CORD SCROLL OUTPUT JACK HOLD TRSF ANS/ OPER SECOND KEYSET FIRST KEYSET CONNECTING A KEYSET FIGURE 8–7 TO A KDB-DLI LINE CORD...
- Page 130 Home Page Table of Contents iDCS 500 Release 2 / OfficeServ INSTALLATION TECHNICAL MANUAL PART 8 MARCH 2004 CONNECTING A STATION DEVICE FIGURE 8–9 TO A KDB VIA MDF...
- Page 131 MANAGEMENT 9.1 SOFTWARE MANAGEMENT The iDCS 500 operating software is stored on the SmartMedia card which is inserted into the front of the MCP card. The SmartMedia card has 16 Megabytes of NAND flash memory and is formatted, with a custom format to allow faster loading, in a similar manner to a hard disk.
- Page 132 10–1. 10.2 GRADING THE iDCS 500 FOR DTMF RECEIVERS DSP’s (Digital Signal Processors) are used in the iDCS 500 system as DTMF receivers. Considerations must be made when using features of the system that require DSP’s. Different system traffic patterns may affect the availability of common resource DSP’s.
- Page 133 Home Page Table of Contents iDCS 500 Release 2 / OfficeServ INSTALLATION TECHNICAL MANUAL PART 10 MARCH 2004 Proper programming of trunks that require DSP’s allows for better utilization of the available DSP’s. It is recommended that only the trunks on the T1 Span that are going to be used should be programmed.
- Page 134 Home Page Table of Contents iDCS 500 Release 2 / OfficeServ INSTALLATION TECHNICAL MANUAL PART 10 MARCH 2004 SIO1 SIO2 SIO3 SIO4 PSU-B PSU-B PSU-B/PSU60 PSU-B/PSU60 SLOT1 SLOT1 SLOT2 SLOT2 SLOT3 SLOT3 SLOT4 SLOT4 SLOT5 SLOT5 SLOT6 SLOT6 SLOT7 SLOT7...
- Page 135 Home Page Table of Contents iDCS 500 Release 2 / OfficeServ INSTALLATION TECHNICAL MANUAL PART 11 MARCH 2004 PART 11. SVMi-8/SVMi-16E SET UP 11.1 INTRODUCTION This section provides the additional steps required to set up the SVMi-8/SVMi-16E card for operation in the iDCS telephone system. Included is information regarding the Activity LED, HDD LED, Reset Button and Power Requirements.
- Page 136 Home Page Table of Contents iDCS 500 Release 2 / OfficeServ INSTALLATION TECHNICAL MANUAL PART 11 MARCH 2004 11.2 INSTALLATION OF THE SVMi-8/SVMi-16E Follow the steps below to ensure that the SVMi-8/SVMi-16E is properly setup. 1. INSPECTION Unpack and inspect the unit for obvious damage. This card should be labeled SVMi-8/SVMi-16E.
- Page 137 If steps 1 and 2 above proved to be successful you have completed the installation and setup of the SVMi-8/SVMi-16E hardware. You are now ready to begin programming the SVMi-8/SVMi-16E Voice Mail/Auto Attendant system parameters. See the SAMSUNG SVMi-8/SVMi-16E Technical Manual. 11.3...