
Related Manuals for D-Link DCH-S161


Summary of Contents for D-Link DCH-S161
- Page 1 Wi-Fi Water Sensor DCH-S161 User Manual January 29, 2019 Hardware: A1 Manual Version: 1.10...
- Page 2 Trademarks D-Link and the D-Link logo are trademarks or registered trademarks of D-Link Corporation or its subsidiaries in the United States or other countries. All other company or product names mentioned herein are trademarks or registered trademarks of their respective companies.
-
Page 3: Table Of Contents
Mounting the Water Sensor ..........8 Installation ...............10 Powering The Water Sensor ............10 mydlink™ App ................11 The Google Assistant Installation .........13 Using the mydlink App ............17 Controlling Your Sensor ............17 Sensor ..................18 Firmware Upgrade ..............20 Troubleshooting ..............21 D-Link DCH-S161 User Manual... -
Page 4: Product Overview
If any of the above items are missing, please contact your reseller. Note: Using a power supply with a different voltage rating than the one included with your product will cause damage and void the warranty. D-Link DCH-S161 User Manual... -
Page 5: Introduction
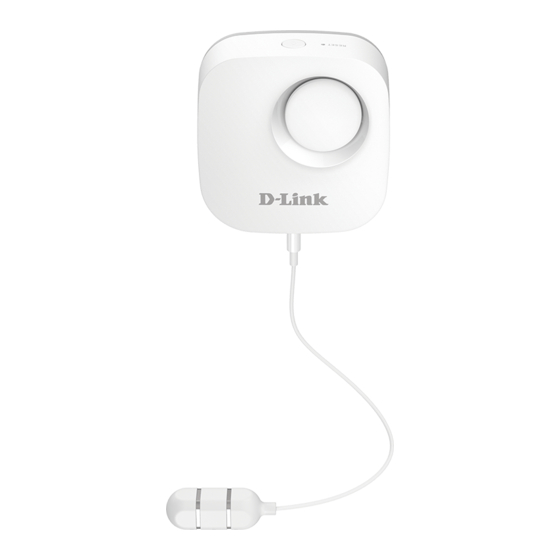
Introduction The mydlink™ DCH-S161 is a wireless water sensor that helps keep your home safe. You can install the probe anywhere and it will help you detect water leaks before it turns into serious flooding. If the water sensor is triggered, a 90 dB alarm will sound and an LED will blink to give you audio and visual warnings. -
Page 6: Hardware Overview
The 2 holes where appropriately-sized screws can be placed in order to mount the device. Battery Cover Release Tab Press down from the top and pull out the battery cover from here. Water-Sensing Probe Port Where to plug in the cable for the water-sensing probe. D-Link DCH-S161 User Manual... -
Page 7: Led Behavior
Blinking The device is connecting to a Wi-Fi network. Solid The device is booting up or has been reset successfully. Blinking The device has lost its Wi-Fi connection. Solid Updating firmware. Orange Blinking Ready for setup. D-Link DCH-S161 User Manual... -
Page 8: Siren Behavior
Section 1 - Product Overview Siren Behavior Action Button Siren Note: Press the Action Button to immediately silence the siren. Beeping every 3 seconds Water detected. Beeping will occur for one minute. D-Link DCH-S161 User Manual... -
Page 9: Safety
Before you Begin Plan the location of your water sensor: 1. Insert batteries before mounting. 2. Make sure the water sensor is placed in a location that has a consistent and adequate Wi-Fi signal. D-Link DCH-S161 User Manual... -
Page 10: Wireless Installation Considerations
(fish tanks), mirrors, file cabinets, brick, and concrete will degrade your wireless signal. 3. Keep your product at least 1 to 2 meters (3 to 6 feet) from electrical devices or appliances that generate RF noise. D-Link DCH-S161 User Manual... -
Page 11: Getting Started
Using a 6 mm drill bit, drill two holes that are 2.5 cm deep over the marks. For a plaster, drywall, or concrete wall, insert plastic anchors to support the screws first. Step 3 Twist the screws into the wall or anchors, making sure to leave enough clearance between the screw head and the wall. D-Link DCH-S161 User Manual... - Page 12 Align the screws with the largest holes on the back of the water sensor. Slide the sensor down to lock it into place. Step 5 Assure that the water sensing probe is plugged in securely to the port on the bottom of main sensor unit. Adjust the position as desired. D-Link DCH-S161 User Manual...
-
Page 13: Installation
Section 2 - Installation Installation Powering the Water Sensor Remove the battery cover by gently pressing down on the tab. Insert the two AA batteries and reattach the battery cover. D-Link DCH-S161 User Manual... -
Page 14: Mydlink™ App
Launch the mydlink app and create a new account or sign in to your existing account. Note: If you are asked about allowing the app to access your location, select Allow. Make sure location services are turned on in your phone’s settings. D-Link DCH-S161 User Manual... - Page 15 If you selected Yes: Scan the QR code on the back of the sensor, then press Next. If you selected No: Select the DCH-S161 sensor from the list, then press Next. Select Next and continue to follow the on-screen instructions. Final Step:...
-
Page 16: The Google Assistant Installation
Wi-Fi network as your water sensor. Step 2: Tap on the plus sign icon in order to add a new device. Step 3: Tap on Set up device. Note: The app is consistently being updated and screenshots are subject to change. D-Link DCH-S161 User Manual... - Page 17 Section 2 - Installation Step 4: Tap on "Have something already set up?" Step 5: Search for "mydlink" and tap on mydlink Smart. D-Link DCH-S161 User Manual...
- Page 18 Section 2 - Installation Step 6: Sign in with your D-Link account credentials used for mydlink. Step 7: Tap on the water sensor and then ADD TO A ROOM. Note: The name that your Google Assistant will display for your water sensor will come from how you named it when you added it to your mydlink account in the mydlink app's setup process.
- Page 19 Tap on the desired room name and tap Next. Step 9: You are now done. The water sensor will now be listed as a device in the assigned room. You can adjust individual setings for your water sensor by tapping the water sensor's icon. D-Link DCH-S161 User Manual...
-
Page 20: Using The Mydlink App
Note: Screenshots are representative only. The mydlink app is constantly updating and so may appear different. You can access your DCH-S161 by tapping the Menu icon in the top-left corner, select Devices, and select Sensor. In the selected device group page, you can select the specific sensor in the carousel by tapping its icon. -
Page 21: Sensor
In the sensor control page, after you have selected the specific sensor you wish to configure, tap the button in the bottom-left corner to enter the Device page. icon will tell you approximately how much battery is remaining. D-Link DCH-S161 User Manual... - Page 22 Current Firmware This displays the installed version of the firmware Version on your device. Device ID Identifies the device for support issues. Tap this button to disconnect this device from Remove Device your mydlink account. D-Link DCH-S161 User Manual...
-
Page 23: Firmware Upgrade
Tap to change the time for automatic firmware Upgrade Time updates to be downloaded and installed. Tap an option below if you want to be notified Upgrade Reminder of an upcoming automatic firmware update. D-Link DCH-S161 User Manual... -
Page 24: Troubleshooting
No, you do not need to sign up for a new mydlink account. You just have to sign in to the mydlink app using your existing mydlink account and all your existing devices will show up in the mydlink app. D-Link DCH-S161 User Manual... -
Page 25: Technical Specifications
• Operating: 0 to 40 °C (32 to 104 °F) • Storage: -20 to 65 °C (-4 to 149 °F) Humidity (main unit) • Operating: 10% to 90% non-condensing • Storage: 5% to 95% non-condensing Certifications • FCC • CE • IC D-Link DCH-S161 User Manual... -
Page 26: Regulatory Information
Note The country code selection is for non-USA models only and is not available to all USA models. Per FCC regulations, all WiFi product marketed in the USA must be fixed to USA operational channels only. D-Link DCH-S161 User Manual... - Page 27 Cet équipement est conforme aux limites d'exposition aux rayonnements ISED établies pour un environnement non contrôlé. Cet équipement doit être installé et utilisé avec un minimum de 20 cm de distance entre la source de rayonnement et votre corps. D-Link DCH-S161 User Manual...
- Page 28 Fréquence bande(s) Consommation d’énergie max. Bandas de Frecuencia Potencia máxima de Salida Frequenza/e Potenza max. Output Frequentie(s) Max. Output Power 802.11b 15.86 dBm 802.11g 12.77 dBm 2.4 G 802.11n (20MHz) 12.85 dBm 802.11n (40MHz) 12.88 dBm D-Link DCH-S161 User Manual...
- Page 29 υλικολογισμικό του προϊόντος είναι διαθέσιμα για λήψη από τη σελίδα του προϊόντος στην τοποθεσία www.dlink. com. Par les présentes, D-Link Corporation déclare que ce produit, ces accessoires et ce logiciel sont conformes aux Français [French] directives 2014/53/UE.Le texte complet de la déclaration de conformité de l'UE et le icroprogramme du produit sont disponibles au téléchargement sur la page des produits à...
- Page 30 2014/53/EU. Pełen tekst deklaracji zgodności UE oraz oprogramowanie sprzętowe do produktu można pobrać na stronie produktu w witrynie www.dlink.com. Desta forma, a D-Link Corporation declara que este produto, os acessórios e o software estão em conformidade Português [Portuguese] com a diretiva 2014/53/UE. O texto completo da declaração de conformidade da UE e do firmware...
- Page 31 2014/53/EU. Hela texten med EU-försäkran om överensstämmelse och produkt-firmware kan hämtas från produktsidan på www.dlink.com. Hér með lýsir D-Link Corporation því yfir að þessi vara, fylgihlutir og hugbúnaður eru í samræmi við tilskipun Íslenska [Icelandic] 2014/53/EB. Sækja má ESB-samræmisyfirlýsinguna í heild sinni og fastbúnað vörunnar af vefsíðu vörunnar á www.
- Page 32 Access Points unterstützen die Funktionen DFS (Dynamic Frequency Selection) und TPC (Transmit Power Control) wie erforderlich bei Betrieb auf 5 GHz innerhalb der EU. • Bitte schlagen Sie im Handbuch oder Datenblatt nach nach, ob Ihr Gerät eine 2,4 GHz und / oder 5 GHz Verbindung nutzt. D-Link DCH-S161 User Manual...
- Page 33 5 Ghz dentro de la UE. • Por favor compruebe el manual o la ficha de producto para comprobar si el producto utiliza las bandas inalámbricas de 2.4 GHz y/o la de 5 GHz. D-Link DCH-S161 User Manual...
- Page 34 Toegangspunten ondersteunen DFS (Dynamic Frequency Selection) en TPC (Transmit Power Control) functionaliteit zoals vereist bij gebruik in 5 GHz binnen de EU. • Raadpleeg de handleiding of de datasheet om te controleren of uw product gebruik maakt van 2.4 GHz en/of 5 GHz. D-Link DCH-S161 User Manual...
- Page 35 • Halten Sie das Produkt von Heizkörpern und anderen Quellen fern, die Wärme erzeugen. • Trennen Sie das Produkt immer von der Stromzufuhr, bevor Sie es reinigen und verwenden Sie dazu ausschließlich ein trockenes fusselfreies Tuch. D-Link DCH-S161 User Manual...
- Page 36 • Mantenga el producto alejado de los radiadores y de otras fuentes de calor. • Desenchufe siempre el producto de la alimentación de red antes de limpiarlo y utilice solo un paño seco sin pelusa. D-Link DCH-S161 User Manual...
- Page 37 • Houd het product uit de buurt van radiators en andere warmtebronnen. • U dient het product steeds los te koppelen van de stroom voordat u het reinigt en gebruik uitsluitend een droge pluisvrije doek. D-Link DCH-S161 User Manual...
- Page 38 D-Link designs and builds its products to be as environmentally friendly as possible, by using recyclable, low toxic materials in both products and packaging. D-Link recommends that you always switch off or unplug your D-Link products when they are not in use. By doing so you will help to save energy and reduce CO2 emissions.
- Page 39 D-Link et l’environnement Chez D-Link, nous sommes conscients de l'impact de nos opérations et produits sur l'environnement et nous engageons à le réduire. Pour limiter cet impact, D-Link conçoit et fabrique ses produits de manière aussi écologique que possible, en utilisant des matériaux recyclables et faiblement toxiques, tant dans ses produits que ses emballages.
- Page 40 D-Link zijn producten zo milieuvriendelijk mogelijk, door het gebruik van recycleerbare producten met lage toxiciteit in product en verpakking. D-Link raadt aan om steeds uw D-Link producten uit te schakelen of uit de stekker te halen wanneer u ze niet gebruikt. Door dit te doen bespaart u energie en beperkt u de CO2-emissies.
- Page 41 D-Link a životní prostředí Ve společnosti D-Link jsme si vědomi vlivu našich provozů a výrobků na životní prostředí a snažíme se o minimalizaci těchto vlivů. Proto své výrobky navrhujeme a vyrábíme tak, aby byly co nejekologičtější, a ve výrobcích i obalech používáme recyklovatelné a nízkotoxické materiály.
- Page 42 D-Link produkter som er så miljøvennlig som mulig, ved å bruke resirkulerbare, lav-toksiske materialer både i produktene og forpakningen. D-Link anbefaler at du alltid slår av eller frakobler D-Link-produkter når de ikke er i bruk. Ved å gjøre dette hjelper du å spare energi og å redusere CO2-utslipp.
- Page 43 D-Link sine produkter, så de er så miljøvenlige som muligt, ved at bruge genanvendelige materialer med lavt giftighedsniveau i både produkter og emballage. D-Link anbefaler, at du altid slukker eller frakobler dine D-Link-produkter, når de ikke er i brug. Ved at gøre det bidrager du til at spare energi og reducere CO2-udledningerne.
- Page 44 D-Link och miljön På D-Link förstår vi och är fast beslutna att minska den påverkan våra verksamheter och produkter kan ha på miljön. För att minska denna påverkan utformar och bygger D-Link sina produkter för att de ska vara så miljövänliga som möjligt, genom att använda återvinningsbara material med låg gifthalt i både produkter och förpackningar.