Table of Contents
Available languages
Available languages
Quick Links
Chapters
Table of Contents

Related Manuals for Silvercrest IAN 86673


Summary of Contents for Silvercrest IAN 86673
- Page 1 THERMOMÈTRE FRONTAL ET AURICULAIRE SSOT 6 A1 THERMOMÈTRE FRONTAL VOORHOOFD- EN OOR- ET AURICULAIRE THERMOMETER Mode d’emploi Gebruiksaanwijzing STIRN-UND-OHR- FOREHEAD & EAR THERMOMETER THERMOMETER Bedienungsanleitung Operating instructions IAN 86673...
- Page 2 Avant de lire le mode d‘emploi, ouvrez les deux pages conte- nant les illustrations et familiarisez-vous ensuite avec toutes les fonctions de l‘appareil. Vouw vóór het lezen de beide pagina‘s met de afbeeldingen open en maak u vertrouwd met alle functies van het apparaat. Klappen Sie vor dem Lesen die beiden Seiten mit den Abbildun- gen aus und machen Sie sich anschließend mit allen Funktionen des Gerätes vertraut.
- Page 4 SET 12hr SET 24hr (12/24) (12/24) SET hour SET minute SET sleep SET Year SET month SET day disable...
-
Page 5: Table Of Contents
Table des matières Introduction Utilisation conforme à l’usage prévu ....Page 7 Fourniture ............Page 8 Description des pièces et éléments ....Page 8 Données techniques ........... Page 9 Sécurité Instructions générales de sécurité ..... Page 11 Instructions de sécurité ........Page 13 Consignes de sécurité... - Page 6 Sont utilisés dans le présent mode d‘emploi / sur l‘appareil les pictogrammes suivants : Lire le mode d‘emploi ! Tenir compte des avertissements et instructions de sécurité ! Risque d‘explosion ! Courant continu (type de courant et de tension) Milliampère Danger de mort et d‘accidents pour les en- fants et les enfants en bas-âge ! Produit médical de type B Année et mois de fabrication...
-
Page 7: Utilisation Conforme À L'usage Prévu
Introduction Thermomètre frontal et auriculaire Introduction Toutes nos félicitations pour l’achat de votre nouvel appareil. Vous avez choisi un produit de grande qualité. Le mode d’emploi fait partie de ce produit. Il contient des remarques importantes concernant la sécurité, l’utilisation et la mise au rebut. -
Page 8: Fourniture
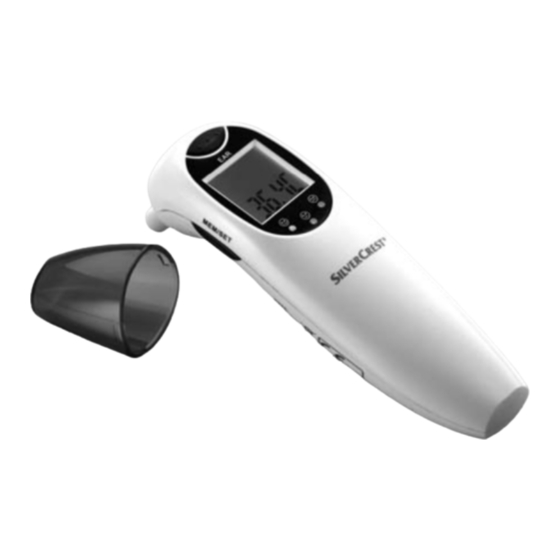
Introduction Fourniture 1 x thermomètre frontal et auriculaire (avec pile et capuchon 1 x mode d’emploi Description des pièces et éléments Touche « MEM / SET » (interrogation des mémoires, etc.) Tête de mesure Touche « EAR » (mesure de la température en mode auriculaire / scan) Touche « FOREHEAD »... -
Page 9: Données Techniques
Introduction Ecran à cristaux liquides Symbole changement de pile Symbole affi chage année Symbole affi chage date Symbole mode auriculaire Symbole mode standard Symbole mode scan Affi chage de la température Symbole mode frontal Symbole mode de veille Symbole mode Setup Symbole mode mémoire Affi... - Page 10 Introduction Coupure automatique : coupure automatique au bout d’une minute Plage de mesure mode auriculaire et frontal : 32 °C - 42,9 °C (89,6 °F - 109,2 °F) Exactitude de mesure : ± 0,2 °C (± 0,4 °F) pour la plage 35,5 °C - 42,0 °C (95,9 °F - 107,6 °F) ±...
- Page 11 Introduction / Sécurité Pression atmosphérique : 700 ~ 1060 hPa Dimensions : env. 135 x 37 x 58 mm (long. x larg. x haut.) Poids : env. 50 g *Relative humidity = humidité relative de l’air Sécurité CONSERVEZ POUR L’AVENIR L’ENSEMBLE DES INSTRUCTIONS DE SECURITE ET INSTRUCTIONS ! Instructions générales de sécurité...
- Page 12 Sécurité physiques, sensorielles et mentales limitées, ou manquant d’expérience ou de connaissances, à moins d’être surveillées par une personne responsable de leur sécurité ou d’avoir reçu de cette personne des instructions indiquant comment utiliser l’appareil. Les enfants doivent être surveillés afi n de s’assurer qu’ils ne jouent pas avec l’appareil.
- Page 13 Sécurité sement. Procédez plusieurs fois à la mesure à un intervalle respectif de 0,5 à 1 heure pour suivre l’évolution de la température. Vos mesures faciliteront le diagnostic pour votre médecin. N’utilisez pas le thermomètre dans des conditions de température extrêmes et / où à l’extérieur. Il en résulte des mesures inexactes.
-
Page 14: Consignes De Sécurité Pour La Pile
Sécurité Consignes de sécurité pour la pile Enlever la pile de l’appareil si celui-ci est resté longtemps inutilisé. PRUDENCE ! RISQUE D’EXPLOSION ! Ne jamais tenter de recharger la pile ! Veiller à insérer la pile en respectant la polarité correcte ! La polarité... -
Page 15: Avant La Mise En Service
Avant la mise en service / Utilisation Avant la mise en service Retrait de la protection pile Poussez vers le bas le couvercle du compartiment à pile Tirez le fi lm de protection au niveau de la languette du compartiment à pile. Repoussez le couvercle du compartiment à... -
Page 16: Mesures De Températures
Utilisation 2. Appuyez sur la touche « MEM / SET » pour sélectionner le mode 12h ou 24h. 3. Appuyez sur la touche « FOREHEAD » . Les heures clignotent et peuvent être corrigées à l’aide de la touche « MEM / SET » 4. Appuyez à nouveau sur la touche « FOREHEAD » Les minutes clignotent et peuvent être corrigées à... - Page 17 Utilisation Prise de température (mode auriculaire) Important ! Il est recommandé de procéder à 3 prises de température consécutives dans la même oreille et de partir du principe que le température la plus élevée est la température exacte. La prise de tempé- rature suivante peut être commencée lorsque l’affi...
- Page 18 Utilisation 3. Vérifi ez que la tête de mesure et le capteur de mesure soient propres. 4. Nettoyez avec précaution le conduit auditif à l’aide d’un coton tige. 5. Tirez le pavillon de l’oreille légèrement vers l’arrière de la tête en biais vers le haut/vers l’arrière, afi n de li- bérer l’accès du conduit auditif et qu’il ne se trouve aucun obstacle entre le capteur et le tympan.
- Page 19 Utilisation Avis : L’appareil se coupe automatiquement s’il n’est pas actionné pendant plus d’une minute. Si le mode de veille est activé, l’écran à cristaux liquides s’éteint. Si le mode de veille est désactivé, l’appareil se met en mode standard. Si le thermomètre a été utilisé dans des conditions normales, le résultat de la dernière prise de température est toujours mémorisé...
- Page 20 Utilisation Notez de quelle manière vous avez pris votre température et dites-le à votre médecin. 1. Si le mode de veille est actif, activez le thermomètre avant la prise de température en appuyant sur une touche quelconque. 2. Appuyez avec précaution sur le capuchon de protec- tion et retirez celui-ci sans forcer avec un léger mouvement tournant.
- Page 21 Utilisation 9. Répétez les étapes 3. à 6. pour procéder à d’autres prises de températures. Avis : L’appareil se coupe automatiquement s’il n’est pas actionné pendant plus d’une minute. Si le mode de veille est activé, l’écran à cristaux liquides s’éteint. Si le mode de veille est désactivé, l’appareil se met en mode standard.
- Page 22 Utilisation Le thermomètre est de type tel qu’il procède à une mesure exacte si son boîtier est à température ambiante. Aussi, ne le tenez pas trop longtemps dans la main et tenez-le éloignez des rayons directs du soleil ! N’utilisez pas l’appareil immédiatement après nettoyage de la tête de mesure .
- Page 23 Utilisation 7. Vous pouvez alors lire sur l’écran à cristaux liquides le résultat de la mesure (ill. E). 8. L’affi chage peut avoir lieu aussi bien en °C qu’en °F (voir « Fonctions / analyse des problèmes – Sélection de l’unité de température »). 9.
-
Page 24: Mesures Horaires (Mode Chronomètre)
Utilisation Mesures horaires (mode chronomètre) L’horloge intégrée peut être utilisée en chronomètre dans une plage de 0,01 secondes à 3 minutes. Cette fonction est nécessaire pour la mesure du pouls et de la fréquence cardiaque. Pour ce faire, l’appareil peut être mis en mode de chronomètre. -
Page 25: Fonctions / Analyse Des Problèmes
Fonctions / analyse des problèmes Fonctions / analyse des problèmes Sélection de l’unité de température Appuyez simultanément sur les touches « EAR » « FOREHEAD » et maintenez-les appuyées jusqu’à ce que « °F » apparaisse derrière l’affi chage de la température. Le passage de « °F » à « °C » est possible de la même manière. -
Page 26: Remplacement De La Pile
Fonctions / analyse des problèmes liquides (ill. G). Une nouvelle pression sur la touche « MEM / SET » permet de faire affi cher l’emplacement de mémoire suivant avec la valeur mesurée correspondante. Il est possible de mémoriser au plus 9 valeurs mesurées. Pour revenir au mode standard, procédez comme suit : 1. -
Page 27: Solutions Aux Problèmes
Fonctions / analyse des problèmes Mettez la pile neuve dans le compartiment à pile. Avis : Ce faisant, veillez à respecter la polarité. Le marquage Plus de la pile doit regarder vers le haut. Glissez la pile neuve sous l’ergot de métal et enfoncez-la jusqu’à... - Page 28 Fonctions / analyse des problèmes Problème Cause possible Solution Affi chage « Lo » Le thermomètre Suivez le mode sur l‘écran à est-il correctement d’emploi pour cristaux liquides positionné dans vous assurer du (valeur me- l’oreille ou au bon positionne- surée inférieure niveau du front/ ment dans l’oreille à...
-
Page 29: Nettoyage Et Entretien
Fonctions / ... / Nettoyage et entretien Problème Cause possible Solution Affi chage Pas de résultat à Suivez le mode « ErrU » sur la suite de la me- d‘emploi en ce l‘écran à cris- sure qui concerne la taux liquides manière de procé- der correctement aux mesures. -
Page 30: Garantie Et S.a.v
Nettoyage et entretien / Garantie et S.A.V. minimes peuvent déjà fausser le résultat. Nettoyez le boîtier à l’aide d’un chiff on doux légèrement humide. En cas d’encrassements plus importants, il est possible d’ajouter un nettoyant doux. Conservez l’appareil dans un lieu sec et évitez l’exposition aux rayons directs du soleil. - Page 31 Garantie et S.A.V. preuve d‘achat. En cas de garantie, veuillez contacter votre service après-vente par télé- phone. En respectant cette procédure, vous bénéfi ciez d‘une expédition gratuite de votre marchandise. La garantie couvre uniquement les défauts de matériel ou de fabrication, à l‘exclusion des pièces d‘usure ou des dommages sur les pièces susceptibles de se casser, comme les commuteurs ou accumulateurs.
-
Page 32: Recyclage
Garantie et S.A.V. / Recyclage Service France Tel.: 0800 919270 E-Mail: [email protected] IAN 86673 Service Belgique Tel.: 070 270 171 (0,15 EUR/Min.) E-Mail: [email protected] IAN 86673 Recyclage L’emballage se compose de matières recyclables qui peuvent être mises au rebut dans les déchetteries locales. -
Page 33: Conformité
Recyclage / Conformité rebut de manière adéquate. Renseignez-vous auprès des services municipaux concernant les heures d’ouverture des déchetteries Les piles défectueuses ou usées doivent être recyclées conf. à la Directive 2006 / 66 / EC. Rendez les piles et / ou l’appareil aux organismes de collectes proposés. Les piles ne font pas partie des ordures ménagères ! Rendez les piles et / ou le produit aux organismes de... - Page 34 Conformité Fabricant : Shenzhen Dongdixin Technology Co., Ltd. No. 3 Building XiliBaimang Xusheng Industrial Estate 518108 Nanshan, Shenzhen, China Tél. : +86 755 27 652 471 Téléc. : +86 755 27 652 674 E-Mail : [email protected] Mandataire CE : Shanghai International Holding Corp. GmbH (Europe) Eiff...
- Page 35 Inhoudsopgave Inleiding Doelmatig gebruik..........Pagina 37 Leveringsomvang ..........Pagina 38 Onderdelenbeschrijving ........Pagina 38 Technische gegevens ........Pagina 39 Veiligheid Algemene veiligheidsinstructies .......Pagina 41 Veiligheidsinstructies ........Pagina 43 Veiligheidsinstructies voor de batterij ....Pagina 44 Vóór de ingebruikname Batterijbeveiliging verwijderen ......Pagina 45 Bedrijf Datum / tijd instellen (afb. C) ......Pagina 45 Temperatuurmetingen ........Pagina 46 Tijdmetingen (stopwatchmodus)......Pagina 53 Functies / Storingsanalyse...
- Page 36 In deze gebruiksaanwijzing / aan het apparaat wordt gebruik gemaakt van de volgende pictogrammen: Lees de gebruiksaanwijzing! Waarschuwingen en veiligheidsinstructies in acht nemen! Explosiegevaar! Gelijkstroom (stroom- en spanningssoort) Milliampère Levensgevaar en gevaar voor ongevallen voor kleine kinderen en kleuters! Medisch product type B Productiejaar en -maand 2013-01 Voer de verpakking en het apparaat af...
-
Page 37: Doelmatig Gebruik
Inleiding Voorhoofd- en oorthermometer Inleiding Gefeliciteerd met de aankoop van uw nieuwe apparaat. U hebt hiermee gekozen voor een hoogwaardig product. De bedieningshandleiding maakt deel uit van dit product. Deze bevat belangrijke aanwijzingen voor veiligheid, ge- bruik en afvoeren. Maak uzelf vóór het eerste gebruik ver- trouwd met alle functies van het apparaat. -
Page 38: Leveringsomvang
Inleiding Leveringsomvang 1 x voorhoofd- en oorthermometer (incl. batterij en beschermkapje 1 x gebruiksaanwijzing Onderdelenbeschrijving “MEM / SET”-toets (geheugen oproepen enz.) Meetkop “EAR”-toets (temperatuurmeting in het oor/scanmodus) “FOREHEAD”-toets (temperatuurmeting aan het voorhoofd / de slaap) LC-display LED rood: koorts 38,0 °C - 42,9 °C (100,4 °F - 109,2 °F) LED oranje: verhoogde temperatuur 37,5 °C - 37,9 °C (99,5 °F - 100,2 °F) -
Page 39: Technische Gegevens
Inleiding Symbool oormodus Symbool standaardmodus Symbool scanmodus Temperatuurweergave Symbool voorhoofdsmodus Symbool “Sleep”-modus Symbool setup-modus Symbool memory-modus Weergave PM / AM Maand en tijd in de standaardmodus Symbool stopwatchmodus Technische gegevens Meetmethode: Infrarood (contactvrij) Stroomverzorging: lithiumbatterij 3 V , CR2032 Stroomverbruik: <... - Page 40 Inleiding Meetbereik oor- en voorhoofdsmodus: 32 °C - 42,9 °C (89,6 °F - 109,2 °F) Meetnauwkeurigheden: ± 0,2 °C (± 0,4° F) binnen het bereik van 35,5 °C - 42,0 °C (95,9 °F - 107,6 °F) ± 0,3 °C (± 0,5° F) binnen het bereik van 32,0 °C - 35,4 °C (89,6 °F - 95,7 °F) en binnen het bereik van 42,1 °C - 42,9 °C...
-
Page 41: Algemene Veiligheidsinstructies
Inleiding / Veiligheid Afmetingen: ca. 135 x 37 x 58 mm (L x B x H) Gewicht: ca. 50 g *Relative humidity = relatieve luchtvochtigheid Veiligheid BEWAAR ALLE VEILIGHEIDSTECHNISCHE INSTRUCTIES EN AANWIJZINGEN OM DEZE EVENTUEEL LATER TE KUNNEN RAADPLEGEN! Algemene veiligheidsinstructies WAARSCHUWING! LEVENS- GEVAAR EN GEVAAR VOOR ONGE-... - Page 42 Veiligheid en / of kennis, tenzij een voor hun veiligheid verantwoor- delijke persoon toezicht houdt of hun vooraf instructies gegeven heeft voor het gebruik van het product. Op kinderen dient toezicht te worden gehouden om te voorkomen dat ze met het product spelen. Stel het apparaat niet bloot aan extreme temperaturen, sterke vibraties,...
-
Page 43: Veiligheidsinstructies
Veiligheid malen met intervallen van 0,5 - 1 uur om het tempera- tuurverloop te observeren. Aan de hand van uw meetwaarden kan de arts gemakkelijker een diagnose stellen. Gebruik de thermometer niet onder extreme tempera- tuuromstandigheden en / of buitenshuis. Dit kan leiden tot onnauwkeurige meetwaarden. -
Page 44: Veiligheidsinstructies Voor De Batterij
Veiligheid Veiligheidsinstructies voor de batterij Verwijder de batterij uit het apparaat als het gedurende een langere periode niet wordt gebruikt . VOORZICHTIG! EXPLOSIEGEVAAR! Laad de batterij in géén geval op! Let bij het plaatsen op de juiste polariteit! Deze staat in het batterijvakje aangegeven. -
Page 45: Vóór De Ingebruikname Batterijbeveiliging Verwijderen
Veiligheid / Vóór de ingebruikname / Bedrijf worden afgespoeld en / of moet een arts geraadpleegd worden! Vóór de ingebruikname Batterijbeveiliging verwijderen Schuif het batterijvakdeksel naar beneden. Trek de beschermfolie aan de lip uit het batterijvakje. Schuif het batterijvakdeksel weer op het batterijvakje totdat het hoorbaar vastklikt (afb. -
Page 46: Temperatuurmetingen
Bedrijf Het apparaat bevindt zich in de setup-modus. 2. Druk op de “MEM / SET”-toets om te kiezen tussen het 12- en het 24-uurs formaat. 3. Druk op de “FOREHEAD”-toets . De uren knipperen en kunnen met de “MEM / SET”-toets worden gecorrigeerd. - Page 47 Bedrijf Lichaamstemperatuur meten (oormodus) BELANGRIJK! Wij adviseren, 3 metingen achter- eenvolgend aan hetzelfde oor uit te voeren en daarbij de hoogste temperatuur als meetwaarde te nemen. De nieuwe meting kan worden gestart, zodra op het display de weergave “ ” dooft. Gebruik de thermometer niet als bij de meting pijn optreedt.
- Page 48 Bedrijf 4. Reinig de gehoorgang van het oor voorzichtig met een wattenstaafje. 5. Trek de oorschelp licht in richting van het achterhoofd schuin naar boven/naar achteren, zodat de gehoor- gang vrij toegankelijk is en er geen obstakels zitten tussen de meetsensor en het trommelvlies. 6.
- Page 49 Bedrijf Opmerking: als de thermometer langer dan 1 minuut niet wordt gebruikt, schakelt hij automatisch uit. Bij geactiveerde “Sleep”-modus schakelt het LC-display uit. Bij uitge- schakelde “Sleep”-modus schakelt het apparaat naar de standaardmodus. Wanneer de thermometer onder normale voorwaarden wordt gebruikt, wordt altijd de als laatste vóór het uitschakelen gemeten waarde automatisch opgeslagen.
- Page 50 Bedrijf Onthoud met welke meetmethode u de temperatuur hebt gemeten en deel dit ook uw arts mee. 1. Bij actieve “Sleep”-modus activeert u de thermometer voor de meting door het indrukken van een willekeurige toets. 2. Druk voorzichtig op het beschermkapje en verwijder het zonder krachtsinspanning met een lichte draaibe- weging.
- Page 51 Bedrijf Opmerking: als de thermometer langer dan 1 minuut niet wordt gebruikt, schakelt hij automatisch uit. Bij geacti- veerde “Sleep”-modus schakelt het LC-display uit. Bij uitgeschakelde “Sleep”-modus schakelt het apparaat naar de standaardmodus. Wanneer de thermometer onder normale voorwaarden wordt gebruikt, wordt altijd de als laatste vóór het uitschakelen gemeten waarde automatisch opgeslagen.
- Page 52 Bedrijf Op grond van de bouwwijze meet de thermometer de exacte waarde alleen wanneer de behuizing op kamertemperatuur is. Houd het apparaat bij de meting dus niet te lang in de hand en houd het verwijderd van directe zoninstraling! Gebruik het apparaat niet direct na de reiniging van de meetkop .
-
Page 53: Tijdmetingen (Stopwatchmodus)
Bedrijf 8. De temperatuur kan zowel in “°C” als in “°F” worden weergegeven (zie “Functies / Storingsanalyse - Temperatuureenheid kiezen”). 9. Druk opnieuw op de “EAR”-toets om verdere metingen uit te voeren. 10. Wanneer de thermometer langer dan 1 minuut niet wordt gebruikt, schakelt hij automatisch uit. -
Page 54: Functies / Storingsanalyse Temperatuureenheid Kiezen
Bedrijf / Functies / Storingsanalyse 2. Druk herhaalde malen gelijktijdig op de “FOREHEAD”-toets en de “EAR”-toets totdat op het LC-display het symbool wordt weergegeven (afb. F). 3. De stopwatchmeting wordt door het indrukken van de “FOREHEAD”-toets gestart en door hernieuwd indrukken gestopt. -
Page 55: De Memory-Functie (Memory-Modus)
Functies / Storingsanalyse De memory-functie (memory-modus) BELANGRIJK! De actuele meting wordt altijd op de laatste geheugenplaats opgeslagen. Als alle geheugenplaatsen bezet zijn, wordt altijd de oudste meting uit het geheugen verwijderd. De metingen van de oor- en voorhoofdsmodus worden automatisch in het apparaat opgeslagen. De meetwaarde staat met datum, tijd en meetmodus weer ter beschikking zodra de toets “MEM / SET”... -
Page 56: Batterijen Vervangen
Functies / Storingsanalyse Batterijen vervangen De thermometer is voorzien van een lithiumbatterij (CR2032, 3 V , waarmee vele metingen mogelijk zijn. Als de batterij leeg is, wordt u hierop geattendeerd door middel van een dienovereenkomstige foutmelding (zie “Functies / Storingsanalyse – Storingen verhelpen”). Schuif het batterijvakdeksel naar beneden. -
Page 57: Problemen Verhelpen
Functies / Storingsanalyse Problemen verhelpen Wanneer de thermometer niet binnen het bedoelde bereik kan meten, verschijnt een foutmelding. Deze melding is bedoeld als hulp bij het verhelpen van problemen. Storing Probleem Verhelpen Batterij leeg? Nieuwe batterij Apparaat plaatsen regaeert niet / schakelt auto- Onjuiste polari- Batterij verwijde-... - Page 58 Functies / Storingsanalyse Storing Probleem Verhelpen Controleer de Volg de aanwij- Weergave meetmodus. zingen op met “Hi” op het LC- betrekking tot display correcte metin- (meetwaarde gen. meer dan 42,9 °C of 109,2 °F) Omgevingstempe- Zorg voor een Weergave ratuur buiten het omgevingstempe- “ErrE”...
-
Page 59: Reiniging En Onderhoud
Reiniging en onderhoud Reiniging en onderhoud De lens in de opening van de meetsensor is het gevoeligste deel van het apparaat. Wees uiterst voorzichtig als het apparaat gereinigd moet worden. Ter vermijding van besmetting met ziektekiemen dient de lens na ieder gebruik te worden afgeveegd met een zachte doek die met 70 %-medische alcohol bevochtigd is. -
Page 60: Garantie En Service
Garantie en service Garantie en service U hebt op dit apparaat 3 jaar garantie vanaf de datum van aankoop. Het apparaat is met de grootst mogelijke zorg vervaardigd en is vóór afl evering uitvoerig getest. Bewaar a.u.b. de kassabon als aankoopbewijs. Mocht u een beroep willen doen op uw garantie, neem dan telefonisch contact op met uw serviceadres. -
Page 61: Afvalverwijdering
Na afl oop van de garantieperiode worden eventueel uit te voeren reparaties in rekening gebracht. Service Nederland Tel.: 0900 0400223 (0,10 EUR/Min.) E-Mail: [email protected] IAN 86673 Service België Tel.: 070 270 171 (0,15 EUR/Min.) E-Mail: [email protected] IAN 86673 Afvalverwijdering... -
Page 62: Conformiteit
Afvalverwijdering / Conformiteit gemeentelijke milieupark. Voor meer informatie over inzamelpunten en openingstijden kunt u contact opnemen met uw gemeente. Defecte of verbruikte batterijen moeten volgens de richtlijn 2006 / 66 / EC worden gerecycled. Geef batterijen en / of het apparaat af bij de daarvoor bestemde verzamelstations. Batterijen horen niet thuis in het huisafval! Geef de batterijen en / of het product af bij de daarvoor... - Page 63 Conformiteit Fabrikant Shenzhen Dongdixin Technology Co., Ltd. No. 3 Building XiliBaimang Xusheng Industrial Estate 518108 Nanshan, Shenzhen, China Tel.: +86 755 27 652 471 Fax: +86 755 27 652 674 E-Mail: [email protected] EU-gemachtigde: Shanghai International Holding Corp. GmbH (Europe) Eiff estraße 80 D-20537 Hamburg, Germany Tel.: +49 (0) 40 2513175...
- Page 64 64 NL/BE...
- Page 65 Inhaltsverzeichnis Einleitung Bestimmungsgemäße Verwendung ....Seite 67 Lieferumfang ............Seite 68 Teilebeschreibung ..........Seite 68 Technische Daten ..........Seite 69 Sicherheit Allgemeine Sicherheitshinweise ......Seite 71 Sicherheitshinweise ..........Seite 73 Sicherheitshinweise zu Batterien ....... Seite 73 Vor der Inbetriebnahme Batteriesicherung entfernen ....... Seite 75 Betrieb Datum / Uhrzeit einstellen (Abb.
- Page 66 In dieser Bedienungsanleitung / am Gerät werden folgende Piktogramme verwendet: Bedienungsanleitung lesen! Warn- und Sicherheitshinweise beachten! Explosionsgefahr! Gleichstrom (Strom- und Spannungsart) Milliampere Lebens- und Unfallgefahr für Kleinkinder und Kinder! Medizinprodukt Typ B Fabrikationsjahr und -monat 2013-01 Entsorgen Sie Verpackung und Gerät umweltgerecht! 66 DE/AT/CH...
-
Page 67: Bestimmungsgemäße Verwendung
Einleitung Stirn-und-Ohr-Thermometer Einleitung Herzlichen Glückwunsch zum Kauf Ihres neuen Gerätes. Sie haben sich damit für ein hochwer- tiges Produkt entschieden. Die Bedienungsanleitung ist Bestandteil dieses Produkts. Sie enthält wichtige Hinweise für Sicherheit, Gebrauch und Entsorgung. Machen Sie sich vor der ersten Inbetrieb- nahme mit den Funktionen des Gerätes vertraut. -
Page 68: Lieferumfang
Einleitung Lieferumfang 1 x Stirn-und-Ohr-Thermometer (inkl. Batterie und 1 Schutzkappe 1 x Bedienungsanleitung Teilebeschreibung „MEM / SET”-Taste (Abfrage der Speicher usw.) Messkopf „EAR”-Taste (Temperaturmessung im Ohr / Scan-Modus) „FOREHEAD”-Taste (Temperaturmessung an der Stirn / Schläfe) LC-Display LED rot: Fieber 38,0 °C - 42,9 °C (100,4 °F - 109,2 °F) LED orange: leichte Temperaturerhöhung 37,5 °C - 37,9 °C (99,5 °F - 100,2 °F) -
Page 69: Technische Daten
Einleitung LC-Display Symbol Batteriewechsel Symbol Anzeige Jahr Symbol Anzeige Datum Symbol Ohren-Modus Symbol Standard-Modus Symbol Scan-Modus Temperaturanzeige Symbol Stirn-Modus Symbol Sleep-Modus Symbol Setup-Modus Symbol Memory-Modus Anzeige PM / AM Monat und Stunde im Standard-Modus Symbol Stoppuhr-Modus Technische Daten Messverfahren: Infrarot (berührungsfrei) Stromversorgung: Lithium-Batterie 3 V CR2032... - Page 70 Einleitung Automatische Abschaltung: Automatische Abschaltung nach 1 Minute Messbereich Stirn- und Ohren-Modus: 32 °C - 42,9 °C (89,6 °F - 109,2 °F) Messgenauigkeiten: ± 0,2 °C (± 0,4 °F) im Bereich von 35,5 °C - 42,0 °C (95,9 °F - 107,6 °F) ±...
-
Page 71: Allgemeine Sicherheitshinweise
Einleitung / Sicherheit Maße: ca. 135 x 37 x 58 mm (L x B x H) Gewicht: ca. 50 g *Relative humidity = relative Luftfeuchte Sicherheit BEWAHREN SIE ALLE SICHERHEITSHINWEISE UND ANWEISUNGEN FÜR DIE ZUKUNFT AUF! Allgemeine Sicherheitshinweise LEBENS- UND WARNUNG! UNFALLGEFAHR FÜR KLEINKINDER UND KINDER! Lassen Sie Kinder niemals... - Page 72 Sicherheit Sicherheit zuständige Person beaufsichtigt oder erhielten von ihr Anweisungen, wie das Gerät zu benutzen ist. Kinder müssen beaufsichtigt werden, um sicherzustellen, dass sie nicht mit dem Gerät spielen. Setzen Sie das Gerät - keinen extremen Temperaturen, - keinen starken Vibrationen, - keinen starken mechanischen Beanspruchungen, - keiner direkten Sonneneinstrahlung aus.
-
Page 73: Sicherheitshinweise
Sicherheit Verwenden Sie das Thermometer nicht unter extremen Temperaturbedingungen und / oder im Außenbereich. Ungenaue Messergebnisse sind die Folge. Beachten Sie die Vorgaben zu Umgebungs- und Lagertempera- turen (siehe „Technische Daten“). Der Messfühler sollte weder direkt berührt, noch an- gepustet werden. Ungenaue Messergebnisse sind die Folge. - Page 74 Sicherheit VORSICHT! EXPLOSIONSGEFAHR! Laden Sie Batterien niemals wieder auf! Achten Sie beim Einlegen auf die richtige Polarität! Diese wird im Batteriefach angezeigt. Reinigen Sie Batterie- und Gerätekontakt vor dem Einlegen falls erforderlich. Batterien gehören nicht in den Hausmüll! Jeder Verbraucher ist gesetzlich verpfl ichtet, Batterien ordnungsgemäß...
-
Page 75: Vor Der Inbetriebnahme
Vor der Inbetriebnahme / Betrieb Vor der Inbetriebnahme Batteriesicherung entfernen Schieben Sie den Batteriefachdeckel nach unten. Ziehen Sie die Schutzfolie an der Lasche aus dem Batteriefach. Schieben Sie den Batteriefachdeckel wieder auf das Batteriefach, bis er hörbar einrastet (Abb. A). –... -
Page 76: Temperaturmessungen
Betrieb 3. Drücken Sie die „FOREHEAD“-Taste . Die Stunden blinken und können mit der „MEM / SET“-Taste korrigiert werden. 4. Drücken Sie die „FOREHEAD“-Taste erneut. Die Minuten blinken und können mit der „MEM / SET“- Taste korrigiert werden. Wiederholen Sie die Schritte 3. und 4., um die Werte für Jahr, Monat und Tag einzustellen bzw. - Page 77 Betrieb Körpertemperatur messen (Ohren-Modus) WICHTIG! Es wird empfohlen, 3 Messungen hinter- einander am selben Ohr durchzuführen und dabei die höchste Temperatur als Messwert anzunehmen. Die neue Messung kann jeweils gestartet werden, wenn die Anzeige „ “ erlischt. Verwenden Sie das Thermometer nicht, wenn bei der Messung Schmerzen auftreten.
- Page 78 Betrieb 4. Reinigen Sie vorsichtig den Gehörgang des Ohres mit einem Wattestäbchen. 5. Ziehen Sie die Ohrmuschel leicht in Richtung Hinter- kopf schräg nach oben / nach hinten, damit der Gehörgang frei zugänglich wird und sich keine Hin- dernisse zwischen Messfühler und Trommelfell befi...
- Page 79 Betrieb Hinweis: Das Ausschalten des Gerätes erfolgt automatisch, wenn es länger als 1 Minute nicht betätigt wird. Bei akti- viertem Sleep-Modus schaltet sich das LC-Display aus. Bei deaktiviertem Sleep-Modus schaltet das Gerät in den Standard-Modus. Wenn das Thermometer unter normalen Bedingungen betrieben wurde, wird immer das Ergebnis der jeweils letzten Messung vor dem Ausschalten automatisch gespeichert.
- Page 80 Betrieb Merken Sie sich, mit welchem Messverfahren Sie die Temperatur gemessen haben und teilen Sie dies auch Ihrem Arzt mit. 1. Falls der Sleep-Modus aktiv ist, aktivieren Sie das Thermometer vor der Messung durch Drücken einer beliebigen Taste. 2. Drücken Sie vorsichtig auf die Schutzkappe entfernen Sie sie ohne Kraftaufwendung mit einer leichten Drehbewegung.
- Page 81 Betrieb 8. Die Anzeige kann sowohl in „°C“ als auch in „°F“ erfolgen (siehe “Funktionen / Fehleranalyse - Temperatureinheit wählen“). 9. Wiederholen Sie Schritt 3. bis 6., um weitere Messungen durchzuführen. Hinweis: Das Ausschalten des Gerätes erfolgt automa- tisch, wenn es länger als 1 Minute nicht betätigt wird. Bei aktiviertem Sleep-Modus schaltet sich das LC-Display aus.
- Page 82 Betrieb von seiner Innentemperatur unterscheiden, besonders, wenn die Oberfl äche der Sonneneinstrahlung oder einem Luftzug ausgesetzt ist! Das Thermometer misst bauartbedingt den exakten Wert, wenn sein Gehäuse Raumtemperatur angenommen hat. Behalten Sie es zur Messung deshalb nicht zu lange in der Hand und halten Sie es von direkter Sonnen- strahlung fern! Benutzen Sie das Gerät nicht sofort nach der Reinigung des Messkopfes...
- Page 83 Betrieb 5. Halten Sie den Messkopf in einer Entfernung von 1 cm an die Flüssigkeit und / oder Oberfl äche, deren Temperatur Sie messen wollen. 6. Drücken Sie die „EAR“-Taste , um die Messung zu starten. 7. Nun können Sie das Messergebnis auf dem LC-Display ablesen (Abb.
-
Page 84: Zeitmessungen (Stoppuhr-Modus)
Betrieb Zeitmessungen (Stoppuhr-Modus) Die integrierte Uhr lässt sich im Bereich von 0,01 Sekunden bis 3 Minuten auch als Stoppuhr benutzen. Diese Funktion ist für die Ermittlung der Herz-Pulsrate nötig. Das Gerät muss dazu in den Stoppuhr-Modus umgeschaltet werden. 1. Falls der Sleep-Modus aktiv ist, aktivieren Sie das Thermometer durch Drücken einer beliebigen Taste. -
Page 85: Funktionen / Fehleranalyse
Funktionen / Fehleranalyse Funktionen / Fehleranalyse Temperatureinheit wählen Drücken und halten Sie gleichzeitig die „EAR“-Taste und die „FOREHEAD“-Taste , bis hinter der Temperaturanzeige „°F“ erscheint. Ein Umschalten von „°F“ in „°C“ ist mit der gleichen Prozedur möglich. Die Memory-Funktion (Memory-Modus) WICHTIG! Die aktuelle Messung wird stets auf dem letzten Speicher- platz abgelegt. -
Page 86: Batteriewechsel
Funktionen / Fehleranalyse Um in den Standard-Modus zurückzukehren, gehen Sie wie folgt vor: 1. Drücken Sie gleichzeitig die „FOREHEAD“-Taste und die „EAR“-Taste so oft, bis im LC-Display wieder Raumtemperatur, Datum und Uhrzeit, sowie das Symbol angezeigt werden (Abb. D). 2. Sie befi nden sich jetzt wieder im Standard-Modus. Batteriewechsel Das Gerät ist mit einer Lithium-Batterie (CR2032, 3 V ausgestattet, die sehr viele Messungen ermöglicht. -
Page 87: Behebung Von Problemen
Funktionen / Fehleranalyse Schieben Sie den Batteriefachdeckel wieder auf das Batteriefach, bis er hörbar einrastet (Abb. A). Behebung von Problemen Falls das Gerät eine Messung nicht im vorgesehenen Bereich durchführen kann, gibt es eine Fehlermeldung aus. Diese Meldung soll zur Problembehebung beitragen. Fehler Problem Beseitigung... - Page 88 Funktionen / Fehleranalyse Fehler Problem Beseitigung Anzeige „Hi“ Überprüfen Sie Befolgen Sie die auf LC-Display den Messmodus. Bedienungsanlei- (Messwert tung hinsichtlich über 42,9°C korrekter oder 109,2°F) Messungen. Anzeige „ErrE“ Umgebungstem- Sorgen Sie für LC-Display peratur außerhalb eine Umgebungs- des Bereiches temperatur im 15,0 °C - 40,0 °C / Bereich...
-
Page 89: Reinigung Und Pflege
Reinigung und Pflege Reinigung und Pfl ege Die Linse in der Öff nung des Messfühlers ist das empfi ndlichste Teil des Gerätes. Seien Sie sehr vorsichtig, wenn eine Reinigung erforderlich wird. Zur Vermeidung einer Verunreinigung mit Krankheits- keimen muss nach jedem Gebrauch die Linse mit einem weichen Tuch, das mit 70 %-igem medizinischem Alkohol befeuchtet ist, abgerieben werden. -
Page 90: Garantie Und Service
Reinigung ... / Garantie und Service Liegt sie außerhalb dieses Bereiches, erfolgt eine Fehler- meldung (siehe „Funktionen / Fehleranalyse - Behebung von Problemen“). Entfernen Sie die Batterie, wenn Sie das Gerät längere Zeit nicht einsetzen. Garantie und Service Sie erhalten auf dieses Gerät 3 Jahre Garantie ab Kaufdatum. - Page 91 Tage nach Kaufdatum. Nach Ablauf der Garantiezeit anfallende Reparaturen sind kostenpfl ichtig. Service Deutschland Tel.: 01805772033 (0,14 EUR/Min. aus dem dt. Festnetz, Mobilfunk max. 0,42 EUR/Min.) E-Mail: [email protected] IAN 86673 Service Österreich Tel.: 0820 201 222 (0,15 EUR/Min.) E-Mail: [email protected] IAN 86673 DE/AT/CH...
-
Page 92: Entsorgung
Garantie und Service / Entsorgung Service Schweiz Tel.: 0842 665566 (0,08 CHF/Min., Mobilfunk max. 0,40 CHF/Min.) E-Mail: [email protected] IAN 86673 Entsorgung Die Verpackung besteht aus umweltfreundlichen Materialien, die Sie über die örtlichen Recycling- stellen entsorgen können. Möglichkeiten zur Entsorgung des ausgedienten Produkts erfahren Sie bei Ihrer Gemeinde oder Stadtverwaltung. -
Page 93: Konformität
Entsorgung / Konformität Defekte oder verbrauchte Batterien müssen gemäß Richtlinie 2006/66/EC recycelt werden. Geben Sie Batterien und / oder das Gerät über die angebotenen Sammeleinrichtungen zurück. Batterien gehören nicht in den Hausmüll! Geben Sie die Batterien und / oder das Produkt über die angebotenen Sammeleinrichtungen zurück. - Page 94 Konformität Hersteller: Shenzhen Dongdixin Technology Co., Ltd. No. 3 Building XiliBaimang Xusheng Industrial Estate 518108 Nanshan, Shenzhen, China Tel.: +86 755 27 652 471 Fax: +86 755 27 652 674 E-Mail: [email protected] EU-Bevollmächtigter: Shanghai International Holding Corp. GmbH (Europe) Eiff estraße 80 20537 Hamburg, Germany Tel.: +49 (0) 40 2513175...
- Page 95 Table of Contents Introduction Intended use ............Page 97 Scope of delivery ..........Page 98 Description of parts ........... Page 98 Technical data ........... Page 99 Safety General safety instructions ....... Page 101 Safety instructions ..........Page 103 Safety Instructions for the Battery ..... Page 104 Before getting started Removing the battery fuse ........
- Page 96 The following pictograms are used in these directions for use or on the device itself: Read the directions for use! Please observe the warning and safety instructions! Risk of explosion! Direct current (type of current and voltage) Milliampere Danger to life and danger of accidents for infants and children! Medical device type B Year and month of manufacture...
-
Page 97: Intended Use
Introduction Forehead & Ear Thermometer Introduction Congratulations on the purchase of your new appliance. You have clearly decided in favour of a quality product. These operating instructions are a part of this product. They contain important information in regard to safety, use and disposal. -
Page 98: Scope Of Delivery
Introduction Scope of delivery 1 x Forehead and ear thermometer (incl. battery and protective head guard 1 x Directions for use Description of parts “MEM / SET” button (information retrieval from the memory etc.) Measuring head “EAR” button (temperature measurement in the ear / scan mode) “FOREHEAD”... -
Page 99: Technical Data
Introduction LC display Battery change symbol Year display symbol Date display symbol Ear mode symbol Standard mode symbol Scan mode symbol Temperature display Forehead mode symbol Sleep mode symbol Setup mode symbol Memory mode symbol PM / AM display Month and hour in standard mode Stopwatch mode symbol Technical data Measurement... - Page 100 Introduction Temperature scale: °C (°Celsius) °F (°Fahrenheit) Time display: 12 / 24-hour format Automatic switch-off : Automatic switch-off after 1 minute Measurement range forehead & ear mode: 32°C - 42.9°C (89.6°F - 109.2°F) Measurement accuracies: ± 0.2°C (± 0.4°F) in the range from 35.5°C - 42.0°C (95.9°F - 107.6°F) ±...
-
Page 101: General Safety Instructions
Introduction / Safety Storage temperature: –10.0 °C - +55.0 °C (14.0°F - 131.0°F) at 20 % RH* - 85 % RH* Atmospheric pressure: 700 ~ 1060 hPa Dimensions: approx. 135 x 37 x 58 mm (L x B x H) Weight: approx. - Page 102 Safety This device is not designed to be used by people (including children) with limited physical, sensory or mental abilities or who lack the experience and / or knowledge to use it, unless they are supervised by a person responsible for safety or receive instructions from such a person as to how the device should be used.
-
Page 103: Safety Instructions
Safety Please consult a doctor if the thermometer indicates that the body temperature measured is high. With this measuring method, a fever is indicated if the tempera- ture is above 38.0 °C (100.4 °F). The red LED is a warning. Please take several measurements at intervals of 0.5 to 1 hour in order to follow the progression of the temperature. -
Page 104: Safety Instructions For The Battery
Safety Safety Instructions for the Battery Remove the battery from the device if it is not going to be used for a prolonged period. CAUTION! DANGER OF EXPLOSION! The battery must never be recharged! Ensure correct polarity when inserting the battery! This is indicated in the battery compartment. -
Page 105: Before Getting Started
Before getting started / Operation Before getting started Removing the battery fuse Push the battery compartment lid downwards. Pull the tab of the protective fi lm out of the battery compartment. Push the battery compartment lid onto the battery compartment until it clicks into place (Fig. A). –... -
Page 106: Temperature Measurements
Operation 3. Press the “FOREHEAD” button . The hours will fl ash and can be corrected with the “MEM / SET” button 4. Press the “FOREHEAD” button again. The minutes will fl ash and can be corrected with the “MEM / SET” button Repeat steps 3 and 4 to set the values for the year, month and day or to switch the sleep mode on or off... - Page 107 Operation can be taken when the display “ ” goes out. Do not use the thermometer if pain occurs when the meas- urement is being taken. This could damage the ear canal. Do not use the thermometer with external ear disorders (e.g.
- Page 108 Operation 6. Please keep the outer ear slightly extended and now carefully insert the measuring head into the ear canal. 7. Briefl y press the “EAR” button . The symbol will appear in the LC display and the measurement will start after an acoustic signal. 8.
- Page 109 Operation is stored. The measured value is available again along with information on the date, time and measurement mode when the “MEM / SET” button is pressed again. The device has 9 storage spaces (see section on “Functions / error analysis - the memory function”). Measuring the body temperature (forehead mode) IMPORTANT! It is advisable to carry out 3 meas-...
- Page 110 Operation 2. Carefully press on the protective cap and remove it with a gentle rotary motion and without using any force. 3. Check that the measuring head and the measuring sensors are clean. 4. Hold the measuring sensor 1 cm away from the forehead or temple.
- Page 111 Operation Note: The appliance automatically switches off if it is not operated for longer than 1 minute. When the sleep mode has been activated, the LC display switches itself off . When the sleep mode has been deactivated, the appliance switches to standard mode.
- Page 112 Operation Do not use the appliance immediately after cleaning the measuring head . The evaporative cooling eff ect of the detergent may falsify the measuring result. Sample applications: The temperature of milk in baby bottles The temperature of bathwater 1. If the sleep mode has been activated, activate the thermometer again by pressing any button before taking a measurement.
-
Page 113: Measuring Time (Stopwatch Mode)
Operation 9. Press the “EAR” button again to carry out further measurements. 10. The appliance automatically switches off if it is not operated for longer than 1 minute. This application is not stored in the device. In order to return to standard mode, proceed as follows: 1. -
Page 114: Functions / Error Analysis
Operation / Functions / error analysis 4. You can start a new measurement by pressing the “MEM / SET” button to delete the previously measured time. In order to return to standard mode, proceed as follows: 1. Press the “FOREHEAD” button and the “EAR”... -
Page 115: Changing The Battery
Functions / error analysis Measurements taken in ear and forehead mode are automatically stored in the appliance. The measured values are available again along with information on the date, time and measurement mode when the “MEM / SET” button is operated in standard mode. Press the “MEM / SET”... -
Page 116: Problem-Solving
Functions / error analysis Push the battery compartment lid downwards. Lever the battery out with a small screwdriver. Avoid short-circuiting the battery at all cost. A short- circuit can occur if the screwdriver comes into contact with the battery and the live parts in the battery compartment at the same time. - Page 117 Functions / error analysis Error Problem Solution Weak battery Insert a new Battery sym- battery bol on the LC display Thermometer Pay heed to the “Lo” on the correctly posi- operating in- LC display tioned in the ear structions in re- (measured or on the fore- gard to position-...
-
Page 118: Cleaning And Care
Functions / error analysis / Cleaning and care Error Problem Solution No measure- Please observe “ErrU” on the ment result after the directions LC display measurement. for use with re- gard to taking correct measure- ments. Error detected Contact the “ErrH”... -
Page 119: Guarantee And Service
Cleaning and care / Guarantee and Service Keep the appliance in a dry environment and protect from direct sunlight. The appliance can be stored at temperatures of –10.0 °C - 55.0 °C (14.0 °F - 131.0 °F). Temperatures over 80.0 °C are to be avoided! In order to measure with it, however, it is necessary to let the appliance adjust to room temperature for a suffi... - Page 120 All repairs required after the guarantee period has expired are subject to a charge. Service Great Britain Tel.: 0871 5000 720 (£ 0.10/Min.) E-Mail: [email protected] IAN 86673 120 GB...
-
Page 121: Disposal
1890 930 034 (0,08 EUR/Min., (peak)) (0,06 EUR/Min., (off peak)) E-Mail: [email protected] IAN 86673 Disposal The packaging is made entirely of recyclable materials, which you may dispose of at local recycling facilities. Contact your local refuse disposal authority for more details of how to dispose of your worn-out product. -
Page 122: Conformity
Disposal / Conformity Faulty or used batteries must be recycled in accordance with Council Directive 2006 / 66 / EC. Take used batteries and / or the appliance itself to the collection facilities provided. Batteries should not be disposed of with domestic waste! Take batteries and / or the product itself to the collection facilities provided. - Page 123 Conformity Manufacturer: Shenzhen Dongdixin Technology Co., Ltd. No. 3 Building XiliBaimang Xusheng Industrial Estate 518108 Nanshan, Shenzhen, China Tel.: +86 755 27 652 471 Fax: +86 755 27 652 674 E-Mail: [email protected] EU Representative: Shanghai International Holding Corp. GmbH (Europe) Eiff...
- Page 125 KOMPERNASS GMBH Burgstraße 21 D-44867 Bochum www.kompernass.com Version des informations · Stand van de informatie Stand der Informationen · Last Information Update: 11 / 2012 · Ident.-No.: SSOT6A1-092012-2 IAN 86673...