Issue
03
Date
2019-12-31
HUAWEI TECHNOLOGIES CO., LTD.
No part of this document may be reproduced or transmitted in any form or by any means without prior
written consent of Huawei Technologies Co., Ltd.
and other Huawei trademarks are trademarks of Huawei Technologies Co., Ltd.
All other trademarks and trade names mentioned in this document are the property of their respective
holders.
The purchased products, services and features are stipulated by the contract made between Huawei and
the customer. All or part of the products, services and features described in this document may not be
within the purchase scope or the usage scope. Unless otherwise specified in the contract, all statements,
information, and recommendations in this document are provided "AS IS" without warranties, guarantees
or representations of any kind, either express or implied.
The information in this document is subject to change without notice. Every effort has been made in the
preparation of this document to ensure accuracy of the contents, but all statements, information, and
recommendations in this document do not constitute a warranty of any kind, express or implied.
Address:
Huawei Industrial Base
Bantian, Longgang
Shenzhen 518129
People's Republic of China
Website:
http://www.huawei.com
Email:
Table of Contents

Related Manuals for Huawei OptiX RTN 980L V100


Summary of Contents for Huawei OptiX RTN 980L V100
- Page 1 Date 2019-12-31 The purchased products, services and features are stipulated by the contract made between Huawei and the customer. All or part of the products, services and features described in this document may not be within the purchase scope or the usage scope. Unless otherwise specified in the contract, all statements, information, and recommendations in this document are provided "AS IS"...
-
Page 2: Safety Precautions
The safety precautions in this document are only some that Huawei can predict. Device safety Huawei is not liable for any consequences that result from violation of common safety regulations or equipment production and usage regulations. Before operating a device, check the electrical connection of the device to ensure that the device is securely grounded. - Page 3 Installation Precautions in a Harsh Environment Definition of harsh environment Within 3.7 km (12139 ft ) of an ocean or a salt water lake When outdoor equipment or cabinets are installed in a harsh environment, ensure that the following requirements are met: Antenna installation requirements ...
-
Page 4: Site Preparation
Site Preparation Pole requirements When installing a branching unit and an antenna onto one pole, adjust the distance (h2) between the branching unit A pole must meet the following requirements: A pole must be able to withstand the total weight of the antenna, branching uniting, and RFU. and antenna based on the antenna diameter to ensure that the branching unit does not block the antenna during ... - Page 5 Purchase List (North America) Purchase List (North America) The following materials are not included in the auxiliary material package provided by Huawei. You need to purchase them before installation. The installation operations in this document are for reference only. Remarks...
-
Page 6: Installation Tools
Installation Tools Measuring tape Level Phillips screwdriver Flat-head screwdriver Adjustable wrench Socket suite Torque wrench Hex key Crimping tool Segmented blade Wire clippers Wire stripper Diagonal pliers COAX crimping tool Needle-nose pliers Open-end wrench Combination pliers RJ45 crimping tool utility knife Multimeter Heat gun Hammer drill... -
Page 7: Equipment Components
Equipment Components Branching Unit (SD) Branching Unit (Non-SD) Guide trough RFU port Guide trough RFU port Lifting eye Lifting eye 310mm (12.21 in.) 310mm (12.21 in.) 220mm (8.67 in.) 220mm (8.67 in.) 610mm (24.03 in.) Size: Size: 610mm (24.03 in.) Wight:... - Page 8 Equipment Components Mounting Kits 91 mm (3.58 in.) U-shaped clamp 228 mm (9 in.) Size: 228 mm (9 in.) Wight: 5.5kg (12lb) RSSI test port Load and Short-circuit module Ground screw IF port Load at an RFU port Load at a antenna port or a cascade port Guide pin Facing...
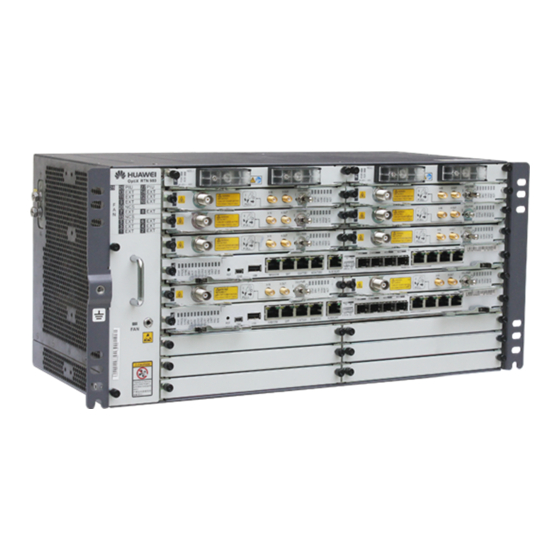
- Page 9 Equipment Components Cables Flexible waveguide RTN 980L IDU Elliptical waveguide SD cable Logical slot layout of the RTN 980L IDU The SD cable can be used only for the connection between the BU and the SD antenna. IF cable RF coaxial cable connector, N-type, male RG-8U cable or 1/2-inch cable RF coaxial cable connector,...
-
Page 10: Installation Scenarios
Installation Scenarios 4+0/3+1 (Single-polarized Antenna) 4+0/3+1 (Single-polarized Antenna, SD) Branching Unit Branching unit Antenna Ground cable Main Load Load Antenna Flexible Ground cable waveguide Flexible waveguide Elliptical waveguide IF cable IF cable Flexible waveguide Antenna Connection of the flexible waveguide/elliptical waveguide Installation procedure Flexible waveguide Installation procedure... - Page 11 Installation Scenarios 8+0/7+1 (Dual-polarized Antenna) 8+0/7+1 (Dual-polarized Antenna, SD) Branching Unit-2 Connection of the flexible Branching Unit-2 waveguide/elliptical waveguide Branching Branching Unit-2 Branching Unit-1 Unit-1 Flexible waveguide connection Ground Branching Unit-2 Ground cable Load cable Flexible Flexible waveguide waveguide Load Main Antenna Antenna...
- Page 12 Installation Scenarios 8+0/7+1 (Single-polarized Antenna) Branching unit-2 When two branching units are cascaded, the frequencies of the TX high and TX low sites are arranged Branching in an opposite order. As shown in the following figure, f are in ascending order, and f' are in unit-1 ascending order.
- Page 13 Installation Scenarios 8+0/7+1 (Single-polarized Antenna, SD) Branching unit-2 Connection of the flexible waveguide/elliptical waveguide When two branching units are cascaded, the frequencies of the TX high and TX low sites are arranged in an Branching unit-1 Branching unit-2 opposite order. As shown in the following figure, f are in ascending order, and f' are in ascending order.
- Page 14 Installation Scenarios 12+0/11+1 (Single-polarized Antenna) Connection of the Branching Unit-3 When two branching units are cascaded, the frequencies of the TX high and TX low sites are arranged in an flexible Branching Unit-3 waveguide/elliptical opposite order. As shown in the following figure, f are in ascending order, and f' are in ascending order.
- Page 15 Installation Scenarios Height Difference Between the Main Antenna and SD Antenna Being Greater Than 20 m (66 ft) Example (Dual-Polarized Antennas) Example (Single-Polarized Antennas) The waveguide length difference between the BU-to-main antenna and BU-to-SD antenna must less than 25 m (82 ft). ...
-
Page 16: Installation References
Installation References Installing RFUs Under a Tower Installing Branching Units Check whether the frequency band information about the RFU to be installed is consistent with that about the corresponding Installing One Branching Unit RFU port on the branching unit. Lead the lifting sling through the lifting eyes of the branching unit, tie the branching unit securely, and tie the handle securely using traction slings. - Page 17 Installation References Installing Branching Units Installing Two Branching Units Install an upper branching unit. Refer to the operations for installing one branching unit. Adjust the azimuth of the branching unit to facilitate installation of the Tighten the screws on the U-shaped clamps using an adjustable wrench. U-shaped clamp.
- Page 18 Installation References Installing Loads Or Short-circuit Modules Installing Flexible Waveguides Connecting a Flexible Waveguide Loads or short-circuit modules must be installed for RFU ports that are not in use. Align the arrow on the load Use flexible waveguides when connections are required: with the guide trough.
- Page 19 Installation References Installing Flexible Waveguides Precautions for Installing Flexible Waveguides The flexible waveguide can be bent only within its maximum twist angle and at the side with a larger area. The E-bend radius and H-bend radius cannot be smaller than the minimum bending radius. For details about the minimum bending radius, see the following table.
- Page 20 Installation References Installing Flexible Waveguides Fixing a Flexible Waveguide Installing flexible waveguide sheaths Components of a Flexible Waveguide Fixture When fixing a 4G flexible waveguide, use the 4G flexible waveguide sheath. When fixing a 5G flexible waveguide, use both the 4G and 5G flexible waveguide sheaths. Place the flexible waveguide in the 5G flexible Flexible Flexible waveguide sheath, and then place the 5G flexible waveguide sheath in the 4G flexible waveguide sheath.
- Page 21 Installation References Installing Elliptical Waveguides Installation Process Assembling Connectors Cutting an elliptical waveguide Start ① Assemble connectors. Keep the cutting area down, in order to avoid dirt or ② copper shavings falling into the waveguide. Hoist an elliptical waveguide. Lay out and install the elliptical ③...
- Page 22 Installation References Installing Elliptical Waveguides Hoisting an Elliptical Waveguide Laying Out and Installing an Elliptical Waveguide Bending an elliptical waveguide Laying out an elliptical waveguide Hoisting grip Flexible Antenna waveguide Bend an elliptical waveguide by applying Use a hoisting grip to hoist an elliptical waveguide Sling tie force evenly along the bent parts.
- Page 23 Installation References Installing Elliptical Waveguides Laying Out and Installing an Elliptical Waveguide Securing the elliptical waveguide Connecting the elliptical waveguide Connect the elliptical waveguide to the branching unit. SD antenna port Elliptical waveguide Blind via b. Screw a. Assembling fixture Connect the flexible waveguide to the antenna.
- Page 24 Installation References Installing Elliptical Waveguides Installing SD Cables Waterproofing Connectors The SD cable can be used only for the connection between the BU and the SD antenna. Fix the SD cable. Route an SD cable. Clamp cable Clamp Waterproof the connectors between the elliptical waveguide and flexible waveguide and between the elliptical waveguide and branching unit.
- Page 25 Installation References Installing SD Cables Installing IF Cables Routing IF Cables and Making Drip Loops Connect the SD cable to the branching unit and antenna. Make drip loops. Route an IF cable. The IF cable should be routed from the top downwards and should be bound at the time of routing.
- Page 26 Installation References Installing IF Cables Connecting an RFU to an IDU Grounding IF Cables Select ground points. Bind the IF cable first to prevent its type-N connector from being pulled out. The place about 0.5 to 1 meter (1.64 ft to 3.28 ft ) away from ...
- Page 27 Installation References Waterproofing Outdoor Connectors Wrap three layers of PVC tape over the waterproof insulation tape. Connectors between the elliptical Connectors between the IF Waterproof the following outdoor connectors and components: cable and RFU waveguide and flexible waveguide Connectors between the elliptical waveguide and branching unit ...
-
Page 28: Installation Check
Installation Check Checking Installation of Cables Checking Installation of the Branching unit, RFU, and antenna Requirement Requirement Poles can bear the weight of branching units and antennas. All outdoor connectors and ground clips are waterproofed. The installation position and direction of branching units meets the requirements specified in the IF cable connectors are made according to specifications. - Page 29 Appendixes Making IF Cables Making Connectors for IF Cables Making Type-N/TNC Connectors for IF Cables Glide the lock nut and clamp 1 over the cable. Strip off the cable sheath. Connect an RG-8U cable or 1/2-inch cable to an IDU through an IF jumper. Lock nut Clamp 1 RG-8U cable or 1/2-...
- Page 30 Appendixes Making IF Cables Making Type-N/TNC Connectors for IF Cables Install the body of the connector. Assembling a Type-N connector Assembling a TNC connector Type-N connector TNC connector Tighten the Rotate to tighten the connector. lock nut. 15 N· m Rotate to tighten the lock nut.
- Page 31 Appendixes BNC Voltage (for RSSI) and Receive Signal Level Look Up Table HUAWEI TECHNOLOGIES CO., LTD. Huawei Industrial Base Bantian Longgang Shenzhen 518129 People's Republic of China www.huawei.com...