Huawei SUN2000-2KTL-L1 User Manual
Hide thumbs
Also See for SUN2000-2KTL-L1:
- User manual (122 pages) ,
- Quick manual (24 pages) ,
- Quick manual (22 pages)

Related Manuals for Huawei SUN2000-2KTL-L1


Summary of Contents for Huawei SUN2000-2KTL-L1
- Page 1 SUN2000-(2KTL-5KTL)-L1 User Manual Issue Date 2020-04-17 HUAWEI TECHNOLOGIES CO., LTD.
- Page 2 Notice The purchased products, services and features are stipulated by the contract made between Huawei and the customer. All or part of the products, services and features described in this document may not be within the purchase scope or the usage scope. Unless otherwise specified in the contract, all statements, information, and recommendations in this document are provided "AS IS"...
-
Page 3: About This Document
NOTICE is used to address practices not related to personal injury. Supplements the important information in the main text. NOTE is used to address information not related to personal injury, equipment damage, and environment deterioration. Issue 01 (2020-04-17) Copyright © Huawei Technologies Co., Ltd. - Page 4 About This Document Change History Changes between document issues are cumulative. The latest document issue contains all the changes made in earlier issues. Issue 01 (2020-04-17) This issue is the first official release. Issue 01 (2020-04-17) Copyright © Huawei Technologies Co., Ltd.
-
Page 5: Table Of Contents
5.4 (Optional) Installing a Smart Dongle .......................... 38 5.5 Connecting an AC Output Power Cable ........................40 5.6 Connecting DC Input Power Cables ........................... 44 5.7 (Optional) Connecting Battery Cables ........................48 Issue 01 (2020-04-17) Copyright © Huawei Technologies Co., Ltd. - Page 6 A Grid Code ............................ 94 B Device Commissioning ......................96 C Resetting Password ........................99 D Quick-break Protection ......................102 E Locating Insulation Resistance Faults .................. 103 F Acronyms and Abbreviations ....................106 Issue 01 (2020-04-17) Copyright © Huawei Technologies Co., Ltd.
-
Page 7: Safety Information
The "NOTICE", "CAUTION", "WARNING", and "DANGER" statements in this document do not cover all the safety instructions. They are only supplements to the safety instructions. Huawei will not be liable for any consequence caused by the violation of general safety requirements or design, production, and usage safety standards. -
Page 8: Personnel Requirements
Do not touch the energized equipment, as the enclosure is hot. 1.2 Personnel Requirements Personnel who plan to install or maintain Huawei equipment must receive thorough training, understand all necessary safety precautions, and be able to correctly perform all operations. -
Page 9: Electrical Safety
Before making electrical connections, switch off the disconnector on the upstream device to cut off the power supply if people may contact energized components. Issue 01 (2020-04-17) Copyright © Huawei Technologies Co., Ltd. -
Page 10: Installation Environment Requirements
Ensure that the ladder is securely positioned. The recommended angle for a ladder against the floor is 75 degrees, as shown in the following figure. An angle rule can be used to measure the angle. Issue 01 (2020-04-17) Copyright © Huawei Technologies Co., Ltd. -
Page 11: Commissioning
When the equipment is powered on for the first time, ensure that professional personnel set parameters correctly. Incorrect settings may result in inconsistency with local certification and affect the normal operation of the equipment. Issue 01 (2020-04-17) Copyright © Huawei Technologies Co., Ltd. -
Page 12: Maintenance And Replacement
If the equipment is faulty, contact your dealer. The equipment can be powered on only after all faults are rectified. Failing to do so may escalate faults or damage the equipment. Issue 01 (2020-04-17) Copyright © Huawei Technologies Co., Ltd. -
Page 13: Product Introduction
SUN2000-3KTL-L1 SUN2000-3.68KTL-L1 SUN2000-4KTL-L1 SUN2000-4.6KTL-L1 SUN2000-5KTL-L1 Figure 2-1 Model identifier (using SUN2000-5KTL-L1 as an example) Table 2-1 Identifier description Meaning Value Series name SUN2000: grid-tied solar inverter Issue 01 (2020-04-17) Copyright © Huawei Technologies Co., Ltd. - Page 14 The SUN2000 applies to residential rooftop grid-tied systems. The system consists of PV strings, grid-tied solar inverters, AC switches, and power distribution units (PDUs). Figure 2-2 Single SUN2000 scenario (dashed boxes indicate optional configuration) Issue 01 (2020-04-17) Copyright © Huawei Technologies Co., Ltd.
- Page 15 (H) Residential power meter (I) Power grid (J) Battery (K) Battery switch (L) Household load (M) FusionSolar app (N) 4G Smart Dongle (O) WLAN-FE Smart Dongle (P) Router (Q) FusionSolar Smart PV Management System Issue 01 (2020-04-17) Copyright © Huawei Technologies Co., Ltd.
-
Page 16: Component Description
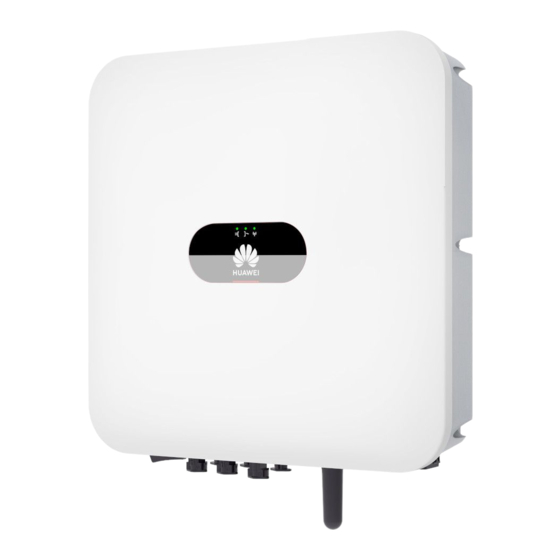
The SUN2000 supports the following power grid types: TN-S, TN-C, TN-C-S, and TT. In the TT power grid, the N-to-PE voltage must be less than 30 V. Figure 2-4 Power grid types 2.2 Component Description Appearance Figure 2-5 Appearance Issue 01 (2020-04-17) Copyright © Huawei Technologies Co., Ltd. -
Page 17: Label Description
SUN2000. Residual voltage exists after the SUN2000 is powered off. It takes 5 minutes for the SUN2000 to discharge to the safe voltage. Issue 01 (2020-04-17) Copyright © Huawei Technologies Co., Ltd. - Page 18 QR code for logging in to Scan the QR code to the SUN2000 WLAN connect to the Huawei SUN2000 WLAN (Android) or obtain the WLAN login password (iOS). The labels are for reference only. Issue 01 (2020-04-17) Copyright © Huawei Technologies Co., Ltd.
-
Page 19: Working Principles
MPPT routes inside the SUN2000 to track the maximum power point of the PV strings. The DC power is then converted into single-phase AC power through an inverter circuit. Surge protection is supported on both the DC and AC sides. Issue 01 (2020-04-17) Copyright © Huawei Technologies Co., Ltd. - Page 20 The SUN2000 uses a reserved battery port for energy storage expansion. Battery performs charging and discharging operations according to the battery working mode. Figure 2-7 Schematic diagram Working Mode Figure 2-8 Working mode Issue 01 (2020-04-17) Copyright © Huawei Technologies Co., Ltd.
- Page 21 Shutdown mode. In Shutdown mode, if the SUN2000 detects that the fault is rectified or the startup command is executed, the SUN2000 enters Standby mode. Issue 01 (2020-04-17) Copyright © Huawei Technologies Co., Ltd.
-
Page 22: Sun2000 Storage
If the SUN2000 has been stored for more than two years, it must be checked and tested by professionals before being put into use. Issue 01 (2020-04-17) Copyright © Huawei Technologies Co., Ltd. -
Page 23: System Installation
After unpacking the SUN2000, check that the deliverables are intact and complete. If any item is missing or damaged, contact your dealer. For details about the number of accessories delivered with the SUN2000, see the Packing List in the packing case. Issue 01 (2020-04-17) Copyright © Huawei Technologies Co., Ltd. -
Page 24: Preparing Tools And Instruments
Crimping tool (model: Disassembly and Assembly Tool Cable tie PV-CZM-22100) (model: Staubli 13001462) Vacuum cleaner Multimeter (DC voltage Marker measurement range ≥ 600 V DC) Steel measuring tape Level Hydraulic pliers Issue 01 (2020-04-17) Copyright © Huawei Technologies Co., Ltd. -
Page 25: Determining The Installation Position
When the SUN2000 is installed under direct sunlight, the power may be derated due to the temperature rise. You are advised to install the SUN2000 in a sheltered place or install an awning over it. Issue 01 (2020-04-17) Copyright © Huawei Technologies Co., Ltd. - Page 26 Do not install the SUN2000 at forward tilted, excessive back tilted, side tilted, horizontal, or upside down positions. Figure 4-1 Installation angle Installation Space Requirements Reserve enough clearance around the SUN2000 to ensure sufficient space for installation and heat dissipation. Issue 01 (2020-04-17) Copyright © Huawei Technologies Co., Ltd.
- Page 27 When installing multiple SUN2000s, install them in horizontal mode if sufficient space is available and install them in triangle mode if no sufficient space is available. Stacked installation is not recommended. Figure 4-3 Horizontal installation mode (recommended) Issue 01 (2020-04-17) Copyright © Huawei Technologies Co., Ltd.
- Page 28 4 System Installation Figure 4-4 Triangle installation mode (recommended) Figure 4-5 Stacked installation mode (not recommended) The installation figures are for reference only and are irrelevant to the SUN2000 cascading scenario. Issue 01 (2020-04-17) Copyright © Huawei Technologies Co., Ltd.
-
Page 29: Moving A Sun2000
Figure 4-6 Moving a SUN2000 ----End 4.5 Installing a SUN2000 Installation Precautions Figure 4-7 shows the dimensions of mounting holes for the SUN2000. Issue 01 (2020-04-17) Copyright © Huawei Technologies Co., Ltd. -
Page 30: Wall-Mounted Installation
M6x60 expansion bolts are delivered with the SUN2000. If the length and amount of the bolts do not meet installation requirements, prepare M6 stainless steel expansion bolts by yourself. Figure 4-8 Expansion bolt composition Issue 01 (2020-04-17) Copyright © Huawei Technologies Co., Ltd. - Page 31 Step 3 (Optional) Install the locking screw for the DC switch. Figure 4-10 Installing a locking screw for the DC switch Step 4 Install the SUN2000 on the mounting bracket. Step 5 Tighten the nuts. Issue 01 (2020-04-17) Copyright © Huawei Technologies Co., Ltd.
- Page 32 Prepare an anti-theft lock suitable for the lock hole diameter (Ф10 mm). An outdoor waterproof lock is recommended. Keep the key to the anti-theft lock. Figure 4-12 Installing an anti-theft lock ----End Issue 01 (2020-04-17) Copyright © Huawei Technologies Co., Ltd.
-
Page 33: Support-Mounted Installation
Step 1 Determine the positions for drilling holes using the marking-off template, and then mark the positions with a marker. Figure 4-13 Determining hole positions Step 2 Drill holes using a hammer drill. You are advised to apply anti-rust paint on the hole positions for protection. Issue 01 (2020-04-17) Copyright © Huawei Technologies Co., Ltd. - Page 34 SUN2000-(2KTL-5KTL)-L1 User Manual 4 System Installation Figure 4-14 Drilling holes Step 3 Secure the mounting bracket. Issue 01 (2020-04-17) Copyright © Huawei Technologies Co., Ltd.
- Page 35 Figure 4-15 Installing a locking screw for the DC switch Step 5 Install the SUN2000 on the mounting bracket. Step 6 Tighten the bolt assemblies. Figure 4-16 Tightening bolt assemblies Step 7 (Optional) Install an anti-theft lock. Issue 01 (2020-04-17) Copyright © Huawei Technologies Co., Ltd.
- Page 36 Prepare an anti-theft lock suitable for the lock hole diameter (Ф10 mm). An outdoor waterproof lock is recommended. Keep the key to the anti-theft lock. Figure 4-17 Installing an anti-theft lock ----End Issue 01 (2020-04-17) Copyright © Huawei Technologies Co., Ltd.
-
Page 37: Electrical Connection
SUN2000-(2KTL-5KTL)-L1 User Manual 5 Electrical Connection Electrical Connection 5.1 Preparing Cables Figure 5-1 SUN2000 cable connections (dashed boxes indicate optional configuration) Issue 01 (2020-04-17) Copyright © Huawei Technologies Co., Ltd. - Page 38 The following third-party Prepared by the power meters are also customer supported: Gavazzi-EM340DINAV23X S1X08, Gavazzi-EM111DINAV81X S1X08, Gavazzi-EM112DINAV01X S1X08, CCS-WNC-3Y-400-MB, and CCS-WNC-3D-240-MB. SUN2000 Select a proper model as Purchased from required. Huawei Issue 01 (2020-04-17) Copyright © Huawei Technologies Co., Ltd.
- Page 39 SDongleA-05 Quick Guide (WLAN-FE). You can obtain these documents at https://support.huawei.com/enterprise by searching for models. Note b: In Spain area, only the DDSU666-H power meter provided by Huawei can be used. Table 5-2 Cable description Cable Type Recommended Source Specifications ...
-
Page 40: Connecting Pe Cables
The minimum cable diameter must comply with local cable standards. The factors that affect cable selection include the rated current, cable type, routing mode, ambient temperature, and maximum expected line loss. 5.2 Connecting PE Cables Precautions Issue 01 (2020-04-17) Copyright © Huawei Technologies Co., Ltd. - Page 41 SUN2000 is properly grounded and set Grounding inspection to Disable to enable the SUN2000 to run properly. If you are not sure whether the SUN2000 is connected to such a type of power grid, contact your dealer or Huawei technical support for confirmation. ...
- Page 42 When using a heat gun, protect the equipment from being scorched. Figure 5-2 Crimping an OT terminal (A) Core wire (B) Insulation layer (C) Heat shrink tubing (D) Hydraulic pliers (E) Heat gun Step 2 Connect the PE cable. Issue 01 (2020-04-17) Copyright © Huawei Technologies Co., Ltd.
-
Page 43: Installing A Wlan Antenna
Step 1 Remove the watertight cap from the ANT port. Step 2 Install the washer to the ANT port on the chassis. Step 3 Install the WLAN antenna. Ensure that the WLAN antenna is installed securely. Issue 01 (2020-04-17) Copyright © Huawei Technologies Co., Ltd. -
Page 44: Optional) Installing A Smart Dongle
When removing the SIM card, push it inwards to eject it. When reinstalling the cover of the Smart Dongle, ensure that the buckles spring back in place with a click sound. 4G Smart Dongle (4G Communication) Issue 01 (2020-04-17) Copyright © Huawei Technologies Co., Ltd. - Page 45 There are two types of Smart Dongle: For details about how to use the WLAN-FE Smart Dongle SDongleA-05, see the SDongleA-05 Quick Guide (WLAN-FE). You can also scan the QR code to obtain the document. Issue 01 (2020-04-17) Copyright © Huawei Technologies Co., Ltd.
-
Page 46: Connecting An Ac Output Power Cable
Do not connect loads between the SUN2000 and the AC switch. Procedure Step 1 Connect the AC output power cable to the AC connector. Issue 01 (2020-04-17) Copyright © Huawei Technologies Co., Ltd. - Page 47 Ensure that AC output cable is secured. Failing to do so may cause SUN2000 malfunction or damage to its AC connector. Ensure that the cable is not twisted. Figure 5-7 Assembling an AC connector (three-core wire) Issue 01 (2020-04-17) Copyright © Huawei Technologies Co., Ltd.
- Page 48 For the core installation method and the length for cable stripping, see the instructions on the side of the plug insert. Figure 5-9 Length for cable stripping Step 2 Connect the AC connector to the AC output port. Ensure that the AC connector is connected securely. Issue 01 (2020-04-17) Copyright © Huawei Technologies Co., Ltd.
- Page 49 Before removing the AC connector, ensure that the DC switch at the bottom of the SUN2000 and all the switches connected to the SUN2000 are OFF. To remove the AC connector from the SUN2000, perform the operations in reverse order. Issue 01 (2020-04-17) Copyright © Huawei Technologies Co., Ltd.
-
Page 50: Connecting Dc Input Power Cables
DC input terminals. Otherwise, the IP rating of the SUN2000 will be affected. Ensure that the following conditions are met. Otherwise, the SUN2000 may be damaged, or even a fire could happen. Issue 01 (2020-04-17) Copyright © Huawei Technologies Co., Ltd. - Page 51 Use the Staubli MC4 positive and negative metal terminals and DC connectors delivered with the SUN2000. Using incompatible positive and negative metal terminals and DC connectors may result in serious consequences. The caused device damage is not covered under any warranty or service agreement. Issue 01 (2020-04-17) Copyright © Huawei Technologies Co., Ltd.
- Page 52 PV optimizer quick guide. Before performing Step 2, ensure that the DC switch is set to OFF. Step 2 Insert the positive and negative connectors into corresponding DC input terminals on the SUN2000. Issue 01 (2020-04-17) Copyright © Huawei Technologies Co., Ltd.
- Page 53 Before removing the positive and negative connectors, ensure that the DC switch is OFF. To remove the positive and negative connectors from the SUN2000, insert a disassembly tool into the notch and press the tool with an appropriate force. Issue 01 (2020-04-17) Copyright © Huawei Technologies Co., Ltd.
-
Page 54: Optional) Connecting Battery Cables
The battery cables should be connected correctly. That is, the positive and negative terminals of the battery connect to the positive and negative battery terminals on the SUN2000 respectively. Otherwise, the SUN2000 may be damaged, or even a fire could happen. Issue 01 (2020-04-17) Copyright © Huawei Technologies Co., Ltd. - Page 55 Step 2 Insert the positive and negative connectors into corresponding battery terminals on the SUN2000. After the positive and negative connectors snap into place, pull the battery cables back to ensure that they are connected securely. Issue 01 (2020-04-17) Copyright © Huawei Technologies Co., Ltd.
-
Page 56: Optional) Connecting Signal Cables
5.8 (Optional) Connecting Signal Cables Context When laying out signal cables, separate them from power cables and keep them away from strong interference sources to prevent communication interruption. Figure 5-18 Signal cable ports Issue 01 (2020-04-17) Copyright © Huawei Technologies Co., Ltd. - Page 57 Guide. You can also scan the QR code to obtain the document. Communication Networking Mode The power meter and Smart Dongle must be connected to the same SUN2000. Single SUN2000 scenarios Issue 01 (2020-04-17) Copyright © Huawei Technologies Co., Ltd.
- Page 58 SUN2000-(2KTL-5KTL)-L1 User Manual 5 Electrical Connection Figure 5-19 Single SUN2000 Figure 5-20 Connecting cables to the power meter (single SUN2000) SUN2000 cascading scenarios − In-phase grid connection Issue 01 (2020-04-17) Copyright © Huawei Technologies Co., Ltd.
- Page 59 SUN2000-(2KTL-5KTL)-L1 User Manual 5 Electrical Connection Figure 5-21 In-phase grid connection Figure 5-22 Connecting cables to the power meter (in-phase grid connection) − Balanced three-phase grid connection Issue 01 (2020-04-17) Copyright © Huawei Technologies Co., Ltd.
- Page 60 In the preceding networking, the SUN2000s are cascaded and support the grid-tied point control function to achieve zero export. If the SUN2000s requires the grid-tied point control function, they need to be connected to a power meter. Issue 01 (2020-04-17) Copyright © Huawei Technologies Co., Ltd.
- Page 61 If multiple signal cables need to be connected to a single connector, ensure that the outer diameters of the signal cables are the same. Figure 5-25 Assembling a signal connector (single SUN2000) Issue 01 (2020-04-17) Copyright © Huawei Technologies Co., Ltd.
- Page 62 Figure 5-26 Assembling a signal connector (SUN2000 cascading) Step 2 Connect the signal connector to the corresponding port. Ensure that the signal connector is connected securely. Figure 5-27 Securing a signal connector ----End Issue 01 (2020-04-17) Copyright © Huawei Technologies Co., Ltd.
-
Page 63: System Commissioning
Unused terminal and port Unused terminals and ports are locked by watertight caps. The installation space is proper, and the Installation environment installation environment is clean and tidy. Issue 01 (2020-04-17) Copyright © Huawei Technologies Co., Ltd. -
Page 64: System Power-On
Step 5 Turn on the DC switch at the bottom of the SUN2000. Step 6 Observe the LEDs to check the SUN2000 operating status. Table 6-2 LED indicators 1 Category Status Description – Running indicator LED1 LED2 Issue 01 (2020-04-17) Copyright © Huawei Technologies Co., Ltd. - Page 65 0.2s) progress. Blinking green at long intervals (on for 1s The mobile phone is and then off for 1s) connected to the SUN2000. There is no communication. Issue 01 (2020-04-17) Copyright © Huawei Technologies Co., Ltd.
- Page 66 Table 6-3 LED indicators 2 Category Status Description – Device LED1 LED2 LED3 replacement Steady red Steady red Steady red The SUN2000 indication hardware is faulty. The SUN2000 needs to be replaced. ----End Issue 01 (2020-04-17) Copyright © Huawei Technologies Co., Ltd.
-
Page 67: Man-Machine Interaction
PV plant information. For iOS users, you can search for FusionSolar in the App Store or scan the following QR code to download the iOS version. The screenshots are for reference only. The actual screens prevail. Issue 01 (2020-04-17) Copyright © Huawei Technologies Co., Ltd. -
Page 68: Optional) Registering An Installer Account
To create multiple installer accounts for a company, log in to the FusionSolar app and tap New User to create an installer account. Figure 7-3 Creating multiple installer accounts for the same company Issue 01 (2020-04-17) Copyright © Huawei Technologies Co., Ltd. -
Page 69: Creating A Pv Plant And A User
Ensure that each QR code is attached within the frame. For details about the physical layout of smart PV optimizers, see FusionSolar App Quick Guide. You can also scan the QR code to obtain the document. Issue 01 (2020-04-17) Copyright © Huawei Technologies Co., Ltd. - Page 70 , upload the photo of the physical layout template as prompted, and tap Submit. Log in to https://intl.fusionsolar.huawei.com to access the WebUI of the FusionSolar smart PV management system. On the home page, click the plant name to go to the plant page. Select Plant Layout, click Add Physical Layout and then Generate with AI, create a physical layout diagram as prompted, and click OK.
-
Page 71: Parameters Settings
Limits or reduces the output power of the PV power system to ensure that the output power is within the power deviation limit. Procedure Step 1 On the home screen, choose Power adjustment > Grid-tied point control. Issue 01 (2020-04-17) Copyright © Huawei Technologies Co., Ltd. - Page 72 If there is only one SUN2000, set this parameter to Inverter. limited power Limitation mode Total power indicates export limitation of the total power at the (kW) grid-tied point. Issue 01 (2020-04-17) Copyright © Huawei Technologies Co., Ltd.
- Page 73 If the Smart Dongle does not detect any meter data or fail-safe the communication between the Smart Dongle and the SUN2000 is disconnected, the Smart Dongle delivers the derating value of the SUN2000 active power by percentage. Issue 01 (2020-04-17) Copyright © Huawei Technologies Co., Ltd.
-
Page 74: Battery Control
Tap Submit. Figure 7-8 Forced charge/discharge Table 7-2 Description of forced charge/discharge parameters Parameter Description Value Range Charge/Discharge Specifies the forced Stop charge/discharge manually. Charge Discharge Issue 01 (2020-04-17) Copyright © Huawei Technologies Co., Ltd. - Page 75 Control Mode Step 1 On the home screen, choose Power adjustment > Battery control > Control mode and perform the required operation. Tap Submit. Figure 7-9 Fixed charge/discharge Figure 7-10 Maximum self-consumption Issue 01 (2020-04-17) Copyright © Huawei Technologies Co., Ltd.
- Page 76 A maximum of 10 time periods can be added. ----End Feeding Power into Grid Step 1 On the home screen, choose Power adjustment > Battery control > Charge from grid. Issue 01 (2020-04-17) Copyright © Huawei Technologies Co., Ltd.
- Page 77 12%–20%, as shown Figure 7-13. If Charge from grid function is disabled by default, comply with the grid charge requirements stipulated in local laws and regulations when this function is enabled. Issue 01 (2020-04-17) Copyright © Huawei Technologies Co., Ltd.
-
Page 78: Afci
Function If PV modules or cables are incorrectly connected or damaged, electric arcs may be generated, which may cause fire. Huawei solar inverters provide arc detection meets the requirement of UL 1699B-2018, ensuring the user safety and property. This function is enabled by default. The solar inverter automatically detects arc faults. To disable this function, log in to the FusionSolar app, enter the Device Commissioning screen, choose Settings >... -
Page 79: Ips Check (For Italy Cei0-21 Grid Code Only)
Step 2 Tap Start to start an IPS test. The SUN2000 detects maximum voltage over 10 min (59.S1), maximum overvoltage (59.S2), minimum undervoltage (27.S1), minimum undervoltage (27.S2), maximum overfrequency (81.S1), maximum overfrequency (81.S2), and minimum underfrequency (81.S1), and minimum underfrequency (81.S2). Issue 01 (2020-04-17) Copyright © Huawei Technologies Co., Ltd. - Page 80 The default overfrequency protection threshold is 51.5 Hz, and the overfrequency default protection time threshold is 0.1s. (81.S2) Minimum The default underfrequency protection threshold is 49.8 Hz, and the underfrequency default protection time threshold is 0.1s. (81.S1) Issue 01 (2020-04-17) Copyright © Huawei Technologies Co., Ltd.
-
Page 81: Drm (Australia As4777)
DI1 and GND of the COM port switched on, the solar inverter should be turned off. When switch S0 is switched off, and switch S9 is switched on, the solar inverter should be grid-tied. Issue 01 (2020-04-17) Copyright © Huawei Technologies Co., Ltd. - Page 82 SUN2000-(2KTL-5KTL)-L1 User Manual 7 Man-Machine Interaction Procedure Step 1 On the home page, choose Settings > Feature parameters. Step 2 Set DRM to Figure 7-17 DRM ----End Issue 01 (2020-04-17) Copyright © Huawei Technologies Co., Ltd.
-
Page 83: System Maintenance
Figure 8-1 Installing a locking screw for the DC switch Step 5 Turn off the DC switch between the SUN2000 and PV strings. Step 6 (Optional) Turn off the battery switch between the SUN2000 and batteries. ----End Issue 01 (2020-04-17) Copyright © Huawei Technologies Co., Ltd. -
Page 84: Routine Maintenance
Major: The SUN2000 enters the shutdown mode and disconnects from the power grid to stop generating power after a fault occurs. Minor: Some components are faulty but the SUN2000 can still connect to the power grid and generate power. Issue 01 (2020-04-17) Copyright © Huawei Technologies Co., Ltd. - Page 85 2. Check whether the AC circuit is The power grid experiences disconnected or the AC circuit an outage. breaker is OFF. The AC circuit is disconnected or the AC circuit breaker is OFF. Issue 01 (2020-04-17) Copyright © Huawei Technologies Co., Ltd.
- Page 86 3. Check whether the peak voltage of the power grid is too high. If the fault persists and cannot be rectified for a long time, contact the power operator. Issue 01 (2020-04-17) Copyright © Huawei Technologies Co., Ltd.
- Page 87 2. If the alarm occurs frequently, check whether the power grid frequency is within the allowed range. If no, contact the local power operator. Issue 01 (2020-04-17) Copyright © Huawei Technologies Co., Ltd.
- Page 88 The short circuit position is valid for a single PV string. If there are multiple PV strings, check the PV strings one by one. For details, see Locating Insulation Resistance Faults. Issue 01 (2020-04-17) Copyright © Huawei Technologies Co., Ltd.
- Page 89 9: The grid-tied relay is abnormal. 10: The DC bus experiences overvoltage. 11: The DC bus experiences undervoltage. 12: The DC bus experiences voltage imbalance. Issue 01 (2020-04-17) Copyright © Huawei Technologies Co., Ltd.
- Page 90 The flash memory is Faulty on after 5 minutes. If the fault insufficient. persists, replace the monitoring The flash memory has bad board or contact your dealer Huawei sectors. technical support. 1. Check that the configured power 2067 Faulty Major...
- Page 91 MPPT is different. 6: The PV string or parallel connection is abnormal. ID7: The string configuration is changed. Perform optimizer 7: The string configuration deployment again. is changed. Issue 01 (2020-04-17) Copyright © Huawei Technologies Co., Ltd.
- Page 92 Contact your dealer or Huawei Fault technical support for optimizer The optimizer is offline or replacement. faulty. Contact your dealer if all failure analysis procedures listed above are completed and the fault still exists. Issue 01 (2020-04-17) Copyright © Huawei Technologies Co., Ltd.
-
Page 93: Sun2000 Disposal
If the original packaging is unavailable, put the SUN2000 inside a suitable hard carton and seal it properly. 9.3 Disposing a SUN2000 If the SUN2000 service life expires, dispose the SUN2000 according to the local disposal rules for electrical equipment and electronic component waste. Issue 01 (2020-04-17) Copyright © Huawei Technologies Co., Ltd. -
Page 94: Technical Parameters
No battery connected: 18 A short-circuit LG-RESU battery connected: 15 A current (per MPPT) Operating No battery connected: 80–600 V voltage range LG-RESU battery connected: 350–450 V Startup voltage 100 V Issue 01 (2020-04-17) Copyright © Huawei Technologies Co., Ltd. - Page 95 AS4777 grid code. Note c: The maximum apparent power is 4990 VA for the AS4777 grid code. Note d: The maximum output current is 21.7 A of the AS4777 grid code. Issue 01 (2020-04-17) Copyright © Huawei Technologies Co., Ltd.
- Page 96 Supported overvoltage protection Arc fault Supported protection Communications Technical SUN2000-2 SUN2000-3 SUN2000-3. SUN2000-4 SUN2000-4. SUN2000-5 Specificatio KTL-L1 KTL-L1 68KTL-L1 KTL-L1 6KTL-L1 KTL-L1 Display LED indicators; WLAN+App WLAN Supported RS485 Supported Issue 01 (2020-04-17) Copyright © Huawei Technologies Co., Ltd.
-
Page 97: Optimizer Technical Specifications
–25° C to +60° C (derated when the temperature is higher than +45° C) Operating temperature Humidity 0–100% RH Operating 0–4000 m (derated above 2000 m) altitude 10.2 Optimizer Technical Specifications Efficiency Technical Description Specifications Maximum efficiency 99.5% European weighted 99.0% efficiency Issue 01 (2020-04-17) Copyright © Huawei Technologies Co., Ltd. - Page 98 71 mm x 138 mm x 25 mm ≤ 550 g Net weight DC input and output terminals –40° C to +85° C Operating temperature –40° C to +70° C Storage temperature Issue 01 (2020-04-17) Copyright © Huawei Technologies Co., Ltd.
- Page 99 User Manual 10 Technical Parameters Technical Description Specifications Operating humidity 0–100% RH Maximum operating 4000 m altitude IP rating IP68 Installation mode PV module support installation PV module frame installation Issue 01 (2020-04-17) Copyright © Huawei Technologies Co., Ltd.
-
Page 100: A Grid Code
C10/11 Supported Supported Supported Supported Supported Supported power grid AS4777 Australia Supported Supported Supported Supported Supported power grid IEC61727- IEC 61727 Supported Supported Supported Supported Supported Supported 60Hz LV (60 Hz) Issue 01 (2020-04-17) Copyright © Huawei Technologies Co., Ltd. - Page 101 Austria Austrian Supported Supported Supported power grid UK G98 Supported Supported Supported Supported Supported Supported power grid G99-TYPE Supported Supported Supported Supported Supported Supported A-LV G99_Type A_LV power grid Issue 01 (2020-04-17) Copyright © Huawei Technologies Co., Ltd.
-
Page 102: B Device Commissioning
SUN2000-(2KTL-5KTL)-L1 User Manual B Device Commissioning Device Commissioning Step 1 Access Device Commissioning screen. Figure B-1 Method 1: before login (not connected to the Internet) Issue 01 (2020-04-17) Copyright © Huawei Technologies Co., Ltd. - Page 103 B Device Commissioning Figure B-2 Method 2: after login (connected to the Internet) Step 2 Connect to the solar inverter WLAN and log in to the device commissioning screen as the installer user. Issue 01 (2020-04-17) Copyright © Huawei Technologies Co., Ltd.
- Page 104 When you access the Device Commissioning screen of the SUN2000 for the first time, you need to manually set the login password because the SUN2000 does not have an initial login password. ----End Issue 01 (2020-04-17) Copyright © Huawei Technologies Co., Ltd.
-
Page 105: C Resetting Password
Log in to the FusionSolar app and go to the Device Commissioning screen. On the password setting screen that is displayed, set the user password. Figure C-1 Setting the password Resetting the WLAN password Issue 01 (2020-04-17) Copyright © Huawei Technologies Co., Ltd. - Page 106 Figure C-3 Setting router parameters Setting management system parameters Log in to the FusionSolar app, choose Device Commissioning > Settings > Communication configuration > Management System Configuration, and set management system parameters. Issue 01 (2020-04-17) Copyright © Huawei Technologies Co., Ltd.
- Page 107 SUN2000-(2KTL-5KTL)-L1 User Manual C Resetting Password Figure C-4 Setting management system parameters ----End Issue 01 (2020-04-17) Copyright © Huawei Technologies Co., Ltd.
-
Page 108: D Quick-Break Protection
Method 1: Turn off the AC switch between the solar inverter and the power grid. Method 2: Set the DC SWITCH at the bottom of the solar inverter to OFF. Issue 01 (2020-04-17) Copyright © Huawei Technologies Co., Ltd. -
Page 109: E Locating Insulation Resistance Faults
If a Low Insulation Resistance alarm is still reported one minute after the solar inverter is powered on, check the percentage for possible short-circuit positions on the Alarm details page and go to Step Issue 01 (2020-04-17) Copyright © Huawei Technologies Co., Ltd. - Page 110 PV module 4, including the previous and the next PV modules and the cables of PV module 4. The solar inverter has a detection precision of ± 1 PV module. Figure E-2 Definition of the percentage of the short-circuit position Issue 01 (2020-04-17) Copyright © Huawei Technologies Co., Ltd.
- Page 111 If the Low Insulation Resistance alarm is still reported one minute after the solar inverter is powered on, the optimizer is faulty. Replace the faulty component to rectify the insulation resistance fault. ----End Issue 01 (2020-04-17) Copyright © Huawei Technologies Co., Ltd.
-
Page 112: F Acronyms And Abbreviations
Acronyms and Abbreviations alternating current direct current direct current identification fault ride through HVRT high voltage ride-through identifier light emitting diode LVRT low voltage ride-through Media Access Control maximum power point MPPT tracking Issue 01 (2020-04-17) Copyright © Huawei Technologies Co., Ltd. - Page 113 SUN2000-(2KTL-5KTL)-L1 User Manual F Acronyms and Abbreviations protective earthing photovoltaic RCMU residual current monitoring unit relative humidity serial number Issue 01 (2020-04-17) Copyright © Huawei Technologies Co., Ltd.