Table of Contents
Quick Links
Table of Contents

Related Manuals for RCA BR200DV


Summary of Contents for RCA BR200DV
- Page 1 BR200DV/BR300DV Service Manual BR200DV BR300DV Service Manual...
-
Page 2: Table Of Contents
BR200DV/BR300DV Service Manual Contents Chapter 1 General Chapter 2 Radio Overview Chapter 3 Mode Introduction Chapter 4 Disassembly For Repair Chapter 5 Circuit Description Chapter 6 PCB Layout Chapter 7 Adjustment Chapter 8 Bill Of Materials Chapter 9 Charger Chapter 10... -
Page 3: Chapter 1 General
Chapter 1 General 1.1 Introduction This manual applies to the service and maintenance of BR200DV and BR300DV radios, and is for the engineers and professional technicians that have been trained by our company. In this manual you can find all the information of product service. Our company reserve the rights to modify the product construction and specification without notice in order to enhance product performance and quality. - Page 4 BR200DV/BR300DV Service Manual Malfunction caused by disassemble, repair or reconstruct the radio by the users without permission. Wear and tear or any man-made sabotage such as mechanical damage, burning or water leaking. Product serial number has been damage or the product trademark is difficult to identify.
-
Page 5: Chapter 2 Radio Overview
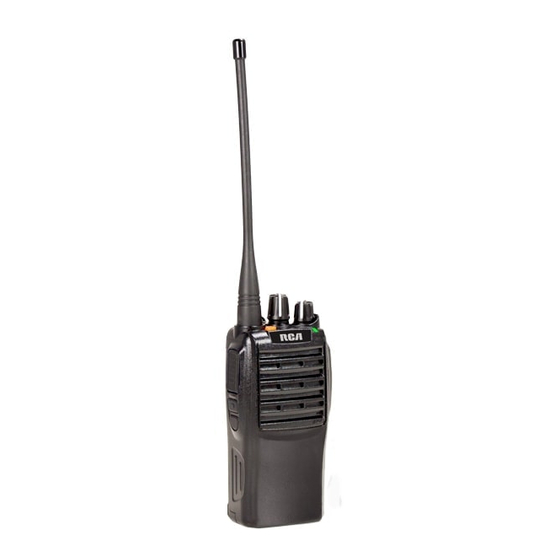
BR200DV/BR300DV Service Manual Chapter 2 Radio Overview a. BR200DV 1. PTT ( PUSH-TO-TALK) Button To make a call, press and hold the PTT button, then speak into the microphone in normal voice. Release the PTT button to receive signals. 2. Side Button 1 (Programmable Button) 3. - Page 6 BR200DV/BR300DV Service Manual will affect the voice quality. Programmable Button Function The dealer can program the Side Button 1, Side Button 2 and the Top Button with the following Optional functions: None (No Function) Annunciation Selection Talkaround Call1/Call2/Call3/Call4 Lone Work...
- Page 7 BR200DV/BR300DV Service Manual b. BR300DV 10. PTT ( PUSH-TO-TALK) Button To make a call, press and hold the PTT button, then speak into the microphone in normal voice. Release the PTT button to receive signals. 11. Side Button 1 (Programmable Button) 12.
- Page 8 BR200DV/BR300DV Service Manual current channel. Red LED lights during transmission. Flashes orange when receiving 5-Tone signaling or 2-Tone signaling . Green LED flashes when scanning or Red LED flashes when low battery. 20. Speaker/Microphone Jacks Used to connect the optional speaker/microphone.
- Page 9 BR200DV/BR300DV Service Manual GPS Auto TX Zone0 Scan ADD/DEL Man-Down Normal Record/Record Stop Protected Record/Record Stop Record play/Play Next/Play Stop Record Delete Surveillance … …...
-
Page 10: Chapter 3 Mode Introduction
BR200DV/BR300DV Service Manual Chapter 3 Mode Introduction Mode combinations Mode Function How to access Normal User For normal use Power on Mode User Field Mode Programming the basic Menu or Programmable Programming information of the radio Mode Data Reading and writing... - Page 11 BR200DV/BR300DV Service Manual 1. Install DR-6000 programming software on the computer. 2. As shown in the figure below, connect the radio to the computer through a special serial or USB programming cable. Computer Programming Radio cable (Earphone /Program port) (RS232 serial port...
- Page 12 BR200DV/BR300DV Service Manual (13) CTCSS(67.0Hz) deviation (14) CTCSS(254.1Hz) deviation (15) Battery warning level (16) RX Sensitivity (17) RX squelch 9 open level (18) RX squelch 9 close level (19) RX squelch 1 open level (20) RX squelch 1 close level (21)...
-
Page 13: Chapter 4 Disassembly For Repair
BR200DV/BR300DV Service Manual Chapter 4 Disassembly For Repair The radio is a kind of sophisticated communication equipment with small and fine mechanical structure. You should assemble and disassemble it carefully during the maintenance process. The Instruction for assembly and disassembly are as follows:... - Page 14 BR200DV/BR300DV Service Manual * Do not disassemble the battery case. Installing/Removing Antenna, Channel Selector, Power/Volume Knob Screw the antenna out of the connector at the top of the radio by holding the bottom of the antenna and turn it counter clockwise until apart.
- Page 15 BR200DV/BR300DV Service Manual Installing/Removing the Belt Clip Use the 2 screws (M2.5x8.0) supplied with the radio and fix these screws on the holes in the radio clip and into the holes in the aluminum case. If you want to remove the clip from the radio, just unscrew them, and remove the clip, you can put the screws back to make sure you do not loose them.
- Page 16 BR200DV/BR300DV Service Manual 3. Pry up the aluminum shell by peaking a straight screwdriver in the cross-slot at the bottom of the aluminum shell, and then pull out the surface shell after placing the aluminum shell inclined to the back; but please be careful not to snap off the cable of the speaker.
- Page 17 BR200DV/BR300DV Service Manual Exploded View of the Parts...
- Page 18 BR200DV/BR300DV Service Manual BR200DV Parts No. Description Qty. 301250607001X Machine screw M2.5X6.0 PB(+) black Ni-plate 2010CU600005X Radio top cover black 2030CU600003X SMA RF socket standard 301070500001X Encoder screw M7X0.75 special shape brass 2020CU600006X RF socket washer 60A 50% high spring silicon...
- Page 19 BR200DV/BR300DV Service Manual 2010CU600007X Encoder knob black ABS 700 2010CU600006X Volume knob black ABS 700 2020CU600003X Alarm silicon key orange 60A 50% high spring silicon 2010CU600010X Light-guider clear PC 4010CU600E01X LOGO LABEL 2010CU600008X Ear phone cover black TPU 2010CU600001X Radio front cabinet black PC+ABS 2950 2030CU600004X Spring Φ2.3X10.5 Φ0.25 spring steel Ni-plate...
- Page 20 BR200DV/BR300DV Service Manual BR300DV...
- Page 21 BR200DV/BR300DV Service Manual Parts No. Description Qty. 2010CU780002X CU780 LCD lens 2010CU600008X Ear phone cover 2010CU780001X CU780 cabinet 2020CU780002X Mic waterproof BR300D LCD module 1070700000001 1211401601001 speaker 2020CU600001X PTT silicon key 2010DR600002X PTT plastic key blue PC+ABS 2950 301200407001X Machine screw M2.0X4.0...
-
Page 22: Chapter 5 Circuit Description
BR200DV/BR300DV Service Manual Chapter 5 Circuit Description 5.1 Frequency configuration The reference frequency of frequency synthesizer is provided by 16.8MHz crystal oscillator X1 TCXO. The receiver adopts quadric mixing mode. The first IF is 49.95MHz, and the second IF is 450kHz. The first local oscillation signal of the receiver is produced by frequency synthesizer and the second local harmonics of 16.8MHz of crystal oscillator X1 TCXO. - Page 23 BR200DV/BR300DV Service Manual Signals from LNA are filtered again by BPF before entering the 1st mixer (Q202). The PWM wave is output by MCU composed of 58 foot and then commutated to adjustable voltage after filtering to change the capacity of varactor diode D905 D203 D202 and D204 to control the center frequency of BPF.
- Page 24 BR200DV/BR300DV Service Manual Receiving Audio Signal Processing: The audio processing circuit of receiver consists of IC300. Voice signals from IC300 are sent to IC301 (CTCSS signaling filter circuit. Squelch Circuit Part of the AF signal from the IC200 enters the FM IC again,and the noise component is amplified and rectified by a filter and an amplifier to produce a DC voltage corresponding to the noise level.
- Page 25 BR200DV/BR300DV Service Manual Gate bias of Q105 and Q107 is controlled by APC circuit, so the output power of transmitter can be controlled conveniently by changing the gate bias voltage. APC(Automatic Power Control) Figure 5 Schematic Diagram for APC Circuit R130 R131 and R132 are power amplification current detector, IC100A is power amplification current sampling amplifier and IC00B is power comparison amplifier.
- Page 26 BR200DV/BR300DV Service Manual distortion in case of oversized MIC signal. Q601, the power switch of voice processing circuit, controlled by MCU, will give power supply to IC601 only during transmission. J501 is the socket for external MIC, and the internal MIC will disconnect automatically when using external MIC, but the internal PTT is still effective.
- Page 27 BR200DV/BR300DV Service Manual Lock lost detection: When PLL is out of lock, IC pin4 will output low level signal to MCU, and then MCU prohibit transmitter from transmitting with a warning tone. Q8, the power filter, can provide PLL with more purified power to reduce the noise of frequency synthesizer.
- Page 28 BR200DV/BR300DV Service Manual IC602:5C (controlled by MCU) (5V LDO) IC603:5M 5R (controlled by MCU) (5V LDO) IC604:5T (controlled by MCU) (5V LDO) IC605:3.3V DC/DC IC618:3.3V LDO, is the supply power of frequency synthesizer 5.8 MCU Unit: Figure 9 Schematic Diagram for MCU Unit MCU Unit controls the operation of every unit to realize all functions of the DR6000.
- Page 29 BR200DV/BR300DV Service Manual Control voice prompt content Memory (FLASH) Channel data, CTCSS/DCS data and other function setting data and parameter adjustment data. CTCSS/DCS signal coding and decoding: CTCSS/DCS signals from MCU are sent to TCXO for modulation respectively . CTCSS/DCS signals from receiver are sent to MCU(pin 25) for decoding, and then MCU test if there are CTCSS/DCS signals with the same setting of the station to decide whether open the speaker or not.
- Page 30 BR200DV/BR300DV Service Manual Table 2 DCS Coding Schedule 5.9 Description of Semiconductor Devices The distribution of each pin goes as the table 3. Table 3---Definition of CPU Base Pin: Type Pin Name Port Name Function FLASH_CS SPI Flash Chip Select...
- Page 31 BR200DV/BR300DV Service Manual AD123_IN13 Connected to 3.3V。 Connected to VSSA VREF+ VREF+ Connected to 3.3V. VDDA VDDA Connected to 3.3V. PA0/ MANDOWN MANDOWN Input; ADC123_IN0 PA1/ BATT Battery Input; ADC123_IN1 PA2/ QT/DQT_IN CTCSS/DCS Input ADC123_IN2 PA3/ VOX Input ADC123_IN3 VSS_4...
- Page 32 BR200DV/BR300DV Service Manual PB12/ DMR_CS C5000 Chip Select SPI2_NSS PB13/ DMR_SCLK C5000 Serial Clock Output(From MCU) SPI2_SCK PB14/ DMR_SDO C5000 Serial Data Input SPI2_MISO PB15/ DMR_SDI C5000 Serial Data Output SPI2_MOSI PLL_LD PLL Lock Detect(High Active) PLL_CS PLL Chip Select...
- Page 33 BR200DV/BR300DV Service Manual PC10/ I2S_CK DMR I2S_CK I2S3_CK PC11/ I2S_RX DMR I2S_RX I2S3ext_SD PC12/ I2S_TX DMR I2S_TX I2S3_SD Key Board K2 Input Key Board K3 Input Key Board K4 Input Key Board K5 Input Key Board K6 Input Key Board K7 Input...
- Page 34 BR200DV/BR300DV Service Manual Table 4 Functional description of semiconductor device Item Model Function Description SKY72310 Frequency Synthesizer IC100 NJM2904 APC, Voltage Comparison, Driving IC200 NJM2591V Receiver 2 Local Oscillation, 2 IF Amplification, Limitation, Demodulation, Noise Amplification IC300 NJM2902V Receiver demodulated signal Amplification, Filtering...
-
Page 35: Chapter 6 Pcb Layout
BR200DV/BR300DV Service Manual Chapter 6 PCB Layout... - Page 36 S404 R417 Q308 C332 C340 IC302 Q306 R148 C159 R137 C132 R134 Q307 R133 R135 C160 C134 C333 R136 C337 R140 R143 C146 C531 C533 R142 C158 C529 C137 C139 R146 Q612 Q902 Q903 C603 Q110 R535 D601 Q602 R969 C165 R534 R152...
- Page 37 S401 Q401 Q400 VR401 R403 C327 L118 Q305 C273 C964 Q304 C153 D502 L114 L113 C150 L112 J500 L109 C138 L110 D101 J502 C140 C144 C130 D102 J501 D103 L151 C135 C136 C148 Q606 IC604 L106 R618 D605 Q607 L211 D604 Q107 IC603...
- Page 38 MIC1...
-
Page 40: Chapter 7 Adjustment
BR200DV/BR300DV Service Manual Chapter 7 ADJUSTMENT 7.1 Required Test Equipment Table 1 Number Name Parameter requirements Computer Above P2, compatible IBM PC, WINDOWS 98/ME/2000/XPOperating System Programming ARD001 software Programming cable Dubbing cable CPL-01 Output voltage:7.4V, output electric current:≥ 5A DC regulator Test range: 0.5---10W... - Page 41 BR200DV/BR300DV Service Manual Figure 1 External Speaker/microphone Interface Definition 7.2 Adjustment Items Some detection and adjustment shall be made to the station technical data after changing the components during the maintenance. The debugging introduction of some related circuits goes as follows: Some parameters of the product can be adjusted (“Interphone Performance Tuning”) by use of ARD001...
- Page 42 BR200DV/BR300DV Service Manual Table 2 High/ Intermediate/ Low Frequency Point of All Models Low Frequency Point Intermediate High Frequency Point Frequency Point DR6000-1 173.975 MHz 136.000 MHz 155.100 MHz DR7000-1 7.3.2 PLL frequency calibration Double-click to enter “Frequency Stability” in “Interphone Performance Tuning” to achieve the rated transmitting frequency by adjusting the number from 0 to 255 (Error<200Hz).
- Page 43 BR200DV/BR300DV Service Manual is the same as that of “QT(670) frequency offset”. 7.3.8 Receiving Sensitivity Double-click to enter “Receiving Sensitivity” in “Interphone Performance Tuning” Mode to adjust the five frequency points including ”Lowest”, “Low”, “Mid”, “High” and “Highest” respectively and the number from 0 to 255 for setting max sensitivity of all points.
- Page 44 BR200DV/BR300DV Service Manual 7.5 Adjusting explanation Table 3 Voltage controlled oscillator Correcting Item Test condition Instrumentation Test point Requirement Remarks member Supply voltage battery Setting terminal:7.4V Receiving 1.0V±0.2V Adjustment Locking frequency point voltage Transmitting high Observation ≤4.0V frequency point Table 4 Receiving part...
- Page 45 BR200DV/BR300DV Service Manual Table 5 Transmitting part Correcting Item Test condition Instrumentation Test point Requirement Remarks member Frequency Counter / Computer RF rate Within ±200Hz Integrated Tester Test Mode Nearly Oscillograph waveform VR501 flat waveform Integrated Tester (balance) Square wave...
- Page 46 BR200DV/BR300DV Service Manual BR200DV/BR300DV BOM Chapter 8 TP-6000-1 DR6000-1 PARTS LIST Ver. 1.0A Component Parts No. Description Qty. Ref. No. Name/Specification BR200DV UNIT 702DR6000101 BR200DV portable 701DR6000101 two-way radio BR200DV packaging 605DR6000101 71200CT01001 CT-01 radio ring CH2001 rapid charger 70700CP01001...
- Page 47 BR200DV/BR300DV Service Manual R641 R642 1090422150001 0402 CHIP R 220Ω RC0402JR-07220R R24 R211 R215 1090427150001 0402 CHIP R 270Ω RC0402JR-07270R R139 R154 1090433150001 0402 CHIP R 330Ω RC0402JR-07330R R102 R103 R108 1090439150001 0402 CHIP R 390Ω RC0402JR-07390R R152 1090447150001 0402 CHIP R 470Ω...
- Page 48 BR200DV/BR300DV Service Manual R648 R689 R692 R958 1090439350001 0402 CHIP R 39kΩ RC0402JR-0739K R117 R141 R313 R22 R125 R307 R330 R421 R422 1090447350001 0402 CHIP R 47kΩ RC0402JR-0747K R423 R424 R425 R427 R428 R624 R627 R679 1090456350001 0402 CHIP R 56kΩ...
- Page 49 BR200DV/BR300DV Service Manual 1090610150001 0603 CHIP R 100Ω RC0603JR-07100R R14 R26 R31 1090615150001 0603 CHIP R 150Ω RC0603JR-07150R R25 R27 1090622150001 0603 CHIP R 220Ω RC0603JR-07220R R210 R402 1090633150001 0603 CHIP R 330Ω RC0603JR-07330R R190 1090647150001 0603 CHIP R 470Ω...
- Page 50 BR200DV/BR300DV Service Manual C31 C202 C673 1120431015091 0402 CHIP C 100pF GRM1555C1H101JZ01D C674 C675 C678 C729 C730 1120431215091 0402 CHIP C 120pF GRM1555C1H121JZ01D C35 C689 C110 C205 C206 1120432216091 0402 CHIP C 220pF GRM155R71H221KA01D C533 C617 C652 1120432716091 0402 CHIP C 270pF...
- Page 51 BR200DV/BR300DV Service Manual C19 C20 C115 C128 C137 C158 C201 C221 C268 C305 C306 C312 C316 C330 C334 C336 C352 C418 C420 C421 C422 C633 1120431036071 0402 CHIP C 0.01μF GRM155R71E103KA01D C648 C651 C654 C658 C672 C702 C703 C705 C707...
- Page 52 BR200DV/BR300DV Service Manual C75 C217 C505 C607 C609 C612 C616 C620 C621 C623 C640 C650 C656 C660 C661 1120431056031 0402 CHIP C 1μF GRM155R61A105KE15D C663 C687 C693 C704 C706 C708 C715 C718 C720 C733 C736 C737 C750 C751 C756 C759 C760 112063P500091 0603 CHIP C 0.5pF...
- Page 53 BR200DV/BR300DV Service Manual C964 1121221077021 CHIP-TAN 100μF TEESVB20J107M8R C337 CERAMIC TRIMMER 1130110000001 TZY2Z100A001R00 TC1 TC2 CAP 10pF INDUCTOR SMALL FIXED 1140411015001 MLG1005SR10JT000 L100 INDUCTO 100nH L7 L10 L19 L22 L39 L207 L247 L248 L500 1170660100001 0603 FERRITE CHIP BLM18AG601S L601 L602 L604 L605...
- Page 54 BR200DV/BR300DV Service Manual INDUCTO 0.56μH SMALL FIXED 1141021027001 LQH32MN1R0M23 L118 INDUCTO 1μH SMALL FIXED C2012C1R0J(or 1140711025001 L104 L109 INDUCTO 1μH SDWL2012C1R0JSTF) SMALL FIXED 1140623326001 MLF1608A3R3KT L608 INDUCTO 3.3μH SMALL FIXED 1140622736001 MLF1608C270KT000 L15 L20 L901 L902 INDUCTO 27uH SMALL FIXED...
- Page 55 BR200DV/BR300DV Service Manual Q101 Q201 1040000012301 TRANSISTOR DTA123JE-TL Q604 1040000014301 TRANSISTOR DTA143ZETL Q902 1040000014401 TRANSISTOR DTA144EE-TL Q303 1040000011401 TRANSISTOR DTC114EE-TL Q400 Q401 1040000011402 TRANSISTOR DTC114TE-TL Q110 Q106 Q200 Q304 1040000014402 TRANSISTOR DTC144EE-TL Q306 Q605 Q607 Q903 Q7 Q601 Q609 Q610...
- Page 56 CU600 KEY PCB CU6002v02.PCB 1211361601001 SPEAKER φ36 16Ω 1W STRUCTURE 2010CU600001X CU600 radio front cabinet black PC1414 BR200DV PTT plastic key blue PC+ABS 2950 2010DR600002X 2010CU600003X CU600 ear phone plastic plug black PC+ABS 2950 2010CU600004X CU600 ear phone cabinet PC+ABS 2950...
- Page 57 BR200DV/BR300DV Service Manual 2010CU600005X CU600 radio top cover black PC+ABS 2950 2010CU600006X CU600 volume knob black ABS 700 2010CU600007X CU600 encoder knob black ABS 700 2010CU600008X CU600 ear phone cover black TPU 2010CU600009X CU600 battery locker black PC+ABS 2950 2010CU600010X...
- Page 58 BR200DV/BR300DV Service Manual TP-BR300DV BR300DV PARTS LIST Ver. 1.0A Component Parts No. Description Qty. Ref. No. Name/Specification BR300DV UNIT 702DR7000101 BR300DV portable 701DR7000101 two-way radio BR300DV packaging 605DR7000101 71200CT01001 CT-01 radio ring CH2001 rapid charger 70700CP01001 ANH200V antenna 7100600113171 G-RAPK14149101-B0072...
- Page 59 BR200DV/BR300DV Service Manual R641 R642 1090422150001 0402 CHIP R 220Ω RC0402JR-07220R R24 R211 R215 1090427150001 0402 CHIP R 270Ω RC0402JR-07270R R139 R154 1090433150001 0402 CHIP R 330Ω RC0402JR-07330R R102 R103 R108 1090439150001 0402 CHIP R 390Ω RC0402JR-07390R R152 1090447150001 0402 CHIP R 470Ω...
- Page 60 BR200DV/BR300DV Service Manual R648 R689 R692 R958 1090439350001 0402 CHIP R 39kΩ RC0402JR-0739K R117 R141 R313 R22 R125 R307 R330 R421 R422 1090447350001 0402 CHIP R 47kΩ RC0402JR-0747K R423 R424 R425 R427 R428 R624 R627 R679 1090456350001 0402 CHIP R 56kΩ...
- Page 61 BR200DV/BR300DV Service Manual 1090610150001 0603 CHIP R 100Ω RC0603JR-07100R R14 R26 R31 1090615150001 0603 CHIP R 150Ω RC0603JR-07150R R25 R27 1090622150001 0603 CHIP R 220Ω RC0603JR-07220R R210 R402 1090633150001 0603 CHIP R 330Ω RC0603JR-07330R R190 1090647150001 0603 CHIP R 470Ω...
- Page 62 BR200DV/BR300DV Service Manual C31 C202 C673 1120431015091 0402 CHIP C 100pF GRM1555C1H101JZ01D C674 C675 C678 C729 C730 1120431215091 0402 CHIP C 120pF GRM1555C1H121JZ01D C35 C689 C110 C205 C206 1120432216091 0402 CHIP C 220pF GRM155R71H221KA01D C533 C617 C652 1120432716091 0402 CHIP C 270pF...
- Page 63 BR200DV/BR300DV Service Manual C19 C20 C115 C128 C137 C158 C201 C221 C268 C305 C306 C312 C316 C330 C334 C336 C352 C418 C420 C421 C422 C633 1120431036071 0402 CHIP C 0.01μF GRM155R71E103KA01D C648 C651 C654 C658 C672 C702 C703 C705 C707...
- Page 64 BR200DV/BR300DV Service Manual C75 C217 C505 C607 C609 C612 C616 C620 C621 C623 C640 C650 C656 C660 C661 1120431056031 0402 CHIP C 1μF GRM155R61A105KE15D C663 C687 C693 C704 C706 C708 C715 C718 C720 C733 C736 C737 C750 C751 C756 C759 C760 112063P500091 0603 CHIP C 0.5pF...
- Page 65 BR200DV/BR300DV Service Manual C964 1121221077021 CHIP-TAN 100μF TEESVB20J107M8R C337 CERAMIC TRIMMER 1130110000001 TZY2Z100A001R00 TC1 TC2 CAP 10pF INDUCTOR SMALL FIXED 1140411015001 MLG1005SR10JT000 L100 INDUCTO 100nH L7 L10 L19 L22 L39 L207 L247 L248 1170660100001 0603 FERRITE CHIP BLM18AG601S L500 L601 L602...
- Page 66 BR200DV/BR300DV Service Manual SMALL FIXED 1140625616001 MLF1608DR56KT INDUCTO 0.56μH SMALL FIXED 1141021027001 L118 LQH32MN1R0M23 INDUCTO 1μH SMALL FIXED C2012C1R0J(or 1140711025001 L104 L109 INDUCTO 1μH SDWL2012C1R0JSTF) SMALL FIXED 1140623326001 MLF1608A3R3KT L608 INDUCTO 3.3μH SMALL FIXED 1140622736001 MLF1608C270KT000 L15 L20 L901 L902...
- Page 67 BR200DV/BR300DV Service Manual Q101 Q201 1040000012301 TRANSISTOR DTA123JE-TL Q604 1040000014301 TRANSISTOR DTA143ZETL Q902 1040000014401 TRANSISTOR DTA144EE-TL Q303 1040000011401 TRANSISTOR DTC114EE-TL Q400 Q401 1040000011402 TRANSISTOR DTC114TE-TL Q110 Q106 Q200 Q304 1040000014402 TRANSISTOR DTC144EE-TL Q306 Q605 Q607 Q903 Q7 Q601 Q609 Q610...
- Page 68 BR200DV/BR300DV Service Manual OPERATIONAL 1020000755101 TC75S51F IC610 AMPLIFIER 1020000300001 WATCHDOG HR_V3000S IC611 1020000324051 MICROPROCESSOR STM32F405VGT6 IC614 1020000015091 UPB1509BV IC619 OTHERS CHIP CRYSTAL 1221008000001 DSX321G (8MHz) X603 RESONATOR CHIP CRYSTAL DSB321SDA 1221029491201 X602 RESONATOR (29.4912MHz) 1221016800001 VC-TCXO DSA321SDA (16.8MHz) X601 DSF753SDF(49.95MHZ...
- Page 69 BR200DV/BR300DV Service Manual R2 R3 R4 R5 R6 R7 1090410250001 0402 CHIP R 1kΩ RC0402JR-071K R8 R9 R10 R11 R12 R13 R14 1090447350001 0402 CHIP R 47kΩ RC0402JR-0747K 1090639150001 0603 CHIP R 390Ω RC0603JR-07390R R19 R22 1090618250001 0603 CHIP R 1.8kΩ...
- Page 70 BR200DV/BR300DV Service Manual silicon CU600 RF socket washer 60A 50% high spring 2020CU600006X silicon 2020CU600007X CU600 knob washer 60A 50% high spring silicon 2020CU780001X CU780 Keypad rubber 2020CU780002X CU780 MIC washer 2030CU600001X CU600 AL cabinet polishing ADC 12 2030CU600002X CU600 battery metal locker polishing SUS304...
-
Page 71: Chapter 9 Charger
BR200DV/BR300DV Service Manual Chapter 9 CH2001 Charger 9.1 General Description: Function: intelligent rapid charging Applicable battery: B2017LI(1700mAh, 7.4V Li-ion battery) B2020LI(2000mAh, 7.4V Li-ion battery) Battery type identification: External Input power supply: DC12±0.5V, 1000mA, ripples <500mV 9.2 Operating environment Temperature: -5 ±2 ℃-- +55 ±2... -
Page 72: Chapter 10 Block And Schematic
BR200DV/BR300DV Service Manual Chapter 10 Block and Schematic... - Page 73 MICROPROCESSOR X603 XOUT EXT SW 8MHz Q304 AFCO ..DTC144EE K1~8 APCSW PLL_CS AFCO PLL_CLK 4X4 KEY BOARD IC500A IC500B PLL_DAT NJM2900V NJM2900V CU7000-1 CU7100-1 Title BR200DV/BR300DV BLOCK DIAGRAM Size Number Revision VER 1.0 Date: Sheet File: Drawn By:...
- Page 74 18pinFPC C5 1u C6 1u C7 1u 0.1u 0.1u C8 1u C9 1u XC6201P302MR 0.01u 470p 0.01u 180R 180R 18pinBTB LCD-1 LCD-2 LCD-3 LCD-4 LCD-5 LAMP 0.01u 560R 560R 560R 560R 470p XC6204B502MR 0.1u 470k 470p MIC1 GREEN*8 Title BR300D LCD Size Number Revision...
- Page 75 IC618 PLL3V3 ANTENNA SW FVCO R190 C145 C151 C273 C662 C663 C664 C665 2SC5066 100k L606 Q105 7.5V 330R 0.4*1.5*3T 0.3*1.5*5T 0.4*1.5*3T C138 0.1u 470p 470p 601s Q107 RD01 L901 R:1.3V RD07 C136 C148 C130 C140 150p D101 D907 C110 C111 C135 L112...
-
Page 76: Appendix 1 Abbreviations
BR200DV/BR300DV Service Manual Appendix 1 Abbreviations (amplify, amplifier) (antenna) (automatic power control) (band pass filter) CTCSS (continuous tone control squelch system) (Digital code squelch) DEMOD (demodulation) (high pass filter) (instantaneous deviation control ) (intermediate frequency) (Light-Emitting Diode) (low noise amplifier)... -
Page 77: Appendix 2 Main Technical Indexes
BR200DV/BR300DV Service Manual Appendix 2: Main Technical Indexes BR200DV/BR300DV Technical Parameters General Specifications Power Supply 7.4V DC ±20% Frequencies - Full Bandsplit 136~174MHz Number of Channels 512 (DR7000-1) (DR6000-1) Channel Spacing 12.5kHz TX High <1.6A Current Drain(Approx.) RX Max. audio <450mA(Internal SP) Standby <70mA... - Page 78 BR200DV/BR300DV Service Manual Adjacent Channel Selectivity 60 dB Spurious Rejection 70 dB Rated Audio 750 mW(16Ω) Audio Distortion @ Rated Audio Audio Response (300-3000Hz) +1 ~ -3 dB Conducted Spurious Emission -57 dBm<1 GHz, -47 dBm>1GHz ETS 300 086...
-
Page 79: Appendix 3 Trouble Shooting
BR200DV/BR300DV Service Manual Appendix 3: Troubleshooting Problems Solutions The radio cannot Battery pack may not be installed properly. Remove the be switched on or battery pack and install it again. no display after Battery power may be insufficient. Recharge or replace switched on.