Table of Contents
- 1 Outdoor Installation
- 2 Bill of Materials
- 3 LG Tank Kit
- 4 Installation Schematic
- 5 Installation Wiring
- 6 Installation – Mains Power Cable
- 7 Installation – Terminal Block 1
- 8 Terminal Block 3
- 9 Antifreeze Solution Temp.
- 10 Central Controller
- 11 DHW Installation
- 12 Tank Heater
- 13 Configuration - Dip Switches
- 14 Configuration – Installer Settings
- 15 Error Codes
- 16 Commissioning Sheet
Table of Contents

Related Manuals for LG Therma V R32


Summary of Contents for LG Therma V R32
-
Page 1: Installation Instructions
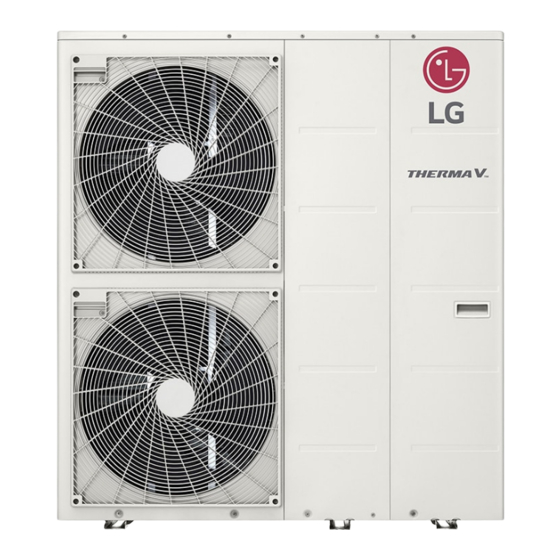
Therma V R32: Generation 3. Installation Instructions. R32 Monobloc - April 2020... - Page 2 Therma V R32 Installation Instructions. Outdoor Installation. Unpack the equipment carefully and check all components are complete. Layout all components so each may be identified. Please retain this installation instruction document for future reference.
- Page 3 Therma V R32 Installation Instructions. Outdoor Installation – Bill of Materials. The LG controller comes packed within the Heat Pump.
- Page 4 The Tank Kit allows for connection and control of the immersion heater, The Tank Kit may be pre fix ed to the tank or may be wall mounted. The LG controller has the ability to perform the sterilization process, via the Tank Kit(Relay), date, time, temperature and hold parameters may be set.
- Page 5 Therma V R32 Installation Instructions. Outdoor Installation. • Prepare a strong and level base. • Place on 3 anti vibration feet, & anchor to base. • Ensure the unit is 300mm from the wall. • The flow & return connections are 1” male.
- Page 6 Heating Only – 5, 7 & 9kW. *Please see note below *:- It is possible to use the LG controller as a room thermostat in this application control of the pump after the buffer tank, will be done by the heat pump : (TB_EXT_PUMP)
- Page 7 Heating Only – 12, 14 & 16kW. *Please see note below *:- It is possible to use the LG controller as a room thermostat in this application control of the pump after the buffer tank, will be done by the heat pump : (TB_EXT_PUMP)
- Page 8 Therma V R32 Installation Instructions. Installation Wiring. Heating Only – 5, 7, 9, 12, 14 & 16kW. (TB_EXT_PUMP)
- Page 9 Therma V R32 Installation Instructions. Installation Schematic. DHW & Heating with 1 Zone – 5, 7 & 9kW.
- Page 10 Therma V R32 Installation Instructions. Installation Schematic. DHW Pre Plumb & Heating with 1 Zone – 5, 7 & 9kW.
- Page 11 Therma V R32 Installation Instructions. Installation Schematic. DHW & Heating with 1 Zone – 12, 14 & 16kW.
- Page 12 Therma V R32 Installation Instructions. Installation Schematic. DHW Pre Plumb & Heating with 1 Zone – 12, 14 & 16kW.
- Page 13 Therma V R32 Installation Instructions. Installation Schematic. DHW & Heating with 2 Zone’s – 5, 7 & 9kW.
- Page 14 Therma V R32 Installation Instructions. Installation Schematic. DHW Pre Plumb & Heating with 2 Zone’s – 5, 7 & 9kW.
- Page 15 Therma V R32 Installation Instructions. Installation Schematic. DHW & Heating with 2 Zone’s – 12, 14 & 16kW.
- Page 16 Therma V R32 Installation Instructions. Installation Schematic. DHW & Heating, Rad’s & UFH 2 Zone – 12, 14 & 16kW.
- Page 17 Therma V R32 Installation Instructions. Installation Schematic. DHW Pre Plumb & Heating with 2 Zone’s – 12, 14 & 16kW.
- Page 18 Therma V R32 Installation Instructions. Installation Wiring. DHW & Heating with 2 Zone’s – 12, 14 & 16kW. DHW & Heating 5, 7, 9, 12, 14 & 16kW.
- Page 19 Therma V R32 Installation Instructions. Installation Schematic. DHW & Boiler with Two Heating Zone’s – 12, 14 & 16kW.
- Page 20 Therma V R32 Installation Instructions. Installation Wiring. DHW & Heating with 2 Zone’s – 12, 14 & 16kW. Boiler, DHW & Heating 5, 7, 9, 12, 14 & 16kW. (TB_EXT_BOILER) Within installer settings, Change to ON LR – Live Return Boiler LS –...
- Page 21 Therma V R32 Installation Instructions. Installation Schematic. DHW with 2 Heat Pumps – 12, 14 & 16kW.
- Page 22 Therma V R32 Installation Instructions. Installation Wiring. DHW 2 Heat Pumps – 12, 14 & 16kW.
- Page 23 Therma V R32 Installation Instructions. Installation – Mains Power Cable. • RCD – Type C. • Rotary Enclosed Isolation switch – IP65. • Mandatory electricity meter fitted within an enclosed box. • Ensure power cable does not touch refrigerant pipework.
- Page 24 Therma V R32 Installation Instructions. Installation – Terminal Block 1. Honeywell 3 Way Valve(V4044c) – 2 Wire. • Terminal 8 – L – Port A - DHW Cylinder. Port B - Buffer Tank. (230V when DHW demand) • Terminal 10 – Neutral.
- Page 25 Therma V R32 Installation Instructions. Installation – Terminal Block 3. 230V 2 Pole Relay Please see wiring diagram, Slides 26 & 27.
- Page 26 Therma V R32 Installation Instructions. Installation Wiring. Relay Example...
- Page 27 Therma V R32 Installation Instructions. Installation Wiring. Relay Example...
- Page 28 Therma V R32 Installation Instructions. Installation – Antifreeze Solution Temp. • If Antifreeze is added to the hydraulic system water then the antifreeze solution temp can be adj usted in the installer settings. (The setting is not visible normally, method is described later) •...
- Page 29 Therma V R32 Installation Instructions. Installation – Antifreeze Solution Temp. • It is the responsibility of the installer to ensure the correct amount of antifreeze additive is applied to the water system to protect the product against water temperatures below 0℃.
- Page 30 Therma V R32 Installation Instructions. Installation – Antifreeze Solution Temp. • Anti-freezing temperature setting is available in installer mode. Change the value from -5 to -10.
- Page 31 Therma V R32 Installation Instructions. Central Controller.
- Page 32 Therma V R32 Installation Instructions. DHW Installation • Remove lid/top of unit ( 5, 7 & 9kW units only • Feed the DHW water tank sensor into the back of the unit, shown in the diagram. • Connect the red connector to the main PCB( Top right hand side of unit) Terminal CN_TH4, the 7 terminal down, from the top right.
- Page 33 Therma V R32 Installation Instructions. DHW Installation – Tank Heater Wire from Heat Pump 6&7 Terminals to DHW Tank Kit Terminals 5&6. Wire from DHW Tank Kit Terminals 3&4 to immersion element in Tank. Wire CN_B/HEAT(A) to Top Terminal’s 6&7...
- Page 34 Therma V R32 Installation Instructions. Configuration - Dip Switches Antifreeze Logic – Dip switch 2 On(To the right) DHW – Dip switch 3 On(To the right) Room Thermostat Control( Field Supplied Dip switch 8 On(To the right), *When dip switch 8 is turned on, ALL HEATING functions are locked from the controller.
- Page 35 Therma V R32 Installation Instructions. Configuration – Installer Settings. Software Version Press the Right arrow to select:- Menu. Press Ok, “Settings” is shown. Press and Hold the UP arrow button for 3 seconds. 4 square boxed are shown Insert the Password – Shown in the bottom right corner (Software Version)
-
Page 36: Error Codes
Therma V R32 Installation Instructions. Error Codes. CH14 First two weeks: Blocked filters and/or air pockets Flow rate alarms are likely to occur during the first two weeks after commissioning; this is due to the formation of air-pockets which may occur and temporarily affect the flow-rate. In most cases, the air will migrate to the auto-air vents (AAV) and release without any requirement for intervention. - Page 37 Therma V R32 Installation Instructions. Configuration – Installer Setting...
- Page 38 Therma V R32 Installation Instructions. Configuration – Installer Setting Rads – 50degC UFH – 40degC...
- Page 39 Therma V R32 Installation Instructions.