Sony BC-VM10 Operating Instructions
Hide thumbs
Also See for BC-VM10:
- Instruction & operation manual (2 pages) ,
- Operating instructions (2 pages) ,
- User manual
Available languages
Available languages
Quick Links
Battery Charger
Chargeur de Batterie
Operating Instructions
Mode d'emploi
BC-VM10
© 2011 Sony Corporation Printed in China
ˎ
The BC-VM10 battery charger can only be used to charge an
"InfoLITHIUM" battery pack (M series).
ˎ
"InfoLITHIUM" battery packs (M series) have the
ˎ
This unit cannot be used to charge a nickel cadmium type or nickel
metal hydride type battery pack.
ˎ
"InfoLITHIUM" is a trademark of Sony Corporation.
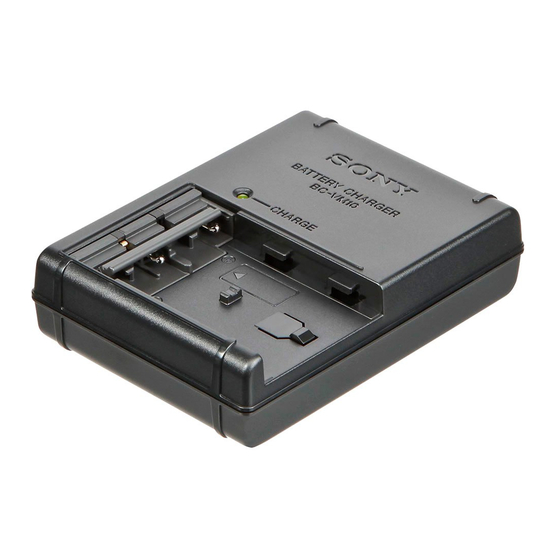
CHARGE lamp
Charger mark
4-289-308-11(1)
Thank you for purchasing the Sony Battery charger.
Before operating this Battery charger, please read this manual thoroughly
and retain it for future reference.
Owner's Record
The model and serial numbers are located on the bottom. Record the
serial number in the space provided below. Refer to these numbers
whenever you call upon your Sony dealer regarding this product.
Model No. BC-VM10
WARNING
To reduce fire or shock hazard, do not expose the unit to rain or moisture.
Do not expose the batteries to excessive heat such as sunshine, fire or the
like.
To reduce the risk of fire or electric shock,
1) do not expose the unit to rain or moisture.
2) do not place objects filled with liquids, such as vases, on the apparatus.
IMPORTANT SAFETY
INSTRUCTIONS
-SAVE THESE INSTRUCTIONS
DANGER
TO REDUCE THE RISK OF FIRE OR
ELECTRIC SHOCK, CAREFULLY
FOLLOW THESE INSTRUCTIONS
ˋ
If the shape of the plug does not fit the power outlet, use an attachment
plug adaptor of the proper configuration for the power outlet.
ˋ
This power unit is intended to be correctly orientated in a vertical or
floor mount position.
The nameplate indicating operating voltage, power consumption, etc. is
located on the bottom.
Battery to be recharged for this product is follows
Brand Name
Battery Type
Rating
(Typical Capacity)
CAUTION
mark.
ˎ
Use the nearby wall outlet (wall socket) when using this unit.
Even when the CHARGE lamp of this unit is off, the power is not
disconnected. If any trouble occurs while this unit is in use, unplug it
from the wall outlet (wall socket) to disconnect the power.
ˎ
Do not use this unit in a narrow space such as between a wall and
furniture.
PRECAUTION
The set is not disconnected from the AC power source (mains) as long
as it is connected to the wall outlet (wall socket), even if the set itself has
been turned off.
Power plug
NOTICE FOR THE CUSTOMERS IN THE U.S.A.
CAUTION
You are cautioned that any changes or modifications not expressly
approved in this manual could void your authority to operate this
equipment.
NOTE
This equipment has been tested and found to comply with the limits for a
Battery pack
Class B digital device, pursuant to Part 15 of the FCC Rules. These limits
are designed to provide reasonable protection against harmful
interference in a residential installation. This equipment generates, uses,
and can radiate radio frequency energy and, if not installed and used
in accordance with the instructions, may cause harmful interference to
radio communications.
Battery mark
However, there is no guarantee that interference will not occur in a
particular installation. If this equipment does cause harmful interference
to radio or television reception, which can be determined by turning
the equipment off and on, the user is encouraged to try to correct the
interference by one or more of the following measures:
ˋ
Reorient or relocate the receiving antenna.
ˋ
Increase the separation between the equipment and receiver.
ˋ
Connect the equipment into an outlet on a circuit different from that to
which the receiver is connected.
ˋ
Consult the dealer or an experienced radio/TV technician for help.
Notes on Use
This unit does not have dust-proof, splash-proof or water-proof
specifications.
Warranty for Recorded Content
Contents of the recording cannot be compensated if recording or
playback is not made due to a malfunction of the battery pack, battery
charger, etc.
Where not to place this unit
Do not place this unit in any of the following locations, whether it is in
use or in storage. Doing so may lead to a malfunction.
ˎ
In direct sunlight such as on dashboards or near heating apparatus, as
this unit may become deformed or malfunction
ˎ
Where there is excessive vibration
ˎ
Where there is strong electromagnetism or radiant rays
ˎ
Where there is excessive sand
In locations such as the seashore and other sandy areas or where dust
clouds occur, protect this unit from sand and dust. There is a risk of
malfunction.
Precautions on Use
ˎ
Attach the battery pack firmly to this unit when charging the battery
pack.
ˎ
The battery terminal may be damaged if the battery pack is not
attached correctly.
ˎ
To protect the battery pack, remove it from this unit when charging is
completed.
ˎ
Do not drop or apply mechanical shock to this unit.
ˎ
Keep this unit away from TVs or AM receivers.
Noise from this unit may enter a TV or radio if placed nearby.
ˎ
Unplug this unit from the wall outlet (wall socket) after use. Hold this
unit when you unplug it from the wall outlet (wall socket).
ˎ
Be sure that nothing metallic comes into contact with the metal parts of
this unit. If it does, a short may occur and this unit may be damaged.
ˎ
The battery pack and this unit can become warm during or
immediately after recharging.
Maintenance
ˎ
If this unit gets dirty, wipe it using a soft dry cloth.
ˎ
If this unit gets very dirty, wipe it using a cloth with a little neutral
solvent added, and then wipe it dry.
ˎ
Do not use thinners, benzine, alcohol, etc., as they will damage the
surface of this unit.
ˎ
When you use a chemical cleaning cloth, refer to its instruction
manual.
ˎ
Using a volatile solvent such as an insecticide or keeping this unit
in contact with a rubber or vinyl product for a long time may cause
deterioration or damage to this unit.
To Charge the Battery Pack
1 Attach the battery pack.
Keeping the battery mark in the same direction as the charger mark
, insert the battery pack until it clicks into place. (See illustration
).
2 Pull the power plug up, and then connect it to a wall outlet
(wall socket).
Always connect the power plug with the prongs at the top (See
illustration ).
Do not connect the power plug with the prongs at the bottom (See
illustration ).
The CHARGE lamp (orange) lights up and charging begins.
When the CHARGE lamp goes out, normal charging is completed
(Normal charge).
For a full charge, which allows you to use the battery pack longer than
usual, leave the battery pack in place for approximately another one
hour (Full charge).
Serial No.
Sony
NP-FM500H
NP-FM50
NP-QM71D
NP-QM91D
DC 7.2 V
DC 7.2 V
DC 7.2 V
DC 7.2 V
11.8 Wh
8.5 Wh
19.9 Wh
29.8 Wh
(1,650 mAh)
(1,180 mAh)
(2,760 mAh)
(4,140 mAh)
To remove the battery pack
Remove the battery pack by sliding it in the opposite direction to when
you attached it and lifting it straight out.
Charging time
Battery pack
NP-FM500H NP-FM50
Normal
charging time
175 min
130 min
(Approx.)
ˎ
For more about the battery life, see the instruction manual of your
camera.
ˎ
The charging time may differ depending on the condition of the battery
pack or the ambient temperature.
ˎ
The times shown are for charging an empty battery pack, which
has been run down with a camera, using this unit at an ambient
temperature of 25 °C (77 °F).
Charging temperature
The temperature range for charging is 0 °C to 40 °C (32 °F to 104 °F).
For maximum battery efficiency, the recommended temperature
range when charging is 10 °C to 30 °C (50 °F to 86 °F).
To use the battery pack quickly
You can remove the battery pack from this unit and use it even if
charging is not completed. However, the charging time affects the time
that the battery pack can be used.
Notes
ˎ
If the CHARGE lamp does not light up, check if the battery pack is
firmly attached to this unit.
ˎ
When a fully charged battery pack is installed, the CHARGE lamp
lights up once and then goes out.
ˎ
A battery pack that has not been used for a long time may take longer
than usual to charge.
You can use the battery charger in any country/region where the
power supply is from 100 V to 240 V AC, 50 Hz/60 Hz.
Do not use an electronic voltage transformer, as this may cause a
malfunction.
Troubleshooting
When the CHARGE lamp blinks, check through the following chart.
The CHARGE lamp blinks in two ways.
Blinks slowly: Turns on and off repeatedly every 1.5 seconds
Blinks quickly: Turns on and off repeatedly every 0.15 seconds
The action to be taken depends on the way the CHARGE lamp blinks.
When the CHARGE lamp keeps blinking slowly
Charging is pausing. This unit is in the standby state.
If the room temperature is out of the appropriate temperature range,
charging stops automatically.
When the room temperature returns to the appropriate range, the
CHARGE lamp lights up and charging restarts.
We recommend charging the battery pack at 10 °C to 30 °C (50 °F to
86 °F).
When the CHARGE lamp keeps blinking quickly
When charging the battery pack for the first time in one of the
following situations, the CHARGE lamp may blink quickly.
If this happens, remove the battery pack from this unit, reattach it and
charge it again.
When the battery pack is left for a long time
When the battery pack is left installed in the camera for a long time
Immediately after purchase
If the CHARGE lamp keeps blinking quickly, check through the following
chart.
Remove the battery pack that is being charged and then rmly attach the same
battery pack again.
The CHARGE lamp blinks again:
The CHARGE lamp lights up and
Install another battery pack.
does not blink again:
If the CHARGE lamp goes out
because the charging time has
passed, there is no problem.
The CHARGE lamp blinks again:
The CHARGE lamp lights up and
e problem is with this unit.
does not blink again:
If the CHARGE lamp goes out
because the charging time has
passed, the problem is with the
battery pack rst installed.
Please contact your nearest Sony dealer in connection with the product that may
have a problem.
Specifications
Input rating
100 V - 240 V AC 50 Hz/60 Hz
14 VA - 20 VA 9 W
Output rating
Battery charge terminal:
8.4 V DC 750 mA
Operating temperature 0 °C to 40 °C (32 °F to 104 °F)
Storage temperature
–20 °C to +60 °C (–4 °F to +140 °F)
Dimensions (Approx.) 70 mm × 25 mm × 95 mm (w/h/d)
(2 7/8 in. × 1 in. × 3 3/4 in.)
Mass
Approx. 90 g (3.2 oz)
Included items
Battery Charger (BC-VM10A) (1)
Set of printed documentation
Design and specifications are subject to change without notice.
NP-QM71D NP-QM91D
280 min
465 min

Related Manuals for Sony BC-VM10


Summary of Contents for Sony BC-VM10
-
Page 1: Charging Time
ˋ Consult the dealer or an experienced radio/TV technician for help. Please contact your nearest Sony dealer in connection with the product that may Notes on Use have a problem. This unit does not have dust-proof, splash-proof or water-proof specifications. - Page 2 ˎ Le chargeur de batterie BC-VM10 ne peut être utilisé que pour Pour charger la batterie charger les batteries « InfoLITHIUM » (série M). Merci pour l’achat de ce chargeur de batterie Sony. rechargeable ˎ Les batteries « InfoLITHIUM » (série M) portent la marque Avant d’utiliser ce chargeur de batterie, veuillez lire attentivement ce...