Table of Contents
- 1 Important Safety Instructions
- 2 Important Notes
- 3 Fcc Information
- 4 Preparation for Use
- 5 Package Contents
- 6 Location of Controls and Indicators
- 7 Charging the Unit
- 8 Setting the Time Manually
- 9 Setting the Alarm
- 10 Listening to FM Radio
- 11 Hands Free Function
- 12 Care and Maintenance
- 13 Troubleshooting
- 14 Serial Number
Table of Contents

Related Manuals for Emerson ER-X300


Summary of Contents for Emerson ER-X300
- Page 1 Bluetooth Speaker with Wireless Charger, Phone Rest that Extends and Rotates, USB Charger, FM Radio, Alarm Clock and 10 Watt Stereo ER-X300 Visit our website at www.emersonradio.com...
-
Page 2: Important Safety Instructions
WARNING IMPORTANT SAFETY INSTRUCTIONS ■ Read these instructions. Keep these instructions. Follow all instructions. Heed all warnings. – Do not use this apparatus near water. – Never remove the casing of this product. – Never lubricate any part of this product. Clean only with dry cloth. -
Page 3: Important Notes
◼ BUILT-IN BATTERY CARE: • Please observe the following if the product contains a battery. • Your product is powered by a rechargeable battery. The full performance of a new battery is achieved only after two or three complete charge and discharge cycles. •... -
Page 4: Preparation For Use
20 cm between the radiator and your body, and fully supported by the operating and installation configurations of the trans and its antenna(s). Thank you for purchasing this Emerson Strong Bass Portable Bluetooth Speaker ER- X300. If you encounter any problems with the set up or operation of this item, please call the 1-800-898-9020 Emerson Consumer Products Corp., Customer Service Hotline, toll free, at... -
Page 5: Package Contents
Package Contents ER-X300 x 1 pc Owner’s Manual x 1 pc USB cable x 1 pc DC5V/2.4A USB Adaptor x 1 pc Location of Controls and Indicators 1. Phone Rest Adjustable Arm AM Indicator (12-Hour) 2. Wireless Charging Platform PM Indicator (12-Hour) -
Page 6: Charging The Unit
Charging the Unit 1. Connect the USB cable with one end (micro USB) plugged into the micro USB connector at the back of the unit, and the other end (standard USB) plugged into the output port of the DC5V/2.4A USB Adaptor provided. 2. -
Page 7: Setting The Alarm
Setting the Alarm Setting the Alarm NING 1. Press and hold the button to have the display “Flashes” Hour (Clock Hour). 2. Press the button to have the display “Flashes” Minutes (Clock Minutes). 3. Press the button again to enter into “Alarm Time Set” mode to have the display “Flashes” Alarm Hour. -
Page 8: Listening To Fm Radio
• Enable your Bluetooth device and select ER-X300 from its Available / Paired device list. If pairing successful, the unit will have quick 4-beat sound prompt out and indicator on front screen will then light up and become solid. • Automatic connection with your Bluetooth devices is possible if they have been paired successfully with this unit before. - Page 9 point discarded. • Press the Tune Down or Tune Up button to adjust volume. • When done listening, press the button to switch to either Bluetooth mode or AUX function. Or press and hold the Power button to turn the unit Off. Note: •...
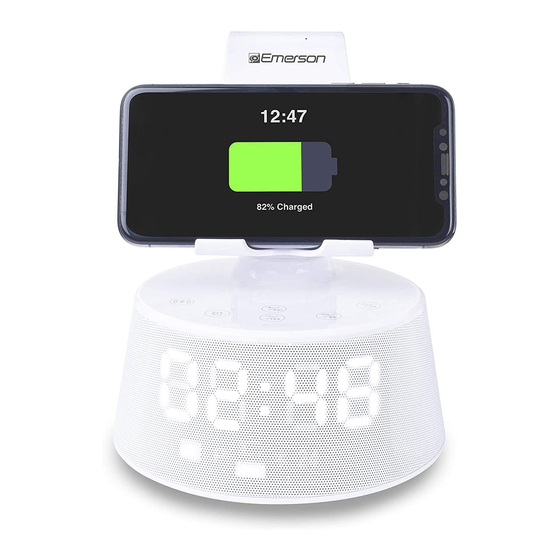
- Page 10 marked with the logo . The center of your smartphone must be positioned properly right in the middle of this charging zone in order to maximize its charging efficiency. • The Blue LED indicator will light up indicating that it is wireless charging your smartphone. To ensure wireless charging performs properly, check the charging icon and/or charging message displays on your smartphone.
-
Page 11: Hands Free Function
4-Level Dimmer Control Press the Dimmer button while in standby mode and select any of the four levels. It also can be adjusted when the Bluetooth, Radio, AUX and Wireless Charging On. Hands Free Function Handsfree is functioning while Bluetooth successfully paired. •... -
Page 12: Care And Maintenance
UNIT DOESN’T RESPOND (NO POWER) • Make sure unit is completely charged. Check that all connections are correct and properly plugged in. Make sure your device is properly paired with the ER-X300. RESETTING THE UNIT • If the unit does not respond properly or appears to be “frozen”, unfold a paperclip and insert the end of the object into the AUX hole where the reset button resides. - Page 13 If the item incurs damage, it will NOT be replaced and the consumer will be responsible for return freight costs to receive their same unit back. Enclose your check or money order payable to Emerson Radio in the amount of $10 to cover return shipping and handling costs.
-
Page 14: Serial Number
The serial number can be found on the bottom cabinet. We suggest that you record the serial number of your unit in the space below for future reference. Model Number: ER-X300 Serial Number: _______________________________ ****** S E R V I C E ******...