
Related Manuals for Whirlpool ACMK 6333/IX


Summary of Contents for Whirlpool ACMK 6333/IX
- Page 1 ACMK 6333/IX...
-
Page 2: Table Of Contents
English Operating Instructions ﺗﻌﻠﻴﻤﺎت اﻟﺘﺸﻐﻴﻞ COOKER AND OVEN ﻃ ﺒ ّﺎخ Contents اﻟﻤﺤﺘﻮﻳﺎت Operating Instructions,2 SAFETY INSTRUCTIONS ﺗﻌﻠﻴﻤﺎت اﻟﺘﺸﻐﻴﻞ Description of the appliance-Overall view,11 وﺻﻒ اﻟﺠﻬﺎز Description of the appliance-Control Panel,11 Installation,12 ﻧﻈﺮة ﻋﺎﻣﺔ Start-up and use,17 وﺳﺎﺋﻞ ﺣﺬر وﻧﺼﺎﺋﺢ Clock/Minute Minder Operation,20 Care and maintenance,22... -
Page 3: Safety Instructions
Before using the appliance carefully read Health and Safety and Use and Care guides. Keep these instructions close at hand for future reference. These instructions shall also be available on website: www.whirlpool.eu SAFETY OF OTHERS IS VERY IMPORTANT Y OUR SAFETY This manual and the appliance itself provide important safety warnings, to be read and observed at all times. - Page 4 INTENDED USE OF THE PRODUCT - This appliance is designed solely for domestic usage. No other use is permitted (e.g. heating rooms). To aim the appliance as professional use is forbidden. The manufacturer declines all responsibility for innapropriate use or incorrect setting of the controls. - This appliance is intended to be used in household and similar applications such as : - Staff kitchen areas in shops, offices and other working environments;...
- Page 5 - The power cable must be long enough for connecting the appliance, once fitted in its housing, to the main power supply. - Do not pull the power supply cable. - If the power cable is damaged it must be replaced with an identical one. The power cable must only be replaced by a qualified technician in compliance with the manufacturer instruction and current safety regulations.
- Page 6 - For further information on the treatment, recovery and recycling of household electrical appliances, contact your competent local authority, the c ollection service for household waste or the store where you purchase the appliance. - This appliance is marked in compliance with European Directive 2012/19/EU, Waste Electrical and Electronic Equipment (WEEE).
- Page 7 ﺑﻴﺎﻧﺎﺕ ﺗﻘﻨﻴﺔ ﻣﻘﺎﻳﻴﺲ ﺍﻟﻔﺮﻥ 4,23×5,54×3,04 ﺳﻢ ()ﻃﻮﻝ×ﻋﺮﺽ×ﻋﻤﻖ 59 ﻟﺘﺮ ﺍﻟﺤﺠﻢ ﺍﻟﻌﺮﺽ 24 ﺳﻢ ﺍﻟﻤﻘﺎﻳﻴﺲ ﺍﻟﻤﻼﺋﻤﺔ ﻣﺘﻌﻠﻘﺔ ﺍﻟﻌﻤﻖ 44 ﺳﻢ ﺑﺤﺠﺮﺓ ﺍﻟﻔﺮﻥ ﺍﻻﺭﺗﻔﺎﻉ 5.8 ﺳﻢ ﺍﻧﻈﺮ ﻟﻮﺣﺔ ﺍﻟﺒﻴﺎﻧﺎﺕ ﺟﻬﺪ ﺗﺰﻭﻳﺪ ﺍﻟﻄﺎﻗﺔ ﻭﺗﺮﺩﺩﻩ ﻳﻤﻜﻦ ﻟﻠﻤﺤﺎﺭﻕ ﺃﻥ ﺗﻼﺋﻢ ﺍﺳﺘﺨﺪﺍﻡ ﺃﻱ ﻧﻮﻉ ﻣﻦ ﺍﻟﻐﺎﺯ ﺍﻟﻤﺒﻴﻦ ﻋﻠﻰ ﻟﻮﺣﺔ ﺍﻟﺒﻴﺎﻧﺎﺕ، ﺍﻟﻤﻮﺟﻮﺩﺓ ﺩﺍﺧﻞ ﺍﻟﺠﻨﺎﺡ...
- Page 8 ﻋﺮﺑﻲ اﻟﺘﻨﻈﯿﻒ واﻟﺼﯿﺎﻧﺔ ﺗﻨﻈﯿﻒ أو ﺻﯿﺎﻧﺔ ﻋﻠﯿﮫ اﻓﺼﻞ ﺟﮭﺎزك ﻋﻦ اﻟﻜﮭﺮﺑﺎء ﻗﺒﻞ إﺟﺮاء أﯾﺔ أﻋﻤﺎل ﻻ ﺗﺴﺘﺨﺪم أﺟﮭﺰة اﻟﺘﻨﻈﯿﻒ ﺑﺎﻟﺒﺨﺎر ﺗﺄﻛﺪ أن اﻟﺠﮭﺎز ﻣﻄﻔﺄ ﻗﺒﻞ اﺳﺘﺒﺪال اﻟﻤﺼﺒﺎح ﻟﺘﺠﻨﺐ اﺣﺘﻤﺎﻟﯿﺔ ﺣﺪوث ﺻﺪﻣﺔ ﻛﮭﺮﺑﺎﺋﯿﺔ ﻻ ﺗﺴﺘﺨﺪم اﻟﻤﻨﻈﻔﺎت اﻟﺨﺸﻨﺔ اﻟﻜﺎﺷﻄﺔ أو اﻟﻤﻜﺸﻄﺎت اﻟﻤﻌﺪﻧﯿﺔ اﻟﺤﺎدة ﻟﺘﻨﻈﯿﻒ زﺟﺎج ﺑﺎب اﻟﻔﺮن ﻷﻧﮭﺎ ﻗﺪ ﺗﺨﺪش اﻟﺴﻄﺢ ﻣﻤﺎ ﻗﺪ ﯾﺆدي إﻟﻰ ﺗﮭﺸﯿﻢ اﻟﺰﺟﺎج...
- Page 9 ﯾﺠﺐ ﺗﻨﻔﯿﺬ ھﺬه اﻹﺟﺮاءات ﺑﻮاﺳﻄﺔ ﻓﻨﻲ ﻛﮭﺮﺑﺎء ﻣﺆھﻞ ﺗﺤﺬﯾﺮ ﻞ اﻟﺠﮭﺎز ﺑﻐﺎز ﺳﺎﺋﻞ، ﯾﺠﺐ ﺷﺪ ﺑﺮﻏﻲ اﻟﺘﻨﻈﯿﻢ ﻗﺪر اﻟﻤﺴﺘﻄﺎع إذا ﺗﻢ ﺗﻮﺻﯿ ﻋﻤﻮدﯾﺎ ﻋﻨﺪ اﻋﺘﻤﺎد اﺳﻄﻮاﻧﺔ اﻟﻐﺎز، ﯾﺠﺐ أن ﺗﺴﺘﻘﺮ اﺳﻄﻮاﻧﺔ اﻟﻐﺎز أو ﻣﺴﺘﻮﻋﺐ اﻟﻐﺎز ﻛﻤﺎ ﯾﺠﺐ اﺳﺘﺨﺪم ﺧﺮطﻮﻣﺎ ﻣﻌﺪﻧﯿﺎ ﻣﺮﻧﺎ أو ﺻﻠﺒﺎ ﻟﺘﻮﺻﯿﻞ اﻟﻐﺎز ﯾﺠﺐ...
- Page 10 اﺣﺘﻔﻆ ﺑﮭﺬه اﻟﺘﻌﻠﯿﻤﺎت ﺑﺎﻟﻤﺘﻨﺎول ﻛﻤﺮﺟﻊ ﻣﺴﺘﻘﺒﻠﻲ اﻗﺮأ ﺗﻌﻠﯿﻤﺎت اﻟﺼﺤﺔ واﻟﺴﻼﻣﺔ واﻻﺳﺘﺨﺪام واﻟﻌﻨﺎﯾﺔ ﺑﺤﺬر ﻗﺒﻞ اﺳﺘﺨﺪام اﻟﺠﮭﺎز ﺗﺘﻮﻓﺮ ھﺬه اﻟﺘﻌﻠﯿﻤﺎت أﯾﻀﺎ ﻋﻠﻰ اﻟﻤﻮﻗﻊ اﻹﻟﻜﺘﺮوﻧﻲ www.whirlpool.eu ﻟﻠﻐﺎﯾﺔ ﺳﻼﻣﺘﻚ وﺳﻼﻣﺔ اﻵﺧﺮﯾﻦ ﻣﮭﻤﺔ ﯾﻮﻓﺮ ھﺬا اﻟﺪﻟﯿﻞ واﻟﺠﮭﺎز ﻧﻔﺴﮫ ﺗﺤﺬﯾﺮات ھﺎﻣﺔ ﻟﻠﺴﻼﻣﺔ، ﯾﺠﺐ ﻗﺮاءﺗﮭﺎ واﻟﺘﻘﯿﺪ ﺑﮭﺎ داﺋﻤﺎ...
-
Page 11: Description Of The Appliance-Overall View
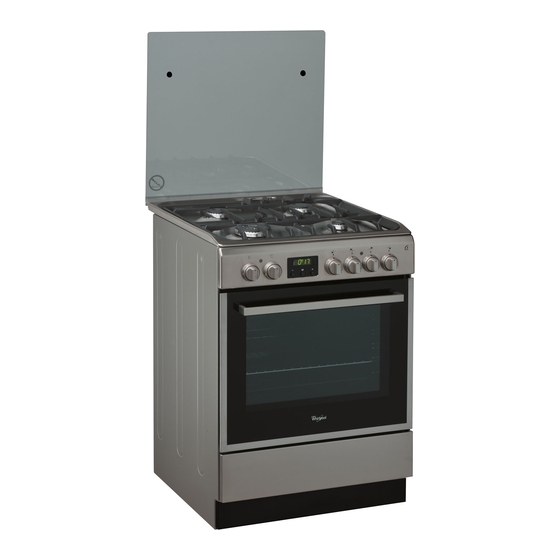
Description of the appliance Overall view Glass cover Gas burner Containment surface spills Hob grid GUIDE RAILS Control panel for the sliding racks position 5 RACK shelf position 4 position 3 DRIPPING PAN shelf position 2 position 1 Adjustable foot Adjustable foot Control panel M M M... -
Page 12: Installation
Installation After prolonged use of the appliance, it is Room ventilation advisable to open a window or increase the speed of any fans used. The appliance may only be installed in permanently- ventilated rooms, according to current national Disposing of combustion fumes legislation and any subsequent amendments in force. - Page 13 Before connecting the appliance to the power • If the cooker is supply, make sure that: installed underneath a HOOD • The appliance is earthed and the plug is compliant wall cabinet, there must with the law. Min. be a minimum distance •...
- Page 14 Once the connection has been performed, make sure that the hose: • Does not come into contact with any parts which reach temperatures of over 50°C. • Is not subject to any pulling or twisting forces and that it is not kinked or bent. •...
- Page 15 Adapting to different types of gas Replacing the Triple ring burner nozzles 1. Remove the pan supports and lift the burners out of It is possible to adapt the appliance to a type of gas their housing. The burner consists of two separate other than the default type (this is indicated on the parts (see pictures).
- Page 16 Safety Chain In order to prevent accidental tipping of the ACMK 6333/IX appliance, for TC A example by a child clim- bing onto the oven door, the supplied safety chain MUST be installed! The cooker is fitted with a safety chain to be fixed by...
-
Page 17: Start-Up And Use
Start-up and use Using the hob Advice when using burners For the burners to work in the most efficient way Lighting the burners possible and to save on the amount of gas For each BURNER knob there is a complete ring consumed, it is recommended that only pans which showing the strength of the flame for the relevant have a lid and a flat base are used. - Page 18 Cooking modes All cooking modes have a default cooking temperature which may be adjusted manually to a value between 40°C and 250°C as desired. THERMOSTAT indicator light When this is illuminated, the oven is generating heat. It switches off when the inside of the oven reaches the selected temperature.
- Page 19 Practical cooking advice The oven is In the GRILL cooking mode, place the dripping pan in provided with a stop sys- position 1 to collect cooking residues (fat and/or grease). tem to extract the racks and prevent them from GRILL coming out of the oven.(1) As shown in the drawing, •...
-
Page 20: Clock/Minute Minder Operation
Clock/Minute Minder Operation Programming cooking COOKING PROCESS A cooking mode must be selected before icon programming can take place. DISPLAY •• •• Programming the cooking duration AUTO button several times until icon 1. Press the icon TIMER icon and the DUR digits on the DISPLAY begin to flash. 2. - Page 21 Oven cooking advice table Cooking Foods Weight Rack Position Pre-heating Recommended Cooking modes (in kg) time temperature time (minutes) (minutes) Duck 65-75 Roast veal or beef 70-75 Traditional Pork roast 70-80 Oven Biscuits (short pastry) 15-20 Tarts 30-35 Pizza (on 2 racks) 2 and 4 15-20 Lasagne...
-
Page 22: Care And Maintenance
Care and maintenance Replacing the oven light bulb Switching the appliance off 1. After disconnecting the oven Disconnect your appliance from the electricity from the electricity mains, remove supply before carrying out any work on it. the glass lid covering the lamp socket (see fi gure). - Page 23 Removing and fitting the oven door: 7.Replace the profile, a click will indicate that the part is positioned correctly. 1.Open the door 8.Open the door completely. 9.Close the supports (see photo). 2.Make the hinge clamps of the oven door rotate backwards completely (see photo) 40°...
- Page 24 فك وإعادة تركيب باب الفرن أفتح الباب انظ ر الص ورة مفصالت باب الفرن بالكامل إلى ال وراء تثبيت ات وحد قم بإدارة في فصل فك الباب الموجودة بالفعل الصورة درج ة س وف يظ ل الب اب مفتو ح ً ا ح والي وح...
- Page 25 وﺳﺎﺋﻞ ﺣﺬر وﻧﺼﺎﺋﺢ • ﻻ ﺗﻘﻢ ﺑﺄي ﻋﻤﻠﻴﺔ ﺗﻨﻈﻴﻒ أو ﺻﻴﺎﻧﺔ دون ﻓﺼﻞ اﻟﺠﻬﺎز ﻋﻦ ﺷﺒﻜﺔ اﻟﻜﻬﺮﺑﺎء .ﺗﻢ ﺗﺼﻤﻴﻢ ﻫﺬا اﻟﺠﻬﺎز وﺗﺼﻨﻴﻌﻪ ﻃﺒﻘﺎ ﻟﻤﻮاﺻﻔﺎت اﻷﻣﺎن اﻟﻌﺎﻟﻤﻴﺔ .اﻟﺮﺋﻴﺴﻴﺔ .ﻳﺘﻢ ﺗﺰﻳﻮد اﻟﺘﺤﺬﻳﺮات اﻟﺘﺎﻟﻴﺔ ﻷﺳﺒﺎب وﻗﺎﺋﻴﺔ وﻳﺠﺐ ﻗﺮاءﺗﻬﺎ ﺑﻌﻨﺎﻳﺔ • إذا ﺗﻌﻄ ّ ﻞ اﻟﺠﻬﺎز، ﻋﻠﻴﻚ أﻻ ﺗﺤﺎول، ﺑﺄي ﺣﺎل ﻣﻦ اﻷﺣﻮال، إﺟﺮاء اﻟﻮﻗﺎﻳﺔ...
- Page 26 ﺟﺪول ﻧﺼﺎﺋﺢ اﻟﻄﻬﻲ ﻓﻲ اﻟﻔﺮن وقت الطهي درجة الحرارة الموصى وقت اإلحماء وضع الصينية الوزن أطعمة أساليب الطهي )(دقائق بها )المسبق (بالدقائق )(بالكجم 65-75 بط 70-75 لحم خروف أو لحم بقري مشوي الفرن التقليدي 70-80 لحم خنزير مشوي 15-20 )البسكويت (معجنات صغيرة 30-35 التورتات...
- Page 27 تشغيل مراقب الساعات/الدقائق أيقونة عملية الطهي !برمجة الطهي .يجب اختيار وضع الطهي قبل أن تتم البرمجة الشاشة •• •• أيقونة التلقائي برمجة مدة الطهي أيقونة المؤقت بالوميضDUR عدة مرات إلى أن تبدأ أيقونة وخانات اضغط على زر .على الشاشة زر...
- Page 28 سيتم تشغيل كل من عنصري التسخين العلوي والسفلي عند استخدام نمط الطهي التقليدي، من األفضل استخدام رف واحد نمط الفرن التقليدي للطهي فقط. إذا تم استخدام أكثر من رف، يتم توزيع التسخين .بطريقة غير متساوية يتم تشغيل كافة عناصر التسخين (العلوية والسفلية والدائرية) وتبدأ ،المروحة...
- Page 29 اﻟﺘﺸﻐﻴﻞ واﻻﺳﺘﺨﺪام ّ اﺳﺘﺨﺪام اﻟﺮف ( ﻗﻄﺮ إﻧﺎء اﻟﻄﺒﺦ )ﻣﻠﻢø اﻟﻤﺤﺮق إﺷﻌﺎل اﻟﻤﺤﺎرق 24-26 (R) ﺳﺮﻳﻊ .ﻳﻮﺟﺪ ﻟﻜﻞ ﻣﻔﺘﺎح ﻣﺤﺮق ﺣﻠﻘﺔ ﻛﺎﻣﻠﺔ ﺗﺒﻴﻦ ﻗﻮة اﻟﻠﻬﺐ ﻟﻠﻤﺤﺮق اﻟﻤﻼﺋﻢ 16-20 (S) ﻧﺼﻒ ﺳﺮﻳﻊ :ﻹﺷﻌﺎل أﺣﺪ اﻟﻤﺤﺎرق ﻓﻲ اﻟﺮف .1. ﺿﻊ ﻣﺼﺪر إﺷﻌﺎل أو ﻗﺪاﺣﺔ ﻏﺎز ﻗﺮﻳﺒﺎ ﻣﻦ اﻟﻤﺤﺮق (A) إﺿﺎﻓﻲ...
- Page 30 ل ، فمن المستهلكة كمية الغاز انقاذ على و شقة و غطاء التي لديها فقط المقالي أوصت بأن ACMK 6333/IX لحجم أن تكون مناسبة وينبغي أيضا .القاعدة وتستخدم TC A الموقد اﻟﻐﺎز اﻟﻄﺒﻴﻌﻲ اﻟﻐﺎز اﻟﺴﺎﺋﻞ 1 اﻟﺠﺪول *اﻟﺘﺪﻓﻖ اﻟﻔﻮﻫﺔ *اﻟﺘﺪﻓﻖ...
- Page 31 :ﺿﺒﻂ اﻹﻋﺪاد اﻷدﻧﻰ ﻟﻤﺤﺎرق اﻟﺮف .• أﻧﻪ ﻳﺴﻬﻞ ﺗﻔﻘﺪﻩ ﻋﻠﻰ ﻃﻮل اﻣﺘﺪادﻩ ﺑﺤﻴﺚ ﻳﻜﻮن ﺑﺎﻹﻣﻜﺎن ﻓﺤﺺ ﺣﺎﻟﺘﻪ .1. أدر اﻟﺤﻨﻔﻴﺔ إﻟﻰ اﻟﻮﺿﻊ اﻷدﻧﻰ .• أﻧﻪ أﻗﺼﺮ ﻣﻦ 0051 ﻣﻠﻢ 2. أﺧﺮج اﻟﻤﻔﺘﺎح واﺿﺒﻂ ﺑﺮﻏﻲ اﻟﻤﻌﺎﻳﺮة، اﻟﻤﻮﺟﻮد داﺧﻞ أو إﻟﻰ ﺟﺎﻧﺐ ﻣﺤﻮر •...
- Page 32 • اﻟﺠﻬﺪ اﻟﻜﻬﺮﺑﺎﺋﻲ ﻓﻲ ﻧﻄﺎق ﻳﺘﺮاوح ﺑﻴﻦ اﻟﻘﻴﻢ اﻟﻤﺸﺎر إﻟﻴﻬﺎ ﻓﻲ ﻟﻮﺣﺔ .اﻟﺒﻴﺎﻧﺎت HOOD • أن اﻟﻤﻘﺒﺲ ﻣﺘﻮاﻓﻖ ﻣﻊ ﻗﺎﺑﺲ اﻟﺠﻬﺎز. إذا ﻟﻢ ﻳﻜﻦ اﻟﻤﻘﺒﺲ ﻣﺘﻮاﻓﻘﺎ ﻣﻊ اﻟﻘﺎﺑﺲ، أﻃﻠﺐ ﻣﻦ ﻓﻨﻲ ّ ﻣﺆﻫﻞ أن ﻳﻘﻮم ﺑﺘﻐﻴﻴﺮﻩ. ﻻ ﺗﺴﺘﺨﺪم ﻛﺒﻼت اﻟﺘﻤﺪﻳﺪ Min.
- Page 33 اﻟﺘﺨﻠﺺ ﻣﻦ دﺧﺎن اﻻﺣﺘﺮاق ﺗﻬﻮءة اﻟﻐﺮﻓﺔ ﻳﺠﺐ ﺿﻤﺎن اﻟﺘﺨﻠﺺ ﻣﻦ دﺧﺎن اﻻﺣﺘﺮاق ﺑﺎﺳﺘﺨﺪام ﺑﻮق ﻣﺘﺼﻞ ﺑﻤﺪﺧﻨﺔ .ﻳﺠﺐ ﺗﺮﻛﻴﺐ اﻟﺠﻬﺎز ﻓﻲ ﻏﺮف داﺋﻤﺔ اﻟﺘﻬﻮءة، وﻓﻘﺎ ﻟﻠﻤﻮاﺻﻔﺎت اﻟﻮﻃﻨﻴﺔ اﻟﺤﺎﻟﻴﺔ اﻣﺘﺼﺎص ﻃﺒﻴﻌﻴﺔ وﺁﻣﻨﺔ أو ﺑﺎﺳﺘﺨﺪام ﻣﺮوﺣﺔ ﻛﻬﺮﺑﺎﺋﻴﺔ ﺗﺒﺪأ ﺑﺎﻟﻌﻤﻞ أوﺗﻮﻣﺎﺗﻴﻜﻴﺎ ﻋﻠﻰ اﻟﻐﺮﻓﺔ اﻟﺘﻲ ﻳﺘﻢ ﺗﺮﻛﻴﺐ اﻟﺠﻬﺎز ﻓﻴﻬﺎ أن ﺗﻜﻮن ﻣﻬﻮءة ﻛﻤﺎ ﻳﻨﺒﻐﻲ ﻟﺘﻮﻓﻴﺮ اﻟﻘﺪر .(ﻛﻠﻤﺎ...
- Page 34 ﻧﻈﺮة ﻋﺎﻣﺔ *ﻏﻄﺎء زﺟﺎﺟﻲ ﻣﺤﺮق اﻟﻐﺎز ﻣﺴﻄﺢ اﻟﺘﻄﻮﻳﻖ ﻟﻠﺘﻨﺎﺛﺮ ﺷﺒﻜﺔ اﻟﺮف ﻣﺴﺎرات اﻟﺘﻮﺟﻴﻪ ﻟﻮﺣﺔ اﻟﺘﺤﻜﻢ ﻻﻧﺰﻻق اﻟﺮﻓﻮف 5 اﻟﻮﺿﻊ ﺣﺎﻣﻞ اﻟﻤﺸﻮاة 4 اﻟﻮﺿﻊ 3 اﻟﻮﺿﻊ ﺻﻴﻨﻴﺔ اﻟﺘﻨﻘﻴﻂ 2 اﻟﻮﺿﻊ 1 اﻟﻮﺿﻊ رﺟﻞ ﻗﺎﺑﻠﺔ ﻟﻠﻤﻌﺎﻳﺮة رﺟﻞ ﻗﺎﺑﻠﺔ ﻟﻠﻤﻌﺎﻳﺮة M M M ﻟﻮﺣﺔ...
- Page 36 Whirlpool EMEA S.p.A. Via Carlo Pisacane n.1 01/2016-19513986900 XEROX FABRIANO 20016 Pero (MI), Italy VAT number: IT00693740425 www.whirlpool.com...