Table of Contents
Quick Links
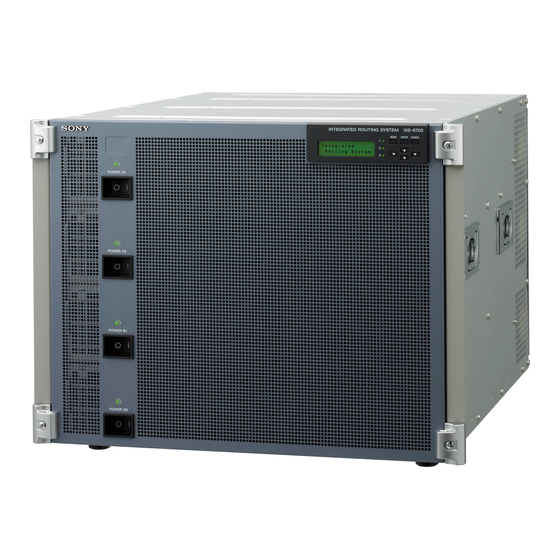
INTEGRATED ROUTING SYSTEM PACK
IXS-6600-C
IXS-6700-C
INTEGRATED ROUTING SYSTEM
IXS-6600
IXS-6700
IKS-6030M
IKS-A6013
IKS-A6061
IKS-V6010M
IKS-V6050SD
IKS-RS6010
IKS-TC6060
INSTALLATION MANUAL
1st Edition (Revised 7)
IKS-A6011
IKS-A6015
IKS-A6062
IKS-V6010SD
IKS-V6060M
IKS-RS6060
IKS-A6012
IKS-A6050
IKS-A6063
IKS-V6050M
IKS-V6060SD
IKS-TC6010
Table of Contents

Related Manuals for Sony IXS-6700-C


Summary of Contents for Sony IXS-6700-C
- Page 1 INTEGRATED ROUTING SYSTEM PACK IXS-6600-C IXS-6700-C INTEGRATED ROUTING SYSTEM IXS-6600 IXS-6700 IKS-6030M IKS-A6011 IKS-A6012 IKS-A6013 IKS-A6015 IKS-A6050 IKS-A6061 IKS-A6062 IKS-A6063 IKS-V6010M IKS-V6010SD IKS-V6050M IKS-V6050SD IKS-V6060M IKS-V6060SD IKS-RS6010 IKS-RS6060 IKS-TC6010 IKS-TC6060 INSTALLATION MANUAL 1st Edition (Revised 7)
- Page 2 ! WARNING This manual is intended for qualified service personnel only. To reduce the risk of electric shock, fire or injury, do not perform any servicing other than that contained in the operating instructions unless you are qualified to do so. Refer all servicing to qualified service personnel.
- Page 3 Attention-when the product is installed in Rack: For the customers in the Netherlands (For IXS-6600/IXS-6700) Voor de klanten in Nederland 1. Prevention against overloading of branch circuit Hoe u de batterijen moet verwijderen, leest u in de When this product is installed in a rack and is Onderhoudshandleiding.
-
Page 5: Table Of Contents
Table of Contents Manual Structure 2. Service Information Purpose of this manual ..............3 2-1. Error Display ..............2-1 2-1-1. Front Panel Status ..........2-1 Related manuals ................3 2-1-2. Error Indications and Countermeasures ....2-4 Trademarks ................... 3 2-1-3. CA Board Error Display ........ -
Page 7: Manual Structure
This manual describes the protocol for controlling this unit. The manual below is provided for the protocol that this unit can support. If this manual is required, please contact your local Sony Sales Office/Service Center. SONY ROUTING SWITCHER SYSTEM REMOTE1 (S-BUS/ROT16) PROTOCOL and COMMAND SPECIFICATIONS Part No.: 9-977-477-xx... -
Page 8: Terminology
Terminology . Routing Switcher Indicates the name of the product category. . Integrated Routing Switcher (IXS-6600/IXS-6700) This is the product name of IXS-6600/IXS-6700. The product category of the Integrated Routing Switcher belongs to Routing Switcher. . Routing Switcher System Indicates the configuration where multiple devices are connected to the Routing Switcher. -
Page 9: Installation
Section 1 Installation 1-1. Installation Procedure The following chart shows the procedure for installing the unit. For details of the following chart, refer to the relevant section or related manual. Start Selection of installation 1-2. Operating Environment place 1-3. Power Supply 1-4. -
Page 10: Operating Environment
. Areas subject where is subjected to static electricity. 1-3-2. Recommended Power Cord Ventilation The inside of the IXS-6700-C/IXS-6600-C (IXS-6000 series hereafter) is cooled by a fan (both sides). . Use the approved Power Cord (3-core mains lead)/Appli- The power supply can be damaged if the exhaust vent ance Connector/Plug with earthing-contacts that conforms to the safety regulations of each country if applicable. -
Page 11: Installation Space (External Dimensions)
1-4. Installation Space (External dimensions) 1-4-1. IXS-6700 Unit : mm IXS-6600/6700... -
Page 12: Ixs-6600
1-4-2. IXS-6600 Unit : mm IXS-6600/6700... -
Page 13: Installing The Options
1-5. Installing the Options The IXS-6700-C/IXS-6600-C is shipped from the factory with the necessary option boards (refer to the following table) already installed in accordance with the specified system configuration. The usable optional board is different depending on the type of signal to handle. - Page 14 IXS-6700/IXS-6600 Option List The following options are available for the IXS-6700/IXS-6600. Model name Board configuration Plug-in board Connector board IKS-6030M MX-112 Board Matrix Board IKS-V6050M DVP-39A Board HD/SD Video Router Processor Board IKS-V6050SD DVP-39B Board SD Video Router Processor Board IKS-V6010M CNI-24A Board 16 HD/SD Digital Video Input Board...
-
Page 15: Installing The Plug-In Boards
1-5-1. Installing the Plug-in Boards Installation Procedure 1. Turn off the main power of this unit (IXS-6700 or IXS-6600) and disconnect the AC power cord from the Be sure to turn off the POWER switch before starting outlet. installation work. 2. - Page 16 4. Remove the fixing screws (IXS-6700: 7 screws, IXS- 5. While the eject levers are opened as shown in the 6600: 5 screws) and remove the Extract PWB stopper illustration, insert the plug-in board into the board assembly. guide rail. B3 x 5 Extract PWB stopper (The illustration shows...
-
Page 17: Installing The Connector Board
1-5-2. Installing the Connector Board 6. While closing the eject levers in the direction of arrow 1, push in the plug-in board. 1. Remove the two screws and remove the blank panel. Store the removed blank panel in a safe place. B3 x 5 Blank panel B3 x 5... -
Page 18: Installing Iks-A6015
1-5-3. Installing IKS-A6015 IXS-6700 option Name of option Name of board Slot on the rear side IKS-A6015 is used by being mounted on IKS-A6011 (CNI-26 board) or IKS-A6012 (CNI-28 board). IKS-V6010M CNI-24A board IN1 to IN8 IKS-V6060M CNO-26A board OUT1 to OUT8 1. -
Page 19: Rack Mounting
1-6. Rack Mounting 1-6-2. Rack Mounting Procedure This section describes the rack mounting procedure using The IXS-6700/IXS-6600 is mounted in the 19-inch standard the RMM-10 rack mount kit. rack. To mount the IXS-6700/IXS-6600 in the rack, use the specified rack mount kit and follow the procedure described 1. - Page 20 3. Loosen the screws on the rear of the right and left 7. Align the groove of the rack tools at the sides of the adapters and adjust the length of the adapter according equipment with the rail, and slide the equipment to the to the depth of the rack.
-
Page 21: Matching Connectors
Use the following connectors and cables, or equivalents when connecting cables to the unit. Model name Panel indication Connector name Matching connector and cable Name Sony part No. IKS-6010M INPUT 1 to 16 BNC, 75 Z Belden 8281 coaxial IKS-6060M... -
Page 22: Input And Output Signals Of Connectors
1-8. Input and Output Signals of ALARM (*1) : D-sub Mini 15-pin, Female Connectors The input and output signals of the connectors at the rear panel are as follows. _ EXT VIEW _ Pin No. Signal name Input/Output Function 1-8-1. IXS-6700, IXS-6600 ALARM-3 Alarm drive-3 ALARM-1... -
Page 23: Iks-A6011
1-8-2. IKS-A6011 REMOTE2/ALARM (* * * * * 2) : D-sub 9-pin, Female AES/EBU INPUT 1 to 12 : D-sub 37-pin, Female _ EXT VIEW _ When it is set as REMOTE2 _ EXT VIEW _ Pin No. Signal name Input/Output Function Frame ground... - Page 24 AES/EBU INPUT 13 to 24 : D-sub 37-pin, Female AES/EBU INPUT 25 to 32 : D-sub 25-pin, Female _ EXT VIEW _ _ EXT VIEW _ Pin No. Signal name Function Pin No. Signal name Function AES/EBU IN 13 (+) AES/EBU INPUT AES/EBU IN 25 (+) AES/EBU INPUT...
-
Page 25: Iks-A6013
1-8-3. IKS-A6013 ANALOG AUDIO INPUT 5 to 8 : D-sub 25-pin, Female ANALOG AUDIO INPUT 1 to 4 : D-sub 25-pin, Female _ EXT VIEW _ Pin No. Signal name Function _ EXT VIEW _ ANALOG AUDIO ANALOG AUDIO IN 5 (+) INPUT Pin No. - Page 26 ANALOG AUDIO INPUT 9 to 12 : D-sub 25-pin, Female ANALOG AUDIO INPUT 13 to 16 : D-sub 25-pin, Female _ EXT VIEW _ _ EXT VIEW _ Pin No. Signal name Function Pin No. Signal name Function ANALOG AUDIO ANALOG AUDIO ANALOG AUDIO ANALOG AUDIO...
-
Page 27: Iks-A6061
1-8-4. IKS-A6061 AES/EBU OUTPUT 13 to 24 : D-sub 37-pin, Female AES/EBU OUTPUT 1 to 12 : D-sub 37-pin, Female _ EXT VIEW _ _ EXT VIEW _ Pin No. Signal name Function AES/EBU OUT 13 (+) AES/EBU OUTPUT Pin No. Signal name Function AES/EBU OUT 13 (_) -
Page 28: Iks-A6063
AES/EBU OUTPUT 25 to 32 : D-sub 25-pin, Female Pin No. Signal name Function AES/EBU OUT 34 (+) AES/EBU OUTPUT AES/EBU OUT 34 (_) Ground _ EXT VIEW _ 1-8-5. IKS-A6063 Pin No. Signal name Function AES/EBU OUT 25 (+) AES/EBU OUTPUT ANALOG AUDIO OUTPUT 1 to 4 : D-sub 25-pin, Female AES/EBU OUT 25 (_) - Page 29 ANALOG AUDIO OUTPUT 5 to 8 : D-sub 25-pin, Female ANALOG AUDIO OUTPUT 9 to 12 : D-sub 25-pin, Female _ EXT VIEW _ _ EXT VIEW _ Pin No. Signal name Function Pin No. Signal name Function ANALOG AUDIO ANALOG AUDIO ANALOG AUDIO ANALOG AUDIO...
-
Page 30: Iks-Rs6010/Iks-Rs6060
1-8-6. IKS-RS6010/IKS-RS6060 ANALOG AUDIO OUTPUT 13 to 16 : D-sub 25-pin, Female RS-422 INPUT 1 to 7 RS-422 OUTPUT 1 to : D-sub 9-pin, Female _ EXT VIEW _ Pin No. Signal name Function _ EXT VIEW _ ANALOG AUDIO ANALOG AUDIO When it is set as Master. -
Page 31: System Connection
1-9. System Connection 1-9-1. S-BUS Data Link The routing switcher system is connected with the S-BUS data link using a 75 Z coaxial cable. The main equipment of the S-BUS data link is shown in the table below. Type in S-BUS Model (function name) Quantity Function/role... - Page 32 The connection example of the S-BUS data link using the IXS-6700 as the primary station is shown. The IXS-6700 does not have the control function of the monitoring S-BUS system. Maximum 16 equipment : S-BUS Terminal Terminal : Signal system line Personal computer Personal computer : Ethernet...
- Page 33 Precautions for connection . For the controller and routing switcher that are used as the primary station, set the S/P selector switch on the CPU board (on the CA board for the IXS-6700/IXS-6600) to the “P” position. . For the controller and routing switcher that are used as the secondary station, set the M/S switch (S/P selector switch in the IXS-6700/IXS-6600) on the CPU board (on the CA board for the IXS-6700/IXS- 6600) to the “S”...
-
Page 34: Network Connection
1-9-2. Network Connection Primary station Station ID = 1 IP(Main):192.168.0.10 IP(Backup):192.168.0.11 IP:192.168.0.5 Install the terminal emulator IXS-6700/IXS-6600 such as BZR-240R/BZR-20/ BZR-21 Ethernet REMOTE1 A NETWORK B NETWORK A Ethernet Ethernet switch Secondary station Station ID = 2 IP(Main):192.168.0.20 IP(Backup):192.168.0.21 Secondary station Ethernet NETWORK A Station ID = 4... -
Page 35: Synchronous Signal For The Audio Signal
1-9-3. Synchronous Signal for the Audio Signal Synchronous signal to use and its setting When you are using the IKS-A6011/A6012/A6013/A6061/ A6062/A6063 (AES/EBU, ANALOG AUDIO input/output board), the synchronous signal is used in the following priority: 1. WORD SYNC IN terminal 2. -
Page 36: Description Of Leds
1-10. Setting the On-Board Switches and Description of LEDs The number shown in the parentheses ( ) indicates the address on the circuit board. 1. CA-65 boardD2215 D2214 D2208 D2201 D2217 D1801 S1201 S1204 D1102 S1202 D1103 D1104 D1315 S1203 D1203... - Page 37 D1103 (A-5): REM1 B TX D1320 (J-5) REMOTE1 connector S-BUS data send status indication Used only for production in the assembly factory. It turns Lights for a period of 0.015 seconds when the system sends off for normal operation. data to the data link through the REMOTE1 B1 or B2 D1504, D1503, D1502, D1501 (J-6): connector.
- Page 38 S1201 (B-3): Station ID/ Unit ID setting switch S1202 (B-4) 8-pin DIP switch 8-pin DIP switch Factory setting (\ indicates the switch lever position.) Factory setting (\ indicates the switch lever position.) BIT1 : Virtual matrix function valid/invalid Sets the station ID of the IXS-6700/IXS-6600 when the selector switch IXS-6700/IXS-6600 is connected to the S-BUS data link as Set this switch when you want to use the virtual matrix...
- Page 39 BIT4 : Unit ID/IP setting method selector switch BIT 8: USER-DEF switch Used to select the method of setting the IP address in the Used to select which setting to be enabled when the IXS- data link that is connected to the NETWORK connector. 6700/IXS-6600 is restarted.
- Page 40 BIT2, BIT3: S/P selector switch S1204 (A-4) : Test rotary switch ..BIT2 : REMOTE1 A connector Run the system with 0 (default) position of this switch..BIT3 : REMOTE1 B, C (B1, B2, C) connectors Used to assign the IXS-6700/IXS-6600 either to the Be aware that if S1204 is set to 8 or 9, the information primary station or to the secondary station when the IXS-...
-
Page 41
IF-844 Board 6. 7 : Not used Factory use only (valid only during startup)
Used for adjustment in the factory. If this mode is executed, all of the setting data are D1 (B-1): SRX deleted. Before executing this mode, implement the Lights in green about 0.015 second when it receives the backup of the setup data using the attached BZR-20 data from the S-BUS data link. -
Page 42
2. DAP-39 Board
D2002 D516 D517 D518 D2003 D1400 D2000 D1401 D2010 D1402 D800 D2013 D1100 D1600 D2012 D1800 D2011 D300 D200 D302 D202 D301 D201 S500 S501 S1100 S800 D511 D510 S2000 S100 D513 D514 D508 D1300 D1301 D503 D502 D1302... - Page 43 D1100 (A-4) : FPGA2 D2003 (A-3) : + + + + + 12 +12 V power operation status indication. Operation status indication of FPGA2 (IC1100). Lights : Operation in progress. Lights : Operation in progress. Turns off : Operation not in progress. Turns off : Operation not in progress.
-
Page 44
3. DVP-39 Board
D1 (A-3) : + + + + + 12 V_CTRL S1001 (A-11) : DIP SW Status indication of the +12 V power supply on the Used for production. Control CPU. Default setting when shipped from the factory is all OFF. Lights when the +12 V power on the control CPU is supplied. -
Page 45
4. IF-20 Board
D2302 D2202 D1318 D1301 D1308 D1316 D1314 D707 D706 D705 D704 D703 D702 D701 D709 D708 S701 D224 D223 D222 D103 D102 D101 D221 D220 D219 D106 D105 D104 D209 D208 D207 D118 D117 D116 D212 D211 D210 D115... - Page 46 D1316 (A-5) : + + + + + 5 V +5 V power supply status indication. Lights when the +5 V power is supplied. When the +12 V power supply is not supplied either to the main or control CPU, this LED does not light. D1318 (A-4) : + + + + + 12 V_MAIN Status indication of the +12 V power supply on the main CPU.
-
Page 47
5. MX-112 Board S7402 D7417 D7418 D7419 S8101 S8001 D8001 D8302 D8303 D8301 D8202 D8203 D8201 S7401 CPU-DK3
D8001 (A-6) : RESET status LED D1 (A-3) : + + + + + 12 V control Indicates the RESET status on the MX-112 board. +12 V control status indication. - Page 48 D8202 (A-7) : DEBUG Ethernet LINK Lights when a link is established via CN8201 (DEBUG Ethernet). D8203 (A-7) : DEBUG Ethernet ACT Lights when transmission or reception is in progress via CN8201 (DEBUG Ethernet). D8301 (A-6) : Internal Ethernet speed 10 Mbps/100 Mbps Indicates whether the communication speed of Ethernet for unit internal communication is 10 Mbps or 100 Mbps.
-
Page 49: Setting The Ip Address
1-11. Setting the IP Address 6. SG-281 BoardSetting the network connection (IP address) . If network setting is performed on the Main CPU board, D501 its values are automatically set in the backup CPU (CA- D502 D505 65) board. D504 . - Page 50 Setting procedure 1. Turn off the power of the IXS-6700/IXS-6600. 2. Connect the PC to the REMOTE3 connector. 3. Set the S1204 of the main CPU (CA-65) board to “E”. 4. Turn on the power of the IXS-6700/IXS-6600. 5. The following image is displayed on the PC screen. IP ADRS M = 192.168.0.135 IP ADRS B = 192.168.0.136...
- Page 51 6. Move the cursor to the item to be set, and press “Enter”. The screen changes to the input mode. 7. Enter the necessary items. 8. Press “Enter” to terminate the setting. 9. Turn off the power and then back on. 10.
-
Page 53: Service Information
Section 2 Service Information 2-1. Error Display 2-1-1. Front Panel Status The current status of the unit can be displayed in the front panel. It is also possible to reset the elapsed time of display window through use of the operation buttons on the the power units and fan units. -
Page 54: Basic Operations
To move to the next layer above Functions of the Operation Buttons Press the CANCEL button. To change the displayed item on the same layer Press the button. a MENU button b CANCEL button To return to the top display c ENTER button Press the MENU button. - Page 55 Press the button to select the item to be reset. PSU ELAPSED TIME: For resetting the elapsed time of the power unit FAN ELAPSED TIME: For resetting the elapsed time of the fan unit Press the ENTER button. The unit name appears on the second line of the display window.
-
Page 56: Error Indications And Countermeasures
2-1-2. Error Indications and Countermeasures This switcher performs self-diagnostics when you turn the The error code and ERROR No. shown in the status power on or press the reset button on the CPU board (CA- display on the CA-65 board also indicate errors. 65) that functions as the main board, as well as at regular You can easily determine the origin of an error through intervals during operation. - Page 57 Error Status You can display the error status in the display window. The error status is displayed in order of importance. Proceed as follows: The item for which the status is displayed can be changed by pressing the button. Press the MENU button to display the top display in the display window.
- Page 58 c) The WORD SYNC IN terminal of the IXS-6600 is a single system, but distributed to two systems A and B inside. IXS-6600/6700...
-
Page 59: Ca Board Error Display
2-1-3. CA Board Error Display CA board front display The front display located on the front of the CA board operates as follows when an error occurs or the warning status is established. . The STATUS indicator lamp of the CA board front display blinks in red (error) or in green (warning). . - Page 60 Status indication item Error code Error code Error symbol Error description E.27 SBUS S-BUS connection error The S-BUS line is disconnected. (detected by using or not using the 75 Z terminator.) E.40 Cross point error The presence or absence of the signal detected at the output terminal does not match at the specified cross point.
-
Page 61: Periodic Inspection And Maintenance
(1) Remove the front panel. (Refer to Section 1-5-1.) Cleaning of the fan every month is recommended. (2) Remove the dust accumulated on the filter with a Contact your local Sony Sales Office/Service Center for vacuum cleaner. information on cleaning the fan. -
Page 62: Lithium Battery
2-3. Lithium Battery A lithium battery is mounted on the CA-65 board for backing up RAM during power-off and for driving internal watch while the power is turned off. Replace the battery before the replacement time shown below comes. (For details on the procedures for replace- ment, refer to the maintenance manual.) Status of using IXS- Replacement time... -
Page 63: Data Backup
2-4. Data Backup The table data that are set from the personal computer (to be abbreviated as PC hereafter) are stored in the RAM on the CA-65 board. Backing up the stored data is recommended in the case of emergency such as data are damaged or lost. -
Page 64: Installing Bzr-20/Bzr-25
2-4-2. Installing BZR-20/BZR-25 BZR-20/BZR-25 can be used in the IBM PC/AT compatible PC in which the Windows 2000 Professional or Windows XP Professional or Windows Vista Business of the Microsoft company is installed. Operating environment Hardware : IBM PC/AT compatible PC in which the Windows 2000 Professional or Windows XP Professional or Windows Vista Business is installed CPU : Operating clock 300 MHz or higher... -
Page 65: Uploading The Data
2-4-3. Uploading the Data Upload the various setup data of the system equipment from the primary stations to a PC. 1. Install the BZR-20 software. (Refer to Section 2-4-2.) 2. Turn on the power of all the equipment on the S-BUS data link. 3. -
Page 66: Downloading The Data
2-4-4. Downloading the Data Downloads the various setup data that are saved in a PC, to the system equipment through primary station. 1. Install the BZR-20 software. (Refer to Section 2-4-2.) 2. Connect the PC to the IXS-6700/IXS-6600 (or connect the PC to each equipment) and start up the BZR-20 software. -
Page 67: Troubleshooting
2-5. Troubleshooting The main power of the IXS-6700 cannot be turned The monitor picture is not displayed correctly. on. (Indicator does not light green.) A picture is not displayed on the monitor screen even The main power of the though the main power of IXS-6700 cannot be turned the IXS-6700/IXS-6600 is on. - Page 68 The audio signal is not displayed correctly. RS-422 IN/OUT does not operate correctly. Although the power to Although the power to IXS-6700/IXS-6600 is IXS-6700/IXS-6600 is turned on, the audio signal turned on, RS-422 IN/OUT is not output correctly. does not operate correctly. Install the standard boards Install the standard boards Are the standard boards...
- Page 69 Appendix A Terminal No. Quick Reference List . As the maximum matrix size is different depending on the signal format, when the i/o connector board at the rear is inserted, the relationship between the slots and the terminal nos. Is different depending on the signal format. .
- Page 70 AUDIO (D-SUB) AUDIO (D-SUB) Terminal number on Connector board Terminal number on Connector board Terminal number on Connector board Slot number SLOT1 SLOT2 SLOT3 SLOT4 SLOT5 SLOT6 SLOT7 SLOT8 SLOT9 SLOT10 SLOT11 SLOT12 SLOT13 SLOT14 SLOT15 SLOT16 AUDIO (BNC) AUDIO (BNC) Terminal number on Connector board Slot number SLOT1...
- Page 71 ANALOG AUDIO RS-422 Numbers without parentheses indicate the display on the screen (Stereo pair = switching units) RS-422 Terminal number on Connector board Numbers within parentheses indicate the number for the signal name on the connector Slot number ANALOG AUDIO Terminal number on Connector board SLOT1 Slot number SLOT2...
- Page 72 2. IXS-6600 system VIDEO VIDEO Terminal number on Connector board Slot number SLOT1 SLOT2 SLOT3 SLOT4 SLOT5 SLOT6 SLOT7 SLOT8 AUDIO (D-SUB) AUDIO(D-SUB) Terminal number on Connector board Terminal number on Connector board Terminal number on Connector board Slot number SLOT1 SLOT2 SLOT3...
- Page 73 The material contained in this manual consists of information that is the property of Sony Corporation. Sony Corporation expressly prohibits the duplication of any portion of this manual or the use thereof for any purpose other than the operation or maintenance of the equipment described in this manual without the express written permission of Sony Corporation.
- Page 74 IXS-6600 (SY) Sony Corporation IXS-6700 (SY) E 2007. 10 16 3-990-222-08 ©2005...