
Related Manuals for Hitachi AXS460BTU


Summary of Contents for Hitachi AXS460BTU
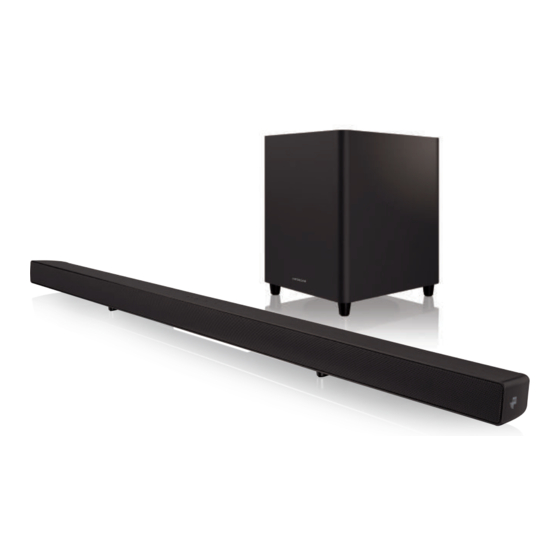
- Page 1 2.1 Bluetooth Soundbar with Wireless Subwoofer AXS460BTU 847/5833 For any help concerning set up and use of your sound bar Please call the Customer Helpline: 0345 604 0105...
-
Page 2: Table Of Contents
Contents Safety Warnings ........................3 Support ..........................5 Unpacking ..........................6 Product Overview ........................7 Main Unit .................................7 Rear View of Subwoofer ..........................8 Remote Control ............................9 Preparation .........................10 Battery Replacement for the Remote Control ................10 Remote Control Operation Range ...................... 10 Installing the Foot Pads ...........................11 Wall Mounting .............................11 Speakers Placement ..........................13 Connections ........................14... -
Page 3: Safety Warnings
Safety Warnings Ventilation Read all the instructions carefully before using the unit and keep them for future the ventilation should not be impeded by reference. covering the ventilation openings with Retain the manual. If you pass the unit items,such as newspapers,table-cloths, onto a third party make sure to include this curtains,etc. - Page 4 The product shall be connected to a MAINS socket outlet with a protective earthing connection.
-
Page 5: Support
Calls from Republic of Ireland will attract international call charges. HITACHI Europe Ltd., declares that the radio equipment type soundbar is in compliance with Directive 2014/53/EU. The full text of the EU declaration of conformity is available at the following internet address: https://estadoc.hitachi. -
Page 6: Unpacking
Thank you for purchasing your new product. We recommend that you spend some time reading this instruction manual Read all the safety instructions carefully before use and keep this instruction manual for future reference. Unpacking Remove all items from the packaging. Retain the packaging. If you dispose of it please do so according to local regulations. -
Page 7: Product Overview
Product Overview Main Unit Front View 1. LED Display 3. NFC (Near Field Communication) Sensor Show the current status. 2. Remote Control Sensor Receive signal from the remote control. Top View SOURCE VOL– VOL+ SOURCE VOL– VOL+ Button Switch the unit between On and Standby mode. -
Page 8: Rear View Of Subwoofer
Rear View HDMI2 HDMI1 COAXIAL OPTICAL AUX 2 AUX 1 2.6A HDMI2 HDMI1 2.6A COAXIAL OPTICAL AUX 2 AUX 1 2.6A Socket 5. AUX 1 (L/R) Sockets 2. COAXIAL Socket 6. ARC Sockets 3. OPTICAL Socket 7. HDMI 2 Socket 8. -
Page 9: Remote Control
Remote Control Button Switch the unit between On and Standby mode. Button Mute the unit or resume the sound. DIGITAL HDMI 3. AUX Button Switch between AUX 1 / AUX 2 mode. 4. DIGITAL Button Switch between OPTICAL / COAXIAL mode. -
Page 10: Preparation
Preparation Battery Replacement for the Remote Control 1. Press and slide the back cover to open the battery compartment of the remote control. 2. Insert two AAA size batteries. Make sure the (+) and ( – ) ends of the batteries match the (+) and ( –... -
Page 11: Installing The Foot Pads
Installing the Foot Pads Ensure all cables to the main unit are disconnected before installing or removing the foot pads. Wall Mounting ed personnel only. Incorrect assembly can result in severe personal injury and property damage (if you intend to install this product yourself, you must check for installations such as electrical wiring and plumbing that may be buried inside the wall). - Page 12 Dowel Solid wall (i.e., Solid brick, Solid concrete, Solid wood, Solid wooden battens) Drywall, Plaster wall, Lath wall, etc. 4. Insert 1 screw ( included) into each dowel. Be sure to leave a 3 mm gap between the wall and the screw’s head. Lift the unit over the heads of the screws and slot into place. 3 mm 25-30 mm...
-
Page 13: Speakers Placement
Speakers Placement SOUNDBAR The subwoofer should be within 5 metres of the soundbar in an SUBWOOFER open area (the closer the better). Do not put anything on the top of the subwoofer. Soundbar ects. If your TV is placed on a table, you can place the soundbar on the table directly in front of the TV stand, centered with the TV screen. -
Page 14: Connections
Connections This section involves various methods of connecting the product to other external components. Ensure all audio connections of the unit are connected before connecting to the mains power socket. Method 1: Optical / Coaxial Connection Use an optical cable (not included) / coaxial cable (not included) to connect the soundbar’s OPTICAL / COAXIAL socket to the OPTICAL OUT / COAXIAL OUT socket of the external device. -
Page 15: Method 2: Hdmi Hub Connection
PCM or Dolby AC-3 (Refer to the user manual of the input source device for its audio setting details) with HDMI input. For a single remote use when connected to a Hitachi TV please carry out the following: (Please check your user manual for other manufacturers TV as this may not be the same.) - Page 16 Using Your TV as a hub Ensure to use an HDMI cables that can support the ARC function. erent manufacturers – please refer to your owner’s manual for details on setting up HDMI-CEC and ARC. While using an HDMI cable for ARC function, CEC (Consumer Electronics Control) provides interoperability between the unit and various devices (e.g.
-
Page 17: Method 3: Aux Connection
Method 3: AUX Connection 1. Use an RCA to RCA stereo audio cable (not included) or 3.5 mm to RCA stereo audio cable (included) to connect the soundbar’s AUX 1 (L/R) socket to the AUDIO OUT sockets of the external device. 2. -
Page 18: Connecting To The Mains Supply
Connecting to the Mains Supply The soundbar and subwoofer are designed to operate with the supplied mains adapter and mains cables. Connecting the unit to any other power source may damage the unit. Ensure all audio connections of the unit are connected before connecting to the mains power socket. rmly inserted into the mains socket. -
Page 19: Pairing The Wireless Subwoofer With The Soundbar
Pairing the Wireless Subwoofer with the Soundbar Automatic Pairing Plug the soundbar and the subwoofer into the mains sockets and switch on the subwoofer. Press on the unit or on the remote control to switch the unit to On mode. The display will show “WELCOME”. -
Page 20: General Operation
This instruction manual explains the basic instructions for operating this unit. Unless otherwise stated, all operations described are based on remote control use. General Operation Standby / ON rst connect the unit to the mains socket, the unit will be in Standby mode. During Standby mode, the POWER . -
Page 21: Aux / Coaxial / Optical / Hdmi Operation
ects Adjusting the Volume Press VOL + / – to adjust the volume. , press on the remote control. The display will show again, or press VOL + / – on the unit or on the remote control to “MUTE”. Press resume normal listening. -
Page 22: Bluetooth® Operation
Bluetooth® mode. The display will show BT. Then PAIRING ash in the display. 2. Activate your Bluetooth® device and select the search mode. “ AXS460BTU ” will appear on your Bluetooth® device list. 3. Select “AXS460BTU” and enter “0000” for the password if necessary. After pairing, the display will show PAIRED. -
Page 23: Maintenance
Maintenance Ensure the unit is fully unplugged from the mains socket before cleaning. To clean the units, wipe the case with a slightly moist, lint-free cloth. uids containing alcohol, ammonia or abrasives. Do not spray aerosol at or near the unit. Hints and Tips If a problem does occur, it may often be due to something very minor. -
Page 24: Product Fiche And Speci Cations
Soundbar (the closer the better) or remove obstacles from between the soundbar and Subwoofer. Ensure the Bluetooth® function is activated on your “AXS460BTU ” on my Bluetooth® device. Bluetooth® device. Ensure you have paired your unit with the Bluetooth®... - Page 25 Ecodesign Information (Soundbar) Information on Power Consumption < 0.5 W Power Consumption of Standby Mode Network Standby < 2.0 W Power Consumption Time interval for power management Switch to standby mode within 10 function switches the unit automatically into minutes after intended use standby Power consumption in network standby if all wireless network ports are activated...
-
Page 27: Other Informantion And Licenses
Amplifier(RMS Output)specifications Soundbar 50 RMS Subwoofer 65 RMS Total 115 RMS Total Peak Power 460 W...