Table of Contents
Install and Connect the Router
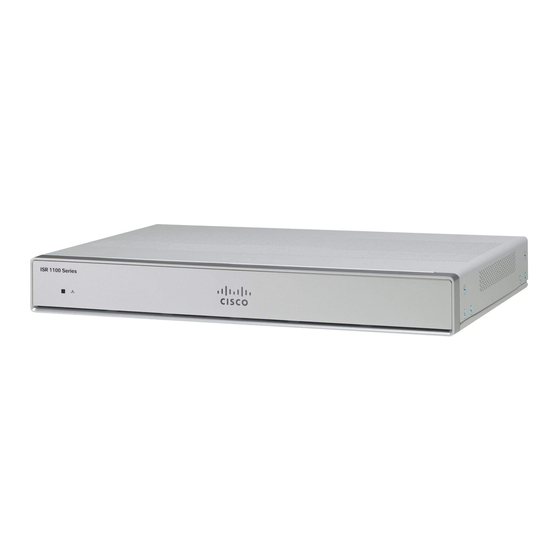
This chapter describes how to install and connect Cisco 1000 Series Integrated Services Router (ISR) to LAN
and WAN networks.
Warning
Read the installation instructions before using, installing or connecting the system to the power source.
Statement 1004
Installing the Cisco 1000 Series Integrated Services Routers involve these tasks:
•
•
•
•
•
•
Unpack the Router
Unpack the router only when you are ready to install it. If the installation site is not ready, to prevent accidental
damage, keep the chassis in its shipping container until you are ready to install.
The router, accessory kit, publications, and any optional equipment you order may be shipped in more than
one container. When you unpack the containers, check the packing list to ensure that you have received all
listed items.
Set up Router on Desktop, Rack, or Wall
After unpacking, based on your requirements, you can set up a Cisco 1100 Series Integrated Services Routers
(ISRs) on a desktop, a rack, or the wall.
Unpack the Router, on page 1
Set up Router on Desktop, Rack, or Wall, on page 1
Connect Power Cable, on page 19
Connect the Router to a Console, on page 21
Connect WAN and LAN Interfaces, on page 25
Configure the Router at Startup, on page 26
Install and Connect the Router
1
Table of Contents

Related Manuals for Cisco 1000 ISR Series


Summary of Contents for Cisco 1000 ISR Series
- Page 1 Install and Connect the Router This chapter describes how to install and connect Cisco 1000 Series Integrated Services Router (ISR) to LAN and WAN networks. Warning Read the installation instructions before using, installing or connecting the system to the power source.
-
Page 2: Rack Mount
The router is shipped with rack mounting brackets that are to be secured on the sides of the chassis. You must first secure rack mounting brackets on the chassis before you set up the chassis on the rack. Caution Do not stack multiple Cisco 1000 ISRs when mounting the routers on a table top. Install and Connect the Router... -
Page 3: Attach The Brackets For C111X
Attach the Brackets for C111x Note When mounting Cisco 1000 ISRs on a rack, ensure that there is ample surrounding space. This ensures more heat removal, which in turn will enable the surrounding air temperature to stay within the specified operating conditions. -
Page 4: Mount The Router
Install and Connect the Router Mount the Router Figure 2: Bracket Installation for C1121-4Px, C1126-8PLTEP and C1128-8PLTEP Mount the Router Before mounting the router on to the rack, refer to the following safety warning statements: Warning To prevent airflow restriction, allow clearance around the ventilation openings to be at least: 1.75 in. (4.4 cm). -
Page 5: Mount The Router Under A Desk Or A Shelf
You can order these kits from your Cisco representative. This procedure describes how to mount router under a desk or a shelf . -
Page 6: Mount Router Using Din Rail Brackets
Install and Connect the Router Mount Router using DIN Rail Brackets Figure 5: Router with Brackets Attached Step 2 After the brackets are attached, drill a 2 mm hole under the desk and insert the wooden screws provided. Mount the router under the desk or shelf using the pan-head wood screws). -
Page 7: Attach Din-Rail Brackets On C112X
Install and Connect the Router Attach Din-Rail Brackets on C112x To attach the DIN Rail brackets to the router chassis, use the PHMS screws and the plastic spacers provided for each bracket. Attach Din-Rail Brackets on C112x This procedure describes how to attach the brackets on the router chassis: Step 1 Remove the 3 bottom screws from the chassis. -
Page 8: Wall Mount The Router
There are two ways to mount a router on the wall, using Key-hole Slots and DIN Rail Brackets. Wall Mount Using Key-hole Slots The Cisco 1100 Series Integrated Services Routers (ISRs) have key-hole slots at the bottom of the chassis for mounting on a wall or any vertical surface. - Page 9 Install and Connect the Router Wall Mount Using Key-hole Slots Figure 9: Wall Mount Using Key-hole Slots - C111x Key-hole slots Install and Connect the Router...
- Page 10 Install and Connect the Router Wall Mount Using Key-hole Slots Figure 10: Wall Mount Orientation-C111x Key-hole slots Install and Connect the Router...
- Page 11 Install and Connect the Router Wall Mount Using Key-hole Slots Figure 11: Wall mount using key-hole slots - C1101-4P Key-hole slots Key-hole slots-spacing: 3.024in (76.81mm) Install and Connect the Router...
- Page 12 Install and Connect the Router Wall Mount Using Key-hole Slots Figure 12: Wall mount using key-hole slots - C1101-4PLTEP Key-hole slots Horizontal spacing: 3.100in (78.74mm) Vertical spacing: 5.758inin (146.25mm) Install and Connect the Router...
- Page 13 Install and Connect the Router Wall Mount Using Key-hole Slots Figure 13: Wall mount using key-hole slots - C1109-2P Horizontal spacing: 7.302in (185.47mm) Key-hole slots Vertical spacing: 7.430in (188.72mm) Figure 14: Wall mount using key-hole slots - C1109-4PLTEP Install and Connect the Router...
- Page 14 Install and Connect the Router Wall Mount Using Key-hole Slots Key-hole slots Horizontal spacing: 3.100in (78.74mm) Vertical spacing: 5.758inin (146.25mm) Figure 15: Wall mount using key-hole slots - C1126-8PLTEP Install and Connect the Router...
-
Page 15: Wall Mount Using Din Rail Brackets
Install and Connect the Router Wall Mount using DIN Rail Brackets Key-hole slots Horizontal spacing: < > Vertical spacing: < > Wall Mount using DIN Rail Brackets The router is shipped with DIN Rail brackets that are to be secured on the bottom side of the chassis. Your chassis installation must allow unrestricted airflow for chassis cooling. - Page 16 Install and Connect the Router Wall Mount using DIN Rail Brackets Figure 17: Orientation of DIN Rail Brackets Figure 18: DIN Rail Brackets and Mount Install and Connect the Router...
-
Page 17: Chassis Grounding
Install and Connect the Router Chassis Grounding Do not over-torque the screws. The recommended torque is 8 to 10 inch-lbf (0.9 to 1.1 N-m). Note Chassis Grounding Warning Connect the Chassis to Earth Ground—To reduce the risk of electric shock, the chassis of this equipment needs to be connected to permanent earth ground during normal use. - Page 18 Install and Connect the Router Chassis Grounding Figure 19: Chassis Ground Connection-Cisco 111x Screw (UNC 6-32) Ground Lug Figure 20: Chassis Ground Connection-Cisco 1101-4PLTEP Screw (UNC 6-32) Install and Connect the Router...
-
Page 19: Connect Power Cable
Screw (UNC 6-32) Ground Lug Connect Power Cable Power supply of the Cisco 1000 Series ISRs is an external AC to DC power adapter. The external DC power connector plugs into the router's 4 points power connector. Install and Connect the Router... - Page 20 Install and Connect the Router Connect Power Cable Figure 22: Power Cable for C111x Power Cable Install and Connect the Router...
-
Page 21: Connect The Router To A Console
Install and Connect the Router Connect the Router to a Console Figure 23: Power Cable for C1127-8PLTEP Power Cable Connect the Router to a Console The C111x Series ISR has an asynchronous serial port. This port provides administrative access to the router through a console terminal or a PC. - Page 22 Install and Connect the Router Connect the Router to a Console Figure 24: Console Adapter for C1101-4PLTEP Micro USB to RJ45 console adapter Figure 25: Console Adapter for C1127X-8PLTEP Micro USB to RJ45 console adapter Install and Connect the Router...
-
Page 23: Connect To The Serial Port With Microsoft Windows
Connect to the Serial Port with Microsoft Windows Use the USB or RJ-45 console port on the router to access the Cisco Internet Operating System (IOS-XE) command line interface (CLI) on the router and perform configuration tasks. A terminal emulation program is required to establish communication between the router and a PC. -
Page 24: Connect To The Console Port With Mac Os
Install and Connect the Router Connect to the Console Port with Mac OS X Connect to the Console Port with Mac OS X This procedure describes how to connect a Mac OS X system USB port to the console using the built in OS X Terminal utility. -
Page 25: Connect Wan And Lan Interfaces
Statement 1088. Ports and Cabling This section summarizes typical WAN and LAN connections for Cisco 1100 Series ISRs. The connections summarized here are described in detail in the Cisco Modular Access Router Cable Specifications document on cisco.com. -
Page 26: Connection Procedures And Precautions
Install and Connect the Router Connection Procedures and Precautions Cable color codes are specific to Cisco cables. Connection Procedures and Precautions After you have installed the router chassis, perform these steps to connect the WAN and LAN interfaces: • Connect each WAN and LAN to the appropriate connector on the chassis.