Table of Contents
LCD
Digital Colour TV
Operating Instructions
KDL-55EX72x / 46HX72x / 46EX72x / 46EX52x / 46CX52x / 40HX72x / 40EX72x / 40EX52x
KDL-40CX52x / 37EX72x / 37EX52x / 32EX72x / 32EX52x / 32EX42x / 32CX52x / 26EX32x
KDL-24EX32x / 22EX32x
4-269-995-14(2)
Getting Started
Using Your BRAVIA TV
Network Setup
Additional Information
Table of Contents

Related Manuals for Sony 32CX52X


Summary of Contents for Sony 32CX52X
- Page 1 Digital Colour TV Operating Instructions KDL-55EX72x / 46HX72x / 46EX72x / 46EX52x / 46CX52x / 40HX72x / 40EX72x / 40EX52x KDL-40CX52x / 37EX72x / 37EX52x / 32EX72x / 32EX52x / 32EX42x / 32CX52x / 26EX32x KDL-24EX32x / 22EX32x 4-269-995-14(2) Getting Started...
-
Page 2: Trademark Information
Please refer to the illustration that actually equipped with the product. Introduction Thank you for choosing this Sony product. Before operating the TV, please read this manual thoroughly and retain it for future reference. The manufacturer of this product is Sony Corporation, 1-7-1 Konan Minato-ku Tokyo, 108-0075 Japan. -
Page 3: Lcd Screen
KDL-46/40/32EX724, KDL-26EX321, KDL-26/24/ 22EX320: Notice for Wireless Signal 1. Hereby, Sony, declares that this unit is in compliance with the essential requirements and other relevant provisions of Directive 1999/5/EC. To obtain the declaration of conformity (DoC) for R&TTE Directive, please access the following URL address. -
Page 4: Disposal Of The Tv Set
backlight LCD TV). Follow your local ordinances and regulations for disposal. Handling and cleaning the screen surface/cabinet of the TV set Be sure to unplug the mains lead connected to the TV set from mains socket before cleaning. To avoid material degradation or screen coating degradation, observe the following precautions. -
Page 6: Table Of Contents
Table of Contents Getting Started Checking the accessories ... 8 Inserting batteries into the remote... 8 1: Attaching the Table-Top Stand ... 9 2: Adjusting the viewing angle of the TV ... 10 3: Connecting an antenna (aerial)/Set Top Box/recorder (e.g. DVD recorder) ... 11 4: Connecting audio/video devices ... -
Page 7: Parts Description
After setting up your BRAVIA TV and learning basic operations with this manual, see the built-in manual (i-Manual) for further explanation of the features of your TV. This TV has a built-in manual (i-Manual). To access the i-Manual, press i-MANUAL on the remote, and select an item. For details, see page 18 of this manual. -
Page 8: Getting Started
Table-Top Stand. Inserting batteries into the remote B For KDL-55/46/40/37/32EX72x, KDL-46/40HX72x Remove the protection sheet. Push and slide the cover upward. B For KDL-46/40/37/32EX52x, KDL-46/40/ 32CX52x, KDL-32EX42x, KDL-26/24/ 22EX32x Remove the protection sheet. Push and lift the cover to open. -
Page 9: 1: Attaching The Table-Top Stand
TV models. Place the TV set on the Table-Top Stand. B For KDL-55/46/40/37/32EX72x, KDL-46/40HX72x, KDL-46/40/37/32EX52x, KDL-46/40/32CX52x, KDL-32EX42x Guide pins • Align the TV from the top, slide it in until the guide pins cannot be seen. B For KDL-26/24/22EX320... -
Page 10: 2: Adjusting The Viewing Angle Of The Tv
• When adjusting the angle, hold the stand with one hand to avoid having the stand slip or TV tip over. 20° 20° Angle adjustment (Tilt) (except KDL-46/40/32CX52x) • Be careful not to pinch your fingers between the TV and stand when adjusting the angle. B For KDL-55/46/40/37/32EX72x, KDL-46/40HX72x,... -
Page 11: 3: Connecting An Antenna (Aerial)/Set Top Box/Recorder (E.g. Dvd Recorder)
• Ensure that there are no objects in front of the TV. IR Sensor 3D Sync Transmitter (KDL-55/46/40/37/32EX72x, KDL-46/40HX72x only) Presence Sensor (except KDL-46/40/32EX520, KDL-40/32EX523) • Do not expose the Presence Sensor to direct sunlight or other strong light, as malfunction may occur. -
Page 12: 5: Preventing The Tv From Toppling Over
(mains lead)/ Bundling the cables B KDL-46/40/32CX52x AC power cord B Except KDL-46/40/32CX52x • Before bundling the cables, remove the cable holder from the AC cover (see step 1 and 2). Reuse the cable holder (see step 3) to bundle the other cables (see step 4). -
Page 13: 7: Performing The Initial Set-Up
7: Performing the initial set-up Except KDL-46/40/ KDL-46/40/32CX52x 32CX52x Connect the TV to your AC power outlet (mains socket). Press 1 on the TV. The = (power) indicator will light up in green. When you switch on the TV for the first time, the Language menu appears on the screen. -
Page 14: Using Your Bravia Tv
Using Your BRAVIA TV Watching the TV GUIDE • The number 5, N, PROG + and AUDIO buttons on the remote have a tactile dot. Use the tactile dots as a reference when operating the TV. Turn on the TV. Press 1 on the TV to turn on the TV. - Page 15 Parts and controls of the remote Use the supplied remote to control your TV. Basic remote operations are explained here. For details on all of the remote function, press i-MANUAL and see the built-in manual (i-Manual) (page 18). For KDL-55/46/40/37/32EX72x, KDL-46/40HX72x Rear of Remote Control 1 :/1...
-
Page 16: Selecting Various Functions And Settings (Home Menu)
Selecting various functions and settings (Home Menu) You can select all the features from the Home menu. See page 17 for the Home menu map. 1, 3 Press HOME. Press F/f/G/g/ to select items. To select items in the Home menu (e.g., selecting “Settings”) 1 Press G/g to select “Settings”. - Page 17 Home menu map After pressing HOME on the remote, following icons are displayed as categories. The categories are available depending on your TV model, region, country and broadcasting conditions. Media Inputs Favourites/History Settings Widgets Applications Qriocity Internet Content Recommendations Recordings You can select a list of TV channels, or a programme guide.
-
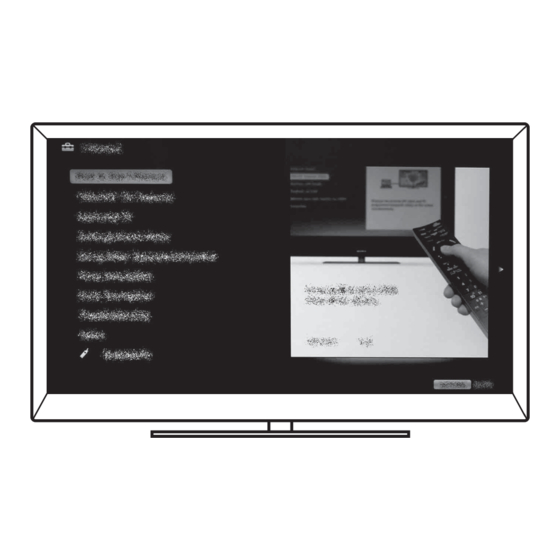
Page 18: Displaying Operating Instructions (I-Manual)
Displaying Operating Instructions (i-Manual) Operating instructions are built into your BRAVIA TV and can be displayed on the screen. To learn more about your TV features, access your i-Manual with the touch of a button. Press i-MANUAL. Press F/f/G/g/ to select items. To select items in the i-Manual 1 Press F/f to select an item. - Page 19 Description of the i-Manual screen To use the bookmark The i-Manual has a bookmark function. Pages can be bookmarked with coloured buttons, according to the instructions at the bottom of the screen. To access your registered bookmarks, go to the top page of the i-Manual and select “Bookmarks”.
-
Page 20: Network Setup
Network Setup When you connect this TV to the Internet, you can enjoy multiple functions: displaying a photograph that shows its location on the map, enjoying Internet video, etc. For details on the functions, refer to the i-Manual. • You will need to contract with an Internet service provider to connect to the Internet. -
Page 21: Setting Up The Internet Connection
Setting up the Internet connection Using the network feature you can connect the TV to the Internet. The set-up procedure differs depending on the type of network and LAN router. Before setting up the Internet connection, be sure to set up a LAN router. Check your wireless LAN environment using the following chart. -
Page 22: If You Cannot Connect To The Internet
Type 3: Unsecured network with any type of wireless LAN router To set up a wireless LAN, SSID (wireless network name) will be required. Press HOME, then select “Network” > “Network Set-up”. Select “Wireless Set-up”. Select “Scan”, then select a network from the list of scanned wireless networks. -
Page 23: Additional Information
Press 1 on the TV to turn it off, disconnect the AC power cord (mains lead), and inform your dealer or Sony service centre of how the indicator flashes (number of flashes). When the 1 (standby) indicator is not flashing, check the items in the tables as follows. -
Page 24: Specifications
D/K: R1–R12, R21–R69/L: F2–F10, B–Q, F21–F69/I: UHF B21–B69/M: A2-A13, A14-A79 Digital: VHF/UHF Sound output 10 W + 10 W (KDL-55/46/40/37/32EX72x, KDL-46/40HX72x, KDL-46/40/37/32EX52x, KDL-46/40/ 32CX52x, KDL-32EX42x) 8 W + 8 W (KDL-26/24/22EX32x) Input/Output jacks Antenna (aerial) cable 75 ohm external terminal for VHF/UHF 21-pin scart connector (CENELEC standard) including audio/video input, RGB input and TV audio/video output. - Page 25 Model name KDL- 55EX72x Power and others Power requirements 220 V – 240 V AC, 50 Hz Energy Efficiency Class Screen size (measured Approx. 138.8 cm/ 55 inches diagonally) Power in “Home”/ 113 W consumption “Standard” mode in “Shop”/ 177 W “Vivid”...
- Page 26 / EPG update mode) 75.5 × 51.0 × 21.6 cm 75.5 × 48.0 × 4.2 cm 10.4 kg 7.9 kg 32CX52x Approx. 80.1 cm/ 32 inches 73.0 W 112 W 107 kWh 0.25 W (15 W in software / EPG update mode) 1,920 dots (horizontal) ×...
- Page 27 Model name KDL- 26EX321 Power and others Power requirements 220 V – 240 V AC, 50 Hz Energy Efficiency Class Screen size (measured Approx. 66.1cm/ 26 inches diagonally) Power in “Home”/ 38.0 W consumption “Standard” mode in “Shop”/ 63 W “Vivid”...
-
Page 28: Installing The Accessories (Wall-Mount Bracket)
TV will be 6 cm. Use this space to route cables to the TV. Wall For product protection and safety reasons, Sony strongly recommends that installing of your TV be performed by Sony dealers or licensed contractors. Do not attempt to install it yourself. - Page 29 SU-WL500, SU-WL100 For KDL-55/46/40/37/32EX72x, KDL-46/40HX72x, KDL-46/40/37/32EX52x, KDL-46/40/32CX52x, KDL-32EX42x SU-WL500 Screw (+PSW 6 × 16) Mounting Hook × Soft cloth • Attach the Mounting Hook using the four screws supplied with the Wall-Mount Bracket. • When attaching the Table-Top Stand again, be sure to fasten the screws (previously removed) to the original holes on the rear of the TV.
- Page 30 SU-WL500 Screw location When installing the Mounting Hook on the SU-WL100 Hook location When installing the TV onto the Base Bracket. Hook location When installing the TV onto the Base Bracket.
-
Page 31: Tv Installation Dimensions Table
54.9 17.5 37EX52x 87.7 54.9 17.5 32EX72x 75.5 48.0 16.1 32EX52x/ 75.5 48.0 16.1 32EX42x 32CX52x 79.9 50.2 17.2 2 SU-WL100 26EX32x 63.1 40.6 24EX32x 58.3 37.6 22EX32x 52.9 34.7 10.8 Figures in the table may differ slightly depending on the installation. -
Page 32: Safety Information
• Leave space around the TV set as shown below. • It is strongly recommended that you use a Sony wall-mount bracket in order to provide adequate air-circulation. Installed on the wall 30 cm 10 cm... - Page 33 Turn off the TV set and unplug the mains lead immediately if any of the following problems occur. Ask your dealer or Sony service centre to have it checked by qualified service personnel. When: – Mains lead is damaged.
- Page 34 Keep this Instruction manual safe you’ll need it Television in the UK is going digital, bringing us all more. Please see overleaf to find out when your area switches to digital. Digital UK is the independent, non-profit organisation leading the process of digital TV switchover in the UK.
- Page 35 If you are missing any channels, it may be that they are not available in your area, or that your aerial needs upgrading. If you have any questions, please contact Sony on 0844 8466555 or call Digital UK on 0845 6 50 50 50 or visit www.digitaluk.co.uk †Calls charged at BT rate of 3p per minute daytime and 1p per minute evenings and weekends.
- Page 36 For useful information about Sony products 4-269-995-14(2) © 2011 Sony Corporation...