Table of Contents
Quick Links
Touch Screen Controller
Model Name
BMS-CT1280E
BMS-CT1280E-TR
● Thank you for purchasing this air conditioning control system.
● In order to use this product safely and correctly, please read this operation manual carefully before use and
make sure that you fully understand the contents.
In particular, please be sure to read the "Safety Precautions".
● After reading this manual, be sure to keep it in a place where the operator of the Unit can always view it.
Air Conditioning Control System
Owner's Manual
Table of Contents

Related Manuals for Toshiba BMS-CT1280E


Summary of Contents for Toshiba BMS-CT1280E
- Page 1 Air Conditioning Control System Touch Screen Controller Model Name BMS-CT1280E BMS-CT1280E-TR ● Thank you for purchasing this air conditioning control system. ● In order to use this product safely and correctly, please read this operation manual carefully before use and make sure that you fully understand the contents.
-
Page 2: Table Of Contents
Touch Screen Controller Owner's Manual Contents 1 Quick Start Guide ......... . . 5 2 Safety Precautions . - Page 3 Touch Screen Controller Owner's Manual Change the Air Conditioning Settings (ON/OFF/Mode/Wind direction/Fan Speed/Set temp.) ..........27 Group unit operation method .
- Page 4 Touch Screen Controller Owner's Manual Restart the Unit (System reboot) ..........56 Disable the Operation Schedule and Power peak cut schedule (Scheduler Operation) .
-
Page 5: Quick Start Guide
Touch Screen Controller Owner's Manual Quick Start Guide Basic Usage To start/stop the air conditioner(s) "Start/Stop Operation" (P.24) To change the set temperature "Change the Air Conditioning Settings (ON/OFF/Mode/Wind direction/Fan Speed/Set temp.)" (P.27) To change the Mode (Cool/Heat/Auto/Dry/Fan) ... -
Page 6: Safety Precautions
WARNING Installation Precautions Ask the dealer from whom you purchased Use a designated TOSHIBA air conditioner. the unit or a professional for installation Please use a designated TOSHIBA air work. conditioner. Using products other than... - Page 7 Touch Screen Controller Owner's Manual CAUTION Installation Precautions Do not install in areas with high humidity or Do not install in direct sunlight or near heat vibration. sources. Doing so may cause a failure. Doing so may cause a failure. Check the Check the installation...
-
Page 8: Operating Method And Screen Structure
Touch Screen Controller Owner's Manual Operating method and screen structure Touch Panel Operation Method Explains the basic touch panel operation method. Drag Touch your finger lightly on the screen and release it Tap an object on the screen, hold your finger down, and immediately. -
Page 9: Screen Structure
Touch Screen Controller Owner's Manual Screen Structure The main screen structures used by this Unit are as follows. The screen can be switched by tapping (or flicking in some cases). ■ Batch ON/OFF screen ■ Alarm history screen ■ Home Menu ■... -
Page 10: Before Usage
Touch Screen Controller Owner's Manual Before Usage Air Conditioning System Configurations The system configurations that this Unit can control are as follows: Set all air conditioners at once. 128 groups, up to a total of 128 units Group 65 Group 1 Group 66 Group 2 Group 67... -
Page 11: Control Target Devices
Touch Screen Controller Owner's Manual Control Target Devices In this Unit, the following devices can be controlled and monitored. Device names shown in this manual Target devices • Multi air conditioners for buildings Air conditioner (Ceiling cassette, ceiling embedded, ceiling hanging, air to air heat exchanger with coil, etc.) You can set air conditioning and •... -
Page 12: About The Main Screens
Touch Screen Controller Owner's Manual About the Main Screens This section explains the home screen and the CONTROL tab of the group screen/individual control screen. ● NOTE Depending on the theme settings, the screen display colours may differ. This manual explains using the screen when "Type A" is set in the theme settings. -
Page 13: Screen Description
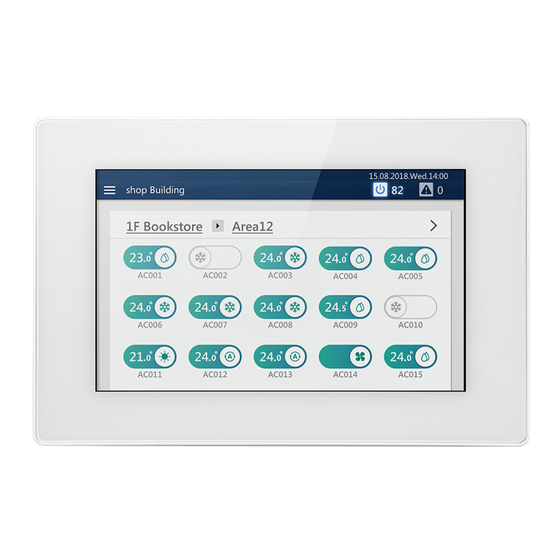
Touch Screen Controller Owner's Manual Screen description Switches for all air conditioners and ON/OFF unit are displayed for each group. You can change the group displayed by scrolling the screen. Name (Icon) Functions Header area It is displayed even on screens other than the home screen. The operation content is common to each screen. - Page 14 Touch Screen Controller Owner's Manual Name (Icon) Functions Switch The air conditioner or ON/OFF unit switch registered in each group is displayed, and the name is displayed below the switch. Displays the operation status of the air conditioner(s). means operating state. The set temperature is displayed on the left and the operation mode is displayed on the right.
-
Page 15: Group Control Screen ([Control] Tab)
Touch Screen Controller Owner's Manual Group control screen ([CONTROL] tab) How to display the screen Scroll the home screen to display the group you want to change the settings for, then tap ● NOTE You can jump to another group in the drop-down menu displayed by tapping the group name. -
Page 16: Screen Description
Touch Screen Controller Owner's Manual Screen description -(1) -(1) -(2) -(2) -(3) -(3) Name (Icon) Functions Group name Displays the name of the currently displayed group. Tap to display the drop-down menu. You can switch the display to the individual control screen for another air conditioner or ON/OFF unit registered in the group. -
Page 17: Individual Control Screen ([Control] Tab)
Touch Screen Controller Owner's Manual Individual control screen ([CONTROL] tab) How to display the screen Scroll the home screen, display the air conditioner or ON/ OFF unit that you want to change the settings for, then tap the switch The CONTROL tab of the individual control screen is displayed. -
Page 18: Screen Description
Touch Screen Controller Owner's Manual Screen description -(1) -(1) -(2) -(2) -(3) -(3) Each display is an example of the screen in the case of an air conditioner. The display contents varies with use environment settings. Name (Icon) Functions Group name The name of the air conditioner or ON/OFF unit currently displayed is shown. - Page 19 Touch Screen Controller Owner's Manual ● NOTE • For ON/OFF unit, only configurable items are displayed. Icons are displayed only when they are registered. (P.59) • If an error occurs, an alarm code is displayed. Operation other than operation ON/OFF is not possible. •...
-
Page 20: Perform Initial Settings
Touch Screen Controller Owner's Manual Perform initial settings Unit Settings Have service personnel perform the following work. Check the installation and wiring of the main unit Follow the installation instructions to complete the installation and wiring work. Check the wiring between the remote controller, indoor unit, and outdoor unit Check that the address from the remote controller to the Unit is correct, and switch ON/OFF, Cool/Heat and confirm that operation is normal. -
Page 21: Unit Settings
Touch Screen Controller Owner's Manual Unit settings Set the user account for remote operation (P.60) Set the IP address (P.62) Set a destination to send email to when an alarm occurs (P.63) PC settings Settings IP address/ Set it to be the same network as the Unit. Subnet mask (Example: the Unit 192.168.2.80/PC 192.168.2.90/subnet 255.255.255.0) Port... -
Page 22: Install The Software
Touch Screen Controller Owner's Manual Install the software Open the web browser of your PC Access "http://[server name or IP address]/touchscreencontroller/[language code]/ download.html" Server name or IP address : For the IP address, enter the value set in step of "Unit settings" (P.21). Language code : Enter the following value according to the language. -
Page 23: Settings When Using Report Creation Software
Touch Screen Controller Owner's Manual Settings when Using Report Creation Software By using the Report Creation Software, you can easily check/output reports (monthly report/daily report) for electric power allocation summed by the Unit with a PC. When using the Report Creation Software, apply the following settings. ●... -
Page 24: Basic Usage
Touch Screen Controller Owner's Manual Basic Usage This section explains the basic setting method for operation Start/Stop and air conditioning, the setting method for the operation schedule, and the confirmation method for the overall air conditioning system. Start/Stop Operation Overall air conditioning system operation method Tap [ -(1)] or [ -(2)]... -
Page 25: Group Unit Operation Method
Touch Screen Controller Owner's Manual Group unit operation method Scroll the home screen to display the group you want to change the settings for, then tap Tap [ -(1)] or [ -(2)] -(1) -(1) -(2) -(2) Check the contents of the message and tap [ -(1)] -(1) -(1) -
Page 26: Operation Method In Units Of Air Conditioner Or On/Off Unit
Touch Screen Controller Owner's Manual When the screen on the left appears, check the contents of the message and tap [ -(1)] or [ -(2)] * All group air conditioners and ON/OFF equipment turn ON or OFF. -(2) -(2) -(1) -(1) * About confirmation pop-up selection Group... -
Page 27: Change The Air Conditioning Settings
Touch Screen Controller Owner's Manual Change the Air Conditioning Settings (ON/OFF/Mode/Wind direction/Fan Speed/Set temp.) Group unit operation method Scroll the home screen to display the group you want to change the settings for, then tap Tap [ -(1)] The batch settings screen is displayed. -(1) -(1) Change settings... - Page 28 Touch Screen Controller Owner's Manual Name Functions Wind direction to switch to the following. ● NOTE Depending on the connected model, items that cannot be set are not displayed. Fan Speed to switch to the following. ● NOTE • For models with limited fan speed setting range, this is changed to the values that can be set for each model.
- Page 29 Touch Screen Controller Owner's Manual Check the contents of the message and tap [ -(1)] -(1) -(1) When the screen on the left appears, check the contents of the message and tap [ -(1)] or [ -(2)] * The settings of the entire group are changed. -(2) -(2) -(1)
-
Page 30: Air Conditioner Unit Operation Method
Touch Screen Controller Owner's Manual Air conditioner unit operation method ● NOTE To change the settings, it is necessary to set to the operation status. (P.26) Scroll the home screen, display the air conditioner you want to change the settings for, then tap the switch Change settings Name Functions... - Page 31 Touch Screen Controller Owner's Manual Name Functions Fan Speed Tap to switch to the following. ● NOTE Fan speeds that cannot be set are not displayed. Set temp. to change the set temperature. ● NOTE • If the operation mode is FAN, the temperature cannot be set. •...
-
Page 32: Set The Operation Schedule
Touch Screen Controller Owner's Manual Set the Operation Schedule You can set the operation schedule that changes settings such as starting/stopping operation at a specified time for an air conditioner or ON/OFF unit. The operation schedule is set on the SCHEDULE tab of the group screen or individual control screen. -
Page 33: Individual Control Screen
Touch Screen Controller Owner's Manual Individual control screen The schedule set for the air conditioner or ON/OFF unit being displayed is displayed on a 24-hour time scale. Functions You can switch the display in day-of-week units. Displays the settings screen. is displayed at the times when the schedule is set. -
Page 34: Create A New Operation Schedule
Touch Screen Controller Owner's Manual Create a new operation schedule In an operation schedule, you can set: • Start time • Day(s) of the week • Air conditioner(s) or ON/OFF unit • ON/OFF Schedule settings can be applied from either the group screen or the individual control screen. In the following procedure, the individual control screen is used to explain. - Page 35 Touch Screen Controller Owner's Manual Select the air conditioner(s) or ON/OFF unit for setting the schedule and tap [ -(1)] You cannot select a model that has already been scheduled at the same time. -(1) -(1) Tap the check box of [ -(1)] and set it to , then select -(2)] or [...
-
Page 36: Monitor The Overall Air Conditioning System
Touch Screen Controller Owner's Manual Monitor the Overall Air Conditioning System To check the operation status of the overall air conditioning system, tap to display the batch ON/OFF screen. To check the alarm occurrence status, tap to display the alarm history screen. ■... -
Page 37: Various Functions
Touch Screen Controller Owner's Manual Various Functions This section explains detailed settings on the CONTROL tab, how to change the schedule on the SCHEDULE tab, and how to check the power usage on the GRAPH tab. Local Remote Controller Lock You can restrict operation of the local remote controllers that belong to each air conditioner. - Page 38 Touch Screen Controller Owner's Manual ● NOTE When local remote control operation is prohibited, if there is a power failure, the local remote control prohibited status will be cancelled when the power returns. If you want to continue the local remote control prohibited status after returning from a power failure, please turn ON DS25-3 under [Menu]-[Initial setting]-[Communication].
-
Page 39: Set Operation Details
Touch Screen Controller Owner's Manual Set Operation Details You can check the current settings of the air conditioner(s) or ON/OFF unit, and set the details of the operation method. Display the CONTROL tab of the air conditioner(s) or ON/OFF unit whose setting you want to change (P.17) When changing in group units, display the batch settings screen (P.27) In the following procedure, the individual control screen is used to explain. - Page 40 Touch Screen Controller Owner's Manual To change, tap to display the settings screen, then tap [OK] after changing the settings For details on the confirmation/setting contents of each item, refer to the following. The items displayed depend on the model and state. Reference Function Name Overview...
-
Page 41: Turn On/Off The Ventilation Function (Ventilation → On/Off)
Touch Screen Controller Owner's Manual Turn ON/OFF the ventilation function (Ventilation → ON/OFF) You can turn ON/OFF the operation of the ventilator connected to the air to air heat exchanger(s) or air conditioner(s). ● NOTE Displayed when a configurable model is connected. Set Ventilation Mode (Ventilation →... -
Page 42: Check The Output Status Of The Air Conditioner(S) (Power Level)
Touch Screen Controller Owner's Manual Check the output status of the air conditioner(s) (Power Level) You can check how much power the air conditioner is using for operation. ● NOTE Displayed in the case of a compatible air conditioner. Check the indoor temperature detected by the outdoor unit (Outdoor temp.) You can check the temperature inside the room detected by the outdoor unit. -
Page 43: Control Air Conditioner Power (Energy Saving Ratio [%])
Touch Screen Controller Owner's Manual Control air conditioner power (Energy saving ratio [%]) An energy saving function whereby you can operate the air conditioner with suppressed cooling/heating power. Release: Save Mode is not performed. Max.: Operate with the highest save rate. Operate at 50% save rate. -
Page 44: Change To Energy Saving Temperature (Eco Temperature Shift)
Touch Screen Controller Owner's Manual Change to energy saving temperature (Eco Temperature Shift) An energy saving function that changes (shifts) the set temperature according to the current operation mode as follows. Operation Mode Set Temperature Shift Width Cool/Dry Current set temperature +2°C shift Heat Current set temperature -2°C shift Auto/Fan... -
Page 45: Change The Operation Schedule
Touch Screen Controller Owner's Manual Change the Operation Schedule Set the details of the operation schedule Schedule settings can be applied from either the group screen or the individual control screen. In the following procedure, the individual control screen is used. Tap [ -(1)] on the group screen or individual control screen... - Page 46 Touch Screen Controller Owner's Manual Change the setting, then tap [OK] The following items can be set: Setting Items Setting Procedure Time setting [Start date] Tap or flick to change the time. Day of the week setting [week] Set the check box(es) of the day(s) of the week on which you want to execute the schedule to Operation setting [ON/OFF] To enable the setting, set the check box of [(1)] to...
- Page 47 Touch Screen Controller Owner's Manual Setting Items Setting Procedure Return Back settings [Return Back] An energy saving function whereby if you temporarily change the set temperature to one which increases the load, you can automatically return to the energy saving set temperature after a certain time has elapsed.
-
Page 48: Delete The Operation Schedule
Touch Screen Controller Owner's Manual Delete the operation schedule You can delete the schedule from either the group screen or the individual control screen. In the following procedure, the individual control screen is used. Tap [ -(1)] on the group screen or individual control screen -(1) -(1) -
Page 49: Confirm The Operation Time
Touch Screen Controller Owner's Manual Confirm the Operation Time In the GRAPH tab of the group screen or individual control screen, you can check the operation time for each group, air conditioner or ON/OFF unit. You can find the peak period of operation and waste operation. Tap [ -(1)] on the group screen or individual control screen... -
Page 50: Administrator Menu
Touch Screen Controller Owner's Manual Administrator menu Restrict Operation of the Touch Screen Controller (Operation Lock) You can restrict the operation range of the Unit by locking it. This section explains how to lock and release it. For the restriction range, see "Set the operation lock level (Operation lock)" (P.62). -(1) -(1) -(1)] appears. -
Page 51: Confirm Alarm History (Alarm History)
Touch Screen Controller Owner's Manual Confirm Alarm History (Alarm history) You can display alarms that have occurred in a list, including currently occurring alarms. This can be used for grasping the status of the site such as investigating the cause of an alarm and the recovery status. ●... -
Page 52: Confirm The Power Consumption On A Graph (Power Consumption)
Touch Screen Controller Owner's Manual Confirm the Power consumption on a Graph (Power consumption) Pulse values are graphed and the electric power can be visually confirmed. * This function can be displayed when the electric power is measured by connecting this Unit to a pulse oscillation type watt hour meter. -
Page 53: [Functions] Menu Settings
Touch Screen Controller Owner's Manual [Functions] Menu Settings On the [Functions] menu, demand control of outdoor units and summation of data for power allocation can be performed. How to display the [Functions] menu -(1) -(1) -(1)] appears. Tap [ -(1)] -(1)] appears. -
Page 54: Set Demand Control Schedule Of Outdoor Unit (Power Peak Cut Schedule)
Touch Screen Controller Owner's Manual Set demand control schedule of outdoor unit (Power peak cut schedule) The demand function of the outdoor unit can be managed with the schedule to 90 to 0% according to the peak time zone. Setting example: When "80%"... - Page 55 Touch Screen Controller Owner's Manual Tap or flick to set the start time and tap [ -(1)] -(1) -(1) Select the outdoor demand level and tap [ -(1)] to add a demand schedule -(1) -(1) To add a schedule such as change/release of demand level, repeat steps ●...
-
Page 56: Delete An Power Peak Cut Schedule
Touch Screen Controller Owner's Manual Delete an Power peak cut schedule Tap [ -(2)] with [ -(1)] (P.53) -(1) -(1) -(2) -(2) -(1) -(1) Set the check box of the schedule you want to delete to then tap [ -(1)] The selected schedule will be deleted. -
Page 57: Disable The Operation Schedule And Power Peak Cut Schedule (Scheduler Operation)
Touch Screen Controller Owner's Manual Disable the Operation Schedule and Power peak cut schedule (Scheduler Operation) You can disable registered Operation Schedules and Power peak cut schedules so that they do not operate. Tap [Scheduler Operation] in the [Functions] menu (P.53) Set the check box to if you do not want to operate each schedule, or set the check box to to operate them, then tap [OK]... -
Page 58: Set The Screen Display (Display)
Touch Screen Controller Owner's Manual Set the screen display (Display) You can change the display settings of the screen, such as language and date display format. Tap [ -(2)] with [ -(1)] (P.57) Tap the item you want to change Language: You can change the display language of the screen. -
Page 59: Set Icons Of Devices Other Than Air Conditioners (Icon)
Touch Screen Controller Owner's Manual Set icons of devices other than air conditioners (Icon) You can display icons of each device on the CONTROL tab of devices other than air conditioners such as ventilation fan or lighting. Tap [ -(2)] with [ -(1)] (P.57) -(2) -(2) -
Page 60: Set An Account For Remote Operation (User Account)
Touch Screen Controller Owner's Manual Set an account for remote operation (User Account) You can set a user account to operate the Unit remotely. * Remote operation can be used when the Unit is connected via LAN to a PC on which the Remote Control Software is installed. -
Page 61: Delete A User Account
Touch Screen Controller Owner's Manual Set level Administrators: All functions can be used. Power Users: The following functions cannot be used. • Confirm/change the operation schedule • [Menu] > Functions • [Menu] > Initial setting Guests: Only the operation status can be confirmed. The settings cannot be changed. ●... -
Page 62: Set The Operation Lock Level (Operation Lock)
Touch Screen Controller Owner's Manual Set the operation lock level (Operation lock) Tap [ -(2)] with [ -(1)] (P.57) -(2) -(2) -(1) -(1) Enter the password and tap [ -(1)] ● NOTE The factory default setting password is "1048". -(1) -(1) Select the protection level during lock ●... -
Page 63: Set Alarm Email Destination (Alarm Email Address)
Touch Screen Controller Owner's Manual Tap [ -(1)] The Unit restarts. -(1) -(1) Set alarm email destination (Alarm email address) You can set the email address to send email to when an alarm occurs. ● NOTE Up to five email addresses can be set. Tap [ -(2)] with [ -(1)] (P.57) -
Page 64: Set The Screen Brightness (Backlight)
Touch Screen Controller Owner's Manual Set the screen brightness (Backlight) You can set the brightness of the screen and the duration after the end of the operation. (30, 60, 360, or 720 minutes later) Tap [ -(2)] with [ -(1)] (P.57) -(1) -(1) Select the brightness and tap [... -
Page 65: Remote Monitoring Using A Pc
Touch Screen Controller Owner's Manual Remote monitoring using a PC You can monitor and control the Unit by accessing it from a PC. This section explains the system diagram and the operating environment. For settings, etc., see "Settings for Remote Monitoring with a PC" (P.20). ●... -
Page 66: Exit Remote Control Software
Touch Screen Controller Owner's Manual Click [ Click [ You are logged out from the Remote Control Software. Exit Remote Control Software Tap [ -(1)] -(1) -(1) Tap [ -(1)] Exit the Remote Control Software. -(1) -(1) -
Page 67: Power Allocation
Touch Screen Controller Owner's Manual Power allocation Electric Power Allocation System that can be Used with this Unit In normal houses, a contract is made with the electric power company for each house, but in buildings such as offices and shops, a contract is made between the building owner and the electric power company, and the building owner pays the total electricity bill. -
Page 68: Power Allocation System
Touch Screen Controller Owner's Manual Power Allocation System In order to perform power allocation, it is necessary to sum the data for power allocation. Summing may be done by automatic meter-reading or manual meter-reading. Set the summation date of the power allocation data (Automatic Meter-Reading) You can set the date for automatic meter-reading of the power allocation data. -
Page 69: Sum Data For Power Allocation As Necessary (Manual Meter-Reading)
Touch Screen Controller Owner's Manual Sum data for power allocation as necessary (Manual Meter-Reading) You can manually meter-read the data for power allocation from the previous meter-reading day until the current day. Manual meter-reading is convenient if you need to sum data for power allocation before the automatic meter-reading day, such as when a tenant leaves. -
Page 70: Troubleshooting
Touch Screen Controller Owner's Manual Troubleshooting Phenomenon Question Confirmation items The LCD does not display. Is the power turned on? Check that the power is not turned off by the breaker or the like. There is a green LED at the lower rear of the main unit and a green LED on the AC adapter that indicate that power is being supplied. - Page 71 Touch Screen Controller Owner's Manual Phenomenon Question Confirmation items The LCD does not turn off. Is an alarm occurring? The LCD will still be on when an alarm is occurring. Turn off the alarm. Sometimes the LCD becomes The LCD's antistatic control is Temporarily stop the LCD periodically to prevent LCD burn-in.
- Page 72 Software. the Remote Control Software storage Carrier Corporation). location? Right-click on the TOSHIBA Carrier Corporation folder, select the [Properties] - [Security] Name, click the "Edit" button and check [Allow] for [Full control] under different settings. The schedule setting changes Are you trying to change the schedule To change the schedule settings, please set only one of either the have not been reflected.
-
Page 73: Useful Information
Touch Screen Controller Owner's Manual Useful information The following cases are not faults with the Unit. Problem Cause When an air conditioner is stopped, its This is because even when an air conditioner is stopped, you can set its operation from the operation status is displayed on the LCD Touch Screen Controller. -
Page 74: Function List
Touch Screen Controller Owner's Manual Function list Key Features Key Features Main unit 8 inputs ON/OFF Inputs DIO interface 8 inputs x 4 units Setting mode Power pulse measurement Set temp. Demand Interlocking Fan speed settings Fire Alarm Interlocking Swing ON External input Security Interlocking Local remote controller operation lock/unlock... -
Page 75: Glossary
Touch Screen Controller Owner's Manual Glossary Power peak cut ON/OFF unit The maximum demand power, which is the power value used Indicates devices that cannot control or monitor set to calculate the electricity fee from the electric power temperature or setting mode among the managed devices. company. - Page 76 Touch Screen Controller Owner's Manual Unit Operation Remote Operation Operation Operation Operation Item Adminis- Power Lock Lock Lock Guests trators Users None - Level 1 - Level 2 Menu Operation lock screen Alarm History ...
-
Page 77: Warranty And After-Sales Service
Touch Screen Controller Owner's Manual Warranty and after-sales service About the Warranty • Please keep the warranty card carefully after confirming that necessary items have been filled in. • The warranty period is one year from date of purchase. Since repairs may be charged for even within the warranty period, please check the warranty details stated in the warranty card. -
Page 78: Oss License
Touch Screen Controller Owner's Manual OSS License... - Page 79 Touch Screen Controller Owner's Manual...
- Page 80 Touch Screen Controller Owner's Manual...
- Page 81 Touch Screen Controller Owner's Manual...
- Page 82 Customer Memo Model Name BMS-CT1280E / BMS-CT1280E-TR Installation Date Year Month Name of dealer from whom you purchased the unit Phone number It is convenient to fill this in at the time of purchase in case you need to request repair, etc.