Huawei SUN2000 User Manual
Hide thumbs
Also See for SUN2000:
- User manual (170 pages) ,
- Quick manual (24 pages) ,
- Quick installation manual (12 pages)

Related Manuals for Huawei SUN2000


Summary of Contents for Huawei SUN2000
- Page 1 31186168 SUN2000 (8KTL-28KTL) User Manual Issue Date 2014-07-30 HUAWEI TECHNOLOGIES CO., LTD.
- Page 2 Notice The purchased products, services and features are stipulated by the contract made between Huawei and the customer. All or part of the products, services and features described in this document may not be within the purchase scope or the usage scope. Unless otherwise specified in the contract, all statements, information, and recommendations in this document are provided "AS IS"...
-
Page 3: About This Document
About This Document About This Document Purpose This document describes the SUN2000 in terms of its installation, electrical connections, commissioning, maintenance, and troubleshooting. Get familiar with this document before installing and operating the SUN2000. This document is under continuous updates and correcting. You can download the latest version from http://support.huawei.com/carrier/. - Page 4 Modified the output power of the inverter at different temperatures in General Data in Technical Specifications. Issue 04 (2013-12-15) Added descriptions about the SUN2000-23KTL. Issue 03 (2013-10-11) Added descriptions about the SUN2000-28KTL. Issue 02 (2013-06-08) This issue is the second official release.
-
Page 5: Table Of Contents
5.4.2 Connecting RS485 Communications Cables ......................59 6 System Operation ........................64 6.1 Checking Before Power-On ............................64 6.2 Powering on the SUN2000 ............................64 6.3 Setting Initialization Parameters ..........................65 7 LCD ..............................68 7.1 Monitoring Menu Hierarchy ............................68 7.2 Monitoring Operations .............................. - Page 6 7.2.15 Enabling the USB Guide Function ........................102 7.2.16 Viewing the System Version ..........................105 8 Maintenance ..........................107 8.1 Powering Off the SUN2000 ............................107 8.2 Daily Maintenance ..............................108 8.3 Common Faults and Troubleshooting Measures ....................... 108 9 Inverter-Associated Operations ..................... 116 9.1 Removing the SUN2000 ............................
-
Page 7: Safety Precautions
To ensure good heat dissipation and reserve enough space for installing the SUN2000, the SUN2000 is at least 200 mm, 500 mm, 300 mm, and 1000 mm away from objects on its both sides, top, bottom, and front respectively. - Page 8 Do not disconnect the DC power supply during the SUN2000 operation. Do not touch a running SUN2000 except for the liquid crystal display (LCD) and DC switch because the shelf and heat sinks become hot during the SUN2000 operation.
-
Page 9: Overview
Introduction of the function, model and application of the SUN2000. Function The SUN2000 is a grid-tied PV inverter. It converts the high-voltage DC power generated by PV arrays into sine wave three-phase AC power with the same frequency and phase as the power grid. - Page 10 23 kW SUN2000-28KTL 27.5 kW Application The SUN2000 applies to commercial rooftop grid-tied systems and large power station grid-tied systems. Typically, the grid-tied system consists of PV modules, grid-tied inverters, and AC distribution modules (ACDUs), as shown in Figure 2-2.
-
Page 11: Appearance
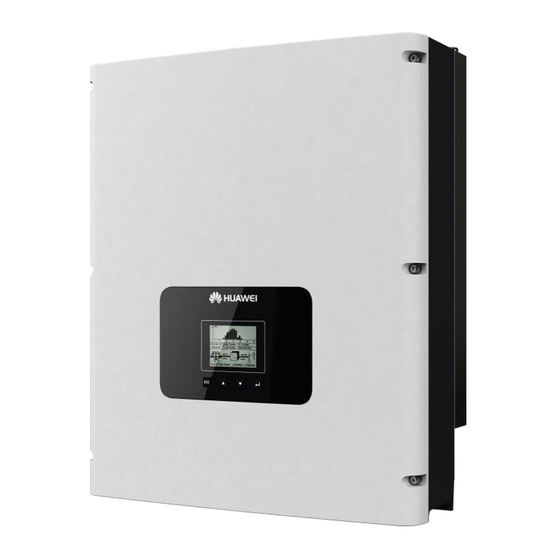
Figure 2-3 Power grid modes supported by the SUN2000-8KTL to SUN2000-23KTL Figure 2-4 Power grid modes supported by the SUN2000-28KTL 2.2 Appearance This topic describes the SUN2000 in terms of its appearance and specifications. Issue 07 (2014-07-30) Huawei Proprietary and Confidential... - Page 12 Front view 1. Shell 2. Control panel The LCD displays the SUN2000 operating data, such as input power, output power, and electricity output. The indicators show the SUN2000 operating status and its faults. Issue 07 (2014-07-30) Huawei Proprietary and Confidential...
- Page 13 SUN2000 (8KTL-28KTL) User Manual 2 Overview Side view Rear view 1. Heat sink 2. Install mounting rackets Issue 07 (2014-07-30) Huawei Proprietary and Confidential Copyright © Huawei Technologies Co., Ltd.
-
Page 14: Symbol Conventions
Note: The objects in blue are dustproof plugs. Remove them before connecting DC input power cables. 2.3 Symbol Conventions Introduction of the symbols and nameplates of the SUN2000. Symbol Table 2-2 describes all symbols on the SUN2000. Table 2-2 Symbols... - Page 15 SUN2000, see Inverter-Associated Operations. Identifying Nameplates Each SUN2000 is labeled with a nameplate on which you can view the model, technical specifications, and certification label, as shown in Figure 2-5. Issue 07 (2014-07-30) Huawei Proprietary and Confidential...
- Page 16 2 Overview Figure 2-5 Nameplates 1. Trademark and product model of the 2. Technical specifications of the SUN2000 SUN2000 3. Labels of certifications that the SUN2000 4. Company name and the complies with manufacturing place Table 2-3 describes certification labels.
-
Page 17: Monitoring Panel
2. Indicators 3. Buttons The LCD displays the SUN2000 data in graphics and characters, including the operating information, alarm information, system parameters, and user parameters. If you do not press any button within 90s, the liquid crystal display (LCD) returns to the... - Page 18 Allows you to view the power flow from the PV strings to the SUN2000 and view the voltage and current of each input. Allows you to view the power flow from the SUN2000 to the power grid and view the voltage and current of each output. −...
- Page 19 2 Overview Figure 2-8 Idle: Irradiation Detecting Figure 2-9 shows the displayed page when the SUN2000 detects a fault or a shutdown command. Figure 2-9 Shutdown: Fault Indicators The SUN2000 monitoring panel provides four indicators, which are described in Table 2-4.
-
Page 20: Working Principles
(on for 1s and warning. For details about the then off for 4s) warning, see 7.2.2 Viewing Alarm Records. Buttons The SUN2000 monitoring panel has four buttons, which are described in Table 2-5. Table 2-5 Button description Button Name Function Return... - Page 21 The SUN2000-8KTL, SUN2000-10KTL, and SUN2000-12KTL receive inputs from four PV strings. Then the inputs are grouped into two MPPT routes inside the SUN2000 to track the maximum power point of the PV strings. After that, the DC power is converted into three-phase AC power through an inverter circuit.
- Page 22 The DC switch disconnects internal circuits from the DC input to facilitate maintenance. The category II DC surge protection device (SPD) on the input side provides the discharge loop for the overvoltage power on the DC side to protect the SUN2000 internal circuits from DC overvoltage. ...
- Page 23 Standby The SUN2000 enters the standby mode when the external environment does not meet the requirements for starting the SUN2000. In standby mode, the SUN2000 continuously performs the self-check and enters the operating mode once the operation requirements are met.
- Page 24 Mode a shutdown command in standby or operating mode. The SUN2000 may shut down due to a fault, after receiving a shutdown command, or after manual operation. After detecting a startup command or that a fault is rectified, the SUN2000 enters the standby mode.
-
Page 25: Inverter Storage
If the inverter has been long-term stored, inspections and tests should be conducted by qualified personnel before it is put into use. Issue 07 (2014-07-30) Huawei Proprietary and Confidential Copyright © Huawei Technologies Co., Ltd. -
Page 26: Installation
Do not store the SUN2000 in areas with flammable or explosive materials. Do not install the SUN2000 in places prone to body contact because the SUN2000 shelf and heat sinks become hot during the SUN2000 operation. 4.1 Checking Before Installation Before unpacking, check that the packing materials are intact. - Page 27 User Manual 4 Installation Checking Deliverables After unpacking the SUN2000, check whether deliverables are intact and complete. If any damage is found or any component is missing, contact the dealer. Figure 4-1 shows the components and mechanical parts that should be delivered.
-
Page 28: Tools
Positive and negative metal terminals are packed with positive and negative connectors respectively. Separate the positive from negative metal terminals after unpacking the SUN2000 to avoid confusing the polarities. Documentation 1 Includes the quick installation guide in paper copies and user manual in a CD-ROM. - Page 29 Removes DC connectors from the SUN2000. Manufacturer: AMPHENOL Vacuum cleaner Cleans up dust after drilling holes. Multimeter Checks the grounding connections. Marker Diameter: 10 mm at most Marks signs. Issue 07 (2014-07-30) Huawei Proprietary and Confidential Copyright © Huawei Technologies Co., Ltd.
-
Page 30: Determining The Installation Position
Comply with the following requirements when determining the installation position: Do not install the SUN2000 on flammable building materials. Do not store the SUN2000 in areas with flammable or explosive materials. Issue 07 (2014-07-30) Huawei Proprietary and Confidential Copyright © Huawei Technologies Co., Ltd. - Page 31 To ensure good heat dissipation and reserve enough space for installing the SUN2000, the SUN2000 is at least 200 mm, 500 mm, 300 mm, and 1000 mm away from objects on its both sides, top, bottom, and front respectively, as shown in Figure 4-2.
- Page 32 The stacked installation mode shown in Figure 4-4 is not recommended. The clearance between SUN2000s meets requirements shown in the following figures. Figure 4-3 Triangle installation mode Issue 07 (2014-07-30) Huawei Proprietary and Confidential Copyright © Huawei Technologies Co., Ltd.
-
Page 33: Moving The Sun2000
4.4 Moving the SUN2000 This topic describes how to move the SUN2000 to the installation position horizontally. Procedure Step 1 Insert hands into the slots on both sides of the SUN2000 and hold the handles, as shown in Figure 4-5 Figure 4-6. -
Page 34: Support-Mounting The Sun2000
Figure 4-5 Moving the SUN2000 (1) Figure 4-6 Moving the SUN2000 (2) Step 2 Lift the SUN2000 from the packing case and move it to the installation position. To prevent device damage and personal injury, keep balance when moving the SUN2000 because the SUN2000 is heavy. - Page 35 5.1 Installing PGND Cables. You are advised to install the SUN2000 in a position in the same height as your eyes to facilitate operation and maintenance. Procedure Step 1 Determine the positions for drilling holes using the rear panel in the packing case, and mark...
- Page 36 Step 3 Align the rear panel with hole positions, insert M10 x 60 bolts into the holes, and tighten the bolts to a torque of 30 N.m using a torque wrench, as shown in Figure 4-10. Issue 07 (2014-07-30) Huawei Proprietary and Confidential Copyright © Huawei Technologies Co., Ltd.
- Page 37 Figure 4-10 Securing a rear panel Step 4 Hold the handle at the bottom of the SUN2000 with one hand and hold the end of the other handle near the SUN2000 top with the other end, and then stand the SUN2000, as shown in Figure 4-11.
- Page 38 SUN2000 (8KTL-28KTL) User Manual 4 Installation Figure 4-12 Mounting a SUN2000 on a rear panel Step 6 Tighten the two hexagon screws at the bottom of the SUN2000 to a torque of 5 N.m, as shown in Figure 4-13. Figure 4-13 Tightening hexagon screws...
-
Page 39: Wall-Mounting The Sun2000
4 Installation Step 7 (Optional) Install an antitheft lock, as shown in Figure 4-14. The function of an antitheft lock is to secure the SUN2000 to the rear panel and protect it from stealing. Figure 4-14 Installing an antitheft lock ----End 4.6 Wall-mounting the SUN2000... - Page 40 5.1 Installing PGND Cables. You are advised to install the SUN2000 in a position in the same height as your eyes to facilitate operation and maintenance. Procedure Step 1 Determine the positions for drilling holes using the rear panel in the packing case, and mark...
- Page 41 An expansion bolts contains four parts, as shown in Figure 4-17. Figure 4-17 Expansion bolt composition 1. Expansion sleeve 2. Flat washer 3. Spring washer 4. M10 x 60 bolt Issue 07 (2014-07-30) Huawei Proprietary and Confidential Copyright © Huawei Technologies Co., Ltd.
- Page 42 Step 3 Align the rear panel with hole positions, insert expansion bolts into the holes, and tighten the expansion bolts to a torque of 30 N.m using a torque wrench with a 17 mm open end, as shown in Figure 4-19. Issue 07 (2014-07-30) Huawei Proprietary and Confidential Copyright © Huawei Technologies Co., Ltd.
- Page 43 Figure 4-20 Installing lifting eyes Step 7 Use one hand to hold the handle at the bottom of the SUN2000 and use the other hand to hold the handle close to the top of the SUN2000 and then stand the SUN2000, as shown in Figure 4-21.
- Page 44 To prevent device damage and personal injury, keep balance when lifting the SUN2000 because the SUN2000 has a heavy top. Figure 4-21 Lifting the SUN2000 Step 8 Route a rope through the lifting eyes and hoist the SUN2000, as shown in Figure 4-22. The rope must bear the SUN2000 weight.
- Page 45 SUN2000 (8KTL-28KTL) User Manual 4 Installation Figure 4-22 Hoisting the SUN2000 Step 9 Mount the SUN2000 on the rear panel and keep them aligned with each other, as shown in Figure 4-23 Figure 4-24. Figure 4-23 Mounting the SUN2000 on the rear panel (front view)
- Page 46 SUN2000 (8KTL-28KTL) User Manual 4 Installation Figure 4-24 Mounting the SUN2000 on the rear panel (rear view) Step 10 Tighten the two hexagon screws at the bottom of the SUN2000 to a torque of 5 N.m, as shown in Figure 4-25.
- Page 47 SUN2000 (8KTL-28KTL) User Manual 4 Installation Figure 4-26 Installing an antitheft lock ----End Issue 07 (2014-07-30) Huawei Proprietary and Confidential Copyright © Huawei Technologies Co., Ltd.
-
Page 48: Electrical Connections
Select cables according to local cable specifications (Yellow-green wires are only used for grounding). 5.1 Installing PGND Cables Connect the SUN2000 to a ground bar over protection ground (PGND) cables for grounding purposes. Prerequisites A ground cable has been prepared. Huawei recommends an outdoor power cable with a cross-sectional area of 6 mm (10AWG). - Page 49 5 Electrical Connections Context Good grounding for the SUN2000 can help resist the impact of the surge voltage and improve the EMI performance. First connect the PGND cable before connecting the AC power cable, DC power cable, and communication cable.
- Page 50 To disconnect a ground cable, remove the nut from the M6 welded stud using an adjustable wrench, and then remove the spring washer, flat washer, and crimped OT terminal. Issue 07 (2014-07-30) Huawei Proprietary and Confidential Copyright © Huawei Technologies Co., Ltd.
-
Page 51: Connecting Ac Output Power Cables
User Manual 5 Electrical Connections 5.2 Connecting AC Output Power Cables Connect the SUN2000 to the AC power distribution frame (PDF) or power grid over AC input power cables. Prerequisites An independent there-phase circuit breaker for each inverter must be installed at the output side to ensure that the inverter can be securely disconnected. - Page 52 Step 1 Remove the cable gland and the adapter from the AC output connector. Step 2 Remove the insulation layer of the AC output cable of an appropriate length using a wire stripper. Issue 07 (2014-07-30) Huawei Proprietary and Confidential Copyright © Huawei Technologies Co., Ltd.
- Page 53 The preceding figure shows only how to strip cables for the SUN2000-8KTL to SUN2000-23KTL. For the SUN2000-28KTL, align the neutral cable with the protective jacket and cut off the neutral cable. When cutting off the cable, take protective measures to prevent the cable from splashing and hurting people.
- Page 54 Connect L3 to the hole numbered 3. Connect N to the hole numbered 4. For the SUN2000-28KTL, do not connect the neutral cable to the hole numbered 4. Issue 07 (2014-07-30) Huawei Proprietary and Confidential Copyright © Huawei Technologies Co., Ltd.
- Page 55 Tighten the adapter to a torque of 1-2 N.m. Figure 5-12 Installing a socket Step 7 Secure the cable gland to the adapter, as shown in Figure 5-13. Issue 07 (2014-07-30) Huawei Proprietary and Confidential Copyright © Huawei Technologies Co., Ltd.
- Page 56 Figure 5-13 Installing a cable sealing cover Step 8 Connect the AC output connector to the bayonet coupling of the AC output wiring terminal on the SUN2000 and rotate it clockwise until you hear a "click" sound, as shown in Figure 5-14.
-
Page 57: Installing Dc Input Power Cables
SUN2000 and the power grid. Figure 5-15 Removing an AC output connector 5.3 Installing DC Input Power Cables Connect the SUN2000 to PV arrays over DC input power cables Prerequisites PV modules generate electric energy when exposed to sunlight and can create an electrical shock hazard. - Page 58 The positive and negative terminals of PV arrays connect to the positive and negative DC input terminals respectively. If the SUN2000 connects to the power grid directly, ensure that the PV arrays are not grounded. If the DC voltage is a non-zero value between the positive terminal of PV arrays and the ground, the PV arrays are subject to insulation faults.
- Page 59 DC input connectors are classified into positive and negative connectors, as shown in Figure 5-17 Figure 5-18. Figure 5-17 Positive connector composition 1. Housing 2. Cable gland Figure 5-18 Negative connector composition 1. Housing 2. Cable gland Issue 07 (2014-07-30) Huawei Proprietary and Confidential Copyright © Huawei Technologies Co., Ltd.
- Page 60 Positive and negative metal terminals are packed with positive and negative connectors respectively. Separate the positive from negative metal terminals after unpacking the SUN2000 to avoid confusing the polarities. Procedure Step 1 Remove cable glands from the positive and negative connectors.
- Page 61 Step 5 Reinstall cable glands on positive and negative connectors and rotate them against the insulation covers. t is recommended that you secure the nut by using removal wrenches, as shown in Figure 5-22. Issue 07 (2014-07-30) Huawei Proprietary and Confidential Copyright © Huawei Technologies Co., Ltd.
- Page 62 Step 6 Take off the blue dustproof plugs from the bottom of the DC input connectors. Step 7 Insert the positive and negative connectors into corresponding DC input terminals of the SUN2000 until you hear a "click" sound, as shown in Figure 5-23.
-
Page 63: Connecting Communications Cables
0.8 mm. ----End Follow-up Procedure To remove the positive and negative connectors from the SUN2000, insert a removal wrench into the bayonet and press the wrench with an appropriate strength, as shown in Figure 5-24. - Page 64 RS485 Port The SUN2000 communicates with the RS485 port to send the data of energy yield, alarm information, and running status to the PC terminal of the element management system (EMS) monitoring software (such as the NetEco) and the local data collector (such as the Smart Logger).
-
Page 65: Connecting Rs485 Communications Cables
(a maximum of 20 SUN2000s is supported in one daisy chain). 5.4.2 Connecting RS485 Communications Cables Connect the SUN2000 to communications equipment (such as the data collector and PC terminal) over RS485 communications cables. Context You are recommended to use 24 AWG outdoor shielded network cables with the internal resistance less than or equal to 1.5 ohms/10 m and external diameter of 4.5 mm to 7.5 mm as... - Page 66 Step 2 Insert the shielded network cable into the sealing nut, seals, screw nut, and housing. Step 3 Connect the stripped network cable to corresponding pins on the plug, as shown in Figure 5-28. Issue 07 (2014-07-30) Huawei Proprietary and Confidential Copyright © Huawei Technologies Co., Ltd.
- Page 67 RS485B, RS485 differential signal White and green PGND Blue RS485A, RS485 differential signal + White and blue RS485B, RS485 differential signal Green PGND White and brown PGND Brown PGND Issue 07 (2014-07-30) Huawei Proprietary and Confidential Copyright © Huawei Technologies Co., Ltd.
- Page 68 Step 7 Secure the sealing nut to the housing, as shown in Figure 5-32. Figure 5-32 Connecting a communications cable (5) Step 8 Insert the plug into the RS485 port on the SUN2000, and tighten the screw nut. ----End Issue 07 (2014-07-30) Huawei Proprietary and Confidential...
- Page 69 User Manual 5 Electrical Connections Follow-up Procedure To remove an RJ45 connector from the SUN2000, remove the screw nut, press the clip on the RJ45 connector, and then pull out the shielded RJ45 connector. Issue 07 (2014-07-30) Huawei Proprietary and Confidential...
-
Page 70: System Operation
6.2 Powering on the SUN2000 This topic describes how to power on the SUN2000 after electrical connection is complete. Procedure Step 1 Switch on the AC circuit breaker between the SUN2000 and the power grid. If you perform Step 2... -
Page 71: Setting Initialization Parameters
The initialization parameters include the system language, system time, and power grid standard code. Context If the SUN2000 is started for the first time, set the initialization parameters by referring to this section. If the SUN2000 is not started for the first time, it will enter the startup detection page. Procedure ... - Page 72 Advanced User , and choose Settings > Init Wizard to set the grid code. The SUN2000-28KTL applies only to the medium-voltage grid-feeding scenarios. The power grid standard codes supported are the China medium-voltage grid standard code,...
- Page 73 6 System Operation For multiple SUN2000s networked, after the initialization parameters are set, you need to set the address and baud rate for each SUN2000 by following the rules below: Addresses for all SUN2000s in the same daisy chain should be different from each other.
-
Page 74: Lcd
This topic describes the monitoring panel, monitoring menu, default page, and monitoring operations. 7.1 Monitoring Menu Hierarchy This topic describes the monitoring menu hierarchy, which allows you to perform operations conveniently. Figure 7-1 shows the monitoring menu hierarchy. Issue 07 (2014-07-30) Huawei Proprietary and Confidential Copyright © Huawei Technologies Co., Ltd. - Page 75 The initial passwords for Common User, Advanced User and Special User are 000001. Login inverter for the first time to use the initial password, and change the password as soon as possible to ensure account safety. Issue 07 (2014-07-30) Huawei Proprietary and Confidential Copyright © Huawei Technologies Co., Ltd.
- Page 76 SUN2000 (8KTL-28KTL) User Manual 7 LCD Figure 7-2 Monitoring menu hierarchy (2) Issue 07 (2014-07-30) Huawei Proprietary and Confidential Copyright © Huawei Technologies Co., Ltd.
-
Page 77: Monitoring Operations
7.2.1 Viewing System Operating Information This topic describes how to view the SUN2000 operating information on the monitoring panel. The operating information includes the daily energy yield, monthly energy yield, year energy yield, historical energy yield, total energy yield, ISO value, input data, output data, and the cabinet temperature. - Page 78 The operating information includes the daily energy yield, monthly energy yield, year energy yield, historical energy yield, total energy yield, ISO value, input data, output data, and the cabinet temperature. Issue 07 (2014-07-30) Huawei Proprietary and Confidential Copyright © Huawei Technologies Co., Ltd.
- Page 79 To switch between days, press NOTE The selected block is displayed in white. NOTICE To view the energy yield in the past 12 months Issue 07 (2014-07-30) Huawei Proprietary and Confidential Copyright © Huawei Technologies Co., Ltd.
- Page 80 To view the energy yield in the past 25 years (including the current year), press . To view the energy yield on a specific month of the current year, press Issue 07 (2014-07-30) Huawei Proprietary and Confidential Copyright © Huawei Technologies Co., Ltd.
- Page 81 8. On the E-Total page, view the total energy yield, CO emission reduction, and revenue corresponding to the CO emission reduction from the startup time to the current time. Issue 07 (2014-07-30) Huawei Proprietary and Confidential Copyright © Huawei Technologies Co., Ltd.
- Page 82 9. On the ISO Value page, view the day ISO value on the current month. To view the maximum insulation resistance detected when the SUN2000 connects to the power grid for the last time on each day of the current month, press 10.
-
Page 83: Viewing Alarm Records
User Manual 7 LCD Operation Procedure 12. On the Cabinet Temp. page, view the temperature of the input SUN2000. ----End 7.2.2 Viewing Alarm Records This topic describes how to view active and historical alarm records and set the alarm record sort mode on the monitoring panel. - Page 84 ID. A stands for the sequence of the alarm in the active alarm list. B stands for the total number of active alarms. Issue 07 (2014-07-30) Huawei Proprietary and Confidential Copyright © Huawei Technologies Co., Ltd.
-
Page 85: Setting System Time Parameters
Time or By Alarm Severity. ----End 7.2.3 Setting System Time Parameters This topic describes how to set the time and date for the SUN2000 on the monitoring panel. Issue 07 (2014-07-30) Huawei Proprietary and Confidential Copyright © Huawei Technologies Co., Ltd. - Page 86 30 seconds. If you exit from the Settings page and log in again within 30 seconds, no authentication is required. 4. Choose User Param., and press Log in to the SUN2000 as Advanced Issue 07 (2014-07-30) Huawei Proprietary and Confidential Copyright © Huawei Technologies Co., Ltd.
-
Page 87: Setting The System Language
----End 7.2.4 Setting the System Language This topic describes how to set the SUN2000 display language on the monitoring panel. Issue 07 (2014-07-30) Huawei Proprietary and Confidential Copyright © Huawei Technologies Co., Ltd. - Page 88 30 seconds. If you exit from the Settings page and log in again within 30 seconds, no authentication is required. 4. Choose User Param., and press Log in to the SUN2000 as Advanced Issue 07 (2014-07-30) Huawei Proprietary and Confidential Copyright © Huawei Technologies Co., Ltd.
-
Page 89: Setting The Contrast
The pages will be displayed in the selected language. ----End 7.2.5 Setting the Contrast This topic describes how to set the SUN2000 contrast on the monitoring panel. Procedure The following table describes the procedure for setting the contrast. The parameter values in the figures are for reference only. - Page 90 30 seconds. If you exit from the Settings page and log in again within 30 seconds, no authentication is required. 4. Choose User Param., and press Log in to the SUN2000 as Advanced User. 5. Choose Contrast by pressing , and...
-
Page 91: Setting The Currency And Currency Factor
The parameter values in the figures are for reference only. Operation Procedure 1. On the default page, press to enter the main menu. 2. Choose and press Issue 07 (2014-07-30) Huawei Proprietary and Confidential Copyright © Huawei Technologies Co., Ltd. - Page 92 30 seconds. If you exit from the Settings page and log in again within 30 seconds, no authentication is required. 4. Choose User Param., and press Log in to the SUN2000 as Advanced User. 5. Set the currency. 1. Select Currency by pressing...
-
Page 93: Changing A Password
The following table describes the procedure for setting a new password. The parameter values in the figures are for reference only. Operation Procedure 1. On the default page, press to enter the main menu. Issue 07 (2014-07-30) Huawei Proprietary and Confidential Copyright © Huawei Technologies Co., Ltd. - Page 94 Advanced User, and Special User. The initial password for Common User, Advanced User, and Special User is 000001. If you forget the password, contact Huawei technical support for a dynamic password that is effective only on the current day. Change the password after login.
-
Page 95: Setting Communications Parameters
Procedure The following table describes the procedure for setting communications parameters. The parameter values in the figures are for reference only. Issue 07 (2014-07-30) Huawei Proprietary and Confidential Copyright © Huawei Technologies Co., Ltd. - Page 96 The selectable user name is Advanced User. The initial passwords for Advanced User is 000001. If you forget the password, contact Huawei technical support for a dynamic password that is effective only on the current day. Change the password after login.
-
Page 97: Setting Protection Parameters
Connect. ----End 7.2.9 Setting Protection Parameters This topic describes how to set SUN2000 protection parameters on the monitoring panel. Procedure The following table describes the procedure for setting protection parameters. The parameter values in the figures are for reference only. - Page 98 30 seconds, no authentication is required. 4. Choose Protect Param. and press If you log in to the SUN2000 as Advanced User, perform step 5. If you log in to the SUN2000 as Special User, perform step 6.
-
Page 99: Setting Feature Parameters
SUN2000 as Advanced User. ----End 7.2.10 Setting Feature Parameters This topic describes how to set SUN2000 feature parameters on the monitoring panel. Procedure The following table describes the procedure for setting feature parameters. The parameter values in the figures are for reference only. - Page 100 30 seconds, no authentication is required. 4. Choose Feature Param. and press If you log in to the SUN2000 as Advanced User, perform step 5 only. If you log in to the SUN2000 as Special User, perform step 6 only.
-
Page 101: Setting Isolation Parameters
Special User. ----End 7.2.11 Setting Isolation Parameters This topic describes how to set SUN2000 isolation parameters on the monitoring panel. Context To ground PV arrays, install a three-phase four-wire isolation transformer and the parameter of Isolation is set to Input Grounded, With TF. -
Page 102: Enabling Manual Power-On And Power-Off
The selectable user names are Common User and Advanced User. The initial password for Common User and Advanced User is 000001. If you forget the password, contact Huawei technical support for a dynamic password that is effective only on the current day. Change the password after login. - Page 103 If you want to enable manual power-on, go to step 5. If you want to enable manual power-off, go to step 6. Log in to the SUN2000 as Advanced User. Issue 07 (2014-07-30) Huawei Proprietary and Confidential Copyright © Huawei Technologies Co., Ltd.
- Page 104 1. Choose Power-On and press 2. Enter again to confirm your settings. 6. Enable manual power-off. 1. Choose Power-Off, and press 2. Enter again to confirm your settings. ----End Issue 07 (2014-07-30) Huawei Proprietary and Confidential Copyright © Huawei Technologies Co., Ltd.
-
Page 105: Restoring Factory Settings
7 LCD 7.2.13 Restoring Factory Settings This topic describes how to restore factory settings for the SUN2000 on the monitoring panel. After restoring factory settings is complete, all parameters except the current date and time will restore the default factory settings. However, the operating information, alarm records, and system logs do not change. - Page 106 30 seconds. If you exit from the Settings page and log in again within 30 seconds, no authentication is required. 4. Choose Restore Defaults, and press Log in to the SUN2000 as Advanced User. 5. On the displayed page, press 6. Press to complete the settings.
-
Page 107: Cleaning The User Data
The selectable user names are Advanced User and Special User. The initial password for Advanced User and Special User is 000001. If you forget the password, contact Huawei technical support for a dynamic password that is effective only on the current day. Change the password after login. -
Page 108: Enabling The Usb Guide Function
Firmware upgrade: Upgrade the SUN2000 software. Configuration importing: Load the existing configuration file to the SUN2000 and update the configuration parameters in batches (all parameters set on the LCD). Data exporting: Download the alarm, performance, log data in the file format to the local computer to facilitate analysis. - Page 109 The user name can be set to Advanced User and Special User. The initial password for Advanced User and Special User is 000001. If you forget the password, contact Huawei technical support for a dynamic password that is effective only on the current day. Change the password after login.
- Page 110 9 only. 6. To confirm the Current is correct, press NOTICE Firmware upgrade is allowed only when the SUN2000 is properly connected to the PV arrays (the PV connection indicator is green). Before upgrading the firmware, download the upgrade...
-
Page 111: Viewing The System Version
9. After the data is successfully exported, press ----End 7.2.16 Viewing the System Version This topic describes how to view the SUN2000 version on the monitoring panel. Procedure The following table describes the procedure for viewing the SUN2000 version. The parameter values in the figures are for reference only. - Page 112 SUN2000 (8KTL-28KTL) User Manual 7 LCD Operation Procedure 2. Choose and press The version information includes Type, Model, Version, and SN. ----End Issue 07 (2014-07-30) Huawei Proprietary and Confidential Copyright © Huawei Technologies Co., Ltd.
-
Page 113: Maintenance
When maintaining or replacing the SUN2000, comply with the safety precautions and operation procedure specified in this section. Context After shutting down the SUN2000, the remaining electricity and heat may cause electrical shocks and body burns. Therefore, operate the SUN2000 five minutes later after the shutdown. -
Page 114: Daily Maintenance
Before wiping the heat sink, ensure that the DC SWITCH is OFF and the circuit breaker between the SUN2000 and the power grid is disconnected. Wait at least for 5 minutes before wiping the heat sink. 8.3 Common Faults and Troubleshooting Measures This topic describes the common faults and troubleshooting measures for the SUN2000. - Page 115 8 Maintenance The alarm severity is defined as follows: Major: The SUN2000 enters the shutdown mode and disconnects from the power grid to stop generating electricity after a fault occurs. Minor: Some components are faulty but the SUN2000 can still generate electricity.
- Page 116 SUN2000 (8KTL-28KTL) User Manual 8 Maintenance Alarm Alarm Alarm Causes Measures Name Severit 1. The SUN2000 detects its DC Bus Major Abnormal external external working Voltage conditions trigger the conditions in real time, Fault protection for the DC and therefore the...
- Page 117 Abnormal external Reason ID = 4, 13, 14, 16, or Module conditions cause the Fault protection for the 1. The SUN2000 detects its inversion circuit inside external working the SUN2000. The conditions in real time, possible causes are as and therefore the...
- Page 118 3. Check whether the grid voltage peak is too high. Reason ID = 27 or 28 1. The SUN2000 detects its external working conditions in real time, and therefore the SUN2000 automatically recovers to the normal...
- Page 119 PV arrays are insulation resistance installed in a threshold. For details, see long-term moist 7.2.9 Setting Protection environment. Parameters. Issue 07 (2014-07-30) Huawei Proprietary and Confidential Copyright © Huawei Technologies Co., Ltd.
- Page 120 Major An unrecoverable fault Flip the DC switch on the Fault occurs on a circuit inside SUN2000 to OFF, wait for 5 the SUN2000. minutes, and flip the DC switch to ON. Check whether the fault is rectified. If no, contact Huawei technical support.
- Page 121 Flash. There is a replace the entire monitor problem in device. equipment. If you cannot rectify faults with the measures listed in Table 8-2, contact Huawei technical support. Issue 07 (2014-07-30) Huawei Proprietary and Confidential Copyright © Huawei Technologies Co., Ltd.
-
Page 122: Inverter-Associated Operations
9.3 Disposing the SUN2000 This topic describes how to dispose the SUN2000. If the SUN2000 service life expires, dispose the SUN2000 according to the local rules about disposing electrical equipment waste, or return the SUN2000 to Huawei. Customers pay the expenses for disposing the SUN2000. -
Page 123: Technical Specifications
SUN2000 (8KTL-28KTL) User Manual 10 Technical Specifications Technical Specifications This topic lists the technical specifications for all SUN2000 models. Efficiency Technical SUN2000 SUN2000 SUN2000 SUN2000 SUN2000 SUN2000 SUN2000 SUN2000 Specifications -8KTL -10KTL -12KTL -15KTL -17KTL -20KTL -23KTL -28KTL Max. efficiency 98.50%... - Page 124 < 3% distortion AC connected Inrush current 33 A / 2 ms (Peak / Duration) Max. output short current 400 A / 110 ms (Peak / Duration) Issue 07 (2014-07-30) Huawei Proprietary and Confidential Copyright © Huawei Technologies Co., Ltd.
- Page 125 -20KTL -23KTL -28KTL Display Graphical LCD RS485 General Data Technical SUN2000 SUN2000 SUN2000 SUN2000 SUN2000 SUN2000 SUN2000 SUN2000 Specifications -8KTL -10KTL -12KTL -15KTL -17KTL -20KTL -23KTL -28KTL Issue 07 (2014-07-30) Huawei Proprietary and Confidential Copyright © Huawei Technologies Co., Ltd.
- Page 126 EN/IEC62109-1, EN/IEC62109-2, EN61000-6-2, EN61000-6-3, EN61000-3-2, EN61000-3-3, EN61000-3-11, EN61000-3-12 Grid code VDE-AR-N4105, VDE0126-1-1, BDEW 2008, CEI 0-21, CEI 0-16, G59/2, G83/2, AS4777, CGC/GF004:2011, IEC61727, IEC62116, EN50438, MEA 2013, PEA 2013 Issue 07 (2014-07-30) Huawei Proprietary and Confidential Copyright © Huawei Technologies Co., Ltd.
-
Page 127: Quality Assurance
During the warranty period, the user should provide the invoice and date. The signs on the products should be clear. Otherwise, Huawei will not be liable for the quality assurance. The warranty period of this product is 60 months after it is unpacked and accepted. The start time must be within 30 days after the delivery date. -
Page 128: A Abbreviation
Element Management System Electromagnetic Interference Liquid Crystal Display Light Emitting Diode Maximum Power Point MPPT Maximum Power Point Tracking Protective Earthing PGND Protection Ground Photovoltaic Surge Protection Device Issue 07 (2014-07-30) Huawei Proprietary and Confidential Copyright © Huawei Technologies Co., Ltd. -
Page 129: B Power Grid Standard Codes
China medium-voltage power grid (no neutral wires for 28 kW systems) TAI-PEA Thailand 220 V TAI-MEA Thailand 230 V BDEW-MV480 Germany medium-voltage power grid (no neutral wires for 28 kW systems) Issue 07 (2014-07-30) Huawei Proprietary and Confidential Copyright © Huawei Technologies Co., Ltd. - Page 130 Japan 50 Hz Japan (60 Hz) Japan 60 Hz EN50438-Turkey-MV Turkey medium-voltage power grid EN50439-Turkey Turkey low-voltage power grid C10/11 Belgium C10/11-MV Belgium medium-voltage power grid EN50438Y2007-NL Netherlands Issue 07 (2014-07-30) Huawei Proprietary and Confidential Copyright © Huawei Technologies Co., Ltd.