Samsung BD-P1400 User Manual
Hide thumbs
Also See for BD-P1400:
- User manual (129 pages) ,
- Service manual (94 pages) ,
- User manual (68 pages)
Table of Contents
Table of Contents

Related Manuals for Samsung BD-P1400


Summary of Contents for Samsung BD-P1400
- Page 1 Blu-ray Disc Player User’s Manual BD-P1400...
-
Page 3: Player Features
key features of your new Blu-ray Disc Player Player Features Digital Photo Viewer (JPEG) You can enjoy digital photos on your TV. MP3 Playback This unit can play mp3 fi les from CD-R/-RW, DVD-R/-RW discs. HDMI (High Defi nition Multimedia Interface) HDMI reduces picture noise by allowing a pure digital video/audio signal path from the player to your TV. - Page 4 Graphic planes Two individual, full HD resolution (1920x1080) video layers are available, on top of the HD video layer. One layer is assigned to video-related graphics (like subtitles), and the other layer is assigned to interactive elements, such as buttons or menus. Various wipes, fades and scroll effects may be available on both layers.
- Page 5 safety information WARNING TO REDUCE THE RISK OF ELECTRIC SHOCK, DO NOT REMOVE THE COVER(OR BACK). NO USER-SERVICEABLE PARTS ARE INSIDE. REFER SERVICING TO QUALIFIED SERVICE PERSONNEL. The lighting fl ash and Arrowhead within Triangle Is a warning sign alerting you of dangerous voltage Inside the product WARNING •...
-
Page 6: Precautions
Note: • This unit can be used only where the power supply is AC 120V, 60Hz. It cannot be used elsewhere. • This Blu-ray Disc Player is designed and manufactured to respond to the Region Management Information. If the Region number of a BD/DVD disc does not correspond to the Region number of this Blu-ray Disc Player, the Blu-ray Disc Player cannot play the disc. -
Page 7: Handling Cautions
This player also operates differently than a standard DVD player or other AV equipment. Please contact the SAMSUNG customer care center if you have questions or encounter diffi culty in playing BD, DVD or CD discs in this player. Also, refer to the rest of this Manual for additional information on playback restrictions. -
Page 8: Table Of Contents
Channel Amplifi er) Connecting to an Audio System (Dolby Digital, DTS Amplifi er) Connecting to an Audio System (HDMI supported Amplifi er) Connecting to Samsung's FTP/Internet site for Software Upgrades Before Playing On-Screen Menu Navigation Playing a Disc Using the Search and Skip Functions... - Page 9 contents SYSTEM SETUP SYSTEM UPGRADE WATCHING A MOVIE LISTENING TO MUSIC VIEWING A PICTURE TROUBLESHOOTING 8_ contents Setting up the Language Options Setting up the Audio Options Setting up the Speaker Options Setting up the Video display/output Options Setting up the HDMI setup options Setting up the Parental Lock Firmware Upgrade System Information...
-
Page 10: Before Reading The User's Manual
Copyright ©2007 Samsung Electronics Co.,Ltd. All rights reserved; No part or whole of this user’s manual may be reproduced or copied without the prior written permission of Samsung Electronics Co.,Ltd. Defi nition This involves a function available on a BD-ROM. -
Page 11: Disc Type And Characteristics
getting started DISC TYPE AND CHARACTERISTICS Disc types that can be played Disc Types Disc Logo BD-ROM DVD-VIDEO AUDIO-CD DVD-RW (V mode and fi nalized only) DVD-R (V mode and fi nalized only) CD-R/-RW DVD-RW/-R • This player is compatible with the NTSC color system only. •... -
Page 12: Discs That Cannot Be Played
Compliance and Compatibility Notice section of this Manual. If you encounter compatibility problems, please contact the SAMSUNG customer care center. This Samsung Blu-ray Disc Player (BD-P1400) supports only the BD-ROM Profi le 1 version 1.0 specifi cation. If you want to play later version discs, you may need to update player's fi... -
Page 13: Disc Types
Once a DVD-R recorded in Video Mode is fi nalized, it becomes DVD-Video. • This unit can play back DVD-R discs recorded and fi nalized with a Samsung DVD video recorder. It may not be able to play some DVD-R discs depending on the disc and the condition of the recording. -
Page 14: Disc Storage & Management
❖ Using JPEG disc • CD-R/-RW, DVD-RW/-R recorded with UDF, ISO9660 or JOLIET format can be played back. • Only JPEG fi les with the ".jpg", ".JPG", ".jpeg" or "JPEG" extension can be displayed. • Progressive JPEG is supported. ❖ DVD-RW/-R (V) •... -
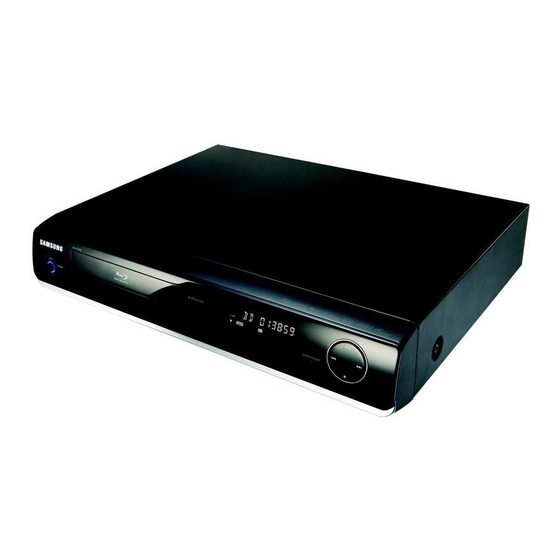
Page 15: Front Panel
description FRONT PANEL DISC TRAY OPEN/CLOSE BUTTON Remote Control Sensor PLAY/PAUSE BUTTON STOP BUTTON SEARCH/SKIP BUTTONS DISPLAY STANDBY INDICATOR POWER BUTTON FRONT PANEL DISPLAY 14_ description Opens to accept a disc. Opens and closes the disc tray. Plays a disc or pauses playback. Stops disc playback. -
Page 16: Rear Panel
REAR PANEL The fan always revolves when the power is on. Ensure a minimum of 4 inches of clear space on all sides of the fan when installing the product. 5.1CH ANALOG AUDIO OUT AUDIO OUT VIDEO OUT COMPONENT VIDEO OUT DIGITAL AUDIO OUT (COAXIAL) DIGITAL AUDIO OUT... -
Page 17: Tour Of The Remote Control
remote control TOUR OF THE REMOTE CONTROL 16_ remote control... - Page 18 English _17...
-
Page 19: Setting The Remote Control
remote control SETTING THE REMOTE CONTROL You can control certain functions of your TV with this remote control. Control function buttons include : TV POWER, TV CH ,., TV VOL + –, TV MUTE, TV INPUT SEL.. To determine whether your television is compatible, follow the instructions below. Switch your television on. -
Page 20: Controllable Tv Codes
CONTROLLABLE TV CODES Brand SAMSUNG TV POWER+01, +02, +03, +04, +05, +06, +07, +08, +09 AIWA TV POWER+82 ANAM TV POWER+10, +11, +12, +13, +14, +15, +16, +17, +18 BANG & OLUFSEN TV POWER+57 BLAUPUNKT TV POWER+71 BRANDT TV POWER+73... -
Page 21: External Components
connections This section involves various methods of connecting the Blu-ray Disc Player to other external components. CONNECTING TO A TV WITH AN HDMI CABLE Using an HDMI-HDMI cable (not included) connect the HDMI OUT terminal on the rear of the Blu-ray Disc Player to the HDMI IN terminal of your TV. -
Page 22: Hdmi Auto Detection Function
If you connect a Samsung TV to the Blu-ray Disc Player using an HDMI cable, the player can be easily operated using the TV remote control. (This is only available with Samsung TVs that support the Anynet+ feature.) (See pages 41~42) •... -
Page 23: Connecting To A Tv With Dvi Cable
connections CONNECTING TO A TV WITH DVI CABLE Using the HDMI-DVI cable (not included), connect the HDMI OUT terminal on the rear of the Blu-ray Disc Player to the DVI IN terminal of your TV. Using the audio cables, connect the AUDIO (red and white) OUT terminals on the rear of the Blu-ray Disc Player to the AUDIO (red and white) IN terminals of your TV. -
Page 24: Connecting To A Tv (Component)
CONNECTING TO A TV (COMPONENT) Connecting to your TV using Component video cables. You will enjoy high quality and accurate color reproduction images. Component video separates the picture element into black and white(Y), blue(P ), red(P through the audio output.) Using component video cables (not included), connect the COMPONENT VIDEO OUT terminals on the rear of the Blu-ray Disc Player to the COMPONENT IN terminals of your TV. -
Page 25: Connecting To A Tv (S-Video)
connections CONNECTING TO A TV (S-VIDEO) Connecting to your TV using an S-Video cable. You will enjoy high quality images. S-Video separates the picture element into black and white(Y) and color(C) signals to present clearer images than regular video input mode. (Audio signals are delivered through the audio output.) Using an S-Video cable (not included), connect the S-VIDEO OUT terminal on the rear of the Blu-ray Disc Player to the S-VIDEO IN terminal of your TV. -
Page 26: Connecting To A Tv(Video)
CONNECTING TO A TV(VIDEO) Using video/audio cables, connect the VIDEO (yellow) / AUDIO (red and white) OUT terminals on the rear of the Blu-ray Disc Player to the VIDEO (yellow) / AUDIO (red and white) IN terminals of your TV. Turn on the Blu-ray Disc Player and TV. -
Page 27: Connecting To An Audio System
connections CONNECTING TO AN AUDIO SYSTEM (2 CHANNEL AMPLIFIER) Using the audio cables, connect the AUDIO (red and white) OUT terminals on the rear of the Blu-ray Disc Player to the AUDIO (red and white) IN terminals of your Amplifi er. Using the video signal cable(s), connect the HDMI, COMPONENT, S-VIDEO, or VIDEO OUT terminals on the rear of the Blu-ray Disc Player to the HDMI, COMPONENT, S-VIDEO, or VIDEO IN terminal of your TV as described on pages 20 to 25. -
Page 28: 5.1 Channel Amplifi Er
CONNECTING TO AN AUDIO SYSTEM (5.1 CHANNEL AMPLIFIER) Using the audio cables, connect the 5.1 ANALOG AUDIO OUT (Front R, Front L, CENTER, SUBWOOFER, Surround L, Surround R) terminals on the rear of the Blu-ray Disc Player to the 5.1 Channel ANALOG AUDIO IN (Front R, Front L, CENTER, SUBWOOFER, Surround L, Surround R) terminals of your Amplifi... -
Page 29: Connecting To An Audio System (Dolby Digital, Dts Amplifi Er)
connections CONNECTING TO AN AUDIO SYSTEM (DOLBY DIGITAL, DTS AMPLIFIER) If using an optical cable (not included), connect the DIGITAL AUDIO OUT (OPTICAL) terminal on the rear of the Blu-ray Disc Player to the DIGITAL AUDIO IN (OPTICAL) terminal of your Amplifi er. If using a coaxial cable (not included), connect the DIGITAL AUDIO OUT (COAXIAL) terminal on the rear of the Blu-ray Disc Player to the DIGITAL AUDIO IN (COAXIAL) terminal of the Amplifi... -
Page 30: Connecting To An Audio System (Hdmi Supported Amplifi Er)
CONNECTING TO AN AUDIO SYSTEM (HDMI SUPPORTED AMPLIFIER) Using the HDMI-HDMI cable (not included), connect the HDMI OUT terminal on the rear of the Blu-ray Disc Player to the HDMI IN terminal of your Amplifi er. Using the HDMI-HDMI cable, connect the HDMI OUT terminal of the Amplifi er to the HDMI IN terminal of your Turn on the Blu-ray Disc Player, TV, and Amplifi... -
Page 31: Connecting To Samsung's Ftp/Internet Site For Software Upgrades
CONNECTING TO SAMSUNG'S FTP/INTERNET SITE FOR SOFTWARE UPGRADES Using the Direct LAN Cable (UTP cable), connect the LAN terminal on the rear of the Blu-ray Disc Player to the LAN terminal of your modem. - Connect to the Internet for future software upgrades. -
Page 32: Before Playing
Not all discs are compatible and not every disc will playback. For additional information, refer to the Disc Type and Characteristics and Compliance and Compatibility Notice sections of this Manual. If you encounter compatibility problems, please contact SAMSUNG customer care center. -
Page 33: On-Screen Menu Navigation
basic functions of your Blu-ray Disc Player ON-SCREEN MENU NAVIGATION Video Music Photo Setup PLAYING A DISC Press the OPEN/CLOSE ( ) button. The STANDBY indicator light goes out and the tray opens. Place a disc gently into the tray with the disc’s label facing up. Press the PLAY/PAUSE ( ) button or OPEN/CLOSE ( ) button to close the disc tray. -
Page 34: Using The Search And Skip Functions
USING THE SEARCH AND SKIP FUNCTIONS During play, you can search quickly through a chapter or track, and use the skip function to jump to the next selection. Searching through a Chapter or Track During playback, press the SEARCH ( •... -
Page 35: System Setup
system setup For your convenience, confi gure proper settings for the external device to connect or any other environment before using the player. SETTING UP THE LANGUAGE OPTIONS If you set the audio, subtitle, disc menu and player menu, in advance, they will come up automatically every time you watch a movie. -
Page 36: Setting Up The Audio Options
SETTING UP THE AUDIO OPTIONS Allows you to set up the Audio device and sound status depending on the audio system being used with the player. With the unit in Stop mode, press the MENU button. Press the ▲▼ buttons to select Setup, then press the ENTER or ►... -
Page 37: Pcm Down Sampling
system setup PCM Down Sampling • On : Select this when the Amplifi er connected to the player is not 96KHz compatible. 96KHz signals will be down converted to 48KHz • Off : Select this when the Amplifi er connected to the player is 96KHz compatible. -
Page 38: Setting Up The Speaker Options
SETTING UP THE SPEAKER OPTIONS If you have connected this player to an Amp/Receiver or Home theater via the 5.1 channel Analog outputs you need to set the Speaker Options for the best sound. With the unit in Stop mode, press the MENU button. Press the ▲▼... -
Page 39: Setting Up The Video Display/Output Options
system setup SETTING UP THE VIDEO DISPLAY/OUTPUT OPTIONS This function allows you to setup the TV screen settings. This function depends on the disc or TV type. It may not work with some discs or TVs. With the unit in Stop mode, press the MENU button. Press the ▲▼... - Page 40 Movie Frame (24 Fs) Movies are usually fi lmed at 24 frames per second. Some Blu- ray Discs have the capability of playing back at this frame rate. Setting the Movie Frame (24Fs) feature to ON allows you to adjust the Blu-ray player's HDMI output to 24 frames per second for improved picture quality.
-
Page 41: Front Display
system setup ❖ Resolution according to the output mode • BD playback Setup 1080p, Movie Frame(24Fs) off 1080p/1080i, Movie Frame (24Fs) on 1080i, Movie Frame (24Fs) off 720P 480P 480i • DVD playback Setup 1080p 1080i 720P 480P 480i This player has the HDMI Auto Detect Feature. -
Page 42: Setting Up The Hdmi Setup Options
Anynet+ is a convenient function that offers linked operations with other Samsung products with the Anynet+ feature. You can operate this unit using a Samsung TV remote control or power on the Samsung TV and Home theater and start disc playback simply by pressing the PLAY button on the Blu-ray player's remote. - Page 43 • Available buttons on the Samsung TV remote: These buttons work the same as this player's remote control. - Playback control buttons : - Menu operation button : - Numeric buttons : - Color buttons : TV Anynet+ Menu...
-
Page 44: Setting Up The Parental Lock
SETTING UP THE PARENTAL LOCK The Parental Lock function works in conjunction with BD/DVDs that have been assigned a rating which helps you control the types of BD/DVDs that your family watches. There are up to 8 rating levels on a disc. With the unit in Stop mode, press the MENU button. -
Page 45: Setting The Rating Level
system setup Setting the Rating Level Press the ▲▼ buttons to select Rating Level, then press the ENTER or ► button. Press the ▲▼ buttons to select the rating level you want, then press the ENTER button. For example, if you select up to Level 6, discs that contain Level 7, 8 will not play. -
Page 46: System Upgrade
Samsung may offer upgrades to your Blu-ray player's fi rmware in the future. To upgrade this fi rmware you must : Go to samsung.com and refer to 'SUPPORT' page to download the fi rmware and burn an update CD. - Page 47 system upgrade To perform the system upgrade, press the ◄► buttons to select Start and then press the ENTER button. The system update gets started. When the verifi cation is done, you will see a window that allows you to update fi rmware. To perform the fi rmware update,press the ◄►...
-
Page 48: System Information
SYSTEM INFORMATION When the fi rmware upgrade is done, check the fi rmware details by following the steps below. With the unit in Stop mode, press the MENU button. Press the ▲▼ buttons to select Setup, then press the ENTER or ► button. Press the ▲▼... - Page 49 system upgrade Press the ▲▼ buttons to select a desired item, then press the ENTER button. • If DHCP is set to Off and DNS is set to Manual HDMI Setup Photo Parental Setup Network Setup Setup System Upgrade DHCP No Disc No Disc IP Address...
-
Page 50: Watching A Movie
watching a movie USING THE DISPLAY FUNCTION During playback, press the INFO button on the remote control. Press the ▲▼ buttons to select the desired item. Press the ◄► buttons to make the desired setup and then press the ENTER button. •... -
Page 51: Using The Disc Menu & Popup/Title Menu
watching a movie USING THE DISC MENU & POPUP/TITLE MENU Using the Disc Menu During playback, press the DISC MENU button on the remote control. Press the ▲▼◄► buttons to make the desired setup, then press the ► or ENTER button. •... -
Page 52: Repeat Play
REPEAT PLAY Repeat the current chapter or title. Repeat playback During playback, press the REPEAT button on the remote control. Repeat screen appears. Press the ▲▼ buttons to select Chapter or Title. • BD/DVD repeats play by chapter or title. To return to normal play, press the REPEAT button again, then press the ▲▼... -
Page 53: Selecting The Subtitle Language
watching a movie Using the INFO button During playback, press the INFO button on the remote control. Press the ▲▼ buttons to select Audio language. Press the ◄► buttons on the remote control to select the desired audio. This function depends on what audio languages are encoded on the disc and may not be available. ... -
Page 54: Changing The Camera Angle
CHANGING THE CAMERA ANGLE When a BD/DVD contains multiple angles of a particular scene, you can use the ANGLE function. Using the ANGLE function During playback, press the INFO button on the remote control. Press the ▲▼ buttons to select Angle. Press the ◄►... -
Page 55: Clearing A Bookmark
watching a movie Playing back a bookmark During playback, press the MARKER button on the remote control. Press the ◄► buttons to select a bookmarked scene. Press the ENTER or PLAY/PAUSE( Clearing a bookmark During playback, press the MARKER button on the remote control. -
Page 56: Listening To Music
listening to music PLAYING AN AUDIO CD(CD-DA) Insert an Audio CD(CD-DA) into the disc tray. For an audio CD, the fi rst track will be played automatically. To move to the Music List, press the STOP or RETURN button. The Music List screen is displayed Press the ▲▼... -
Page 57: Buttons On The Remote Control Used For
listening to music BUTTONS ON THE REMOTE CONTROL USED FOR AUDIO CD (CD-DA)/ MP3 DISC PLAYBACK REPEAT AUDIO CD(CD-DA) & MP3 During playback, press the REPEAT or RED(A) button repeatedly to select the repeat mode you want. When playing an Audio CD(CD-DA) : Normal When playing an MP3 disc : Normal... - Page 58 Playlist You can create a playlist with up to 99 tracks. To setup, follow steps 1 to 2 in page 55. Press the GREEN(B) button. Press the ▲▼ buttons to select a track, then press the ENTER button to add it to the Playlist. Repeat this procedure to add additional tracks.
-
Page 59: Viewing A Picture
Viewing a Picture VIEWING A PICTURE Insert a JPEG disc into the disc tray. • The Menu screen is displayed. ▲▼ Press the buttons to select Photo, then press the ENTER button. • The Photo List is displayed. ▲▼ Press the buttons to select a picture. -
Page 60: Zoom
ZOOM To setup, follow steps 1 to 3 in "Viewing a Picture" on page 58. Press the ENTER button. Press the YELLOW(C) button. Use the RED(A) and GREEN(B) buttons to zoom in/out the image. - To stop the Zoom - Press the YELLOW(C) button. -
Page 61: Troubleshooting
troubleshooting Before requesting service, please check the following. PROBLEM No operations can be performed with the remote control. Disc does not play. 5.1 channel sound is not being reproduced. Disc Menu doesn’t appear. icon appears on screen. Play mode differs from the Setup Menu selection. - Page 62 • If the problem still cannot be solved, please contact your nearest Samsung authorized service center. • Make sure that the disc is not dirty or scratched.
-
Page 63: Appendix
Audio Output *Frequency Response *S/N Ratio *Dynamic Range *Total Harmonic Distortion - Samsung Electronics Co., Ltd reserves the right to change the specifi cations without notice. - Weight and dimensions are approximate. 62_ appendix AC 120V, 60Hz 29 W 9.3 Ibs 16.9 (W) x 12.8 (D) x 3.1 (H) inches... -
Page 64: Copy Protection
• HD DVD discs cannot be played in this player. • Samsung cannot assure that this player will play every disc bearing the BD-ROM, DVD-Video, DVD-RW / DVD- R and CD-RW / CD-R logos, and this player may not respond to all operating commands or operate all features of every disc. -
Page 65: Warranty (For Usa Users Only)
SAMSUNG or SAMSUNG’s authorized service center. Transportation to and from the service center is the responsibility of the purchaser. SAMSUNG will repair or replace this product, at our option and at no charge with new or reconditioned parts, if found to be defective during the limited warranty period specified above. - Page 66 Contact SAMSUNG WORLD WIDE If you have any questions or comments relating to Samsung products, please contact the SAMSUNG customer care center. Region Country CANADA North America MEXICO U.S.A ARGENTINE BRAZIL CHILE COSTA RICA ECUADOR EL SALVADOR GUATEMALA Latin America...
- Page 67 Contact SAMSUNG WORLD WIDE If you have any questions or comments relating to Samsung products, please contact the SAMSUNG customer care center. 1-800-SAMSUNG (7267864)/www.samsung.com/us Samsung Electronics America,Inc. 105 Challenger Road Ridgefield Park,NJ 07660-0511 1-800-SAMSUNG (7267864) www.samsung.com/us AK68-01454A...