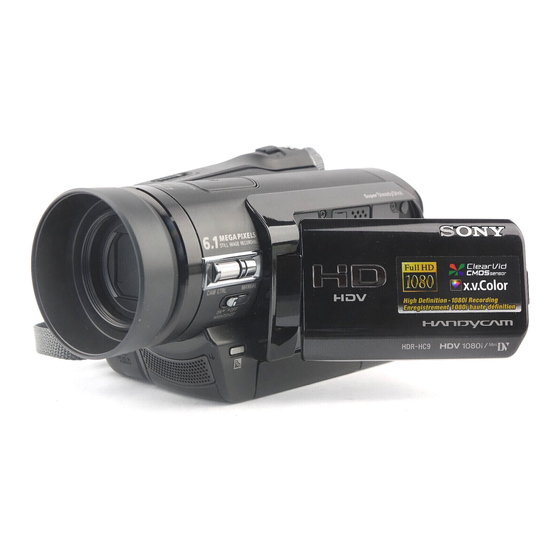
Sony Handycam HDR-HC9 Operating Manual
Digital hd video camera recorder
Hide thumbs
Also See for Handycam HDR-HC9:
- Operating manual (136 pages) ,
- Service manual (113 pages) ,
- Specifications (2 pages)
Table of Contents
Quick Links
Digital HD Video Camera Recorder
Operating Guide
HDR-HC9
© 2008 Sony Corporation
3-278-987-12(1)
Enjoying pictures with
high definition quality
Getting Started
Recording/
Playback
Using the Menu
Dubbing/Editing
Using a Computer
Troubleshooting
Additional Information
Quick Reference
Spanish Quick Guide/
Guía rápida en español
10
12
21
39
64
73
78
90
103
115
Table of Contents

Related Manuals for Sony Handycam HDR-HC9


Summary of Contents for Sony Handycam HDR-HC9
- Page 1 Digital HD Video Camera Recorder Operating Guide HDR-HC9 © 2008 Sony Corporation 3-278-987-12(1) Enjoying pictures with high definition quality Getting Started Recording/ Playback Using the Menu Dubbing/Editing Using a Computer Troubleshooting Additional Information Quick Reference Spanish Quick Guide/ Guía rápida en español...
-
Page 2: Important Safeguards
WARNING To reduce fire or shock hazard, do not expose the unit to rain or moisture. This symbol is intended to alert the user to the presence of uninsulated “dangerous voltage” within the product’s enclosure that may be of sufficient magnitude to constitute a risk of electric shock to persons. -
Page 3: Replacement Parts
Cleaning Unplug the set from the wall outlet before cleaning or polishing it. Do not use liquid cleaners or aerosol cleaners. Use a cloth lightly dampened with water for cleaning the exterior of the set. Installation Water and Moisture Do not use power-line operated sets near water – for example, near a bathtub, washbowl, kitchen sink, or laundry tub, in a wet basement, or near a swimming pool, etc. -
Page 4: Read This First
(2) this device must accept any interference received, including interference that may cause undesired operation. Notes HDR-HC9 is to be used with AC Adaptor Model AC-L200/L200B. CAUTION You are cautioned that any changes or modifications not expressly approved in this manual could void your authority to operate this equipment. -
Page 5: Notes On Use
See www.dtsc.ca.gov/hazardouswaste/perchlorate Perchlorate Material: Lithium battery contains perchlorate. Notes on use Your camcorder is supplied with two kinds of manuals – “Operating Guide” (This manual) – “First Step Guide” for using your camcorder while connected to a computer (stored on the supplied CD-ROM) - Page 6 Be sure to insert the “Memory Stick Duo” into the Memory Stick Duo Adaptor. Memory Stick Duo Adaptor Using the camcorder • Do not hold the camcorder by the following parts. Viewfinder • The camcorder is not dustproof, dripproof or waterproof.
- Page 7 DV players (The screen appears blue). Check the contents of tapes by playing them back on this camcorder prior to playing them back on other devices. About this manual • The images of the LCD screen and the...
-
Page 8: Table Of Contents
Using the Menu Using the menu items ...39 Menu items ... 40 CAMERA SET menu ... 42 Settings to adjust your camcorder to the recording conditions MEMORY SET menu ... 49 Settings for the “Memory Stick Duo” PICT.APPLI. menu ... 52... - Page 9 Troubleshooting Troubleshooting ... 78 Warning indicators and messages ... 87 Additional Information Using your camcorder abroad ... 90 Maintenance and precautions ... 91 Usable cassette tapes ... 91 About the “Memory Stick” ... 92 About the “InfoLITHIUM” battery pack ... 93 About i.LINK ...
-
Page 10: Enjoying Pictures With High Definition Quality
• The down convert function converts HDV format video to DV for playback or editing when your camcorder is connected to a TV or VCR that is not HDV1080i compliant. The resulting image is displayed in SD (standard definition). -
Page 11: Viewing Video Recorded In The Hdv Format
• For details on HDV1080i compliant TVs, see page 34. Viewing on a 16:9 (wide)/4:3 TV ( p. 36 Your camcorder can down convert video recorded in the HDV format to SD (standard definition) image quality for playback on a conventional TV. Dubbing to VCR or DVD/HDD recorders ( p. -
Page 12: Getting Started
Getting Started Step 1: Checking supplied items Make sure that you have following items supplied with your camcorder. The number in the parentheses indicates the number of that item supplied. AC Adaptor (1) (p. 13) Power cord (Mains lead) (1) (p. 13) Wireless Remote Commander (1) (p. -
Page 13: Step 2: Charging The Battery Pack
(H series) (p. 93) after attaching it to your camcorder. b Notes • You cannot attach any “InfoLITHIUM” battery pack other than the H series to your camcorder. Attach the battery pack to your camcorder. Attach the battery pack by sliding it in the direction of the arrow until it clicks. - Page 14 Step2: Charging the battery pack (Continued) To remove the battery pack Slide the POWER switch to OFF (CHG). Slide the BATT (battery release) lever and remove the battery pack. When storing the battery pack Fully discharge the battery before storing it for an extended period (p.
-
Page 15: Playing Time
Adaptor or battery terminal with any metallic objects. This may cause a malfunction. • Even if your camcorder is turned off, AC power (house current) is still supplied to it while connected to the wall outlet (wall socket) via the... -
Page 16: Step 3: Turning The Power On And Setting The Date And Time
You can set the desired date and time by touching SET] (p. 39). b Notes • If you do not use your camcorder for about 3 months, the built-in rechargeable battery gets discharged and the date and time settings may be cleared from the memory. In that case, charge the rechargeable battery and then set the date and time again (p. -
Page 17: Changing The Language Setting
• The lens cover opens automatically when the POWER switch is set to CAMERA-TAPE or CAMERA-MEMORY. • If the buttons on the touch panel do not work correctly, adjust the touch panel (CALIBRATION) (p. 98). Changing the language setting You can change the on-screen displays to show messages in a specified language. -
Page 18: Step 4: Making Setting Adjustments Before Recording
Step 4: Making setting adjustments before recording The LCD panel Open the LCD panel 90 degrees to the camcorder (1), then rotate it to the best angle to record or play (2). DISPLAY/BATT INFO 180 degrees (max.) 90 degrees to the... -
Page 19: Step 5: Inserting A Tape Or A "Memory Stick Duo
Step 5: Inserting a tape or a “Memory Stick Duo” Cassette tape You can use mini DV cassettes only (p. 91). b Notes • The recordable time varies depending on [ REC MODE] (p. 57). Slide and hold the OPEN/ EJECT lever in the direction of the arrow and open the lid. - Page 20 • When the access lamp is lit or flashing, your camcorder is reading/writing data. Do not shake or knock your camcorder, turn the power off, eject the “Memory Stick Duo,” or remove the battery pack. Otherwise, image data may be damaged.
-
Page 21: Recording/Playback
Recording/Playback Easy Recording/Playback (Easy Handycam) With this Easy Handycam operation, most of the camera settings are automatically optimally adjusted, which frees you from detailed adjustments. The screen font size increases for easy viewing. Movies Slide the POWER switch E to turn on the CAMERA-TAPE lamp. - Page 22 Easy Recording/Playback (Easy Handycam) (Continued) Playing back movies/still images Slide the POWER switch E to turn on the PLAY/EDIT lamp. Touch the buttons on the touch panel A as follows. To cancel Easy Handycam Press EASY C again. Adjustable menu settings during Touch [MENU] to display adjustable menu settings.
-
Page 23: Recording
Recording Lens cover Opens in accordance with the setting of the POWER switch. START/STOP B Recording movies Movies are recorded on a tape. Slide the POWER switch in the direction of the arrow repeatedly to turn on the CAMERA-TAPE lamp. If the POWER switch is set to OFF (CHG), slide it while pressing the green button. -
Page 24: Recording Still Images
Recording (Continued) Recording still images Still images are recorded on the “Memory Stick Duo.” Slide the POWER switch in the direction of the arrow repeatedly to turn on the CAMERA-MEMORY lamp. If the POWER switch is set to OFF (CHG), slide it while pressing the green button. -
Page 25: Zooming
• You cannot change the zoom speed with the zoom buttons on the LCD panel. • The minimum possible distance between camcorder and subject while maintaining sharp focus is about 1 cm (about 13/32 in.) for wide angle and about 80 cm (about 2 5/8 feet) for telephoto. -
Page 26: Controlling The Image Settings Manually With The Cam Ctrl Dial
Recording (Continued) • When the POWER switch is set to CAMERA- TAPE, still images will be recorded at image size 4.6M in the HDV format, 3.4M (4:3) or 4.6M (16:9) in the DV format. Controlling the image settings manually with the CAM CTRL dial It is useful to assign a frequently used menu item to the CAM CTRL dial. -
Page 27: Recording In Dark Places (Nightshot)
. (back light) again. Recording in mirror mode Open the LCD panel 90 degrees to the camcorder (1), then rotate it 180 degrees to the lens side (2). z Tips • A mirror-image of the subject appears on the LCD screen, but the picture will be normal when recorded. -
Page 28: Playback
Playback Slide the POWER switch in the direction of the arrow repeatedly to turn on the PLAY/EDIT lamp. If the POWER switch is set to OFF (CHG), slide it while pressing the green button. Playing movies Touch to rewind to the desired scene, then touch playback. -
Page 29: Viewing Still Images
Viewing still images Touch The most recently recorded image is displayed. 60min 60min Switches the playback media* Previous/Next is displayed on the tape playback screen. To display pictures on a “Memory Stick Duo” on the Index screen Touch . Touch one of the pictures to back to the single display mode. A Previous/Next 6 pictures B The picture displayed before switching to the index screen To view pictures in other folders, touch... -
Page 30: Using Pb Zoom
Playback (Continued) Using PB zoom You can magnify images from about 1.1 to 5 times (from about 1.5 to 5 times in still images) the original size. Magnification can be adjusted with the power zoom lever or the zoom buttons on the LCD panel. 1 Play back the picture you want to magnify. -
Page 31: Using The Guide Functions (Usage Guide)
Using the guide functions (USAGE GUIDE) You can easily select the desired setting screens by using the guide functions (USAGE GUIDE). 60min STBY GUIDE Your camcorder has 4 guide functions as shown below. SHOOT Takes you to the setting GUIDE: screens related to recording. -
Page 32: Searching For The Starting Point
PLAY/EDIT lamp, then operate the Remote Commander (p. 28). 60min STBY 0:00:00 The last 2 seconds (approx.) of the most recently recorded scene are played back. Then, your camcorder is set to standby. mREW PLAY STOP DISPLAY ZERO SET MEMORY... -
Page 33: Searching For A Scene By Date Of Recording (Date Search)
During playback, press ZERO SET MEMORY on the Remote Commander at a point you want to locate later on. The tape counter is reset to “0:00:00” appears on the screen. 60min 0:00:00 P-MENU If the tape counter is not displayed, press DISPLAY. -
Page 34: Playing The Picture On A Tv
Refer also to the instruction manuals supplied with the device to be connected. b Notes • Make all menu settings on your camcorder before connecting. The TV may not recognize the video signal properly if the [VCR HDV/DV] or [i.LINK CONV] setting is changed after the TV and your camcorder were connected with an i.LINK cable. -
Page 35: Connecting To A High Definition Tv
(HD image quality). • A DV formatted picture is played back as it is (SD image quality). COMPONENT IN AUDIO Type Camcorder Component video cable (supplied) A/V connecting cable (supplied) • An A/V connecting cable is also needed to output audio signals. Connect the white and red plugs of the A/ V connecting cable to the audio input jack of your TV. -
Page 36: Connecting To A 16:9 (Wide) Or 4:3 Tv
• If your TV is not compatible with HDV1080i specification, connect your camcorder and TV with the supplied component video cable and A/V connecting cable as illustrated in • The TV needs to be set so that it recognizes that the camcorder is connected. See the instruction manuals supplied with your TV. - Page 37 TV. i.LINK cable (supplied) • The TV needs to be set so that it recognizes that the camcorder is connected. See the instruction manuals supplied with your TV. : Signal flow, ( ): Reference pages...
- Page 38 • If you connect your camcorder to your TV using more than one type of cable to output images from a jack other than the i.LINK jack, the order...
-
Page 39: Using The Menu
Using the Menu Using the menu items Slide the POWER switch in the direction of the arrow repeatedly to turn on the respective lamp. CAMERA-TAPE lamp: CAMERA-MEMORY lamp: Duo” PLAY/EDIT lamp: settings for viewing/editing Touch the LCD screen to select the menu item. Unavailable items will be grayed out. -
Page 40: Menu Items
Menu items CAMERA SET menu SCENE SELECT SPOT MTR·FCS SPOT METER EXPOSURE WHITE BAL. SHARPNESS SHUTTR SPEED AUTOSLW SHTR AE SHIFT CAMERA COLOR WB SHIFT SPOT FOCUS FOCUS TELE MACRO PEAKING FLASH SET SUPER NS NS LIGHT COLOR SLOW S ZEBRA HISTOGRAM SELF-TIMER... - Page 41 Position of lamp: SMTH SLW REC PictBridge PRINT USB SELECT DEMO MODE EDIT/PLAY menu VAR.SPD PB REC CTRL END SEARCH STANDARD SET menu VCR HDV/DV REC FORMAT DV SET VOLUME MIC LEVEL LCD/VF SET COMPONENT i.LINK CONV TV TYPE DISP GUIDE STATUS CHECK GUIDEFRAME CENTER MARKR...
-
Page 42: Camera Set Menu
CAMERA SET menu Settings to adjust your camcorder to the recording conditions The default settings are marked with B. The indicators in parentheses appear when the items are selected. See page 39 for details on selecting menu items. SCENE SELECT... - Page 43 * Adjusted to focus on subjects farther away only. ** Adjusted not to focus on subjects a short distance away. b Notes • If you set [SCENE SELECT], the settings of [SHUTTR SPEED] and [WHITE BAL.] are canceled. SPOT MTR·FCS (Spot Meter & Spot Focus) You can adjust the brightness and the focus of a picture at the same time.
- Page 44 , set [WHITE [AUTO] was selected, or taken your camcorder outdoors after inside use (or vice versa), select [AUTO] and aim your camcorder at a nearby white object for about 10 seconds for better color balance adjustment. PUSH], if you change the [SCENE SELECT]...
- Page 45 b Notes • When the shutter speed is set between 1/725 to 1/10000 second, still images cannot be recorded. • For example, if you select 1/100 second, [100] appears on the screen. • At a slow shutter speed, automatic focus may be lost.
- Page 46 To adjust the focus automatically, touch [AUTO] t b Notes • The minimum possible distance between camcorder and subject while maintaining sharp focus is about 1 cm (about 13/32 in.) for wide angle and about 80 cm (about 2 5/8 feet) for telephoto.
- Page 47 • Adjust the focus manually ([FOCUS], p. 45) when it is hard to focus automatically. • The shutter speed of your camcorder changes depending on the brightness. The motion of the picture may slow down in this case.
-
Page 48: Digital Zoom
CAMERA SET menu (Continued) The zebra pattern appears at a screen brightness level of about 100 IRE or higher. b Notes • Portions of the screen where brightness is about 100 IRE or higher may appear overexposed. z Tips • IRE represents the screen brightness. HISTOGRAM When you set [HISTOGRAM] to [ON], the [HISTOGRAM] (a graph to display a... -
Page 49: Memory Set Menu
CONV.LENS When using an optional conversion lens, use this function to record using the optimum compensation for camera shake for each lens. B OFF Select this when the conversion lens (optional) is not used. WIDE CONV. ( Select this to use the wide conversion lens (optional). - Page 50 MEMORY SET menu (Continued) Capacity of the “Memory Stick Duo” and the number of recordable pictures When the POWER switch is set to CAMERA- MEMORY 6.1M 4.6M 2848 × 2848 × 2136 1602 6.1M 4.6M 128MB 256MB 512MB 1500 2000 1250 1650 2950...
- Page 51 Touch [YES] t b Notes • You cannot delete the created folders using your camcorder. You will have to format the “Memory Stick Duo” (p. 51), or delete them using your computer. • The number of recordable pictures on a “Memory Stick Duo”...
-
Page 52: Pict.appli. Menu
PICT.APPLI. menu Special effects on pictures or additional functions on recording/playback The default settings are marked with B. The indicators in parentheses appear when the items are selected. See page 39 for details on selecting menu items. FADER You can record a transition with the following effects adding to the interval between scenes. - Page 53 • If you set [CINEMA EFECT], [SPOT METER] and [EXPOSURE] return to [AUTO]. • You cannot add special effects to pictures from devices connected to your camcorder. z Tips • You can save pictures edited using special effects on a “Memory Stick Duo” (p. 69) or record them on VCR or DVD/HDD recorders (p.
- Page 54 HDV/DV Interface (i.LINK). Only the original pictures can be output. • You cannot add special effects to pictures from devices connected to your camcorder. z Tips • You can save pictures edited using special effects on a “Memory Stick Duo” (p. 69) or record them on VCR or DVD/HDD recorders appears.
-
Page 55: Edit/Play Menu
[END]. PictBridge PRINT See page 71. USB SELECT You can connect the camcorder to a personal computer with a USB cable and import pictures to the computer. You can also connect the camcorder to a PictBridge compatible printer using this function. -
Page 56: Standard Set Menu
VCR HDV/DV Select the playback signal. Normally select [AUTO]. When your camcorder is connected to another device using an i.LINK cable, select the signal to input/output from the HDV/DV Interface (i.LINK). The selected signal is recorded or played back. -
Page 57: Rec Format
[VCR HDV/DV] setting. Otherwise, the connected device, such as a VCR, may not be able to recognize the video signal from your camcorder. • When [AUTO] is selected, if the signal switches between HDV and DV formats, the picture and sound are interrupted temporarily. - Page 58 B NORMAL Standard brightness. BRIGHT Brightens the LCD screen. b Notes • When you connect your camcorder to outside power sources, [BRIGHT] is automatically selected for the setting. • When you select [BRIGHT], battery life is slightly reduced during recording.
- Page 59 Refer also to the manual supplied with your TV. • When you connect your camcorder to a TV with an i.LINK cable to play back the tape, the setting of [TV TYPE] is invalid.
- Page 60 The default setting is [ON], allowing you to use the supplied Remote Commander (p. 106). z Tips • Set to [OFF] to prevent your camcorder from 0:00:00:00 60min responding to a command sent by remote control units of other camcorders or VCRs.
- Page 61 5 minutes. NEVER The camcorder is not automatically turned off. b Notes • When you connect your camcorder to a wall outlet (wall socket), [A.SHUT OFF] is automatically set to [NEVER]. CALIBRATION See page 98. QUICK REC (Quick recording)
-
Page 62: Time/Langu. Menu
CLOCK SET See page 16. WORLD TIME When using your camcorder abroad, you can set the time difference by touching , the clock will be adjusted in accordance with the time difference. If you set the time difference to 0, the clock returns to the originally set time. - Page 63 Deleting a menu item t [P-MENU SET UP] Touch t [DELETE]. If the desired menu item is not displayed, touch 60min STBY 0:00:00 Select button to delete. DISP MENU GUIDE SCENE SMOOTH SELECT SLWREC TELE FADER MACRO Touch the menu item that you want to delete.
-
Page 64: Dubbing/Editing
** When connecting your camcorder to a monaural device, connect the yellow plug of the A/V connecting cable to the video jack on the device, and the white (left channel) or red (right channel) plug to the audio jack on the device. -
Page 65: Dubbing To Another Device
• You cannot dub pictures using the HDMI cable. • Pictures recorded in the DV format are dubbed as SD (standard definition) images, regardless of the connection. Jacks on your camcorder Open the jack cover and connect the cable. A/V OUT HDV/DV Using an i.LINK cable (supplied) - Page 66 • Note the following when connecting with an i.LINK cable: – The recorded picture becomes rough when a picture is paused on your camcorder while recording to a VCR or DVD/HDD recorder. – Data codes (date/time/camera settings data) may not be displayed or recorded depending on the device or application.
-
Page 67: Recording Pictures From A Vcr, Etc
“Memory Stick Duo.” Be sure to insert a cassette or a “Memory Stick Duo” for recording in your camcorder beforehand. You can connect your camcorder to a VCR, etc., or an i.LINK-compatible device using the i.LINK cable. Connect your camcorder to the wall outlet (wall socket) using the supplied AC Adaptor for this operation (p. - Page 68 • When a 4:3 video signal is input, it appears with black bands on the right and left sides on the screen of your camcorder. Recording still images Perform steps 1 to 4 in “Recording movies.”...
-
Page 69: Dubbing Pictures From A Tape To A "Memory Stick Duo
• The date and time the picture is recorded on the tape and stored on the “Memory Stick Duo” are recorded. On your camcorder, the date and time the picture is recorded on the tape are displayed. Camera setting data recorded on the tape cannot be stored on the “Memory Stick Duo.”... -
Page 70: Marking Images On The "Memory Stick Duo" With Specific Information (Print Mark/Image Protection)
• To cancel Print mark, touch the image again to cancel Print mark in step 3. • Do not mark images on your camcorder if the “Memory Stick Duo” already has some images with the Print mark put on using other devices. -
Page 71: Printing Recorded Images (Pictbridge Compliant Printer)
You can print out pictures using a PictBridge compliant printer without connecting the camcorder to a computer. Connect your camcorder to the AC Adaptor to obtain power from the wall outlet (wall socket) (p. 13). Insert the “Memory Stick Duo” containing still images into your camcorder and turn on the printer. - Page 72 Printing recorded images (Continued) • We cannot guarantee the printing of images recorded with a device other than your camcorder. z Tips • PictBridge is an industry standard established by the Camera & Imaging Products Association (CIPA). You can print still images without using...
-
Page 73: Using A Computer
Exporting imported movies from a computer to your camcorder You can send movies which were imported to the computer back to your camcorder in HD (high definition) image quality. About “First Step Guide” The “First Step Guide” is an instruction manual you can refer to on your computer. -
Page 74: System Requirements
Memory Stick slot on your computer to copy still images to the computer. • When using a “Memory Stick PRO Duo” and your computer is not compatible with it, connect your camcorder with the USB cable instead of using the Memory Stick slot on the computer. -
Page 75: Installing The "First Step Guide" And Software
Tips • See page 77 when you use a Macintosh computer. Installing the “First Step Guide” Confirm that your camcorder is not connected to the computer. Turn on the computer. b Notes • Log on as an Administrator for installation. - Page 76 Connect your camcorder and computer with an i.LINK cable or USB cable. When connecting with a USB cable, [USB SELECT] appears on the screen of your camcorder. Select [ Memory Stick]. Click [Next] after connection is complete. A message stating that you need to restart may appear, but you do not need to restart at this time.
-
Page 77: Viewing "First Step Guide
[FirstStepGuide] folder on the CD-ROM, and then double-click [Index.html]. • Refer to your camcorder’s “First Step Guide” in PDF (p. 75) in the following cases: – When printing the desired topics of “First Step Guide”... -
Page 78: Troubleshooting
– [ AUDIO MIX] of [DV SET] – [MIC LEVEL] The camcorder gets warm. • The camcorder may get warmer while you use it. This is not a malfunction. The supplied Remote Commander does not function. • Set [REMOTE CTRL] to [ON] (p. 60). - Page 79 • Slide the POWER switch to OFF (CHG) (p. 13). • Attach the battery pack to the camcorder correctly (p. 13). • Connect the power cord (mains lead) to the wall outlet (wall socket) properly.
- Page 80 The Cassette Memory indicator or title display does not appear while using a cassette with Cassette Memory. • This camcorder does not support Cassette Memory, so the indicator does not appear. The remaining tape indicator is not displayed. • Set [ REMAINING] to [ON] to always display the remaining tape indicator (p.
- Page 81 (p. 91). • The tape is stuck to the drum due to moisture condensation. Remove the cassette and leave your camcorder for at least 1 hour, then reinsert the cassette (p. 96). You cannot record on the “Memory Stick Duo.”...
- Page 82 Troubleshooting (Continued) [COLOR SLOW S] does not operate correctly. • [COLOR SLOW S] may not operate correctly in total darkness. Use NightShot or [SUPER NS]. You cannot use [SUPER NS]. • The NIGHTSHOT switch is not set to ON (p. 27). The auto focus does not function.
- Page 83 Noises appear and displayed on the screen. • The tape was recorded in a TV color system other than that of your camcorder (NTSC). This is not a malfunction (p. 90). Date Search does not work correctly. • Be sure to record more than 2 minutes after the date changed.
- Page 84 HDMI OUT jack, if copyright protection signals are recorded in the pictures. • DV format pictures input to the camcorder via i.LINK cable (p. 67) cannot be output. • This occurs if you record on a tape in both HDV and DV formats.
- Page 85 HDMI cable. • You cannot dub pictures using the HDMI cable. New sound added to a recorded tape on another camcorder is not heard. • Adjust [ AUDIO MIX] from the [ST1] (original sound) side until the sound is heard appropriately (p. 57).
- Page 86 Troubleshooting (Continued) Not available If this function is set [SPOT MTR·FCS] NightShot, [SUPER NS], [CINEMA EFECT] [SCENE SELECT] [SPOT METER] NightShot, [SUPER NS], [CINEMA EFECT] [EXPOSURE] NightShot, [SUPER NS], [CINEMA EFECT] [WHITE BAL.] NightShot, [SUPER [SHARPNESS] [CINEMA EFECT] [SHUTTR SPEED] NightShot, of the CAM CTRL [SUPER NS],...
-
Page 87: Warning Indicators And Messages
(p. 13). C:21:ss • Moisture condensation has occurred. Remove the cassette and leave your camcorder for at least 1 hour, then re- insert the cassette (p. 96). C:22:ss • Clean the head using a cleaning cassette (optional) (p. 97). -
Page 88: Moisture Condensation
Warning indicators and messages (Continued) Q (Warning indicators pertaining to the tape) Slow flashing: • There is less than 5 minutes remaining on the tape. • No cassette is inserted.* • The write-protect tab on the cassette is set to lock (p. 91).* Fast flashing: •... -
Page 89: Pictbridge Compliant Printer
(p. 51, 92). Memory Stick folders are full. • You cannot create folders exceeding 999MSDCF. You cannot delete created folders using your camcorder. • You will have to format the “Memory Stick Duo” (p. 51), or delete them using your computer. -
Page 90: Additional Information
Additional Information Using your camcorder abroad Power supply You can use your camcorder in any country/region using the AC Adaptor supplied with your camcorder within the AC 100 V to 240 V, 50/60 Hz range. Use a commercially available AC plug adaptor [a], if necessary, depending on the design of the wall outlet (wall socket) [b]. -
Page 91: Maintenance And Precautions
Maintenance and precautions Usable cassette tapes Your camcorder is capable of recording in both HDV and DV formats. You can use mini DV format cassettes only. Use a cassette with the Your camcorder is not compatible with the Cassette Memory function. -
Page 92: About The "Memory Stick
– If you use the “Memory Stick Duo” near screen of your camcorder. the display of a computer. power off on your camcorder, or remove the battery pack for replacement while your camcorder is reading or writing image files on the “Memory Stick Duo”... -
Page 93: About The "Infolithium" Battery Pack
“Design rule for Camera File system” universal standard established by the JEITA (Japan Electronics and Information Technology Industries Association). • On your camcorder, you cannot play back still images recorded on other devices (DCR- TRV900 or DSC-D700/D770) that do not conform to the universal standard (These models are not sold in some regions). - Page 94 To store the battery pack, remove it from your camcorder and put it in a dry, cool place. • To discharge the battery pack on your camcorder completely, set [A.SHUT OFF] to...
-
Page 95: About I.link
Notes • When connecting your camcorder to another i.LINK-compatible device, be sure to turn off the power of the device and disconnect the AC Adaptor from the wall outlet (wall socket) before connecting or disconnecting the i.LINK... -
Page 96: About X.v.color
(battery pack) or DC 8.4 V (AC Adaptor). • For DC or AC operation, use the accessories recommended in these operating instructions. • Do not let your camcorder get wet, for example, from rain or sea water. If your camcorder gets wet, it may malfunction. Sometimes this malfunction cannot be repaired. - Page 97 • When you bring your camcorder from an air conditioned car or room into a hot place outside. • When you use your camcorder after a squall or a shower. • When you use your camcorder in a hot and humid place.
- Page 98 LCD screen • Do not exert excessive pressure on the LCD screen, as it may cause damage. • If your camcorder is used in a cold place, a residual image may appear on the LCD screen. This is not a malfunction.
-
Page 99: Specifications
Adaptor or while the battery pack is inserted. The rechargeable battery will be fully discharged in about 3 months if you do not use your camcorder at all without the AC Adaptor connected or the battery pack attached. Use your camcorder after charging the pre-installed rechargeable battery. - Page 100 JEITA (Japan Electronics and Information Technology Industries Association). Files in this format can have additional information such as your camcorder’s setting information at the time of recording. The unique pixel array of Sony’s ClearVid CMOS sensor and image...
- Page 101 General Power requirements DC 6.8 V/7.2 V (battery pack) DC 8.4 V (AC Adaptor) Average power consumption During camera recording using the viewfinder with normal brightness: HDV recording 4.2 W DV recording 4.0 W During camera recording using the LCD with normal brightness: HDV recording 4.5 W DV recording 4.3 W Operating temperature...
- Page 102 Specifications (Continued) On trademarks • “Handycam” and registered trademarks of Sony Corporation. • HDV and the HDV logo are trademarks of Sony Corporation and Victor Company of Japan, Ltd. • “Memory Stick,” “ Duo,” “ PRO Duo,” “ “Memory Stick PRO-HG Duo,” “...
-
Page 103: Quick Reference
The accessory can be turned on or off as you operate the POWER switch on your camcorder. Refer to the operating instructions supplied with your accessory for details. • When you connect an accessory, open the shoe cover. - Page 104 Identifying parts and controls (Continued) A MANUAL button (26) B CAM CTRL dial (26) C NIGHTSHOT switch (27) D . (back light) button (27) E Zoom buttons (25) F START/STOP button (23) G DISPLAY/BATT INFO button (14) H (USB) jack (71) I Speaker Playback sounds come out from the speaker.
- Page 105 5.5 mm (7/ 32 in.)) to the tripod receptacle using a tripod screw. Attaching the supplied lens hood Place the lens hood against the lens hood receptacle of the camcorder, and turn it in the direction of the arrow. Continued ,...
- Page 106 Notes • Remove the insulation sheet before using the Remote Commander. • Aim the Remote Commander towards the remote sensor to operate your camcorder (p. 105). To change the battery of the Remote Commander 1 While pressing on the tab, inset your fingernail into the slit to pull out the battery case.
-
Page 107: Indicators Displayed During Recording/Playback
Indicators displayed during recording/playback Recording movies GUIDE Recording still images qaqs 60min 60min FINE 6.1M Viewing movies Viewing still images qj qa qk ql 6.1M MEMORY PLAY wg wh GUIDE A Recording format ( (57) Recording mode (SP or LP) is also displayed in the DV format. - Page 108 Indicators displayed during recording/playback (Continued) S Playback folder (51) T Previous/Next folder icon The following indicators appear when the first or last picture of the current folder is displayed and when there are multiple folders on the same “Memory Stick Duo.” Touch to move to the previous folder.
- Page 109 Indicators when you made changes Upper left Q.REC Bottom Upper left Indicator Meaning Recording format (56) AUDIO MODE* (57) SP LP Recording mode* (57) Self-timer recording (48) WIDE SELECT* (57) QUICK REC** (61) Interval photo recording (52) Flash light/ REDEYE REDUC (46) Upper right Indicator Meaning...
- Page 110 Indicators displayed during recording/playback (Continued) ** The setting can be made only for the pictures in the HDV format. Other indicator Indicator b Notes • Indicators and their positions are approximate and differ from what you actually see. Checking the screen indicators (Display guide) You can easily check the meaning of each indicator that appears on the LCD screen.
-
Page 111: Index
Index Numeric 1080i/480i ...59 12BIT...57 16BIT...57 480i ...59 AC Adaptor...13 AE SHIFT...45, 86 ALL ERASE...51 AUDIO MIX...57 AUDIO MODE...57 AUTOSLW SHTR (Auto slow shutter) ...45 A.SHUT OFF (Auto shut off) ...61 A/V connecting cable ...35, 64 A/V OUT jack...34, 104 Backlight...27, 82 Battery ...13 BEACH...42... - Page 112 Index (Continued) Macintosh ...77 Maintenance and precautions ...91 MEMORY SET menu ...49 “Memory Stick” ...92 “Memory Stick Duo”...19 FORMAT ...51 Menu...39 MIC LEVEL...58 Mirror mode ...27 Moisture condensation ...96 MONOTONE ...52 MOSAIC FADER ...52 NEG.ART...54 NEW FOLDER ...51 NS LIGHT (NightShot Light) ...47 NTSC...83, 90 Number of recordable pictures...
- Page 113 VAR.SPD PB (Various speed playback) ...55 VF B.LIGHT (Viewfinder brightness) ...58 VOLUME ...58 Warning indicators...87 Warning messages ...88 WB SHIFT (White Balance Shift) ...45 WHITE BAL. (White balance)...43, 86 WHITE FADER ...52 Windows ...73, 74 WORLD TIME...62 Write-protect tab ...91 X.V.COLOR ...49, 96 ZEBRA ...47 Zero set memory ...32...
-
Page 115: Spanish Quick Guide Guía Rápida En Español
Spanish Quick Guide/Guía rápida en español Paso 1: Comprobación de los elementos suministrados Asegúrese de que su videocámara contiene los siguientes elementos. El número entre paréntesis indica la cantidad del elemento. Adaptador de alimentación de ca (1) Cable de alimentación (1) Control remoto inalámbrico (1) Tiene instalada una pila de litio tipo botón. - Page 116 Paso 2: Carga de la batería Batería Al tomacorriente de la pared Para cargar la batería “InfoLITHIUM” (serie H), conéctela a la videocámara. b Notas • No puede conectar ninguna batería “InfoLITHIUM” que no sea de la serie H a la videocámara.
- Page 117 Para retirar la batería Deslice el interruptor POWER hasta la posición OFF (CHG). Deslice la palanca BATT (liberación de la batería) y retire la batería. Palanca BATT (liberación de la batería) Cuando guarde la batería Descargue completamente la batería antes de guardarla durante un período prolongado.
- Page 118 Paso 2: Carga de la batería (Continuación) Tiempo de grabación Tiempo aproximado (min) disponible cuando utiliza una batería completamente cargada. Tiempo de Batería grabación continua Formato de grabación NP-FH50 NP-FH60 (suministrada) NP-FH70 NP-FH100 * El tiempo de grabación normal muestra la hora cuando se repite la operación de inicio/ detención de la grabación, al conectar y desconectar la alimentación y al usar la función...
- Page 119 Acerca del adaptador de alimentación de • Si utiliza el adaptador de alimentación de ca conéctelo a un tomacorriente de pared cercano. Si se produce alguna falla de funcionamiento al utilizar la videocámara, desconecte el adaptador de alimentación de ca del tomacorriente de inmediato.
-
Page 120: Cambio Del Ajuste De Idioma
Paso 3: Encendido y ajuste de la fecha y la hora (Continuación) Ajuste [A] (año) con Puede seleccionar cualquier año hasta el año 2079. Vaya hasta [M] (mes) con ajústelo con Vaya hasta [D] (día) con ajústelo con operación para ajustar las horas y los minutos. - Page 121 Paso 4: Ajustes antes de grabar Panel LCD Abra el panel LCD 90 grados con respecto a la videocámara (1) y luego gírelo hacia el mejor ángulo para grabar o reproducir (2). DISPLAY/BATT INFO 180 grados (máx.) 90 grados con respecto 90 grados a la videocámara (máx.)
- Page 122 Paso 5: Inserción de una cinta o un “Memory Stick Duo” Cinta de videocasete Solamente puede utilizar videocasetes mini b Notas • El tiempo disponible para grabación varía en función del [ MODO GRAB.]. Deslice y sostenga la palanca OPEN/EJECT en el sentido de la flecha y abra la tapa.
- Page 123 Indicador de acceso Para expulsar un “Memory Stick Duo” Empuje suavemente el “Memory Stick Duo” hacia dentro una vez. b Notas • Cuando el indicador de acceso se enciende o parpadea, la videocámara está leyendo o grabando datos. No sacuda ni golpee la videocámara, no la apague, ni extraiga el “Memory Stick Duo”...
- Page 124 Grabación Cubierta del objetivo Se abre según el ajuste del interruptor POWER. START/STOP B Grabación de películas Las películas se graban en una cinta. Deslice el interruptor POWER varias veces en el sentido de la flecha para que se encienda el indicador CAMERA-TAPE. Si el interruptor POWER está...
- Page 125 Grabación de imágenes fijas Las imágenes fijas se graban en el “Memory Stick Duo”. Deslice el interruptor POWER varias veces en el sentido de la flecha para que se encienda el indicador CAMERA-MEMORY. Si el interruptor POWER está ajustado en la posición OFF (CHG), deslícelo mientras presiona el botón verde.
- Page 126 Reproducción Deslice el interruptor POWER en el sentido de la flecha varias veces para encender el indicador PLAY/EDIT. Si el interruptor POWER está ajustado en la posición OFF (CHG), deslícelo mientras presiona el botón verde. Reproducción de películas Toque para rebobinar hasta la escena deseada y luego toque para iniciar la reproducción.
- Page 127 Visualización de imágenes fijas Toque Se visualiza la imagen grabada más recientemente. 60min 60min Cambia entre los medios de reproducción* Anterior/Siguiente aparece en la pantalla de reproducción de cintas. Para visualizar imágenes de un “Memory Stick Duo” en la pantalla de índice Toque .
- Page 128 Additional information on this product and answers to frequently asked questions can be found at our Customer Support Website. http://www.sony.net/ Printed in Japan...