Table of Contents
Quick Links
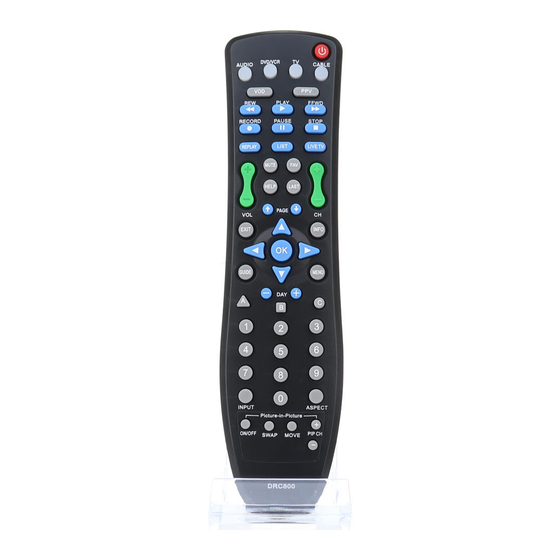
DRC800 4-in-1 Universal Remote Control User Guide
Overview
Your new 4-in1 universal remote operates most manufacturer's cable
set-top boxes and up to three other devices.
In addition, this remote provides advanced features such as Digital
Video Recording (DVR) control and Picture-in-Picture (PIP) support.
You can lock volume control to any of these devices, to make
adjusting your home entertainment volume easier. See "Changing
Volume Lock". This remote comes from the factory without the
volume locked to any specific device.
You can also change what type of device each mode key controls. See
"Reassigning Device Keys".
Installing batteries
Your remote requires 2 AAA batteries. To install...
1. Remove the battery case cover and the old batteries (if
necessary).
2. Follow the diagram inside the battery case to insert the new
batteries.
Using your remote
To control a device, simply press one of the device mode keys (TV,
AUDIO, DVD/VCR, CABLE) at the top of your remote. After you set up
the remote to control that device, you may begin using the device.
See "Programming - code input method" for more information on
programming a mode key to your device.
Table of Contents

Related Manuals for Motorola DRC800


Summary of Contents for Motorola DRC800
- Page 1 DRC800 4-in-1 Universal Remote Control User Guide Overview Your new 4-in1 universal remote operates most manufacturer’s cable set-top boxes and up to three other devices. In addition, this remote provides advanced features such as Digital Video Recording (DVR) control and Picture-in-Picture (PIP) support. You can lock volume control to any of these devices, to make adjusting your home entertainment volume easier. See “Changing Volume Lock”. This remote comes from the factory without the volume locked to any specific device. You can also change what type of device each mode key controls. See “Reassigning Device Keys”. Installing batteries Your remote requires 2 AAA batteries. To install… 1. Remove the battery case cover and the old batteries (if necessary). 2. Follow the diagram inside the battery case to insert the new batteries. Using your remote To control a device, simply press one of the device mode keys (TV, AUDIO, DVD/VCR, CABLE) at the top of your remote. After you set up the remote to control that device, you may begin using the device. See “Programming - code input method” for more information on programming a mode key to your device.
- Page 2 Button Functions Explained...
-
Page 3: Amplifier, Tuner
Programming – code input method Each of the additional device keys controls a particular type of device. For example, the DVD/VCR key controls your VCR, DVR, or DVD player, but not your TV, unless you specify otherwise. See “Reassigning device keys”. This device key… Controls this type of device… DVD/VCR DVD, VCR, DVR, HTIM, TV/VCR, TV/DVD, TV/VCR/DVD, AND DVD/VCR CABLE Cable box only AUDIO AMPLIFIER, TUNER 1. Find the device you want to control in the device code list. 2. Press and hold a device key (AUDIO, DVD/VCR, or TV) until the mode indicator lights cycle through all modes and lands back on the mode key you selected. Mode key selected indicator light will remain on. 3. Enter the four-digit code. The indicator light will… a. Blink 3 Times – confirms code successful, test remote by pressing keys to see if unit responds. If not, repeat these steps with a different code. b. Goes out – code unsuccessful, repeat all steps. Note: if no codes work, please try programming using the “Programming – code search method”. Programming – Code search method 1. Press and hold a device key (AUDIO, DVD/VCR, or TV) until the mode indicator lights cycle through all modes and lands back on the mode key you selected. Mode key selected indicator light will remain on. 2. Press a function key (such as POWER or MUTE). The following function keys are valid for searching (Power is recommended): • Power • Mute •... -
Page 4: Changing Volume Lock
Tip: After programming, note the code that was successful by following the steps in “Code identification method” so you can reprogram your remote in future if need be. Code identification method 1. Press and hold a device key (AUDIO, DVD/VCR, or TV) until the mode indicator lights cycle through all modes and lands back on the mode key you selected. Mode key selected indicator light will remain on. 2. Enter [9] [9] [0]. a. Press 1, counting the indicator light blinks. This indicates the 1 digit of code. b. Press 2, 3 and 4, counting the indicator light blinks for each. This indicates the 2 , and 4 digits of code. Changing volume lock Locking the volume controls to a single device makes it easier to control volume, without having to guess whether the volume will change. If you lock the remote's volume controls to the TV (for example), you will always be able to change the volume to the level you want, without having to adjust it on multiple devices. Locking the volume keys: 1. Press and hold a device key (i.e. AUDIO) in which you would like to lock the volume keys to, until the mode indicator lights cycle through all modes and lands back on the mode key you selected. Mode key selected indicator light will remain on. 1. Press [VOL +] key. The indicator light blinks three times, indicating it has locked the volume control to the device you selected. The AUDIO device key always controls its own volume, regardless of if the device is locked to volume control. Note: If you reassign AUDIO to another device, such as a second TV, the second TV will always control its own volume. Unlocking the volume keys: 1. Press and hold a device key (i.e. AUDIO) in which you would like to unlock the volume keys to, until the mode indicator lights cycle through all modes and lands back on the mode key you selected. Mode key selected indicator light will remain on. 2. Press [VOL +] key. Reassigning Device keys Each device key accesses a specific type of device (for example, the DVD/ VCR key can only be... -
Page 5: Troubleshooting
programmed to control a DVD player, VCR, DVR, or HTIB system). This makes it easier to search for a code if your device’s code does not appear on the list provided. Your new remote allows you to change the type of device that may be assigned to a device key. That way, if you have two TVs, for example, you can control them both by changing the type of device the DVD/VCR or AUDIO modes control. 1. Press and hold a device key (i.e. AUDIO) in which you would like to reassign, until the mode indicator lights cycle through all modes and lands back on the mode key you selected. Mode key selected indicator light will remain on. 2. Enter code [9] [9] [2]. 3. Press the device mode key you want to reassign to. That mode key’s indicator light blinks 3 times to confirm. Note: reassigning Cable mode key is not allowed. Assigning a key back to its original device type: 1. Press and hold the device mode key (TV, AUDIO, DVD/VCR, or Cable) you want to reset to its original type (for ex., AUDIO) until the mode indicator lights cycle through all modes and lands back on the mode key you selected. Mode key selected indicator light will remain on. 2. Enter code [9] [9] [2]. The mode key’s indicator light blinks three times and turns off. 3. Press the device mode key you selected in step 1 again. The mode key’s indicator light blinks three times and turns off. Troubleshooting If you have trouble with your remote, try the following steps in order. My remote is not responding… • Review the information in “Using Your Remote” to make sure that the key you pressed is active for the device you are controlling. • Make sure you are controlling the device you think you are. See “Using Your Remote” for more information on choosing a device to control. • Make sure your batteries are good. If battery power is low, your remote enters a “Low Battery Condition” to conserve battery power for retaining your settings. See “Installing Batteries” for more information on changing the batteries. • Reset all settings 1. -
Page 6: Code List
Director 0476 0166, Wards 0158, 0014 0056, 0016, 0466, 0039 General Instrument 0476 Yamaha 0176, 1176 CXC 0180 Jerrold 0476 Motorola 0476, 1376 Daewoo 0451, 1661, 0092, 0672, 0623, Pioneer 1877 0039 Scientific Atlanta 1877 Denon 0145 A-Mark 0003 Dumont 0017... - Page 7 0030, 0178, 0039, Haier 0768 1250, 0178 0165, 0032, 0056 Hallmark 0178 Monivision 0843, 0700 Rhapsody 0185 Harley-Davidson 0179 Motorola 0835, 0093, Runco 0017, 0030 Harman/Kardon 0054 0055 Sampo 0030, 0032, 1755, Harvard 0180 Moxell 0835 0052, 0039 Havermy 0093...
- Page 8 Vidikron 0054 Emerex 0032 Mitsubishi 0067, 0043, Vidtech 0178 Emerson 0037, 0184, 0807 Viewsonic 1755 0000, 0121, 0043, Motorola 0035, 0048 Viking 0046 0209, 0002, 0278, 0479, MTC 0240, 0000 Wards 0054, 0030, 0178, 1479, Multitech 0000, 0072 0111, 0179,...
-
Page 9: Combination Devices
Proscan 0060, 1060 Vector Research 0038 Quasar 0162, 1035 Protec 0072 Video Concepts 0045 RadioShack 0000 Pulsar 0039 Videomagic 0037 RCA 0240, 0807, 1060, Quasar 0035, 0162, 1035 Videosonic 0240 1035 RadioShack 0000 Villain 0000 Samsung 1014 Radix 0037 Wards 0060, 0035, 0048, Sansui 0000, 1479, 0479 Randex 0037 0047, 0081,... - Page 10 Sansui 0695 Microsoft 0522 Devices Sanyo 0873, 0104 Mintek 0839, 0717 Sharp 0630 Mitsubishi 1521, 0521 Advent 1016 Sony 0864 Motorola 1042 Apex Digital 0830 Sylvania 0675, 0000 Moxell 1042 Broksonic 0695 Toshiba 0503 Nesa 0717 Jensen 1016 Zenith 0869...