Table of Contents
Quick Links
Table of Contents

Related Manuals for RCA 19V400TV


Summary of Contents for RCA 19V400TV
- Page 1 TV/VCR User's Guide Changing Entertainment. Again.
-
Page 2: Important Safeguards
Product Registration Please fill out the product registration card (packed separately) and return it immediately. For U.S. customers: Your RCA Consumer Electronics product may also be registered at www.rca.com/productregistration. Registering this product allows us to contact you if needed. Product Information Keep your sales receipt to obtain warranty parts and service and for proof of purchase. - Page 3 IMPORTANT SAFEGUARDS 7. WATER AND MOISTURE Do not use this unit near water. For example, near a bathtub, washbowl, kitchen sink, laundry tub, in a wet basement, or near a swimming pool. 8. ACCESSORIES Do not place this unit on an unstable cart, stand, tripod, bracket, or table.
- Page 4 IMPORTANT SAFEGUARDS 19. DAMAGE REQUIRING SERVICE Unplug this unit from the wall outlet and refer servicing to qualified service personnel under the following conditions: a. When the power-supply cord or plug is damaged. b. If liquid has been spilled, or objects have fallen into the unit.
-
Page 5: Table Of Contents
PRECAUTIONS MOISTURE CONDENSATION DO NOT OPERATE ANY FUNCTIONS ON THIS UNIT FOR AT LEAST TWO OR THREE HOURS WHEN MOISTURE IN THE AIR CONDENSES ON IT. LET THE UNIT STAND WITH POWER ON (SEE BELOW). WHAT IS MOISTURE CONDENSATION? When a cold liquid is poured into a glass, for exam- ple, water vapor in the air will condense on the surface of the glass. -
Page 6: Features
FEATURES Color TV With Video Cassette Recorder - Unique space saving design combines a color TV and a video cassette recorder. High Quality Picture Technology - This TV/VCR equipped “HQ” incorporates VHS High Quality technol- ogy. A built-in detail enhancer is used to boost the recorded signal and provide maximum picture quality during playback. -
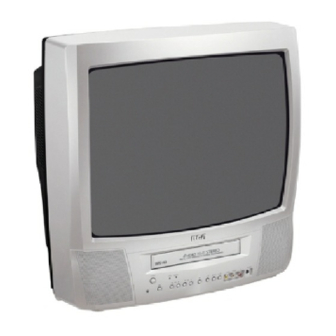
Page 7: Location Of Controls
LOCATION OF CONTROLS FRONT FRONT: 1. Cassette Loading Slot - To insert or remove a video tape. 2. POWER Button - Press to turn the TV/VCR on or off. 3. T.REC Indicator - Lights when the unit is in the Timer Record Mode. -
Page 8: Remote Control
REMOTE CONTROL EJECT INPUT MUTING GO BACK AUTO TRACK STOP PAUSE SKIP • REVERSE FORWARD RESET SEARCH T.REC SPEED PROGRAM TV/VCR SOUND 1. POWER Button - Press to turn the TV/VCR on. Press again to turn the TV/VCR off. 2. Direct Channel Selection Buttons (0-9) - Allows direct access to any channel. -
Page 9: Power Source
BATTERY INSTALLATION Slide the battery compartment cover. Install two “AAA” batteries, paying attention to the polarity diagram in the battery compartment. Replace the compartment cover. BATTERY PRECAUTIONS The precautions below should be followed when using batteries in this device: 1. Use only the size and type of batteries specified. 2. -
Page 10: Antenna Connections
ANTENNA CONNECTIONS If you are using an indoor or outdoor antenna, follow the instructions below that correspond to your antenna system. If you are using a cable TV service (CATV), see page 11 for Cable TV connections. Combination VHF/UHF Antenna ( Single 75 ohm cable or 300 ohm twin-lead wire ) Connect the 75 ohm cable from the combination VHF/UHF antenna to the Antenna Jack. -
Page 11: Cable Tv Connections
CABLE TV CONNECTIONS This TV/VCR has an extended tuning range and can tune most cable channels without using a Cable TV converter box. Some cable companies offer "premium pay channels" in which the signal is scrambled. Descrambling these signals for normal viewing requires the use of a descrambler device which is generally provided by the cable company. -
Page 12: Auto Clock Setting
AUTO CLOCK SETTING The Auto Clock function will automatically set the built-in clock (Month, Day, Year and Time) when the TV/VCR is connected to an Antenna or Cable system and it is turned off. As the TV/VCR searches for a receivable station in your area and it receives a broadcast signal for Auto Clock, the Auto Clock needs several minutes to set itself. -
Page 13: Manual Clock Setting
MANUAL CLOCK SETTING You must set the date and time manually for Timer Recordings, ON/OFF Timer and Daylight Saving Time if the Auto Clock process did not set them correctly. EXAMPLE: Setting the clock to “8:30 AM”, 27th (SAT) March, 2004. Press the MENU button. - Page 14 TV OPERATION MUTING Press MUTING button to switch off the sound. The TV/VCR’s sound will be silenced and “MUT- ING” will briefly appear on the screen. The sound can be switched back on by pressing this button again or one of the VOL + or – buttons.
-
Page 15: To Memorize Channels
Captions: This Closed Caption Mode will display text on the screen in English or another language (depending on the setting of the Closed Captions CH. 1 or 2). Generally, Closed Captions in English are transmitted on Captions Channel 1 and Closed Captions in other languages are transmitted on Captions Channel 2. -
Page 16: Setting The V-Chip
TO MEMORIZE CHANNELS TO ADD/DELETE CHANNELS Press the MENU button. Press the SET + or – button to select the CH SET-UP mode, then press the ENTER button. Press the SET + or – button to select the ADD/DELETE mode, then press the ENTER button. - Page 17 TO SET THE V-CHIP In the V-CHIP SET menu, press the SET + or – button to select “TV RATING”, then press the ENTER button. Press the SET + or – button to display the desired setting, then press the ENTER button. OFF : TV RATING is not set TV-Y : All children TV-Y7 : 7 years old and above...
-
Page 18: To Set The On Timer
TO SET THE ON TIMER This feature allows you to have the TV/VCR automati- cally turn “ON” at a predetermined time. If you program the “ON TIMER” once, the TV/VCR will turn “ON” on the programmed day (daily/weekly) at the same time to the same channel. -
Page 19: Picture Control Adjustments
PICTURE CONTROL ADJUSTMENTS Picture controls are factory preset but you can adjust them individually as follows: To display the picture adjust- ment screen, press the MENU button. Press the SET + or – button to select the TV SET-UP option, then press the ENTER button. -
Page 20: Playback
LOADING AND UNLOADING Use only video cassette tapes marked LOADING Push the center of the tape until it is automatically retracted into the TV/VCR. AUTOMATIC POWER ON AND PLAY When loading a cassette tape without the erase preven- tion tab intact, the TV/VCR will turn on automatically and playback will start immediately. -
Page 21: Special Playback
SPECIAL PLAYBACK TO VISUALLY SEARCH FOR DESIRED POINTS When either the FORWARD or REVERSE button is pressed in the PLAYBACK mode, the speed search picture will appear. When pressed twice, the search picture will increase speed. Speed search time depends upon the speed used (SP, LP or SLP) during recording. -
Page 22: One-Touch Timer Recording (Otr)
ONE-TOUCH TIMER RECORDING ( OTR ) The One-Touch Timer Recording feature provides a simple and convenient way to make a timed recording. EXAMPLE: One-touch Timer Recording for 30 minutes. Press the POWER button to turn on the TV/VCR. Load a video cassette with the erase prevention tab intact. -
Page 23: Using The Real Time Tape Counter
TO SET DAILY/WEEKLY TIMER When setting the date in the step 4 on page 22, press the SET – button repeatedly when the current day is displayed. The setting changes as follows: Example The current day (Friday) SUN-SAT MON-SAT One month later minus one day MON-FRI WKL-WED... -
Page 24: Stereo Recording And Playback
STEREO RECORDING AND PLAYBACK RECORDING STEREO BROADCASTS The VHS Hi-Fi audio system permits high fidelity recording of MTS STEREO TV broadcasts. When an MTS STEREO broadcast is received, the STEREO will appear on the screen and the program can be viewed or recorded in stereo. -
Page 25: Duplicating A Video Tape
DUPLICATING A VIDEO TAPE If you connect the TV/VCR to another VCR or Camcorder, you can duplicate a previously recorded tape. Make all connections before turning on the power. Insert a blank cassette with the erase prevention tab intact into the TV/VCR. Insert a previously recorded cassette into the play back VCR or Camcorder. -
Page 26: Troubleshooting Guide
TROUBLESHOOTING GUIDE Check the following chart before requesting service. SYMPTOM POWER The AC power cord is not connected. No power. Although the power is on, Cassette is not inserted. the TV/VCR does not T. REC button is depressed. operate. TV BROADCAST RECEPTION TV station experiencing problems. - Page 27 SYMPTOM TV station stopped broadcasting. TV shuts off. Sleep timer is set. TV station experiencing problems or program tuned is not closed caption. TV signal is weak. Closed caption is not activated. The CAPTION button is not depressed. RECORDING The video cassette's erase prevention TV recording does not work.
-
Page 28: Reception Disturbances
RECEPTION DISTURBANCES Most types of television interference can be remedied by adjusting the height and position of the VHF/UHF antenna. Outdoor antennas are recommended for best results. The most common types of television interference are shown below. If one of these symptoms appear when the TV/VCR is connected to a Cable TV system, the disturbance may be caused by the local Cable TV company broadcast. -
Page 29: Specifications
AC 120V 60Hz 86 Watts (AC 120V) W 19-1/4" x D 18-3/16" x H 19-1/16" 41.9 Ibs Video: In (RCA) 1Vp-p/75 ohm Audio: In (RCA) –8dBm/50K ohm –20¡C to 60¡C (–4¡F to 140¡F) 5¡C to 40¡C (41¡F to 104¡F) Remote Control... -
Page 30: Limited Warranty
• Pay any Authorized RCA VCR Service Center the labor charges to repair your TV/ VCR. • Pay any Authorized RCA VCR Service Center for the new or, at our option, rebuilt replacement parts and picture tube required to repair your TV/VCR. - Page 31 • Please complete and mail the Product Registration Card packed with your set or register on-line at www.rca.com/product registration. It will make it easier to contact you should it ever be necessary. The return of the card is not required for warranty coverage.
- Page 32 This Class B digital apparatus complies with Canadian ICES-003 Visit the RCA web site at www.rca.com Please do not send any products to the Indianapolis address listed in this manual or on the carton. This will only add delays in service for your product.