
Related Manuals for RCA 25415


Summary of Contents for RCA 25415
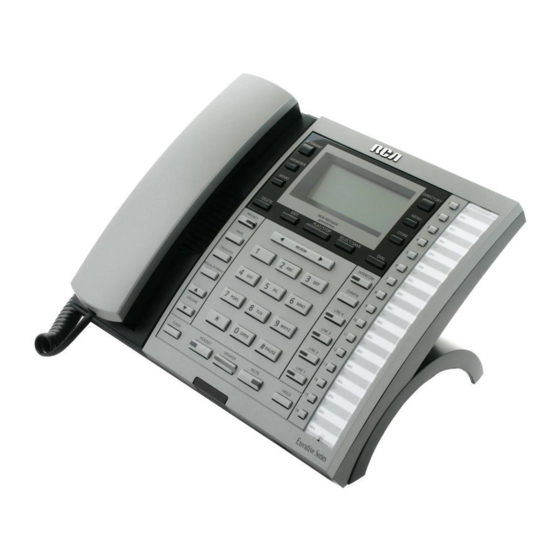
- Page 1 4-Line Intercom Speakerphone with Answerer and Caller ID User’s Guide Please read this manual before operating product for the first time. Model 25415...
-
Page 2: Equipment Approval Information
• This equipment may not be used on coin service provided by the telephone company. • Party lines are subject to state tariffs, and therefore, you may not be able to use your own telephone equipment if you are on a party line. -
Page 3: Fcc Rf Radiation Exposure Statement
H5400 accessory handset and module. This telephone is designed to be simple to use, however, you can reach its full potential more quickly by taking a few minutes to read this user’s guide. -
Page 4: Table Of Contents
Table of Contents ...2 QUIPMENT PPROVAL NFORMATION ...2 NTERFERENCE NFORMATION FCC RF R ...3 ADIATION XPOSURE TATEMENT ...3 ICENSING ...3 EARING OMPATIBILITY ...5 ARTS HECKLIST ...5 ELEPHONE EQUIREMENTS ...5 AYOUT ...6 MPORTANT NSTALLATION NFORMATION ...6 MPORTANT NSTALLATION UIDELINES ...6 NSTALLING THE HONE ...8 ...8... -
Page 5: Parts Checklist
Only other RCA 25413 , 25414, or 25415 or GE 29487 or 29488 models are compatible for full system operation. Connecting phones other than the RCA 25413 , 25414, or 25415 or GE 29487 or 29488 to Line 1 may inhibit the intercom and paging operations. -
Page 6: Important Installation Information
As a precaution, you may want to write down any stored information you do not want erased. IMPORTANT: If you are not going to use the telephone for more than 30 days, remove the batteries because they can leak and damage the unit. - Page 7 You may connect up to 16 RCA 25413, 25414 and/or 25415 phones to the system at one time. Features like intercom, page and call transfer may be used among the units, but Line 1 must be common for all 25413, 25414, or 25415 units for these features to work properly.
-
Page 8: Data Port
7. Press the SELECT/SAVE button to save. The cursor automatically moves to LINE 2. 8. Repeat steps 6 and 7 for each telephone line. After you select the ringer tone for LINE 4, press the EXIT button. NOTE: The line indicators flash for incoming calls even if the ringer is disabled. -
Page 9: Priority Line
I. Press the 6 key two times for the letter N. Press the 3 key twice for the letter E. 7. Press the SELECT/SAVE button to save. NOTE: The Phone Name and ID shows in the display when the phone is idle. Programming the Telephone... -
Page 10: Intercom Auto Answer
Call Alert Tone Turn on the Call Alert to hear a tone for incoming calls while you are on the telephone. This function notifies you that there is a incoming call while you are using the phone. If you do not want this tone to disturb your conversation, you can set it to OFF. -
Page 11: Display Contrast
10 digits. NOTE: If the CID telephone number does not display correctly, you may not be able to dial back the number from the Caller ID menu. You may need to set regional area codes if you reside in an area which: •... -
Page 12: Hour Format
- If you have new messages, the unit answers after the 3rd ring. - If you have no new messages, the unit answers after the 5th ring. - You can hang up after the 3rd or 4th ring and save the pay telephone or long distance charge. -
Page 13: Message Length
Message Length This sets the maximum recording time for the caller to leave a message when the answering function is on. 1. Press the MENU button while in standby mode. 2. Use the < REVIEW > button to scroll to ANSWERING MACHINE. 3. -
Page 14: Mailbox
ID# set to 15, or 16, the default pickup delay time is 13 seconds 7. Press the SELECT/SAVE button to save. TIP: Set different Auto Attendant pickup delay times in different 25415’s Set Day Time for Auto Attendant The Auto-Attendant Day outgoing message will be played during the Day Time you program. The pre-recorded announcement is: “Hello, please enter your party’s extension. -
Page 15: Set Night Time For Auto Attendant
Programming the Auto Attendant Set Night Time for Auto Attendant The Auto-Attendant Night outgoing message will be played during the Night Time you program. The pre-recorded announcement is: “Hello, please enter your party’s extension. If you do not know the extension number, press zero (0), zero (0).” 1. -
Page 16: Basic Operation
Pre-dialing 1. With the phone idle and the handset on the cradle, manually enter the telephone number. The telephone number shows in the display. 2. Press the DIAL or SPEAKER button, or lift the handset to take a line, and the telephone number is automatically dialed. -
Page 17: Switching Between The Speakerphone , H
Switching Between the Speakerphone, Handset, and Headset To switch to the speakerphone, press SPEAKER. The speakerphone indicator turns on. Put handset back in cradle. To switch to the handset, pick up the handset. The speakerphone or headset turns off. To switch to the headset, press the HEADSET button to enable the headset, and the headset indicator turns on. Hang up the handset. Mute To have a private, off-line conversation, use the MUTE feature. -
Page 18: Transferring A Call To Another Station
To connect and conference 1. To make a call, press the line you want and dial the telephone number. If you already have someone on the line, skip to step 2. 2. Press the HOLD button to place the call on hold. -
Page 19: Ntercom Calls
4. Press the CONFERENCE button. 5. Speak to both parties. NOTE: If you have more than one party on hold (telephone line or intercom), you must select the line for the party you want to conference with. To disconnect one party: Press the line or intercom button for the person you want to continue speaking with, and the other party is automatically disconnected. -
Page 20: Paging All Stations
Saving a CID Record to the Intercom/Memory Log or to Phone Book Memory 1. While a name and telephone number shows in the display, if you need to edit the information, press the SELECT/SAVE button and follow the steps for Storing a Name and Number in Memory. -
Page 21: Dialing Back
1. Press the STORE button. ENTER NUMBER is displayed. 2. Use the touch tone pad on your telephone to enter the telephone number you want to store. The numbers you enter show in the display. NOTE: If you make a mistake, use the < REVIEW > button to move the cursor to the incorrect digit, and press the DELETE button to delete. -
Page 22: Reviewing Phone Book (Directory) Memory
Storing a Pause in Memory Press the #PAUSE button twice to insert a pause in the dialing sequence of a stored telephone number when a pause is needed (for example, when you must dial a 9 to get an outside line or when you must enter codes to access your bank’s information line). -
Page 23: Clear All Memories
This process allows you to dial a succession of stored numbers from separate memory locations. This is useful when you must dial several sequences of numbers, such as with frequent calls via a telephone company long distance provider. For example... -
Page 24: Playback And Erasing A Greeting
Answering System Operation Playback and Erasing a Greeting 1. Press the MENU button while in standby mode. 2. Use the < REVIEW > button to scroll to ANSWERING MACHINE 3. Press the SELECT/SAVE button. 4. Use the < REVIEW > button to scroll to PLAYBACK GREETING. 5. -
Page 25: Accessing The Answering System From Another Location
To delete all the messages: 1. Press and hold the DELETE button for 2 seconds during message playback or while in standby mode. DELETE ALL MESSAGES? shows in the display. 2. Press the DELETE button again to confirm the deletion. NOTE: You cannot delete ALL messages while you are playing the new messages. -
Page 26: Recording Auto Attendant Greetings
Auto Attendant Operation If the caller does not enter an extension number after hearing the message, the Auto-Attendant waits about 5 seconds and replays the ATTENDANT OGA (out-going announcement) for the caller. If the caller still does not enter an extension number within 5 seconds; a) the Greeting Only OGA “Sorry, no one is available to answer the call. -
Page 27: Display Messages
It is possible to enhance your phone to a cordless feature with the additional purchase of the H5400 accessory handset and module. The H5400 is packaged with an RF module, when the module is properly inserted into the back of the 25415 base, the antenna icon on the display will illuminate. -
Page 28: Eneral Product Care
If trouble is experienced with this equipment, for repair or warranty information, please contact customer service at 1-800-511-3180. If the equip- ment is causing harm to the telephone network, the telephone company may request that you disconnect the equipment until the problem is resolved. -
Page 29: Limited Warranty
Limited Warranty What your warranty covers: • Defects in materials or workmanship. For how long after your purchase: • One year, from date of purchase. (The warranty period for rental units begins with the first rental or 45 days from date of shipment to the rental firm, whichever comes first.) What we will do: •... - Page 30 Index Accessing the Answering System from Another Location 25 Accessory Information Answering an Intercom Call Answering Calls 16 Answering Machine Answering System Auto Attendant 25 Auto Attendant Pickup Delay Auto Attendant Sequence for Callers Base Layout Basic Operation 16 Call Alert Tone Call Screening Call Waiting Caller ID Caller ID 20...
- Page 31 Pre-dialing Priority Line Privacy 18 Programming the Answering Machine Programming the Auto Attendant 14 Programming the Telephone Providing Privacy 18 Receiving a Transferred Call from Another Station Receiving and Storing CID Records 20 Recording a Greeting Recording Auto Attendant Greetings...
- Page 32 Visit the RCA web site at www.rca.com Please do not send any products to the Indianapolis address listed in this manual or on the carton. This will only add delays in service for your product. ATLINKS USA, Inc. 101 West 103rd Street Indianapolis, IN 46290 ©2005 ATLINKS USA, Inc.