Epson Runsense SF-810 Quick Start Manual
Gps sport monitor
Hide thumbs
Also See for Runsense SF-810:
- User manual (132 pages) ,
- Quick start manual (2 pages) ,
- User manual (97 pages)
Quick Links
See also:
User Manual
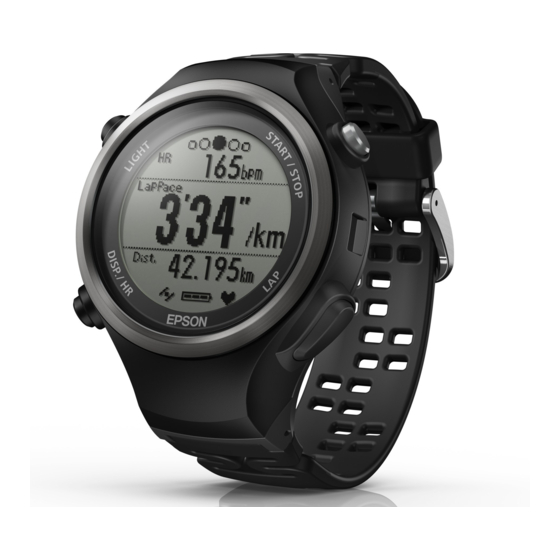
GPS Sports Monitor
TM
Quick Start Guide
What's in the box
Watch
Cradle
An optional AC adapter can be purchased separately.
1. Charging and setup
Charge this product before using it for the first time.
1. Connect the cradle to a power source.
» Using a PC
Connect the cradle's USB plug to the computer's USB port.
Do not use a USB hub. Instead, connect the cradle directly to the computer.
» Using the optional AC adapter
Connect the cradle's USB plug to the AC adapter's USB port.
We recommend using the optional AC adapter (model number: SFAC04). If you do not use a
supported AC adapter, you may not be able to charge the product or it may not operate
correctly.
2. Place the product into the cradle.
Check that the contact points on the product are pointing up and match the contact marks
on the cradle. After placing the product into the bottom of the cradle with the LCD screen
facing out, push carefully on the top of the product until it clicks into place.
When the product is placed correctly, the alarm sounds, the charging screen is displayed, and
charging starts.
3. When charging is complete, remove the product from the cradle.
Hold the cradle and press the product down into the lower part of the cradle to release the
product.
4. Follow the on-screen instructions to set the language, units, and user information.
Scroll up
Select the
Select the
highlighted
highlighted
Scroll down
option
option
5. When you are in a location with no obstructions overhead, select Yes.
A signal is received from the GPS and time is automatically synchronised.
When Complete is
displayed, press
NOTE
When you do not use the product for a while, it enters sleep mode and the time display turns off. This is
not a malfunction as the display is restored the next time you move the product. If time synchronisation
fails, the time screen will automatically be updated the next time a GPS signal has been received. You can
proceed to section 2, "Using RUNSENSE View. "
2. Using Epson RUNSENSE View (Windows® PC)
Installing Epson Run Connect Software
This product allows you to manage measured data using the RUNSENSE View web app. To upload
measurement data, you need to install Epson Run Connect on your Windows PC and connect to the
Internet.
NOTE
Install Epson Run Connect before connecting the product to your PC.
1. Visit epson.com/support/sf810 (U.S.) or epson.ca/support/sf810 (Canada) and
download Epson Run Connect for PC.
2. Run the downloaded file and follow the instructions displayed on the setup
screen.
Creating an account
1. Connect the cradle with a USB cable to the PC on which Epson Run Connect is
installed.
2. Place the product into the cradle.
Check that the contact points on the product are pointing up and match the contact marks on
the cradle.
Epson Run Connect starts.
3. Click Create Account and enter your details.
Uploading your data
Connect your RUNSENSE product to the computer. The following box automatically
appears. Enter your Login ID and Password and click Upload.
Viewing your data
1. Click Start RUNSENSE View on the Run Connect screen.
Or visit https://go-wellness.epson.com/runsense-view/.
2. Click the data you want to check from the list.
NOTE
For information on using the RUNSENSE View, see the RUNSENSE View Help.
Contact marks
3. Using the Epson Run Connect app
Installing Epson Run Connect
Download and install Epson Run Connect from your mobile device's app store.
NOTE
The following mobile devices are supported:
• iPhone 4s, iPhone 5, iPhone 5c, iPhone 5s, iPhone 6, and iPhone 6 Plus with iOS 6 or later.
• Mobile devices running Android
Pairing your product
1. Start the Epson Run Connect app.
2. Tap Pairing.
3. Tap Start Pairing.
4. Press and hold
on the product.
Set your height,
weight, DOB,
gender, today's
date, and the date
format.
5. Tap OK on your mobile device.
.
Your product displays a passcode.
6. Enter the 6-digit passcode on your mobile device and tap OK or Pair.
7. Tap OK to finish pairing.
NOTE
For more information on using the Epson Run Connect app, see the online iOS or Android user manual.
4. Wearing your SF-810
Wear the product snugly around your wrist as shown in the illustration below.
Tighten the wristband if your pulse is not measured correctly while exercising.
Bone
NOTE
After putting on the product, press
Contact marks
4.3 or later with Bluetooth® Smart.
TM
Heart rate sensor
on the Time screen, and check that your pulse is being measured.
Caring for your SF-810
Your Runsense product is made from materials commonly used in watches and other consumer
products. Since you may wear your product over extended periods, including when you are exercising
and sweating, it is important that you take care of your skin and your product according to these
instructions. Prolonged wearing of your product without proper care could lead to skin irritation or rash.
Please follow the precautions below to ensure full enjoyment and benefit of your Runsense product:
• Keep Runsense and skin clean.
• Keep Runsense and skin dry.
• Give skin a rest and some air.
Proper wear and care of your SF-810 is an important part of your enjoyment of this product. Make sure
to see the online User Manual for more detailed information on caring for your product.
Safety Instructions
The following symbols are used in this guide to indicate possible dangerous operations or handling.
Make sure you understand these warnings before using the product.
This symbol indicates information that, if ignored, could possibly result in
Warning
serious personal injury.
This symbol indicates information that, if ignored, could possibly result in
Caution
personal injury or damage the product.
This symbol indicates an action that should be done.
This symbol indicates an action that must not be done.
Notes on Using the Product and Components
Warning
Exercise according to your physical capabilities.
Stop exercising and consult your doctor if you feel unwell during exercise.
This product is not intended for use to diagnose, prevent, or treat disease or other conditions, and
is not a medical device. If you have any concerns, consult your doctor before using this product.
Do not use or store this product in the following environments. It may cause an electric shock or
fire, or the product may malfunction or be damaged.
•Locations with very high or low temperatures or humidity
•Near volatile substances
•Dusty places
•Near a strong magnetic field (for example, near a loudspeaker)
Do not disassemble this product, and do not attempt to repair this product by yourself. It may
cause an electric shock or accident.
Do not leave this product within reach of young children.
The cradle cords included with this product contain chemicals, including lead, known to the State
of California to cause birth defects or other reproductive harm. Wash hands after handling. (This
notice is provided in accordance with Proposition 65 in Cal. Health & Safety code § 25249.5 and
following.)
Caution
Persons with high skin sensitivity, eczema, allergies, or asthma may be more likely to experience
skin irritation or an allergic reaction from the Runsense product or similar products. Even persons
without such conditions may start to experience redness or skin irritation on wrists from prolonged
use or if the product is not cleaned regularly as indicated above. If you experience such symptoms:
• Stop wearing and remove your product immediately. Do not put it back on.
• If symptoms persist for more than 2-3 days after removing the product, consult a dermatologist.
• Make sure to follow the wear and care instructions above and in the online User Manual.
Using your SF-810
This product has a Time screen, Measurement screen, Settings
screen (Settings menu and Measure set. menu), and History screen,
and you can perform operations with the following buttons.
Button
Time screen
Measurement screen
Operation
Starts heart rate
Changing between screen.
Short press
measurement.
Displays the time screen.
Turns the power on or off.
(Not available while
Long press*
1
measuring.)
Turns the light on or off. The light turns on for approximately 10 seconds.
Short press
Displays the Measure set.
Displays the Settings menu.
menu.
Long press*
1
> Settings screen
(Not available while
measuring.)
Performs GPS positioning,
Starts, stops, or resumes
and displays the
Short press
measuring.
Measurement screen.
Displays the time screen.
–
(Not available while
Long press*
1
measuring.)
Displays your workout
Records laps while
Short press
history.
measuring.
Sync to Bluetooth device.
Resets*
2
while measuring is
Use this when uploading
Long press*
1
stopped.
measurement data.
*1 Hold down for at least two seconds until the screen changes.
*2 When you reset the display, it returns to the status before measuring started allowing you
to start the next measurement. Data that has been measured up to that point is stored in the
product's memory.
If no operations are performed after three minutes when the System settings, User settings, or
History screens are displayed, you are returned to the time screen.
Using the chronograph
This function allows you to measure split times and lap times simultaneously.
Split Time
Measures the elapsed time from the start.
Start
Lap Time
Records the elapsed time for each lap.
You can record laps by pressing
on the product during Chronograph measurement, or by using the
AT lap function.
Settings screen
Confirm a selection.
From the Settings menu,
the time screen is displayed.
From the Measure set.
menu, the measurement
screen is displayed.
–
Selects the upper item.
Increases the value.
Selects the upper item.
Scrolls through the values.
Selects the lower item.
Decreases the value.
Selects the lower item.
Scrolls through the values.

Related Manuals for Epson Runsense SF-810


Summary of Contents for Epson Runsense SF-810
- Page 1 Use this when uploading Long press* For more information on using the Epson Run Connect app, see the online iOS or Android user manual. fails, the time screen will automatically be updated the next time a GPS signal has been received. You can stopped.
- Page 2 See the Epson Runsense Website for software warranties. Epson is not responsible for warranty Run mode Split time service should the Epson label or logo or the rating label or serial number be removed. Epson is Walking mode Average pace...