Quick Links
See also:
Owner's Manual
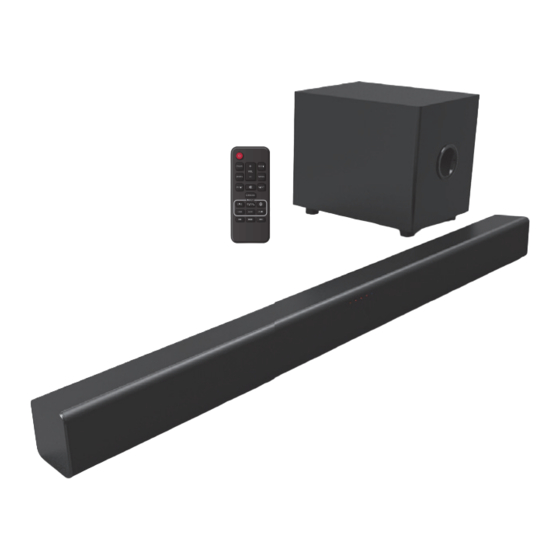
SOUNDBAR
Setup Manual
See the Online Owner's Manual for details:
See the Online Owner's Manual for details:
sanyo-av.com
sanyo-av.com
Please visit website
Please visit website
sanyo-av.com
1
Select Download.
2
Type in the Model # "FWSB426F", and click "Search".
3
3
Select the Manual and click on "D
S l
t th M
l
d li k
"
Download" " .
4
l
d
SUPPLIED ACCESSORIES
• Remote Control (NC302UH) and Batteries (AAA, 1.5V x 2)
• Setup Manual
• Digital Audio Optical cable
• Line-In cable
Register Online at sanyo-av.com/support/ today to get the most benefits from your purchase.
Registering your model with SANYO makes you eligible for all of the valuable benefits such as
software upgrades and important product notifications.
Register Online at
sanyo-av.com/support/
y
pp
SANYO is a registered trademark of SANYO Electric Co., Ltd. and is used by Funai Electric Co., Ltd. and Funai Corporation, Inc.
under license from SANYO Electric Co., Ltd. Any liability related to SANYO products, including design and quality, is the sole
responsibility of Funai Electric Co., Ltd. and Funai Corporation, Inc.
Please contact Funai Corporation, Inc. for any questions or claims related to SANYO products: sanyo-av.com
© 2016 Funai Electric Co., Ltd.
* 2 V M N 0 0 2 4 9 A *
B
luetooth
S
etting
Press
(Bluetooth Icon) button on the Remote
1
Control to switch the Soundbar to Bluetooth mode.
2
Turn On your Bluetooth compatible device.
On your Bluetooth compatible device search for r r r r r r a a a a a a a a a n
an n n n n n n d
an
nd
nd d d d d d d d d d
nd
3
select "SANYO_FWSB
426
F" to pair (or register r r r ) ) ) ) ) y y y y y y y y y y o o o o o o o o o o u u u u u u u u u r r r r r r
Soundbar with your Bluetooth compatible devic c c c c c c c e ce e e e e e e e e . . . .
• If a Passcode is requested, enter "0000".
Bluetooth
Available Devices
• If the Soundbar name does not appear on the e e e e e
SANYO_FWSB426F
Pairing...
Bluetooth compatible device, press
button
on n n n n n
on the Remote Control.
Play music on the connected Bluetooth compatible device.
4
5
To Exit Bluetooth mode, press another Audio
Input Source button on the Remote Control.
NOTE(
):
S
If reconnecting the Bluetooth device to the Soundbar fails, delete the registered
profile of this Soundbar from the Bluetooth device, then perform pairing again.
This unit can store up to 9 device profiles.
M
S
W
ount
oundbar on a
all
(Optional-refer to 'Installing the Soundbar on a wall' in the Online Owner's Manual.)
9/64" ~ 5/32"/3.5 ~ 4mm
Molly Anchor
5/32"/4mm
1-3/16"/30mm
~ 3/ 16
"/ 5 m
m ''
~ 3 / 8
" / 9
m m
''
Use the "Wall Mounting Template" at the bottom right of this guide when you make
the screw holes on the wall.
1
Use one of the Connection Methods shown below to Connect the Soundbar to your TV before plugging in
the AC Power cord.
Digital Audio Coaxial Cable
(not supplied)
Digital Audio Optical Cable
supplied
Most modern digital TV's do not have Red and White Coaxial Analog Audio Outputs, but do have Red and
White Coaxial Analog Audio Inputs. If you plan to use Red and White Analog Coaxial Cables to Connect
your TV to this Soundbar, please ensure that your TV does indeed have Red and White Coaxial Analog
Audio OUT. Refer to your TV's User Manual for details.
To Connect Soundbar directly to other devices (Blu-ray player, Game System, etc.), see your Device's User Manual.
Printed in China
XHB00UH ★★★★
R
emote
(POWER/Standby)
Press to Turn On or Off
(Standby mode)*.
STANDARD/ SPORTS/
MUSIC/ MOVIE/ NEWS/
NIGHT
on
Press to Select desired
Passcode:
Equalizer mode.
0000
SURROUND
Press to Select Surround
Sound On or Off.
LINE/ OPT.(ical) or COAX.(ial)/
USB/ AUX(iliary)
/
Press one of the INPUT Buttons
to Select appropriate Source.
*Unplug the AC Power cord to Turn
Off completely.
Insert Batteries
Install 2 AAA (1.5V) batteries (supplied)
1
2
NOTE(
):
S
• Do not mix old and new batteries.
• Do not mix alkaline, standard (carbon-zinc) or rechargeable
(ni-cad, ni-mh, Li-ion, etc.) batteries.
C
onnections
Line-in Cable
Good
Good
HEADPHONE
supplied
or
Better
Better
DIGITAL AUDIO
OUT (COAXIAL)
or
Best
Best
DIGITAL AUDIO
OUT (OPTICAL)
C
ontrol
VOL(ume)
Press to adjust Volume
No Power
+ (up) / - (down) for Soundbar.
No Sound / Distorted sound
(MUTE)
Press to Mute the Sound
and press again to Unmute
the Sound.
PAIR(ing)
No Sound from Subwoofer
Press to Start Pairing mode.
Press to operate the
BLUETOOTH device and
USB Memory Stick (WAV file
Echo Sound is heard when both the
Only).
TV and Soundbar Sound are On.
Intermittent or No Reaction to
the Remote Control.
3
An external Device cannot connect
with the Soundbar via Bluetooth.
Unstable connection between the
Bluetooth Device and the Soundbar.
2
Connect AC Power cords from Soundbar and Wireless Subwoofer
to an electric outlet.
Rear of Soundbar
CONNECT button
- This button is not a Power-On
button. DO NOT PRESS IT, if Pressed,
the Bluetooth Connection to the
Soundbar will be disabled. (Refer to
"Troubleshooting" below "No Sound
from Subwoofer" for pairing the Subwoofer.)
3
Turn Soundbar On using Remote
Check the LED lighting sequence when the
Unit is turned On.
- If the Red LED on the Subwoofer lights up, the Unit
is connected to the Subwoofer.
- When the Subwoofer Red LED is blinking, Unit is not
detecting the Subwoofer. (Refer to "Troubleshooting" below
"No Sound from Subwoofer" for pairing the Subwoofer.)
4
The INPUT indicator lights
up when you Select your
connected INPUT (e.g. OPT .
(Orange)/COAX.(Green)).
- The OPTICAL/COAXIAL INPUT
Rear of TV
indicator blinks when the format of
any Input source is not compatible
on this Unit. Check your TV or other
sources are outputting a Digital
Audio output format (Dolby Digital
or LPCM).
NOTE(
):
S
• Make sure the Soundbar is Turned Off when Connecting Cables.
• Check whether all Connection Cables are properly connected.
• If you Connect from the Headphone Output on the Device's Source to the Line-Input on the Soundbar, make
sure the Volume of the Headphone Output on the Device's Source is set to an appropriate mid-level sound.
Setting it too Low will produce weak output from the Soundbar or setting it too High could cause distortion.
• The feet of the Subwoofer cannot be removed. Do not apply force to them.
T
roubleshooting
Problem
• Unplug AC Power cord from Soundbar and Subwoofer, wait for 20 seconds. Then Plug in the Subwoofer followed
by the Soundbar, immediately turn the Soundbar On using the Remote Control.
• Make sure the TV, other Devices and Soundbar are all Turned On.
• Make sure Unit is Connected to an Audio Output on your Device.
• Press INPUT source buttons on your Soundbar Remote Control to select the correct Audio Input.
• Confirm that the Soundbar is not Muted. Press the VOL +/- or MUTE ICON button's on the Remote to unmute
the Sound .(See 'Adjust the Volume' on the Online Owner's Manual: sanyo-av.com)
• Adjust the Sound Settings on your Connected device.
• Adjust the Headphone Volume on some TV's if you connect this Unit to the Headphone jack on your TV using the
Supplied 3.5mm Line-In cable.
• If Input is Optical Sound make sure that the Optical Cable Connector is completely inserted into the Terminal (Click
Sound heard when properly inserted).
• Press and Hold CONNECT button on the Rear of the Subwoofer until the Red LED starts blinking fast. Use the
Soundbar Remote Control and put the Soundbar in AUX input, when in AUX input, Press and Hold the PAIR
button on the Remote Control until the AUX and BLUETOOTH LEDs on the Soundbar blink together. At this point
the Soundbar will attempt Pairing with the Subwoofer, if successful, the LED on the Rear of the Subwoofer will
light up solid Red. See the Online Owner's Manual for details: sanyo-av.com
• Certain Sound Sources may not contain enough Bass Sound to activate the Subwoofer, try playing Audio with
more Bass.
• It is normal for the TV and Soundbar Sounds to have an Echo Sound when both are turned On at the same time.
• To Eliminate the Echo Sound Turn the Off or Mute the TV Sound.
• Check the Batteries in Remote Control and make sure they are Inserted properly using + or - symbols.
• Aim Remote at the Center of this Unit.
• Use a Digital or Phone Camera pointing the Remote Control at the Camera Lens and press any Remote button.
If Remote IR LED(s) flash on Camera Display, then the Remote is Transmitting a Signal. Some Phone Cameras
have IR filters in their Lens, therefore you will not see the IR LED(s) flash.
• If your Thumb is used to operate the Remote Control sometimes it may not be fully working when pointed at the
Soundbar, make sure that your Index Finger is Not blocking the IR Signal from the Front of the Remote Control.
• Confirm that Bluetooth is Enabled on the external Device. See the User Manual on the external Device on how to
enable Bluetooth.
• Another Bluetooth Device is already connected to the Soundbar. Disconnect the connected Device, then try again.
• The Bluetooth reception may be poor. Confirm that there is no obstacle between the Bluetooth Device and the
Soundbar. If this does not improve the Sound quality, move the Bluetooth Device closer to the Soundbar.
LED
(POWER/Standby).
LINE
USB
OPTICAL/
AUX
PAIR
COAXIAL
Tip

Related Manuals for Sanyo FWSB426F


Summary of Contents for Sanyo FWSB426F
- Page 1 Most modern digital TV's do not have Red and White Coaxial Analog Audio Outputs, but do have Red and SANYO is a registered trademark of SANYO Electric Co., Ltd. and is used by Funai Electric Co., Ltd. and Funai Corporation, Inc.
- Page 2 For product recycling information, please visit - sanyo-av.com Reorient or relocate the receiving antenna. limitations or exclusions may not apply to you.