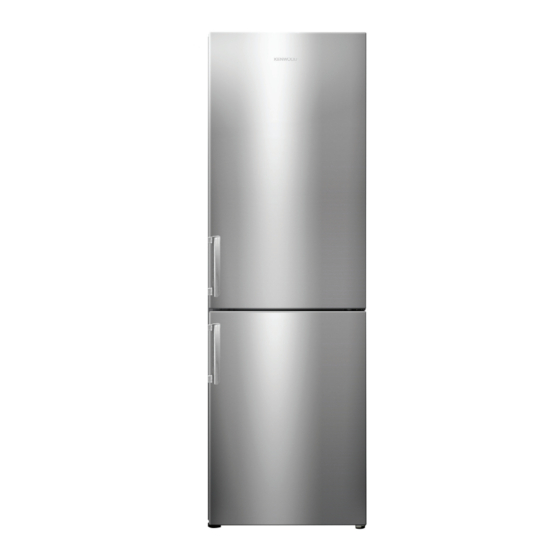
Summary of Contents for Kenwood KFC60B15
- Page 1 60cm Frost Free Fridge Freezer KFC60B15 / KFC60W15 / KFC60X15 installation / instructions manual...
-
Page 3: Table Of Contents
Contents safety warnings ........................4 unpacking ..........................6 installation ........................... 7 location ..........................7 levelling the unit ....................... 7 free space requirements ....................7 installling the door handle ....................7 reversing the door swing ....................8 cleaning before use ......................11 before using your unit .....................11 product overview ...................... -
Page 4: Safety Warnings
safety warnings For your continued safety and to reduce the risk of injury or electric shock, please follow all the safety precautions listed below. • Read all instructions carefully before using the unit and keep them for future reference. • Retain the manual. If you pass the unit onto a third party, make sure to include this manual. - Page 5 • Do not store explosive substances such as aerosol cans with a flammable propellant in this appliance. • Do not store bottles or glass containers in the freezer compartment. Contents can expand when frozen (fizzy drinks) which may break the bottle and damage your freezer compartment.
-
Page 6: Unpacking
Thank you for purchasing your new Kenwood Fridge Freezer. These operating instructions will help you use it properly and safely. We recommend that you spend some time reading this installation/instruction manual in order that you fully understand all the operational features it offers. -
Page 7: Installation
installation installation location When selecting a position for your unit you should make sure the floor is flat and firm, and the room is well ventilated with an average room temperature of between 10°C and 43°C. Avoid locating your unit near a heat source, e.g. cooker, boiler or radiator. Also avoid direct sunlight as it may increase the electrical consumption. -
Page 8: Reversing The Door Swing
installation reversing the door swing tools required: Philips style screwdriver / Flat bladed screwdriver / Hexagonal spanner • Ensure the unit is unplugged and empty. • To take the door off it is necessary to tilt the unit backwards. You should rest the unit on something solid, e.g. - Page 9 installation 4. Remove the middle hinge. Lift the lower door and place it on a padded surface to prevent from being scratched. 5. Remove the stopper and lower door stop block from the bottom of the lower door and move them to the opposite side. Screw tightly.
- Page 10 installation 8. Screw the levelling feet fix board, bottom hinge and levelling feet tightly on their new position. 9. Stand the unit. Remove the middle hinge hole covers and swap their position with the middle hinge. Reverse the middle hinge. 10.
-
Page 11: Cleaning Before Use
installation 12. Attach the upper corner cover. Put back the upper cover. Attach the upper door corner block. 13. Move the door handles to the other side of the doors accordingly. cleaning before use Wipe the inside of the unit with a weak solution of bicarbonate soda. Then rinse with warm water using a sponge or cloth. -
Page 12: Product Overview
product overview main unit Control Panel LED Light Fridge Glass Shelf Fridge Door Shelf Salad Bin Cover Shelf Salad Bin Freezer Drawer Freezer Glass Shelf Bottle Stopper Egg Tray Ice Tray Wine Rack... -
Page 13: Operation
operation switching on your unit 1. Connect the mains cable to the mains socket. The internal temperature of your unit is controlled by an electronic control panel. 2. Press repeatedly to set temperature for the fridge compartment (2 to 8°C) and press repeatedly to set temperature for the freezer compartment (-16 to -24°C). -
Page 14: Noises Inside The Unit
noises inside the unit! You may notice that your unit makes some unusual noises. Most of these are perfectly normal, but you should be aware of them! These noises are caused by the circulation of the refrigerant liquid in the cooling system. It has become more pronounced since the introduction of CFC free gases. -
Page 15: Defrosting Frozen Food
defrosting frozen food 1. Take the frozen food out from the freezer compartment and uncover the frozen food. Let it defrost at room temperature. Don’t forget that defrosting in a warm area encourages the growth of bacteria and low temperature cooking may not destroy dangerous bacteria. 2. -
Page 16: Maintenance
maintenance changing the internal LED light The internal light is an LED panel that cannot be changed by the user. Please contact a qualified service agent. care when handling / moving your unit Hold the unit around its sides or base when moving it. Under no circumstances should it be lifted by holding the edges of the top surface. -
Page 17: Specifications
Model KFC60B15 / KFC60W15 / KFC60X15 Appliance Category Category 7 (Refrigerator – Freezer) Overall Dimension (H x W x D) 1850 x 595 x 725 mm Fresh Food Storage Volume 233 L Frozen Food Storage Volume 93 L Defrosting Type... - Page 20 Need Help with your product? Your product is supported by Knowhow under a Trademark Licence from Fisher & Paykel Appliances Italy SpA. For help or spare parts please call us on: 0344 561 1234 The symbol on the product or its packaging indicates that this product must not be disposed of with your other household waste.


