
Related Manuals for LG DA-W6100A


Summary of Contents for LG DA-W6100A
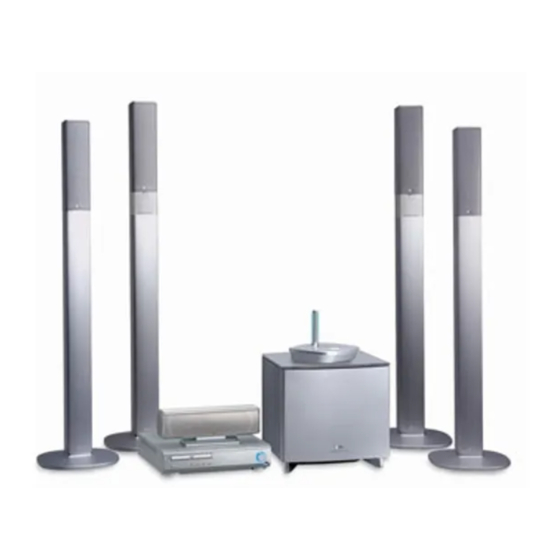
- Page 1 DVD RECEIVER SERVICE MANUAL MODEL: DA-W6100A/D, FE-6100CVE, FE-6100TE, FE-6100WE FA-W6100SL, FA-W6100SR, ACC-W6100 Digitized in Heiloo Netherland...
-
Page 2: Table Of Contents
www.freeservicemanuals.info CONTENTS SECTION 1. GENERAL • SERVICING PRECAUTIONS ........................1-2 • ESD PRECAUTIONS ..........................1-4 • SPECIFICATIONS ............................1-5 • LOCATION OF CUSTOMER CONTROLS ....................1-6 SECTION 2. AUDIO PART • ELECTRICAL TROUBLESHOOTING GUDIE .................... 2-1 • DVD PLAYER PROGRAM DOWNLOAD METHOD ................... 2-5 •... -
Page 3: Section 1. General
www.freeservicemanuals.info SECTION 1. GENERAL PART SERVICING PRECAUTIONS NOTES REGARDING HANDLING OF THE PICK-UP 1. Notes for transport and storage 1) The pick-up should always be left in its conductive bag until immediately prior to use. 2) The pick-up should never be subjected to external pressure or impact. Storage in conductive bag Drop impact 2. - Page 4 www.freeservicemanuals.info NOTES REGARDING COMPACT DISC PLAYER REPAIRS 1. Preparations 1) Compact disc players incorporate a great many ICs as well as the pick-up (laser diode). These components are sensitive to, and easily affected by, static electricity. If such static electricity is high voltage, components can be damaged, and for that reason components should be handled with care.
-
Page 5: Esd Precautions
www.freeservicemanuals.info ESD PRECAUTIONS Electrostatically Sensitive Devices (ESD) Some semiconductor (solid state) devices can be damaged easily by static electricity. Such components commonly are called Electrostatically Sensitive Devices (ESD). Examples of typical ESD devices are integrated circuits and some field-effect transistors and semiconductor chip components. The following techniques should be used to help reduce the incidence of component damage caused by static electricity. -
Page 6: Specifications
www.freeservicemanuals.info SPECIFICATIONS Power supply AC 220V,60Hz Power consumption Mass 4.6kg [General] External dimensions (W x H x D) 350mm Signal system NTSC Laser Semiconductor laser, wavelength 650nm Frequency range(audio) 4 Hz ~20 kHz [CD/DVD] Signal-to-noise ratio(audio) More than 75dB(1kHz,NOP,20kHz LPF/A-Filter) Dynamic range (audio) More than 75dB Harmonic distortion(audio) -
Page 7: Location Of Customer Controls
www.freeservicemanuals.info LOCATION OF CUSTOMER CONTROLS FRONT PANEL STOP BUTTON SKIP/TUNE BUTTON PAUSE BUTTON PLAY BUTTON OPEN/CLOSE DISC TRAY MENU VOLUME POWER BUTTON FUNCTION PHONE (MONO/STERO) BUTTON CONTROLLER AND INDICATOR BUTTON CONNECTORs TITLE (FM/AM) BUTTON DISPLAY WINDOW SLEEP TUNED STEREO REPEAT PLAY BACK REC/RDS SOUND MODE INDICATOR... -
Page 8: Rear Panel
www.freeservicemanuals.info REAR PANEL WOOFER OUT CONNECTOR S-VIDEO FM300Ω COAXAL VIDEO 2(INPUT) COMPONENT AM ANTENNA ANTENNA CONNECTOR CONNECTOR SWITCH CONNECTOR VIDEO SELECTOR S-VIDEO OUT SWITCH CONNECTOR SPEAKER CONNECTORS VIDEO1 (INPUT/OUT PUT) CONNECTORS - 1-7 - Digitized in Heiloo Netherland... - Page 9 www.freeservicemanuals.info - 1-8 - Digitized in Heiloo Netherland...
-
Page 10: Section 2. Audio Part
www.freeservicemanuals.info SECTION 2. AUDIO PART ELECTRICAL TROUBLESHOOTING GUDIE Turn power on. Check power supply circuit. Is power on? Check laser circuit. Does initial read work? Check focus circuit. Check disc. Does it play? Check tracking servo circuit. Check audio circuit. Does it output audio? - 2-1 - Digitized in Heiloo Netherland... - Page 11 www.freeservicemanuals.info 2. AUDIO µ. COM Circuit POWER ON Does Video1/2 Does LOADING FM 87.5 appear appear at FLD? at FLD? Does it appear Does LOADING DVD Error at appear at FLD? FLD? Check Does no Dise or Connector(PN103)if Reconnet it. Time appear at FLD? is normally.
- Page 12 www.freeservicemanuals.info 3. Front Circuit (1/2) POWER ON Check if the LED OFF. Reconnec it. PN101/PN102 is OK. Check if the Is digitron Refer to SMPS Part. Front power is on normally? OK(*1). Check if all Buttens are OK. Check if the Volume is Check if the Check if the...
- Page 13 www.freeservicemanuals.info Front Circuit (2/2) Check Refer to Check if the if the Power part of the Refer to SMPS. power(SMPS). Power part of the Front is OK. Front is OK. Check if Check if R027~R036 PN101 PIN12, 13 Waverfrom Refer to Micom Replace R027~R036 Circuit Check if...
-
Page 14: Dvd Player Program Download Method
www.freeservicemanuals.info DVD PLAYER PROGRAM DOWNLOAD METHOD 1. DVD player without CD-RW option 1-1) Download the DVD program from your PC as following procedure ACTION FLD display • Plug the Power cord out • Connect the Fixture for download (Refer to Deck Mechanism Adjustment) •... - Page 15 *use file format: ISO9660 • Format the CD-RW Disc as below. Make the Folder name to “lg_dvd UPGRADE lg” under root folder lg_dvd_firmware upgrade • Download the source file in the folder (Ex, If the source file is “lg_a3_korea.bin, “lg_dvd...
-
Page 16: Waveforms Of Major Check Point
www.freeservicemanuals.info WAVEFORMS OF MAJOR CHECK POINT 2V/Div. 2V/Div. 500nS/Div. 500nS/Div. • IC 208 pin • IC 208 pin • Serial data clock waveform during normal play. • Serial data output wavefrom during normal play. 2V/Div. 2V/Div. 500nS/Div. 500nS/Div. • IC 201 pin •... -
Page 17: Internal Block Diagram Of Ics
www.freeservicemanuals.info INTERNAL BLOCK DIAGRAM OF ICs I CS4228 I CS49300 - 2-8 - Digitized in Heiloo Netherland... - Page 18 www.freeservicemanuals.info I CS8415A I NJU7312A I NJM2279 - 2-9 - Digitized in Heiloo Netherland...
-
Page 19: Ic Voltage Sheet
www.freeservicemanuals.info IC VOLTAGE SHEET I NJM 2279 I CS8415 I STA505 (IC102) (IC206) (IC710, IC730, IC750, IC770) PIN No. Volt(V) PIN No. Volt(V) PIN No. Volt(V) PIN No. Volt(V) I PS9702B (IC301) PIN No. Volt(V) PIN No. Volt(V) PIN No. Volt(V) PIN No. Volt(V) 3.21 2.92 3.21... - Page 20 www.freeservicemanuals.info I LC87F67 (IC101) PIN No. Volt(V) PIN No. Volt(V) PIN No. Volt(V) PIN No. Volt(V) 2.45 -3.25 1.02 -3.25 1.63 -3.25 4.96 -17.71 -3.25 5.19 4.97 1.27 4.98 3.23 -14.91 4.98 1.21 1.31 4.79 -3.23 1.83 -3.23 4.85 -3.23 4.79 -3.23 4.99...
- Page 21 www.freeservicemanuals.info I PN902, CN902 I IC910 I IC921 I PN901, CN901 PIN No. Volt(V) PIN No. Volt(V) PIN No. Volt(V) PIN No. Volt(V) 27.6 27.6 27.6 16.9 I IC911 I IC922 PIN No. Volt(V) PIN No. Volt(V) I IC923 I IC924 I IC926 PIN No.
-
Page 22: Block Diagram
www.freeservicemanuals.info BLOCK DIAGRAM 2-13 2-14 Digitized in Heiloo Netherland... -
Page 23: Schematic Diagrams
www.freeservicemanuals.info SHEMATIC DIAGRAMS • AMP SCHEMATIC DIAGRAM 2-15 2-16 Digitized in Heiloo Netherland... - Page 24 www.freeservicemanuals.info • I/O SCHEMATIC DIAGRAM 2-17 2-18 Digitized in Heiloo Netherland...
- Page 25 www.freeservicemanuals.info • DSP(DIGITAL AUDIO PROCESSING) SCHEMATIC DIAGRAM 2-19 2-20 Digitized in Heiloo Netherland...
- Page 26 www.freeservicemanuals.info • FRONT & POWER SCHEMATIC DIAGRAM NOTE: Warning Parts that are shaded are critical With respect to risk of fire or electrical shock. 2-21 2-22 Digitized in Heiloo Netherland...
- Page 27 www.freeservicemanuals.info • SMPS SCHEMATIC DIAGRAM NOTE: Warning Parts that are shaded are critical With respect to risk of fire or electrical shock. 2-23 2-24 Digitized in Heiloo Netherland...
- Page 28 www.freeservicemanuals.info • µ-COM SCHEMATIC DIAGRAM 2-25 2-26 Digitized in Heiloo Netherland...
-
Page 29: Printed Circuit Diargams
www.freeservicemanuals.info PRINTED CIRCUIT DIAGRAMS • MAIN P.C. BOARD(SOLDER SIDE) 2-27 2-28 Digitized in Heiloo Netherland... - Page 30 www.freeservicemanuals.info • MAIN P.C. BOARD(COMPONENT SIDE) 2-29 2-30 Digitized in Heiloo Netherland...
- Page 31 www.freeservicemanuals.info • MAIN/FRONT P.C. BOARD(SOLDER SIDE) • MAIN/FRONT P.C. BOARD(COMPONENT SIDE) 2-31 2-32 Digitized in Heiloo Netherland...
- Page 32 www.freeservicemanuals.info • POWER P.C. BOARD NOTE: Warning Parts that are shaded are critical With respect to risk of fire or electrical shock. 2-33 2-34 Digitized in Heiloo Netherland...
- Page 33 www.freeservicemanuals.info MEMO MEMO Digitized in Heiloo Netherland...
-
Page 34: Section 3. Dvd Part
www.freeservicemanuals.info SECTION 3. DVD PART ELECTRICAL TROUBLESHOOTING GUIDE 1. µ-COM Circuit A. No Power POWER ON Does CD/DVD appear at FLD? Is P5101 Does no DISC appear? connected normally? Reconnect it. Does Logo appear Check power on the screen? (Refer to power) If power is normal Is P5501 Pin8 normal? - Page 35 www.freeservicemanuals.info No disc .Power on Check loading Part. Push Pick-up to inner track to Does tray open or close? the end by hand. Does DECK assembly is defective. PMD03 Pin10 change (Limit sw) high to low? Pressing the open/close key repeatedly, check the voltage of IC2M1 check µ-COM Part.
- Page 36 www.freeservicemanuals.info DISC IN OPEN/CLOSE Fig.3. FOCUS ERROR waveform Check Check IC2A1 Pins47,50,51,52 the focus error moving the FOCUS ON? lens up and down. in DVD Mode (IC2A1 Pin39) IC201 no output : Pick-up is defective. Does the level change at IC201 Replace IC201.
- Page 37 www.freeservicemanuals.info CHECK A Fig.5. RF waveform Check RF Eye-Pattern. Check IC2A1 Pin3. No signal: Pick-up is defective RF : 1.5-1.6V(TP2A0) Does the sawtooth waveform emit Is the eye-pattern vivid? Does the 1.6V emit? Replace IC2A1. at IC2A1 Pin36? Replace IC201. Check IC201 Pin84.
-
Page 38: Block Diagrams
www.freeservicemanuals.info BLOCK DIAGRAMS 1. RF/CD DSP/DVD DSP/DVD SERVO Block Diagram - 3-9 - Digitized in Heiloo Netherland... - Page 39 www.freeservicemanuals.info 2. MPEG Block Diagram - 3-10 - Digitized in Heiloo Netherland...
- Page 40 www.freeservicemanuals.info 3. µ-COM Block Diagram - 3-11 - Digitized in Heiloo Netherland...
- Page 41 www.freeservicemanuals.info B. Audio abnoraml C. Video abnoraml AUDIO ABNORMAL VIDEO ABNORMAL Check Audio jack. Check Video jack. Check MPEG_CLK Signal Refer to Video part. of MPEG part. Refer to Audio part. Refer to MPEG part. Replace B/D. D. Open/Close abnormal OPEN/CLOSE ABNORMAL Check Front.
- Page 42 www.freeservicemanuals.info E. Picture abnoraml PICTURE ABNORMAL Check the disc. Refer to Servo part Check MPEG_CLK Signal of MPEG part Check DSP Check MPEG Replace B/D F. Disc Error DISC ERROR Check Disc Refer to Servo part Replace B/D - 3-3 - Digitized in Heiloo Netherland...
- Page 43 www.freeservicemanuals.info 2. MPEG Circuit Power is on Does Logo appear Check power & clock. on the screen? Does the Check CD/DVD DSP output moving picture of the DVD Disc Is MPEG data signal normal? play on the screen signal. normally? Check MPEG Decoder input signal.
- Page 44 www.freeservicemanuals.info 3. RF/Servo Circuit CHECK POINT(General) Does signal goes "High" to IC201 Pin186 when the power is on? Does signal pulse Check "2.µ-COM Part". input to IC201 Pins53, 54 when the power is on? Does Does Replace X201 or IC206 TTL pulse output to 33.8688MHz clock input (33MHz clock defect)
- Page 45 www.freeservicemanuals.info - 3-12 - Digitized in Heiloo Netherland...
-
Page 46: Schematic Diagrams
www.freeservicemanuals.info SCHEMATIC DIAGRAMS • DRIVE & RF SCHEMATIC DIAGRAM 3-13 3-14 Digitized in Heiloo Netherland... - Page 47 www.freeservicemanuals.info • MPEG SCHEMATIC DIAGRAM 3-15 3-16 Digitized in Heiloo Netherland...
- Page 48 www.freeservicemanuals.info • µ-COM SCHEMATIC DIAGRAM 3-17 3-18 Digitized in Heiloo Netherland...
- Page 49 www.freeservicemanuals.info • DVD DSP(DIGITAL SIGNAL PROCESSING)SCHEMATIC DIAGRAM 3-19 3-20 Digitized in Heiloo Netherland...
-
Page 50: Waveforms
www.freeservicemanuals.info WAVEFORMS Stop : 2.50MS/s 4 Acqs M20.0 s Glitch Ch1 2 Apr 1999 500mV 14:47:27 IC2A1 Pin 42, Focus Error IC2A1 Pin 41 IC2A1 Pin 41 IC501 Pin 118, Composite IC501 Pin 112, Chrominance IC501 Pin 114, Luminance IC2A1 Pin 36, Pi Tracking Error VBR TRACKING Error (Super video out Mode) - Page 51 www.freeservicemanuals.info • CIRCUIT VOLTAGE CHART IC203 IC201 IC301 IC3F1 IC501 IC305 IC2A1 IC2M1 IC203 IC201 IC301 IC3F1 IC501 IC305 IC2A1 IC2M1 IC203 IC201 IC301 IC3F1 IC501 IC305 IC2A1 IC2M1 PIN STOP PLAY STOP PLAY STOP PLAY STOP PLAY STOP PLAY STOP PLAY STOP PLAY STOP PLAY PIN STOP PLAY STOP PLAY STOP PLAY STOP PLAY STOP PLAY STOP PLAY STOP PLAY STOP PLAY PIN STOP PLAY STOP PLAY STOP PLAY STOP PLAY STOP PLAY STOP PLAY STOP PLAY STOP PLAY 3.18...
- Page 52 www.freeservicemanuals.info IC901 IC451 IC401 IC454 IC453 IC452 IC402 IC801 IC503 IC502 IC2A4 IC2A2 IC206 IC504 IC506 PIN STOP PLAY STOP PLAY STOP PLAY STOP PLAY STOP PLAY STOP PLAY STOP PLAY STOP PLAY PIN STOP PLAY STOP PLAY STOP PLAY STOP PLAY STOP PLAY STOP PLAY STOP PLAY 2.98 2.98 5.51 5.51...
-
Page 53: Printed Circuit Diagram
www.freeservicemanuals.info PRINTED CIRCUIT DIAGRAM • DVD P.C. BOARD(SOLDER SIDE) 3-27 3-28 Digitized in Heiloo Netherland... - Page 54 www.freeservicemanuals.info • DVD P.C. BOARD(COMPONENT SIDE) 3-29 3-30 Digitized in Heiloo Netherland...
- Page 55 www.freeservicemanuals.info MEMO MEMO Digitized in Heiloo Netherland...
-
Page 56: Section 4. Mechansim
www.freeservicemanuals.info SECTION 4. MECHANSIM I DECK MECHANISM P ARTS LOCKATION • Top View(With Tray) Procedure Disass Fig- Parts Fixing Type embly Starting No. Holder 2 Screws, Bottom Clamp 2 Locking Tabs Bottom Clamp Assembly Disc 1, 2 Plate Clamp 1, 2, 3 Magnet Clamp 1, 2, 3, 4 Clamp Upper... - Page 57 www.freeservicemanuals.info I DECK MECHANISM DISASSEMBLY 1. Holder Clamp (Fig. 4-1) 2. Tray Disc (Fig. 4-2) 1) Release 1 Screws(S1). 1) Insert and push a Driver in the emergency eject 2) Unhook 2 Locking Tabs(L1). hole(A) at the right side, or put the Driver on the 3) Lift up the Holder Clamp and then separate it from the Lever(B) of the Gear Emergency and pull the Lever(A) Base Main.
- Page 58 www.freeservicemanuals.info 3. Base Assembly Sled (Fig. 4-3) 3-2. Gear Middle 3-3. Gear Assembly Rack 1) Release 4 Screw(S2). 1) Release the Scerw(S3) 2) Disconnect the FFC Connector(C1) 3-1. Gear Assembly Feed 4. Rubber Rear (Fig. 4-3) 1) Unhook the Locking Tab(L2) in direction of arrow. - 4-3 - Digitized in Heiloo Netherland...
- Page 59 www.freeservicemanuals.info 5. Frame Assembly Up/Down 8. Gear Loading (Fig. 4-4) 9. Guide Up/Down (Fig. 4-4) Note 1) Move the Guide Up/Down in direction of arrow(A) as Put the Base Main face down(Bottom Side) Fig.(A) 1) Release the Screw(S4) 2) Push the Locking Tab(L5) down and then lift up the 2) Unlock the Locking Tab(L3) in direction of arrow and Guide Up/Down to separate it from the Base Main.
-
Page 60: Section 5. Exploded Views
www.freeservicemanuals.info SECTION 5. EXPLODED VIEWS • CABINET AND MAIN FRAME SECTION TUNER Digitized in Heiloo Netherland... - Page 61 www.freeservicemanuals.info • Deck Mechanism Exploded View LOCA.NO. PART NO DESCRIPTION SPECIFICATION 6721RJ0354A DECK ASSEMBLY,VIDEO DP-5RM MULTI -HZ 4861R-0006B CLAMP ASSEMBLY DISC(DP2)-SH 3041R-0057A BASE ASSEMBLY MAIN(DP-4R MULTI)-HZ 3041R-D001A BASE ASSEMBLY DP5 MULTI (SLED)- HZ 3300R-0547A PLATE CLAMP 5016H-1016B MAGNET CLAMP(LDM-R608,10*5,1*1.5T) 4860R-0006A CLAMP UPPER 4930R-0171A...
-
Page 62: Section 7. Speaker Part
www.freeservicemanuals.info SECTION 7. SPEAKER PART ELECTRICAL TROUBLESHOOTING GUIDE 1. RX all kinds of power check C245(+) DC5V Check SMPS board power DC5V Check 1. C281(+) DC3.3V Check 2. C246(+) DC3.0V Check 3. C257(+) DC1.8V Check 4. C288(+) DC2.7 Check 5. C250(+) DC2.7 Check 1.IC212 Soldering check and Replacement 2.IC206 Soldering check and Replacement 3.IC209 Soldering check and Replacement... - Page 63 www.freeservicemanuals.info 3. No sound perception • In case of TX, two RX speakers should be chcked with both them ON. TX ON , RX LEFT ON, RX RIGHT ON Check whether TX Relay get together or TX LED is ON. TX all kinds to power check IC104 3,5,7,9,23,24,26,28PIN power check Refer to TX all kinds to power check...
- Page 64 www.freeservicemanuals.info • In Case of RX speaker, it should be checked with TX and the opposite RX speaker ON. TX ON , RX LEFT ON, RX RIGHT ON Check whether two RX relay get together or RX LED is turned ON. Move to C IC207 3,5,7,9,23,24,26,28PIN power check RX all kinds of power check...
- Page 65 www.freeservicemanuals.info • IC202 Check C246 DC3V check Refer to RX kinds of power check C257 DC1.8V check Refer to RX kinds of power check IC202 66PIN CLK (16MHz) check IC202 Soldering check and Replacement When SW201 ON/OFF Q204 collector pin LOW fi HIGH check Q204 Soldering check and Replacement IC203 37PIN DC 3V check Refer to RX kinds of power check...
- Page 66 www.freeservicemanuals.info • IC105 Check C140 DC3.3V check Refer to TX kinds of power check C147 DC1.8V check Refer to TX kinds of power check IC105 66PIN CLK (16MHz) check IC105 Soldering check and Replacement SW102 ON/OFF Q103 collector pin LOW fi HIGH check Q103 Soldering check and Replacement IC107 37PIN DC 3.3V check Refer to TX kinds of power check...
- Page 67 www.freeservicemanuals.info Digitized in Heiloo Netherland...
-
Page 68: Block Diagrams
www.freeservicemanuals.info BLOCK DIAGRAM Digitized in Heiloo Netherland... - Page 69 www.freeservicemanuals.info SHEMATIC DIAGRAMS • TX SCHEMATIC DIAGRAM Digitized in Heiloo Netherland...
- Page 70 www.freeservicemanuals.info • RX SCHEMATIC DIAGRAM 7-10 7-11 Digitized in Heiloo Netherland...
- Page 71 www.freeservicemanuals.info • SMPS SCHEMATIC DIAGRAM 7-12 7-13 Digitized in Heiloo Netherland...
-
Page 72: Wiring Diagram
www.freeservicemanuals.info WIRING DIAGRAM 7-14 7-15 Digitized in Heiloo Netherland... -
Page 73: Printed Circuit Diagram
www.freeservicemanuals.info PRINTED CIRCUIT DIAGRAM • HCC-DW5620 P.C. BOARD 7-16 7-17 Digitized in Heiloo Netherland... - Page 74 www.freeservicemanuals.info • RX MAIN P.C. BOARD • FRONT P.C. BOARD • SMPS P.C. BOARD 7-18 7-19 Digitized in Heiloo Netherland...
-
Page 75: Speaker Exploded Views
www.freeservicemanuals.info SPEAKER EXPLODED VIEWS • Center Speaker • Passive (sub) Woofer Speaker MODEL: FE-6100WE MODEL: FE-6100CVE 7-20 7-21 Digitized in Heiloo Netherland... - Page 76 www.freeservicemanuals.info • Satellite Speaker MODEL: FE-6100TE 7-22 7-23 Digitized in Heiloo Netherland...
- Page 77 www.freeservicemanuals.info MODEL: FA-W6100SL FA-W6100SR 7-24 7-25 Digitized in Heiloo Netherland...
- Page 78 www.freeservicemanuals.info MODEL: ACC-W6100 7-26 7-27 Digitized in Heiloo Netherland...