
Related Manuals for Silvercrest 274455


Summary of Contents for Silvercrest 274455
- Page 1 HALOGEN OVEN SHOM 1000 A1 HALOGEN OVEN HALOGENOFEN Operating instructions Bedienungsanleitung IAN 274455...
- Page 2 Before reading, unfold both pages containing illustrations and familiarise yourself with all functions of the device. Klappen Sie vor dem Lesen die beiden Seiten mit den Abbildungen aus und machen Sie sich anschließend mit allen Funktionen des Gerätes vertraut. GB / IE Operating instructions Page DE / AT / CH...
-
Page 5: Table Of Contents
Contents Introduction ........... 2 Information concerning these operating instructions . -
Page 6: Introduction
Introduction Information concerning these operating instructions Congratulations on the purchase of your new appliance. You have selected a high-quality product. The operating instructions are part of this product. They contain important information on safety, usage and disposal. Before using the product, please familiarise yourself with all operating and safety instructions. -
Page 7: Safety
WARNING A warning notice at this hazard level indicates a potentially hazardous situation. Failure to avoid this hazardous situation could result in injury. ► Follow the instructions in this warning notice to prevent injury. CAUTION A warning notice at this hazard level indicates a potential for property damage. - Page 8 This appliance may be used by children of the age of ■ 8 years or more and by persons with reduced physical, sensory or mental capabilities or lack of experience and/ or knowledge if they are being supervised or have been instructed with regard to the safe use of the appliance and have understood the potential risks.
- Page 9 After use, allow the appliance to cool down completely ■ before cleaning it. Risk of burns! Install the appliance as close as possible to an electrical ■ power socket. Ensure that the power plug is quickly reach- able in case of danger, and also that there is no danger of tripping over the cable.
- Page 10 RISK OF ELECTRIC SHOCK! NEVER immerse the appliance in water or other liquids! ► There is a risk of a potentially fatal electric shock if residual moisture comes into contact with live compo- nents during operation. Always take hold of the plug when handling the power ►...
- Page 11 RISK OF BURNS! The surface of the appliance can become extremely ► hot during use. Therefore touch only the white handle on the lid if it is hot. Always use oven gloves when handling the appliance ► while it is open and hot. Always wear oven gloves to hold the lifting aids on the ►...
-
Page 12: Operating Components
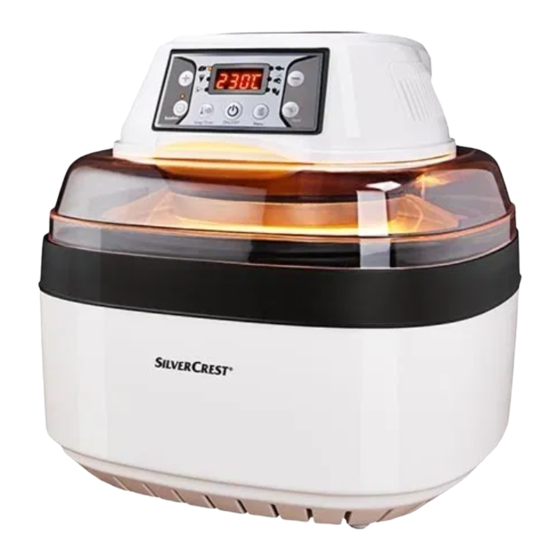
Operating components (For illustrations see fold-out pages) Figure A: 1 Vents 2 Control panel with buttons and display 3 Power cable with mains plug 4 Handle 5 Lid 6 Halogen heating element with fan 7 Release button for lock function in the open position 8 Lifting aids for the inner bowl 9 Base 0 Inner bowl... -
Page 13: Unpacking And Installation
Unpacking and installation Safety instructions WARNING During the fi rst use of the appliance there is a risk of injury and/or damage to property! To avoid risks, observe the following safety instructions: Do not allow children to play with packaging mate- ►... -
Page 14: Unpacking
Unpacking ♦ Remove all parts of the appliance and the operating instructions from the box. ♦ Remove all packaging material. ♦ Remove the silicone sleeves which can be found over the two spacers on the side of the basket q. ♦... -
Page 15: Before Fi Rst Use
Before fi rst use 1) Clean all accessories as described in the section "Cleaning and care" to remove any production residues. 2) Read these operating instructions carefully. 3) Install the appliance in accordance with the safety instructions. 4) Open the lid 5 with the handle 4 until the lock engages. 5) Remove the inner bowl 0. -
Page 16: Accessories
Accessories ♦ Depending on the type of food you want to prepare, you can use one of the following accessories: Part Description For use in conjunction with the basket Roasting spit e q or the skewers w. For preparing French fries and food Basket q products which need to be rotated in the appliance to ensure even cooking. -
Page 17: Using The Roasting Spit
Using the roasting spit 1) When using the roasting spit e to grill poultry or similar, push the slightly pointed end of the roasting spit e forwards through the food until it is centred on the spit e. 2) Turn the locking screws far enough out of the skewers w until you can push them and their guides over the roasting spit e. -
Page 18: Using The Tongs
Using the tongs RISK OF BURNS! ► Always use oven gloves when you remove food or accessories such as the inner bowl 0, the basket q or the grill rack r from the hot appliance. Wear oven gloves even when using the tongs t to remove items. ►... -
Page 19: Operation
Operation 1) If the lid 5 is open, lift it slightly using the handle 4 and press the release button 7 for the lock function. Close the lid 5. 2) Replace the plug in the mains power socket. " " fl ashes on the display. 3) Press the button to switch on the device. - Page 20 ♦ When you select a function, the preset cooking temperature will be shown on the display. If you want a diff erent cooking temperature, you can set this to anything between 50°C and 230°C in 1° increments by pressing the buttons.
- Page 21 9) Press the button to start cooking. The appliance does not need to be preheated and the time shown on the display starts counting down. 10) After a short time, check the progress of the cooking/the browning of the food being cooked. If necessary, carefully open the lid 5 using the handle 4 until the lock engages.
- Page 22 CAUTION Damage to the device! ► Do not use pointed or sharp objects (with the exception of the roasting spit e) to remove the cooked food. These could damage the coating on the inner bowl 0! ► When inserting and removing the roasting spit, take care not to damage the coating on the inner bowl 0! If you have used the basket q, lift it out using the tongs t so that the roasting ♦...
-
Page 23: Tips And Tricks
Tips and tricks ■ To make meat more tender, you can marinate it beforehand. An ideal basis for this can be sour cream, red wine, vinegar, buttermilk or fresh papaya or pineapple juice, for example. Add herbs and spices according to taste. Ideally, leave it overnight. -
Page 24: Cleaning And Care
Cleaning and care Safety instructions WARNING! DANGER TO LIFE DUE TO ELECTRIC SHOCK! Risk of injury when cleaning the appliance! To avoid risks, observe the following safety instructions: Before cleaning, pull out the plug and wait until the ► appliance has completely cooled down. Risk of injury! Never clean the appliance under running water and ►... -
Page 25: Storage
Storage Store the cleaned appliance in a clean and dry location. Storage/disposal Storage If you plan not to use the appliance for a long period, store it in a clean, dry place away from direct sunlight. Disposal of the device Do not dispose of the appliance in your normal domestic waste. -
Page 26: Warranty
Repairs carried out after expiry of the warranty period shall be subject to charge. Service Service Great Britain Tel.: 0871 5000 720 (£ 0.10/Min.) E-Mail: [email protected] IAN 274455 Service Ireland Tel.: 1890 930 034 (0,08 EUR/Min., (peak)) (0,06 EUR/Min., (off peak)) E-Mail: [email protected]... -
Page 27: Importer
Importer KOMPERNASS HANDELS GMBH BURGSTRASSE 21 44867 BOCHUM GERMANY www.kompernass.com SHOM 1000 A1 GB │ IE │ 23 ■... - Page 28 ■ 24 │ GB │ IE SHOM 1000 A1...
- Page 29 Inhaltsverzeichnis Einführung ........... 26 Informationen zu dieser Bedienungsanleitung .
-
Page 30: Einführung
Einführung Informationen zu dieser Bedienungsanleitung Herzlichen Glückwunsch zum Kauf Ihres neuen Gerätes. Sie haben sich damit für ein hochwertiges Produkt entschieden. Die Bedie- nungsanleitung ist Bestandteil dieses Produkts. Sie enthält wichtige Hinweise für Sicherheit, Gebrauch und Entsorgung. Machen Sie sich vor der Benutzung des Produkts mit allen Bedien- und Sicherheitshinweisen vertraut. -
Page 31: Sicherheit
WARNUNG Ein Warnhinweis dieser Gefahrenstufe kennzeichnet eine mögliche gefährliche Situation. Falls die gefährliche Situation nicht vermieden wird, kann dies zu Verletzungen führen. ► Die Anweisungen in diesem Warnhinweis befolgen, um Verletzungen von Personen zu vermeiden. ACHTUNG Ein Warnhinweis dieser Gefahrenstufe kennzeichnet einen möglichen Sachschaden. - Page 32 Dieses Gerät kann von Kindern ab 8 Jahren sowie von ■ Personen mit reduzierten physischen, sensorischen oder mentalen Fähigkeiten oder Mangel an Erfahrung und/ oder Wissen benutzt werden, wenn sie beaufsichtigt oder bezüglich des sicheren Gebrauchs des Gerätes unter- wiesen wurden und die daraus resultierenden Gefahren verstanden haben.
- Page 33 Lassen Sie das Gerät nach dem Gebrauch abkühlen, be- ■ vor Sie es reinigen! Verbrennungsgefahr! Stellen Sie das Gerät möglichst in der Nähe einer Steckdose ■ auf. Sorgen Sie dafür, dass der Netzstecker bei Gefahr schnell erreichbar ist und die Netzleitung nicht zur Stolper- falle werden kann.
- Page 34 GEFAHR DURCH ELEKTRISCHEN SCHLAG! Tauchen Sie das Gerät niemals in Wasser oder andere ► Flüssigkeiten! Hier kann Lebensgefahr durch elektrischen Schlag entstehen, wenn im Betrieb Flüssigkeitsreste auf spannungsführende Teile gelangen. Fassen Sie das Netzkabel immer am Stecker an. Ziehen ► Sie nicht am Kabel selbst, und fassen Sie das Netzkabel niemals mit nassen Händen an, da dies einen Kurz- schluss oder elektrischen Schlag verursachen kann.
- Page 35 VERBRENNUNGSGEFAHR! Die Oberfl äche des Gerätes kann während des Betriebs ► sehr heiß werden. Berühren Sie das Gerät dann nur am weißen Griff des Deckels. Benutzen Sie immer Topfhandschuhe, wenn Sie am geöff - ► neten, heißen Gerät hantieren. Fassen Sie die Hebehilfen des Innentopfes nur mit Topf- ►...
-
Page 36: Bedienelemente
Bedienelemente (Abbildungen siehe Ausklappseiten) Abbildung A: 1 Be- und Entlüftungsöff nungen 2 Bedienfeld mit Tasten und Display 3 Netzkabel mit Netzstecker 4 Griff 5 Deckel 6 Halogen-Heizelement mit Lüfter 7 Entriegelungstaste für Feststellfunktion im geöff neten Zustand 8 Hebehilfen des Innentopfes 9 Unterteil 0 Innentopf Abbildung B:... -
Page 37: Auspacken Und Anschließen
Auspacken und Anschließen Sicherheitshinweise WARNUNG Bei der Inbetriebnahme des Gerätes können Personen- und Sachschäden auftreten! Beachten Sie die folgenden Sicherheitshinweise, um die Gefahren zu vermeiden: Verpackungsmaterialien dürfen nicht zum Spielen ► verwendet werden. Es besteht Erstickungsgefahr. Beachten Sie die Hinweise zum elektrischen Anschluss ►... -
Page 38: Auspacken
Auspacken ♦ Entnehmen Sie alle Teile des Gerätes und die Bedienungsanleitung aus dem Karton. ♦ Entfernen Sie sämtliches Verpackungsmaterial. ♦ Entfernen Sie die Silikonhülsen, die sich über den beiden Abstandshaltern seitlich am Korb q befi nden. ♦ Entfernen Sie die Schutzfolie vom Bedienfeld Entsorgung der Verpackung Die Verpackung schützt das Gerät vor Transportschäden. -
Page 39: Vor Dem Ersten Gebrauch
Vor dem ersten Gebrauch 1) Reinigen Sie sämtliche Zubehörteile wie im Kapitel „Reinigen und Pfl egen“ beschrieben, um mögliche Rückstände aus der Produktion zu entfernen. 2) Lesen Sie diese Bedienungsanleitung aufmerksam durch. 3) Stellen Sie das Gerät gemäß den Sicherheitshinweisen auf. 4) Öff... -
Page 40: Zubehörteile
Zubehörteile ♦ Je nach Art der Nahrungsmittel, die Sie zubereiten wollen, verwenden Sie eines der folgenden Zubehörteile: Teil Bezeichnung Verwendung Zur Verwendung mit dem Korb q oder Grillspieß e den Halterungen w . Für die Zubereitung von Pommes frites und Nahrungsmitteln, die für ein Korb q gleichmäßiges Garen im Gerät rotieren sollten. -
Page 41: Verwendung Des Grillspießes
Verwendung des Grillspießes 1) Bei Verwendung des Grillspießes e zum Grillen von Gefl ügel o. ä. schie- ben Sie den Grillspieß e mit dem leicht angespitzten Ende voran durch das Nahrungsmittel hindurch, bis dieses mittig auf dem Grillspieß e sitzt. Halterungen heraus, 2) Drehen Sie die Arretierschrauben so weit aus den... -
Page 42: Verwendung Der Zange
Verwendung der Zange VERBRENNUNGSGEFAHR! ► Ziehen Sie immer Topfhandschuhe an, wenn Sie Lebensmittel oder Zubehörtei- le wie den Innentopf 0, den Korb q oder den Grillrost r aus dem heißen Gerät entnehmen. Ziehen Sie auch bei der Entnahme mit der Zange t Topfhandschuhe an! ►... -
Page 43: Bedienen
Bedienen 1) Sollte der Deckel 5 geöff net sein, heben Sie ihn leicht am Griff 4 an und drücken Sie die Entriegelungstaste 7 für die Feststellfunktion. Schließen Sie den Deckel 5 . 2) Stecken Sie den Netzstecker wieder in die Netzsteckdose. Im Display blinkt „... - Page 44 ♦ Beim Anwählen einer Funktion wird im Display die vorprogrammierte Gar- temperatur angezeigt. Wünschen Sie eine davon abweichende Gartempe- ratur, können Sie diese durch Drücken der oder -Taste in 1°-Schritten von 50 °C bis 230 °C einstellen. Wenn Sie die oder -Taste gedrückt halten, ändert sich die Temperatureinstellung in 10°-Schritten.
- Page 45 9) Drücken Sie die -Taste, um den Garvorgang zu starten. Das Gerät benö- tigt keine Aufheizzeit und die im Display angezeigte Zeit beginnt abzulaufen. 10) Kontrollieren Sie nach einiger Zeit den Fortschritt des Garvorgangs bzw. die Bräunung des Gargutes. Ggf. öff nen Sie dazu vorsichtig den Deckel 5 am Griff 4, bis die Feststellfunkti- on einrastet.
- Page 46 ACHTUNG Beschädigung des Gerätes! ► Verwenden Sie keine spitzen oder scharfen Gegenstände (ausgenom- men ist der Grillspieß e), um das Gargut zu entnehmen. Diese könnten die Beschichtung des Innentopfes 0 beschädigen! ► Achten Sie darauf, dass Sie beim Einsetzen und Herausnehmen des Grillspießes nicht die Beschichtung des Innentopfes 0 beschädigen! Haben Sie den Korb q verwendet, heben Sie ihn mit der Zange t so ♦...
-
Page 47: Tipps Und Tricks
Tipps und Tricks ■ Um Fleisch zarter zu machen, können Sie es vorher marinieren. Als Grundla- ge hierfür eignen sich zum Beispiel saure Sahne, Rotwein, Essig, Buttermilch oder frischer Saft von Papaya oder Ananas. Fügen Sie, je nach Geschmack, Kräuter und Gewürze hinzu. Lassen Sie es am besten über Nacht darin ziehen. -
Page 48: Reinigen Und Pfl Egen
Reinigen und Pfl egen Sicherheitshinweise WARNUNG! LEBENSGEFAHR DURCH ELEKTRISCHEN SCHLAG! Bei der Reinigung des Gerätes können Personenschäden auftreten! Beachten Sie die folgenden Sicherheitshinweise, um die Gefahren zu vermeiden: Ziehen Sie vor der Reinigung den Netzstecker und ► warten Sie, bis das Gerät vollständig abgekühlt ist. Verletzungsgefahr! Reinigen Sie das Gerät nie unter fl... -
Page 49: Aufbewahren
■ Reinigen Sie die Zubehörteile in warmen Wasser und Spülmittel. Spülen Sie diese danach mit klarem Wasser ab, um Spülmittelreste zu beseitigen. ■ Reinigen Sie die Außenfl ächen mit einem feuchten Tuch. ■ Achten Sie darauf, dass vor der erneuten Verwendung des Gerätes alle Teile vollständig trocken sind. -
Page 50: Garantie
Nach Ablauf der Garantiezeit anfallende Reparaturen sind kostenpfl ichtig. Service Kompernaß Service Deutschland Tel.: 0800 5435 111 Fax: +49 (0) 2832 3532 E-Mail: [email protected] IAN 274455 Kompernaß Service Österreich Tel.: 0820 899 913 (0,20 EUR/Min.) E-Mail: [email protected] IAN 274455 Kompernaß Service Switzerland Tel.: 0848 000 525... -
Page 51: Importeur
Importeur KOMPERNASS HANDELS GMBH BURGSTRASSE 21 44867 BOCHUM GERMANY www.kompernass.com SHOM 1000 A1 DE │ AT │ CH │ 47 ■... - Page 52 KOMPERNASS HANDELS GMBH BURGSTRASSE 21 44867 BOCHUM DEUTSCHLAND / GERMANY www.kompernass.com Last Information Update · Stand der Informationen: 02 / 2016 · Ident.-No.: SHOM1000A1-102015-3 IAN 274455...