Cisco Linksys RE1000 User Manual
Wireless-n extender
Hide thumbs
Also See for Linksys RE1000:
- User manual ,
- Getting started manual (15 pages) ,
- Getting started (15 pages)

Related Manuals for Cisco Linksys RE1000


Summary of Contents for Cisco Linksys RE1000
- Page 1 User Guide Linksys RE1000 Linksys E3000 Wireless-N Extender High Performance Wireless-N Router...
-
Page 2: Table Of Contents
Linksys RE1000 Table of Contents Contents Chapter 1: Product Overview Front Bottom Chapter 2: Advanced Configuration How to Access the Browser-Based Utility How to Use the Browser-Based Utility Setup > Basic Setup Wireless > Site Survey Wireless > Basic Wireless Settings Wireless >... -
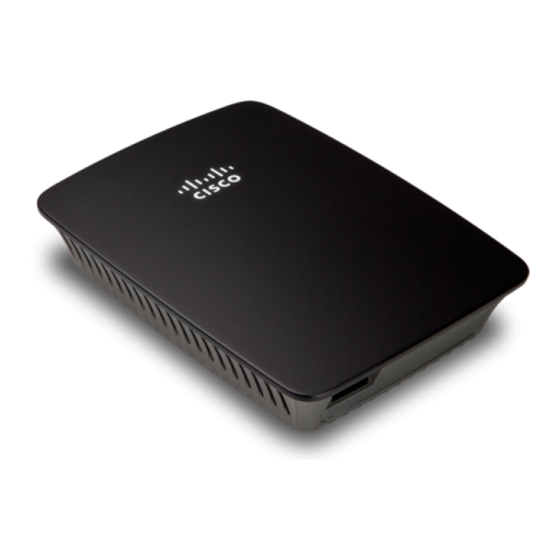
Page 3: Chapter 1: Product Overview
(every two seconds) for Setup and use of the router is easy using Cisco Connect, the two minutes When the Wi-Fi Protected Setup software that is installed when you run the included CD... -
Page 4: Bottom
Linksys RE1000 Chapter 1: Product Overview Power Switch Only featured in the European versions of the RE1000 Bottom Ethernet (green) Using Ethernet cables (also called network cables), this Ethernet port connects Ethernet network devices to your wireless network The green light turns on when an Ethernet device... -
Page 5: Chapter 2: Advanced Configuration
NOTE: You can set a new password on the Administration > Management screen Refer to “Administration > Management” on page 40 3 Click OK to continue NOTE: You can also access the browser-based utility through Cisco Connect Wireless-N Extender... -
Page 6: Setup > Basic Setup
Linksys RE1000 Chapter 2: Advanced Configuration Setup > Basic Setup Static IP If you are required to use a fixed IP address to connect to The first screen that appears is the Basic Setup screen This the upstream access point or router, select Static IP allows you to change the Extender’s general settings... -
Page 7: Wireless > Site Survey
Linksys RE1000 Chapter 2: Advanced Configuration Wireless > Site Survey Wireless > Basic Wireless Settings The Site Survey showing all neighbouring Access Points or Select Manual if you wish to configure the wireless settings Routers show here manually In order to do so, you will be required to get... - Page 8 Protected Setup screen Wi-Fi Protected Setup Light Activity c After the Extender has been configured, click OK The Cisco logo on the top panel of the Extender • on the router’s Wi-Fi Protected Setup screen within functions as the Wi-Fi Protected Setup light...
- Page 9 • method if your client device asks for the Extender’s Wi-Fi Protected Setup Light Activity The Cisco logo on the top panel of the Extender • functions as the Wi-Fi Protected Setup light When the Wi-Fi Protected Setup process is active, the •...
-
Page 10: Wireless > Wireless Security
Linksys RE1000 Chapter 2: Advanced Configuration For each wireless network, the Network Name (SSID), Passphrase Enter a passphrase of 8-63 characters This Security, and Passphrase are displayed at the bottom of passphrase has to match you access point or router... -
Page 11: Wireless > Qos
Linksys RE1000 Chapter 2: Advanced Configuration Wireless > QoS Wireless > QoS WMM Support Wi-Fi Multimedia (WMM) is a wireless Quality of Service feature that improves quality for audio, video, and voice applications by prioritizing wireless traffic No Acknowledgement If you want the Router to re-send data if an error occurs,... -
Page 12: Administration > Management
Linksys RE1000 Chapter 2: Advanced Configuration Administration > Management Management screen allows network’s administrator to manage specific Extender functions for access and security Administration > Log Enabled/Disabled To disable the Log function, select Disabled To monitor traffic between the local network... -
Page 13: Administration > Factory Defaults
Linksys RE1000 Chapter 2: Advanced Configuration Administration > Factory Defaults Administration > Diagnostics Factory Defaults Diagnostics Restore Factory Defaults To reset the Extender’s settings Ping Test to the default values, click this option Any settings you have saved will be lost when the default values are restored... - Page 14 Linksys RE1000 Chapter 2: Advanced Configuration WARNING: Do not interrupt the upgrade process You should not power off the Extender or press the Reset button during the upgrade process Doing so may disable the Extender Wireless-N Extender...
-
Page 15: Status > Device Information
The Device Name is the NetBIOS name The number of packets dropped on the transmit direction of the router The default is Cisco followed by the last 5 is displayed digits of the router’s serial number, which is found on the... -
Page 16: Status > Wlan Statistics
Linksys RE1000 Chapter 2: Advanced Configuration Wired Clients Table Channel Width The radio channel width used by Wireless-N devices is displayed Channel The Extender’s operating radio channel is displayed Wi-Fi Protected Setup Status > Wired Clients table The Extender’s Wi-Fi Protected Setup is displayed... -
Page 17: Appendix F: Specifications
IEEE 802 11n, 802 11g, 802 11b, 802 3u Ports Fast Ethernet, C7 connector for localized AC cable or clip Buttons Reset, Wi-Fi Protected Setup™ LEDs Backlit Cisco logo, Ethernet (active, traffic) Cabling Type CAT 5 Antennas 2 (internal) Detachable (y/n) Transmitted Power 802 11n (40MHz) 15 5 ±... - Page 18 Cisco, the Cisco Logo, and Linksys are trademarks or registered trademarks of Cisco and/or its affiliates in the U S and other countries A listing of Cisco’s trademarks can be found at www.cisco.com/go/trademarks Third-party trademarks mentioned are the property of their respective owners The use of the word partner does not imply a partnership relationship between Cisco and any other company ©...