Table of Contents
Quick Links
Table of Contents

Related Manuals for Pioneer ANH-P9R-BK


Summary of Contents for Pioneer ANH-P9R-BK
- Page 1 NAVIGATION/CD TUNER ENGLISH Operation Manual ANH-P9R-BK...
- Page 2 The screen shown in the example may differ from the actual screen. The actual screen may be changed without notice for performance and function improvements.
-
Page 3: Table Of Contents
Contents Thank you for buying this Pioneer product. Please read through these operating instructions so you will know how to oper- ate your model properly. After you have finished reading the instructions, put them away in a safe place for future reference. - Page 4 Section Contents • Requesting journey duration and kilometres travelled 36 • Displaying the route settings 37 • Request current time 37 • Requesting current position 37 • Requesting the road list 38 Destination memory 38 Special destinations 39 System settings 41 •...
- Page 5 Contents Selecting discs from the disc title list 63 Pausing CD playback 64 Entering disc titles 64 Using compression and dynamic bass emphasis 65 Using ITS memory 66 • Programming tracks in ITS memory 66 • Playback from ITS memory 66 •...
- Page 6 Section Contents Other Functions Attenuating audio volume 85 Displaying the clock 85 • Setting the time display on or off 85 • Off clock display 85 Adjusting the brightness 86 Switching the dimmer setting 86 Selecting the wall paper pattern 87 Using the AUX source 87 •...
-
Page 7: Before You Start
The Software and related documentation are provided to you “AS IS”. PIONEER AND ITS LICENSOR(S) (for the purpose of provisions 2 and 3, Pioneer and its licensor(s) shall be col- lectively referred to as “Pioneer”) MAKES AND YOU RECEIVE NO WARRANTY WHETHER... - Page 8 This is the entire Agreement between Pioneer and you regarding its subject matter. No change in this Agreement shall be effective unless agreed to in writing by Pioneer. If any provision of this Agreement is declared invalid or unen- forceable, the remaining provisions of this...
-
Page 9: Important Safety Information
Before You Start Important Safety Information Before using your Navigation System, be sure to read and fully understand the following safety information: • Read the manual before operating this Navigation System. • This Navigation System is intended solely as an aid to you in the operation of your vehicle. It is not a substitute for your attentiveness, judge- ment, and care when driving. -
Page 10: About This Unit
CLASS 1 LASER PRODUCT to the bottom of this unit. CLASS 1 LASER PRODUCT • The Pioneer CarStereo-Pass is for use only in Germany. • Keep this manual handy as a reference for operating procedures and precautions. • Always keep the volume low enough so you can hear sounds outside of the car. -
Page 11: Protecting Your Unit From Theft
Before You Start Protecting your unit from theft The front panel can be detached from the head unit and stored in the protective case provided to discourage theft. • If the front panel is not detached from the head unit within five seconds of turning off the ignition, a warning tone will sound. -
Page 12: About The Demo Mode
Section Before You Start Notes • When using with a Pioneer Navigation System, if you press RESET OFF is selected. If ACC ON is selected, correct operation may not be possible even if you press RESET • After completing connections or when you... -
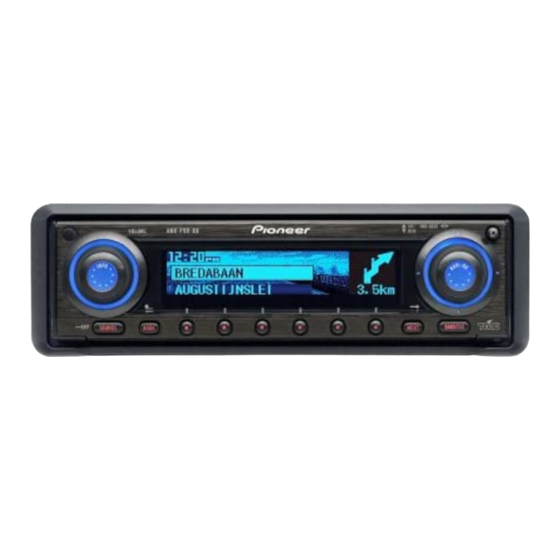
Page 13: What's What
Before You Start What’s what 1 Rotary volume, button INFO With the NAVIGATION function Rotary: Lets you adjust guidance volume level. Push: Displays information indications. With the AUDIO function Rotary: Lets you adjust the volume level of each source. Push: Lets you cancel each function during operation. -
Page 14: Optional Remote Control
90%. Press once more to return to the original volume level. button BAND - 5/∞/2/3 buttons button FUNCTION button SOURCE button AUDIO button VOLUME Note • Navigation operations of the ANH-P9R-BK cannot be performed even if the CD-SR100 is switched to the navigation mode. , which... -
Page 15: Basic Operation
SOURCE off. Notes • External unit refers to a Pioneer product (such as one available in the future) that, although incompatible as a source, enables control of basic functions by this product. Two external units can be controlled by this product, although “External”... -
Page 16: Using Navigation And Sources Simultaneously
Section Basic Operation Using navigation and SOURCES simultaneously If SOURCE is pressed after having set the desti- nation during navigation, the SOURCE display and navigation information are displayed simul- taneously. An announcement is made by the guide audio as necessary. In the case the name of the course changes, although the display will switch to the navigation display, it will automati- cally return to the SOURCE display. -
Page 17: Example Of Multi-Function Button Operation
Basic Operation Example of multi-function button operation Here the “random play” function of the built-in CD player is used as an example to illustrate operation of the multi-function buttons. 1 Press to display NEXT FUNC Press repeatedly until NEXT FUNC 2 Press to enter the function menu. -
Page 18: Display Example (E.g., Built-In Cd Player)
Section Basic Operation Display example (e.g., built-in CD player) Key guidance indicator This product’s display features key guidance indicators. These light to indicate which of the 5/∞/2/3 buttons you can use. When you’re in the function menu, audio menu or the other menus, they also make it easy to see which 5/∞/2/3 buttons you can use to switch func- tions on/off, switch repeat selections and per-... -
Page 19: Navigation
Stars, prominent landmarks, compasses and satellites etc. are used as navigation tools. With the Pioneer ANH-P9R-BK, the location is determined via the GPS receiver (GPS = Global Positioning System). The direction and distance from the destination is determined using a digi- tal street map, a navigation computer and sen- sors. -
Page 20: Before Using Navigation
Section Navigation • button quits the current menu and BACK displays the previous menu. • The route is recalculated by the system if deviation from the route is made. • Press the button to hear the current INFO navigation announcement. •... -
Page 21: Main Navigation Menu
Navigation Main navigation menu Selection from DEST. MEMORY DESTINATION P.O.I. LAST DESTINATIONS can be made by turning the rotary stick, and confirmed by pressing the NAVI/OK • DEST. MEMORY contains destinations which have been stored previously. See Destination memory on page 38. •... -
Page 22: Entering The Destination
Section Navigation Entering the destination The last location entered is displayed. If you want to enter a destination in the displayed location, you can select (refer to page 23) or ROAD (refer to page 24) immediately. If your destination lies in another location, select the location using the rotary stick and press to confirm. -
Page 23: Entering The Destination Road
Navigation The place-distinguishing list is displayed if the selection is ambiguous. Select the required place using the rotary stick and press the button to confirm. NAVI/OK The program switches to road or centre entry. If no roads and only the centre can be selected in the location entered, the program switches directly to route menu. -
Page 24: Entering The Destination Centre
Section Navigation The road nearest to the entry appears in capital letters in the road selection list. The scroll marks indicate that more roads are available for selection in alphabetical order. Select the road by turning the rotary stick and press the button to confirm. -
Page 25: Entering The Post Code For The Desti- Nation Road
Navigation To accept the entry, press and hold the rotary stick for more than 2 seconds or select the small check and briefly press the button. If the complete centre-name was previously entered or was automatically completed, the program switches to route menu. The program switches to the centre list if the selection is ambiguous. -
Page 26: Entering The House Number For The Destination Road
Section Navigation • START–FAST R., START–SHORT R. or START–DYN. R. Starts route calculation. Simultaneously, a prompt appears indicating the currently selected route option ( –SHORT R. route, for a fast route and -FAST R. dynamic route). • HOUSE NUMBER The house number in the specified destination road can be entered here. -
Page 27: Select The Intersection For The Destination Road
Navigation Select the intersection for the destina- tion road Using the rotary stick, select CROSSING route menu and press to confirm. Select the intersection for the destination road by turning the rotary stick and press to confirm. Select to start route guidance. START–... -
Page 28: Storing A Specified Destination In The Destination Memory
Section Navigation Further information under Dynamic navigation with TMC on page 34. • RESTRICTIONS Provides options for avoiding motorways, ferries or toll roads. Selection can be made by turning the right rotary control, and settings can be changed by pressing the button. -
Page 29: Deleting Stored Destinations
Navigation Deleting stored destinations Select destination memory (see page 38). Select the destination to be deleted using the rotary stick and press the button. Destination memory full Occurs when the destination memory is full. Select either (to jump to the destination DELETE memory in order to delete a destination) or (to cancel saving). -
Page 30: Stopover
Section Navigation Stopover This function enables a stopover to be entered when route guidance is active. Entering a stopover Press the multifunction button Using the rotary stick, make a selection and press to confirm. • DEST. MEMORY (see page 38) Select the stopover from the desti- nation memory. -
Page 31: Stopover Reached
Navigation Stopover reached Route guidance to the final destination auto- matically starts following the message HAVE REACHED YOUR STOPOVER Traffic jam function This function allows you to block the approach- ing route sections as from the next junction and calculate a bypass route when a traffic jam or road block is directly ahead. -
Page 32: Cancelling Route Guidance
Section Navigation Cancelling route guidance Press button. BACK Route guidance is cancelled by pressing the button within 8 seconds. NAVI/OK When you press the BACK ance continues. Notes on route guidance After entering the destination (address), the system calculates the route and announces: “Ready to drive off”. - Page 33 Navigation This display tells you that you should follow the course of the road. • “Prepare to turn left” or “Please move into the left- hand lane”. This recommendation prepares you for the next turning to be taken. However, “move into the left- hand lane” does not mean that you should do so immediately! Notes •...
-
Page 34: Dynamic Navigation With Tmc
Section Navigation Dynamic navigation with TMC Notes • Dynamic route guidance is not possible in all countries. • When any route recalculations are made with active dynamic route guidance, the navigation system may request the navigation CD (if the navigation CD is not already inserted). What is dynamic route guidance? Dynamic route guidance is used to calculate the route, taking current traffic announcements... -
Page 35: Displaying Traffic Information
Navigation Displaying traffic information Current traffic announcements can be displayed in plain text. There are several options for requesting current traffic information. Traffic information can be requested via the multifunction buttons route guidance display and, in the case of inac- tive route guidance, via the multifunction button . -
Page 36: Information During Route Guidance
Section Navigation If scroll marks are visible at the left edge of the display, then more than 3 lines are used to dis- play the traffic information. Pressing the button, switches back to the BACK list of current traffic information. Information during route guid- ance Press the... -
Page 37: Displaying The Route Settings
Navigation Displaying the route settings During route guidance, press the Press the multifunction button. The route settings are displayed. After 8 seconds, the system returns to the route guidance display. Request current time During route guidance, press the Press multifunction button The current time is displayed. -
Page 38: Requesting The Road List
Section Navigation Requesting the road list During route guidance, the planned route list can be requested. Press the multifunction button The current road and the road names up to the destination are displayed. The route list can be scrolled by turning the rotary stick. By pressing the NAVI/OK returns to the route guidance display. -
Page 39: Special Destinations
Navigation Special destinations Menu for selecting special destinations from a specified list. Special destinations are e.g. petrol stations, airports or hospitals. Using the rotary stick, select P.O.I. main navigation menu and press to confirm. Using the rotary stick, make a selection and confirm. - Page 40 Section Navigation Select TOWN Special destinations in a specified town can be selected. Using the rotary stick, select the town name and press the button to confirm. NAVI/OK Then select the town from the town selection list using the rotary stick and press again to con- firm.
-
Page 41: System Settings
Navigation System settings In the main navigation menu, press the button. The system settings menu is requested. Selection from TIME SAVE POSITION LANGUAGE* MEASURING UNIT ANNOUNCEMENT ETA ETA CALCULATION can be made by turning, and confirmed by pressing the button. NAVI/OK •... -
Page 42: Saving The Position
Section Navigation Using the multifunction buttons the time is changed every half an hour. By pressing the rotary stick or the multifunction button the time set is accepted. The program returns to the system settings menu. Saving the position Select in the system settings SAVE POSITION menu and confirm. -
Page 43: Setting The Language
Navigation Setting the language Select * in the system settings menu LANGUAGE and confirm. Select the language using the rotary stick. The language selection is accepted by pressing the control and the language is installed. You can choose either a male or a female voice for certain languages. -
Page 44: Average Speed
Section Navigation Average speed Select ETA CALCULATION tings menu and confirm. Select the estimated average speed using the rotary stick. The estimated average speed is accepted by pressing the button. NAVI/OK The system returns to the system settings menu. Selecting the measuring unit in the system set- Select tings menu and confirm. -
Page 45: Tuner
Tuner Display and indicators 1 Band indicator indicator 4 Preset number 5 Frequency 6 Stereo indicator Basic operation This product’s AF function can be switched on and off. AF should be switched off for normal tuning operations. (Refer to page 49.) 1 Press SOURCE Press... -
Page 46: Storing And Recalling Broadcast Stations
Section Tuner Storing and recalling broadcast stations If you press any of the buttons 1 – 6, you can easily store up to six broadcast stations for later recall. Storing broadcast stations 1 Press to display “1” – “6”. NEXT Press until “1”... -
Page 47: Storing The Strongest Broadcast Stations
Tuner Storing the strongest broadcast stations BSM (best stations memory) lets you automati- cally store the six strongest broadcast stations under the buttons 1 – 6. 1 Press to select the BSM mode. FUNC 2 Press to turn the BSM on. “Searching”... -
Page 48: Display And Indicators
Section Display and indicators 2 3 4 1 Band indicator TRFC indicator indicator 5 Preset number indicator NEWS 7 Program service name (or frequency) information What is RDS? RDS (Radio Data System) is a system for provid- ing information along with FM broadcasts. This inaudible information provides such features as program service name, program type, traffic announcement standby, automatic tuning and... -
Page 49: Using Alternative Frequency (Af)
Using alternative frequency (AF) If you are listening to a broadcast and the recep- tion becomes weak or there are other problems, this product will automatically search for a dif- ferent station in the same network which is broadcasting a stronger signal. 1 Press and then press FUNC... -
Page 50: Limiting Stations To Regional Programming
Section Limiting stations to regional programming When AF is used to automatically retune fre- quencies, the regional function limits the selec- tion to stations broadcasting regional programs. 1 Press and then press FUNC the regional mode. 2 Press to turn the regional function on. The light illuminates. -
Page 51: Canceling Traffic Announcements
• Only TP or enhanced other network’s TP sta- tions are tuned in during seek tuning when the “3TRFC” or “T” indicator is on. • Only TP or enhanced other network’s TP sta- tions are stored by BSM when the “3TRFC” or “T”... -
Page 52: Using The Pty Function
Section Using the PTY function A PTY search is performed by program type as indicated in the PTY list (the program types are: News&Inf, Popular, Classics, Others). It also provides automatic tuning to emergency broad- casts (PTY alarm). Searching the PTY 1 Press and then press FUNC... -
Page 53: Pty List
PTY list General Specific News&Inf News Affairs Info Sport Weather Finance Popular Pop Mus Rock Mus Easy Mus Oth Mus Jazz Country Nat Mus Oldies Folk Mus Classics L. Class Classic Others Educate Drama Culture Science Varied Children Social Religion Phone In Touring Leisure... -
Page 54: Using Radio Text
Section Using radio text This tuner can display radio text data transmit- ted by RDS stations, such as station informa- tion, the name of the currently broadcast song and the name of the artist. Notes • When radio text is received, the “TXT” indica- tor lights. -
Page 55: Built-In Cd Player
Built-in CD Player Display and indicators 1 Source name 2 Track number 3 Disc title 4 Play time 5 Track title Basic operation The built-in CD player plays one standard 12 cm or 8 cm (single) CD at a time. Do not use an adapter when playing an 8 cm CD. -
Page 56: Switching And Scrolling The Title
Section Built-in CD Player WARNING Do not use with the front panel left open. If the front panel is left open, it may result in injury in the event of an accident. Notes • You can select CD as the source by pressing when a audio disc is loaded in this SOURCE product. -
Page 57: Built-In Cd Player Function Menu
Built-in CD Player Built-in CD player function menu The built-in CD player function menu has the following functions: Notes • If you do not operate the function within about 30 seconds, the display is automatically returned. (When you select the disc title input mode (TTLin), the display is not returned auto- matically.) •... -
Page 58: Selecting Tracks From The Track Title List
Section Built-in CD Player Selecting tracks from the track title list The track title list lets you see the list of track titles on a CD TEXT disc and select one of them for playback. 1 Press and then press T.LIST to FUNC select the track title list mode. -
Page 59: Multi-Cd Player
Multi-CD Player Display and indicators 1 Source name 2 Disc number 3 Track number 4 Disc title 5 Play time 6 Track title 50-disc multi-CD player Only those functions described in this manual are supported for 50-disc multi-CD players. Basic operation This product can control a multi-CD player, which is sold separately. -
Page 60: Selecting A Disc Directly
Section Multi-CD Player Selecting a disc directly You can use the buttons 1 – 6 (or 7 – 12) to select a disc directly. 1 Press to display “1” – “6” (or “7” – NEXT “12”). Press until “1” – “6” (or “7” – “12”) NEXT appears. -
Page 61: Multi-Cd Player Function Menu
Multi-CD Player Multi-CD player function menu The multi-CD player function menu has the following functions: Notes • If you do not operate the function within about 30 seconds, the display is automatically returned. (When you select the disc title input mode (TTLin) or ITS memory mode (ITS.M), the display is not returned automatically.) •... -
Page 62: Playing Tracks In Random Order
Section Multi-CD Player Playing tracks in random order Random play lets you play back tracks in ran- dom order within the repeat range: multi-CD player repeat and disc repeat. 1 Select the repeat range. Refer to Repeating play on page 61. 2 Press and then press FUNC... -
Page 63: Selecting Tracks From The Track Title List
Multi-CD Player Selecting tracks from the track title list The track title list lets you see the list of track titles on a CD TEXT disc and select one of them for playback. 1 Press and then press FUNC the track title list mode. 2 Press to display the desired track NEXT... -
Page 64: Pausing Cd Playback
Section Multi-CD Player Pausing CD playback Pause lets you temporarily stop playback of the 1 Press and then press FUNC the pause mode. 2 Press to turn pause on. PAUSE The light illuminates. Play of the current track pauses. • Press again to turn pause off. -
Page 65: Using Compression And Dynamic Bass Emphasis
Multi-CD Player 6 Press 3 to move the cursor to the last posi- tion and then press 3 one more time after entering the title. 7 Press to cancel the disc title BAND/ESC input mode. Notes • When playing a CD TEXT disc on a CD TEXT compatible multi-CD player, if you switch to this mode, “Can’t input”... -
Page 66: Using Its Memory
Section Multi-CD Player Using ITS memory The ITS (instant track selection) lets you make a program of favorite tracks from those in the multi-CD player magazine. After you have added your favorite tracks to the ITS memory, you can turn on ITS play and play just those selections. Programming tracks in ITS memory You can use ITS to enter and playback up to 99 tracks per disc, up to 100 discs (with the disc... -
Page 67: Erasing A Track From Its Memory
Multi-CD Player Erasing a track from ITS memory When you want to erase a track from ITS mem- ory, you can do so when ITS play is on. 1 Turn ITS play on while playing a CD from which you want to erase a track program from ITS memory. -
Page 68: Dab Tuner
Section DAB Tuner The following explains how to use this product to control a DAB tuner, which is sold separately. For details of DAB tuner- specific operation/features, see your DAB tuner’s manual. • This product does not have the language filter function. -
Page 69: Basic Operation
DAB Tuner Basic operation 1 Press to select the DAB tuner. SOURCE Press until “DAB Tuner” appears. SOURCE 2 Raise or lower the volume. Rolling the VOLUME changes the volume level. 3 Press 2 or 3 to select a service. 4 Press and hold 2 or 3 for one second and release to select an ensemble. -
Page 70: Switching The Display
Section DAB Tuner Switching the display • Press to select the desired display. DISP Press repeatedly to switch between the DISP following displays: SERVICE (service label) and COMPONENT (ser- vice component label) — D.TEXT (dynamic label segment head line) — SERVICE (service label) and ENSEMBLE (ensemble label) —... -
Page 71: Storing A Dynamic Label
DAB Tuner Storing a dynamic label You can store data from up to six dynamic label transmissions under the buttons MEMO6 1 Select the dynamic label you want to store in memory. Refer to Displaying dynamic labels on page 70. 2 Press and hold any of the buttons until “DAB memo”... -
Page 72: Setting The Announcement Support Interruption
Section DAB Tuner Setting the announcement sup- port interruption 1 Press and then press FUNC announcement support mode. 2 Press the corresponding button to turn the desired announcement support on. Button Announcement NEWS News flash WTHR Area weather flash ANNC Announcement Note •... -
Page 73: Searching The Available Pty
DAB Tuner Searching the available PTY Available PTY search lets you see the list of available PTYs that is in the current ensemble and select one of them to receive. • Available PTY search function is different from PTY search function. With this product, you can operate only the available PTY search. -
Page 74: Tv Tuner
Section TV Tuner The following explains how to use this product to control a TV tuner, which is sold separately. For details of TV tuner- specific operation/features, see your TV tuner’s manual. • With this product, you can operate preset channel list as one additional function. -
Page 75: Changing A Band
TV Tuner Changing a band • Press to select the desired band. BAND/ESC Press repeatedly to switch between BAND/ESC the following bands: TV 1 — TV 2 TV tuner function menu The TV tuner function menu has the following functions: (best stations sequential memory) BSSM Press... -
Page 76: Audio Adjustments
Section Audio Adjustments Recalling equalizer curves There are seven stored equalizer curves which you can easily recall at any time. Here is a list of the equalizer curves: 1 Press to switch to the easy equalizer mode. 2 Press to switch between “CSTM2” NEXT and the other selections (curves). -
Page 77: Using Balance Adjustment
Audio Adjustments Using balance adjustment You can select a fader/balance setting that pro- vides an ideal listening environment in all occu- pied seats. 1 Press to select F/B (fader/balance). AUDIO 2 Press 5 or ∞ to adjust front/rear speaker balance. Each press of 5 or ∞... -
Page 78: Using Bass Adjustment
Section Audio Adjustments Using bass adjustment You can adjust the cut-off frequency and the bass level. • In mode, bass adjustment affects only FRT1 the rear output: front output cannot be adjusted. 1 Press and then press AUDIO 2 Select the desired frequency with 2/3. Press 2 or 3 until the desired frequency appears in the display. -
Page 79: Using Subwoofer Output
Audio Adjustments Using subwoofer output This unit is equipped with a subwoofer output which can be switched on or off. When a sub- woofer is connected to the rear output, first, switch the rear output setting to subwoofer, then turn the subwoofer output on. For more details, see Switching the rear output setting on page 83. -
Page 80: Setting The Sound Focus Equalizer
Section Audio Adjustments Setting the sound focus equal- izer Clarifying the sound image of vocals and instru- ments allows the simple staging of a natural, pleasant sound environment. Even greater listening enjoyment will be obtained if seating positions are chosen care- fully. -
Page 81: Initial Settings
Initial Settings Initial settings menu The initial settings menu has the following func- tions: Note • is displayed only when a separately DAB P. sold hide-away DAB tuner (e.g., GEX- P700DAB) is connected. Initial settings menu operation You can operate the initial settings menu only when the source is off. -
Page 82: Switching The Auxiliary Setting
Section Initial Settings Switching the auxiliary setting It is possible to use auxiliary equipment with this product. Turn the auxiliary setting on when using exter- nal equipment connected to this product. 1 With the source turned off, press and hold 2 Press to select the AUX mode. -
Page 83: Setting The Warning Tone
Initial Settings Button Tuning step 50 kHz 100K 100 kHz Notes • The FM tuning step remains set at 50 kHz during manual tuning. • The tuning step returns to 100 kHz if the bat- tery is temporarily disconnected. Setting the warning tone The warning tone sounds to remind you to detach the front panel. -
Page 84: Setting The Dab Priority Function
Section Initial Settings Setting the DAB priority function When a hide-away DAB tuner (e.g., GEX- P700DAB) is connected, you can set the product in this mode so that a traffic informa- tion interruption from the hide-away DAB tuner takes precedence over this product’s RDS traf- fic announcement (TA) function. -
Page 85: Other Functions
Other Functions Attenuating audio volume The attenuator lets you lower the volume level quickly (by about 90%). 1 Press to display NEXT Press until appears. NEXT 2 Press to turn the attenuator on. appears in the display. • Press again to turn the attenuator off and return to the original volume level. -
Page 86: Adjusting The Brightness
Section Other Functions Adjusting the brightness Display brightness adjustment lets you adjust the display for easier viewing when lighting conditions change. 1 Press to display NEXT Press until NEXT C.MENU 2 Press and then press C.MENU select the brightness mode. 3 Press 2 or 3 to adjust the brightness. -
Page 87: Selecting The Wall Paper Pattern
Other Functions Selecting the wall paper pattern There are three patterns to choose from. 1 Press to display NEXT C.MENU Press until appears. NEXT C.MENU 2 Press and then press C.MENU select the wall paper pattern mode. 3 Press any of the buttons A – C to select the desired pattern. -
Page 88: Additional Information
Section Additional Information CD player and care • Use only CDs that have either of the two Compact Disc Digital Audio marks as show below. • Use only normal, round CDs. If you insert irregular, non-round, shaped CDs they may jam in the CD player or not play properly. -
Page 89: Understanding Built-In Cd Player Error Messages
• This product may not be able to receive traffic information in some areas. Action • Pioneer does not bear responsibility for the accuracy of the information transmitted. Clean disc. • Pioneer does not bear responsibility for changes to information services provided by Replace disc. -
Page 90: Copyright
Chassis (DIN) ... 178 × 50 × 157 mm Nose ... 188 × 58 × 18.0 mm Weight ... 2.0 kg Navigation (GPS receiver) System ... L1, C/Acode GPS Reception system ... 12ch Reception frequency ... 1,575.42 MHz Sensitivity ... –130 dbm Position update frequency ... - Page 91 Additional Information Equalizer (3-Band Parametric Equalizer): (Low) Frequency ... 40/80/100/160 Hz Q Factor ... 0.35/0.59/0.95/1.15 (+6 dB when boosted) Gain ... ±12 dB (Mid) Frequency ... 200/500/1 k/2 k Hz Q Factor ... 0.35/0.59/0.95/1.15 (+6 dB when boosted) Gain ... ±12 dB (High) Frequency ...
-
Page 92
TEL: (03) 9586-6300 PIONEER ELECTRONICS OF CANADA, INC. 300 Allstate Parkway, Markham, Ontario L3R OP2, Canada TEL: (905) 479-4411 PIONEER ELECTRONICS DE MEXICO, S.A. de C.V. San Lorenzo 1009 3er. Piso Desp. 302 Col. Del Valle Mexico, D.F. C.P. 03100 TEL: 55-5688-52-90
...