Pioneer DVR-RT501-S Operating Instructions Manual
Dvd recorder & vcr
Hide thumbs
Also See for DVR-RT501-S:
- Service manual (122 pages) ,
- Operating instructions manual (92 pages) ,
- User manual (47 pages)

Related Manuals for Pioneer DVR-RT501-S


Summary of Contents for Pioneer DVR-RT501-S
- Page 1 DVR-RT501-s DVD Recorder & VCR www.pioneer.co.uk Discover the benefits of registering your product online at (www.pioneer-eur.com) Operating Instructions 2H30301B_En_01_03 8/4/05, 19:18...
- Page 2 Thank you for buying this Pioneer product. Please read through these operating instructions so you will know how to operate your model properly. After you have finished reading the instructions, put them away in a safe place for future reference.
-
Page 3: Operating Environment
Check the power cord once in a while. When you find it damaged, ask your nearest PIONEER authorized service center or your dealer for a replacement. The cut-off plug should be disposed of and must... -
Page 4: Table Of Contents
Contents 01 Before using your unit Precautions ... 6 Accessories ... 7 Features ... 8 Disc ... 9 Discs which can be played back ... 9 Discs on which video can be recorded ... 10 Recording format ... 10 Disc playback in other players ... 11 Parts and functions ... - Page 5 04 Tape playback Loading and unloading a cassette tape ... 46 Cassette tape playback ... 47 Special playback ... 48 Picture search ... 48 Still picture ... 48 Slow motion ... 48 Frame by Frame picture ... 48 Adjusting tracking condition ... 48 Repeat playback ...
-
Page 6: Before Using Your Unit
Before using your unit Precautions Important Warning Please read this page carefully before attempting to operate your VCR/DVD. Follow Instructions – All operating and maintenance instructions should be followed and warnings adhered to. Cleaning – Unplug this product from the wall socket before cleaning. -
Page 7: Accessories
Before using your unit Copyright * Recording and playback of any material may require consent. Please refer particularly to the provi- sions of the copyright Act 1956, the Dramatic and Musical Performers Protection Act 1958, the Performers Protection Acts 1963 and 1972 and to any subsequent statutory enactments and orders. * Unauthorised recording of copyrighted television programs, films, video cassettes and other materials may infringe the rights of copyright owners and be contrary to copyright laws. -
Page 8: Features
Before using your unit Features Not only can you playback and record video tapes, but you can also playback DVD discs or make recordings using DVD-RW/DVD-R discs with this unit. In addition, you can edit the programs you have recorded. Playback function A realistic, powerful, Movie Theater sound DVD-Video... -
Page 9: Disc
DVD-RW Ver. 1.2 / 4x discs. If you want to share DVD-RW discs between this recorder and an older recorder/writer, we recommend using Ver. 1.1 discs. The following table shows older Pioneer DVD recorder compatibility with DVD-RW Ver. 1.2 / 4x discs. Playable... -
Page 10: Discs On Which Video Can Be Recorded
Before using your unit Discs on which video can be re- corded To record video with this unit, use the discs below: Media type DVD-RW Ver.1.0 Ver.1.1 Ver.1.2 Ver.1.1CPRM support Ver.1.2CPRM support DVD-R Ver.2.0 and Ver. 2.0/4x/8x DVD-RW • The disc can be erased and used again about 1,000 times. -
Page 11: Disc Playback In Other Players
Before using your unit Title/Chapter/Track A DVD-Video has large partitions called “Titles”, and smaller partitions within them called “Chapters”. A music CD has other partitions called “Tracks”. A number is allotted to each partition and these numbers are called “title numbers”, “chapter numbers”... -
Page 12: Parts And Functions
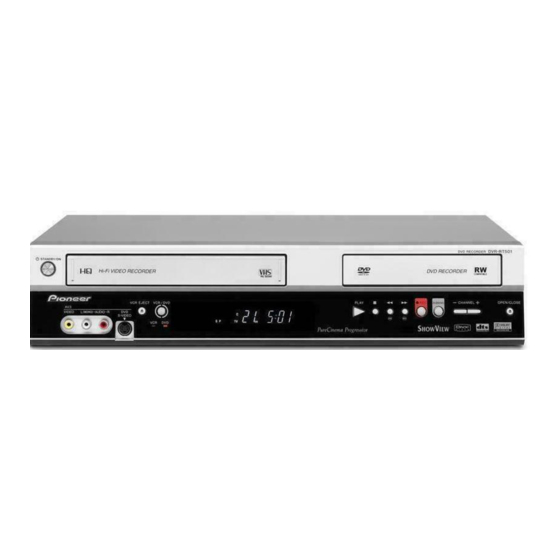
Before using your unit Parts and functions Front VCR indicator Cassette Loading Slot DVD indicator STANDBY/ON button VCR/DVD button AUDIO (L/R)/VIDEO VCR EJECT button IN (AV3) jacks DVD S-VIDEO IN (AV3) jack Rear DECODER/EXTERNAL Scart socket (AV2) AC power cord Make sure that when installed the fan is not obstructed. -
Page 13: Display Window
Before using your unit Display window Display Lights during video tape playback. Video tape is temporarily stopped. Lights during video tape recording. Progressive scanning mode. Timer recording display. XP/SP/LP/EP 4 DVD recording modes. XP, SP, LP or EP can be selected in turn by pressing the REC MODE/SPEED repeatedly. SP/LP 2 VCR recording modes. -
Page 14: Remote Control
Before using your unit Remote control 2H30301B_En_12_17 STANDBY/ON Turns power on/off. VCR EJECT Ejects the cassette tapes. DVD OPEN/CLOSE Opens or Closes the tray. DVD/VCR Switches to operation between VCR and DVD. 30, 47, 78, 79 Direct channel selection of TV. Entering a Pluscode for VIDEO Plus+ timer programming 56 Setting input. - Page 15 Before using your unit How to install the batteries Use dry cell batteries type AAA/R03. These batteries are offered as carbon / zinc-type. You may use both, but do not mix types. Note: Flat, weak batteries will leak. Corrosive electrolyte will damage the remote control handset. Leak proof batteries will not leak immediately when they are flat.
-
Page 16: Basic Connections
Before using your unit Basic connections Connect your VCR/DVD to your main aerial and TV set as shown in the illustration. When you have finished making these connections, connect your VCR/DVD to the mains power supply (230V / 50Hz). Before making or changing any rear panel connections, make sure that all components are switched off and unplugged from the wall outlet. - Page 17 Before using your unit Connect to a TV with Component video output (for DVD/CD playback) You can enjoy the highest quality picture by connecting the unit’s component video out jacks to the component video input jacks of your TV, with component video cables (not supplied). At shipment (with the factory settings), component video signals are not output from these component video jacks.
-
Page 18: Various Settings
Various settings Automatic TV tuning and clock setting Plug in your unit into the mains supply and it will start to automatically tune itself in and set the correct date and time. After setting itself up, you must set the TV to the video channel. -
Page 19: Setup Menu
Various settings SETUP MENU The SETUP MENU consists of several menus where you can make various settings concerning language, audio functions, and images. In addition, this menu includes a clock, channel and other things that require setting just after pur- chase. -
Page 20: Setting The Language
Various settings Setting the language You can choose the language of the menu screen, DVD menu, DVD audio and subtitles. Preparation: • Turn ON the TV and select its AV channel (this may be labelled EXT / AUX etc.). • Select “LANGUAGE” from “SYSTEM SETUP”. For the procedure, see steps 1 to 3 in “Using the SETUP MENU”... -
Page 21: Setting The Parental Control
Various settings Setting the parental control Some discs are specified as not suitable for children. This unit can prevent playback of such discs. Preparation: • Turn ON the TV and select its AV channel (this may be labelled EXT / AUX etc.). •... -
Page 22: Setting The Clock
Various settings Setting the clock Your VCR/DVD is fitted with a 24 hour clock. You must set the date and time for timer record- ings. Preparation: • Turn ON the TV and select its AV channel (this may be labelled EXT / AUX etc.). •... -
Page 23: New Disc Format
DVD-RW (Video mode), or with a DVD-R. • This unit may not be able to record or edit a disc which was recorded or edited using another DVD recorder. • You cannot playback a disc recorded on VR mode on a unit that does not support DVD-RW. -
Page 24: Other (System Setup)
Various settings Other (SYSTEM SETUP) You can turn the display window and screen display “ON” or “OFF”. Preparation: • Turn ON the TV and select its AV channel (this may be labelled EXT / AUX etc.). • Select “OTHER” from “SYSTEM SETUP”. For the procedure, see steps 1 to 3 in “Using the SETUP MENU”... -
Page 25: Still Mode
Various settings STILL MODE You can set the type of image displayed on the TV screen when the playback of the DVD is stilled. Select “STILL MODE” and select the image to be displayed from the list below. AUTOMATIC The field still or frame still is automatically selected. (For normal use.) STILL BY FRAME The frame still is set. -
Page 26: Setting The Audio
Various settings Setting the audio This section describes audio settings. Preparation: • Turn ON the TV and select its AV channel (this may be labelled EXT / AUX etc.). • Select “AUDIO” from “AV SETUP”. For the proce- dure, see steps 1 to 3 in “Using the SETUP MENU” on page 19. -
Page 27: Auto Chapter
Various settings AUTO CHAPTER You can automatically make chapter marks on the DVD to be recorded. Select “AUTO CHAPTER” and select the interval between chapter marks from the list below. OFF: The automatic chapter is not used. 5 MIN: The interval is set to 5 minutes. 10 MIN: The interval is set to 10 minutes. -
Page 28: Setting The Channel
Various settings Setting the channel This VCR/DVD has a built-in tuner to receive TV broadcast transmissions. Before you record a TV- Broadcast, you must set and preset all available channels. This VCR/DVD can preset up to 80 channels. Preparation: • Turn ON the TV and select its AV channel (this may be labelled EXT / AUX etc.). -
Page 29: Replace Tv Station Positions
Various settings Replace TV station positions You can replace the channel positions as you like. Example: Replace the TV station No. 6 with position No. 2. Select “CH TUNING” and press ENTER. Select “CH” and press ENTER. Then select the moving channel position number (6) and press ENTER. -
Page 30: Disc Playback
Disc playback Playback procedure VR mode Video mode DVD-Video DVD-R NOTES: • If a non-compatible disc is loaded, “INCORRECT DISC”, “REGION CODE ERROR” or “PARENTAL ERROR” will appear on the TV screen according to the type of loaded disc. In this case, check your disc again (see pages 9 and 21). -
Page 31: Playback By Selecting A Title
Disc playback Playback by selecting a title VR mode Video mode DVD-R When playing back a recorded disc, you can display the title menu and select the title to be played back. NOTE: When a disc that has been recorded in the Video mode is finalised, a title list is automatically created that can be played back even with other DVD... -
Page 32: Checking Media Information
Disc playback Checking media information DVD-Video VR mode Video mode DVD-R Various information on the loaded disc can be displayed on the TV screen. NOTES: • The displayed information varies with the type of media. • Some information may not appear due to media type or operating conditions. -
Page 33: Special Playback
Disc playback Special playback VR mode DVD-Video Video mode DVD-R NOTE: There may be a slight delay between pressing the button and the function activation. NOTES: • The unit is capable of holding a still video image or On screen display image on your television screen indefinitely. -
Page 34: Commercial Skip
Disc playback Commercial skip / Locating a specific scene DVD-Video VR mode Video mode DVD-R NOTE: You cannot switch to the VCR mode when the play mode screen is showing. Press PLAY MODE to clear the play mode screen, then press DVD/VCR to switch to the VCR mode. -
Page 35: Repeat Playback
Disc playback Repeat playback VR mode DVD-Video Video mode DVD-R NOTES: • Some discs may not work with the repeat operation. • In A-B repeat mode, subtitles near point A or B may not appear. • A-B repeat does not work during the Title and the Chapter repeat playback. -
Page 36: Title Selection
Disc playback Title selection / DVD menu DVD-Video NOTE: Depending on the DVD, you may be unable to select the title, and a “title menu” may simply be called a “menu” or “title” in the instructions supplied with the disc. 2H30301B_En_30_43 Title selection Two or more titles are recorded on some discs. -
Page 37: Changing Angles
Disc playback Changing angles / Zooming / Subtitles VR mode DVD-Video Video mode DVD-R NOTES: • Depending on the DVD, you may not be able to change the angles even if multi-angles are recorded on the disc. • You can use the Pause, Slow, Search or Skip feature in the zoom mode. -
Page 38: Changing Soundtrack Language
Disc playback Changing soundtrack language / Karaoke playback DVD-Video NOTES: • If the desired language is not heard after pressing the button several times, the language is not recorded on the disc. • The vocal output feature is used during playback of Dolby Digital (multi-channel) recorded DVD KARAOKE discs. -
Page 39: Various Operations On Cd
Disc playback Various operations on CD This section describes the TRACK INFO screen where music CDs can be played back using the various operations. NOTES: • In case the disc includes more than 10 tracks, you can turn to the next or the previous page. Press , then press display next/previous page. - Page 40 Disc playback Various operations on CD NOTES: • When playing a CD-R/CD-RW recorded in the MP3 or WMA format, “RANDOM PLAY” and “TIME SEARCH” will not appear in the menu list. • See also A-B Repeat on page 2H30301B_En_30_43 Random playback Press to select “RANDOM PLAY”...
-
Page 41: Mp3/Wma/Jpeg/Divx
Disc playback MP3/WMA/JPEG/DivX MP3/WMA files can be played back. Also, you can display ® JPEG/DivX files on the TV screen. Some discs may not play due to the condition of the recording. Limitations on MP3/WMA/ ® JPEG/DivX file playback: • MP3/WMA/JPEG/DivX ®... - Page 42 Disc playback MP3 file specifications • MP3 files must have the extension letters “.mp3”. • Standard, sampling frequency, and the bit rate: MPEG-1 Audio 32kHz, 44.1kHz, 48kHz 32kbps to 320kbps (constant bit rate or variable bit rate) • The recommend recording setting for a high quality sound is 44.1kHz of sampling frequency and 128kbps of constant bit rate.
- Page 43 Disc playback JPEG file specification JPEG files must have the extension letters “.jpe”, “.jpeg” or “.jpg”. 2H30301B_En_30_43 Playing back JPEG files Press to select JPEG file. • In case the disc includes more than 10 files, you can turn to the next or the previous page.
- Page 44 Disc playback ® DivX video file specifications ® • Official DivX Certified product. ® ® ® • Plays DivX 5, DivX 4, DivX 3 and ® DivX VOD video content (in com- ® pliance with DivX Certified techni- cal requirements). ®...
-
Page 45: Progressive Scan
Disc playback Progressive scan DVD-Video VR mode Video mode DVD-R The unit supports the progressive scanning system as well as the con- ventional interlaced scanning sys- tem. If your TV is equipped with com- ponent video input jacks which sup- port the progressive video input, you can enjoy high quality picture by making the progressive scanning... -
Page 46: Tape Playback
Tape playback Loading and unloading a cassette tape Use only video cassette tapes marked • HQ VHS is compatible with existing VHS equipment. Loading Push the center of the tape until it is automatically inserted. Automatic power ON When you insert a cassette tape the VCR power will turn ON automatically. Automatic playback When loading a cassette tape without an erase prevention tab, playback will start automatically. -
Page 47: Cassette Tape Playback
Tape playback Cassette tape playback NOTES: • This VCR selects the playback tape speed SP or LP automati- cally. • A cassette tape and DVD disc can be played back simulta- neously. If you press DVD/VCR, the tape playback and DVD playback alternate with each other on the screen. -
Page 48: Special Playback
Tape playback Special playback Picture search Reverse picture search function Press REW x 1 or x 2 during the playback. Forward picture search function Press F.FWD x 1 or x 2 during the playback. To return to playback: Press PLAY. Still picture Press PAUSE/STILL during playback. -
Page 49: Zero Return Function
Tape playback ZERO RETURN function / Video index search system ZERO RETURN function This function makes tape rewinding (or forwarding) stop at the counter “00:00:00” position automatically. NOTES for Counter Display: • If you rewind the tape beyond “00:00:00”, a minus sign (“–”) will be displayed in front of the time. -
Page 50: Recording
Recording Read this before recording on disc This section explains things you must know to record onto a disc. Read it before attempting to record. NOTE: Should a power failure occur or should the AC cord plug be disconnected while recording, editing, initializing, finalising or any other function, the program being recorded will be lost or the disc... -
Page 51: Disc Remaining Time
Recording NOTES: • Because of characteristics peculiar to digital video compres- sion technology, scenes with fast motion may appear as a matrix of larger blocks. • During recording, if the picture noise continues for 1 minute, the recording will stop automatically. 2H30301B_En_50_53 Disc remaining time VR mode... -
Page 52: Recording A Tv Program
Recording Recording a TV program DVD-Video VR mode DVD-R You can record programs you watch on TV onto video tapes or DVDs. NOTES: • When recording onto a DVD, it takes some time from when you press REC until recording actually starts. - Page 53 Recording DVD-Video VR mode DVD-R Auto Rewind feature This VCR will automatically rewind the tape when the tape has ended (except during OTR and TIMER REC). It will also eject the tape. NOTES: • If the disc space become full, the recording is stopped and “RECORDING INTERRUPTED”...
-
Page 54: One-Touch Timer Recording (Otr)
Recording One-touch Timer Recording (OTR) DVD-Video VR mode DVD-R The One-touch Timer Recording feature provides a simple and convenient way to make a timed recording. NOTE: If you wish to watch the DVD playback during the VCR OTR, press DVD/VCR to change to DVD mode and perform the DVD playback. -
Page 55: Video Plus+ Programming System
Recording ® VIDEO Plus+ programming system DVD-Video VR mode DVD-R VIDEO Plus+ system is a timer programming system which simplifies timer recording programming. Instead of entering the date, channel and recording time, you simply enter a PlusCode programming number that you can find in your TV listings. -
Page 56: Setting The Timer Program Using The Video Plus+ System
Recording 2H30301B_En_54_62 Press to highlight TUNER CH NO., then enter the corre- sponding tuner channel number. • Select a tuner channel number in the same way as you selected the guide channel number. • You can also select one of the external inputs (AV1, AV2 or AV3) instead of a channel number if some channels are received via an external receiver. - Page 57 Recording NOTES: • If you’ve entered a valid PlusCode number, a summary of the timer recording appears. You can edit any of this information as necessary. Use the buttons to select the item you want to edit, press ENTER, then use the buttons as appropriate to select, then...
- Page 58 Recording NOTES: • Recording starts a few seconds before the preset starting time. • You cannot use the timer record- ing for the both DVD and VCR at the same time. • You can playback the DVD during the VCR timer recording, and you can playback the VCR during the DVD timer recording.
-
Page 59: Timer Recording
Recording Timer recording DVD-Video VR mode DVD-R The timer recording system allows you to select the date, time and channel and record the desired programs. Up to 12 timer pro- grams within a month can be stored in this unit. NOTE: In the event of a power failure the data of the automatic recording will... - Page 60 Recording NOTES: • If you select timer recording on a specified date only one time, select “ONCE” in the “TYPE” for recording. You can record same days of every week or from Monday to Friday using the item “TYPE”. The items you can select are as follows: ONCE: Recording on the selected “DATE”...
- Page 61 Recording NOTES: • Recording starts a few seconds before the preset starting time. • You cannot use the timer recording for the both DVD and VCR at the same time. • You can playback the DVD during the VCR timer recording, and you can playback the VCR during the DVD timer recording.
-
Page 62: Stereo Recording And Playback
Recording Stereo recording and playback This VCR/DVD is capable of recording Hi-Fi quality sound. When recording on a video cassette, a broadcast which is transmitted in NICAM Stereo normally records to the HiFi audio tracks - the normal Mono FM audio signal is recorded to the mono audio track on the cassette. -
Page 63: Editing The Disc
• This unit may not be able to record or edit a disc which was recorded or edited using another DVD recorder. • You cannot edit or record the disc on which disc protection is set. In such a case, be sure to... -
Page 64: Editing A Playlist
Editing the disc Editing a playlist VR mode You can create and edit the playlist based on the original title. NOTES: • A playlist can only be created with a DVD-RW in VR mode. You cannot create a playlist with a DVD-RW in Video mode, nor with a DVD-R. -
Page 65: Changing A Title Name
Editing the disc VR mode NOTES: • The title name can be a maxi- mum of 64 characters. Long names will be shortened in the title menu. • For using the keyboard screen, see “Changing a disc name” (page 76). 2H30301B_En_64_71 Changing a title name Press TITLE MENU to display the title menu. -
Page 66: Erasing A Scene (Edit Title)
Editing the disc VR mode 2H30301B_En_64_71 Erasing a scene (Edit title) You can erase an unnecessary scene from the created playlist. When you erase the scene from the playlist, the scene is not erased from the original title. Press TITLE MENU to display the title menu. Select the playlist where a scene you want to erase is included. - Page 67 Editing the disc VR mode NOTES: • It is no problem to omit the procedures for confirming the scene or adjusting start and end points. • It is not possible to make any adjustments for 2 seconds after a title starts or 2 seconds before it ends.
-
Page 68: Combining The Title
Editing the disc VR mode 2H30301B_En_64_71 Combining the title You can create a playlist by combining several original titles or playlists. To combine titles, it is necessary to create a playlist first. By combining the titles in the playlist, a playlist where several titles are combined is created. -
Page 69: Erasing A Playlist
Editing the disc VR mode 2H30301B_En_64_71 Erasing a playlist You can erase the created playlist. Even if you erase the playlist, the original title will not be erased. Press TITLE MENU to display the title menu. Select the playlist that you want to erase. •... -
Page 70: Editing An Original Title
Editing the disc Editing an original title VR mode In VR mode, you can edit various items, whereas in Video mode, you can edit the title names only. NOTES: • You can automatically add a chapter mark in recording. For more information, see page 27. -
Page 71: Combining Chapters
Editing the disc VR mode NOTE: Chapter marks that have been added automatically in the erasing of a scene procedure (page 73) cannot be erased. 2H30301B_En_64_71 When the scene you want to add a chapter mark, press ENTER. The playback is paused and the position of the added chapter mark appears green. -
Page 72: Changing An Original Title Name
Editing the disc VR mode NOTES: • The title name can be a maxi- mum of 64 characters in VR mode and a maximum of 30 characters in Video mode. Long names will be shortened in the title menu. • “RENAME TITLE” can only be used with DVD-R discs and video mode DVD-RW discs before they have been finalized. -
Page 73: Erasing A Scene (Edit Title)
Editing the disc VR mode NOTES: • If the scene is erased from the original title, the created playlist is erased. • Disc space will only be freed up if scenes lasting several minutes are deleted. • A chapter mark is automatically added at the location of the erased scene. -
Page 74: Erasing An Original Title
Editing the disc VR mode NOTE: If the original title is erased the created playlist is also erased. 2H30301B_En_72_77 Erasing an original title You can erase the original title. Erase the original title after checking its title. The erased title cannot be restored. -
Page 75: Changing A Disc Name
Editing the disc Changing a disc name VR mode Video mode DVD-R You can change a disc name from the title menu. NOTES: • The disc name can be a maxi- mum of 30 characters. Long names will be shortened in the title menu. -
Page 76: Using The Keyboard Screen
Editing the disc Using the keyboard screen This section explains the function of the keyboard screen and how to input characters. The disc name and the title name can be changed using the keyboard screen. Keyboard screen types The keyboard screen has three types of “Letters”, “Numbers”... - Page 77 Editing the disc Erasing a character You can erase the input character. Erasing method 1 Press to select “Back”. Press ENTER. The last input character will be erased. To erase the characters continuously, press ENTER. The input characters will be erased from the last to the top one by one.
-
Page 78: Dubbing
Dubbing Dubbing a tape onto a disc VR mode Video mode DVD-R You can record video or audio on a video tape onto a disc. NOTES: • Dubbing cannot be accomplished when - a copy protected tape is used. - a finalised disc is used. - disc protection is set. -
Page 79: Dubbing A Disc Onto A Tape
Dubbing Dubbing a disc onto a tape VR mode Video mode DVD-R You can record both video and audio from a disc to a video tape. When a disc with a copy guard is used, dubbing cannot be accomplished. NOTES: •... -
Page 80: Dubbing Using Other Equipment
Dubbing Dubbing using other equipment VR mode Video mode DVD-R You can connect another VCR or camcorder for dubbing. Typical connection: When using this unit as a recording device See next page for the diagrams of connection. NOTES: • When this unit is used as a playback device, any on screen displays that appear would also appear on the recording. - Page 81 Dubbing Playback unit connection. The playback unit can be a camcorder or a video recorder. See each operation manual for each playback operation. The copy protected video or DVD disc cannot be copied. See “EXTERNAL AUDIO INPUT” on page 26 for how to switch the external audio input. Dubbing with A/V-cable (or S-Video cable) (not supplied) To playback unit A/V-cable (not supplied)
-
Page 82: Glossary
Additional information Glossary A-B Repeat Playback Playback that repeats between two set points, A and B. angle Recorded onto some DVD discs are scenes which have been simultaneously shot from a number of different angles (the same scene is shot from the front, from the left side, from the right side, etc.). -
Page 83: Screen Sizes And Disc Formats
Additional information playlist User-created titles based on each original title. Progressive scan Technology that simultaneously displays odd- numbered scanning lines and even-numbered scanning lines from top to bottom. Also called “576p”, “p” meaning “progressive”. Regions (DVD only) (example region code marks) Regions associate discs and players with particular areas of the world. -
Page 84: Language Code List
Additional information Language code list Enter the appropriate code number for the initial settings “DVD MENU”, “AUDIO” and/or “SUBTITLE” (see page 20). Language Code Code Abkhazian 1530 1112 Afar 1531 1111 Afrikaans 1611 1116 Albanian 1625 2927 Amharic 1620 1123 1128 Arabic 1619... -
Page 85: Error/Warning Message List
Additional information Error/Warning message list ERROR/WARNING MESSAGE Power ON SYSTEM ERROR PLEASE WAIT SYSTEM ERROR PLEASE WAIT DISC CHECKING SYSTEM ERROR DISC MIGHT BE FAILED PRESS ENTER Playback NO DISC REGION CODE ERROR INCORRECT DISC - C104, C105, C106, C107 PROGRESSIVE OUTPUT. -
Page 86: Problems And Troubleshooting
Sometimes the trouble may lie in another component. Investigate the other components and electrical appliances being used. If the trouble cannot be rectified even after checking the points below, ask your nearest Pioneer authorized service center or your dealer to carry out repair work. NOTE: If the unit does not operate normally due to external effects such as static electricity, disconnect the power plug from the AC outlet and insert again to return to normal operating conditions. -
Page 87: Video Head Cleaning
Additional information SYMPTOMS TV recording does not work. Timer recording does not work. Noise bars on screen. OTHER No 4:3 (16:9) picture. No on-screen display. Nothing appears in the display window. No surround sound. The unit or remote operation key is not functioning. -
Page 88: Other (Additional Information)
The DVD recorder's lens should not become dirty in normal use, but if for some reason it should malfunc- tion due to dust or dirt, consult your nearest Pioneer- authorized service center. Although lens cleaners for CD players are commercially available, we do not rec- ommend using them since some may damage the lens. -
Page 89: Specifications
Additional information Specifications GENERAL Power supply: AC 230V 50Hz Power consumption: Operation: 31W Standby: 5.5W (if display window is off.) Weight: 5.0 kg Dimensions: Width : 430 mm Height : 90 mm Depth : 320 mm Operating temperature: 5°C to 35°C Operating humidity: Less than 80% RH Input Level:... - Page 90 Additional information 2H30301B_En_82_Back 8/4/05, 19:27...
- Page 91 Additional information 2H30301B_En_82_Back 8/4/05, 19:27...
- Page 92 253 Alexandra Road, #04-01, Singapore 159936 TEL: 656-472-1111 PIONEER ELECTRONICS AUSTRALIA PTY. LTD. 178-184 Boundary Road, Braeside, Victoria 3195, Australia, TEL: (03) 9586-6300 PIONEER ELECTRONICS DE MEXICO S.A. DE C.V. Blvd.Manuel Avila Camacho 138 10 piso Col.Lomas de Chapultepec, Mexico,D.F. 11000 TEL: 55-9178-4270 K002E...