AEG 110 User Manual
Hide thumbs
Also See for 110:
- Operating instructions manual (32 pages) ,
- Operating instructions manual (32 pages) ,
- User manual (2 pages)

Related Manuals for AEG 110


Summary of Contents for AEG 110
- Page 1 MM20151 DE INSTALLATIONSHANDBUCH SEWING MACHINE USER MANUAL SEWING MACHINE AEG 110...
-
Page 2: Important Safety Instructions
Important Safety Instructions Important-Please read these instruction fully before starting assembly When using an electrical appliance, basic safety precautions should always be followed, including the following. Read all instructions before using this sewing machine DANGER-- To reduce the risk of electric shock: 1. -
Page 3: Table Of Contents
Contents Know Your Machine Name of parts..........................2 Preparing To Sew Connecting machine to power supply ..................3 Sewing table ..........................4 Presser foot arm ........................4 Changing the presser foot ......................5 Changing the needle........................6 Thread and needle chart......................7 Stitch selector and indicator......................7 Bobbin winding........................8-9 Threading the upper thread.......................10 Threading the bobbin case......................11 Inserting the bobbin case ......................12... -
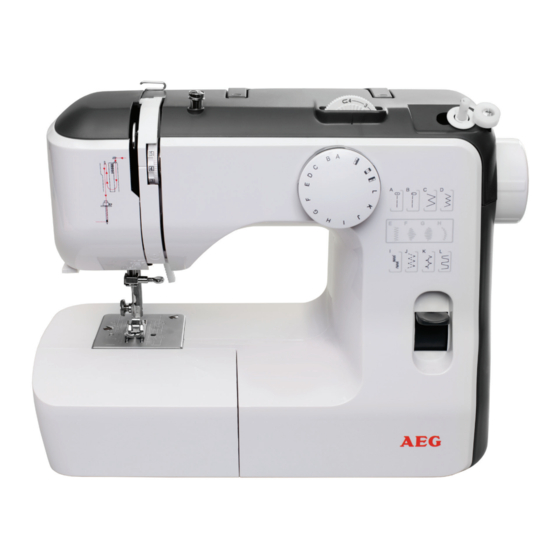
Page 4: Know Your Machine
Know Your Machine Name of parts Reverse sewing lever Power switch Machine socket Handwheel Bobbin winder stopper Bobbin winder spindle Spool pins Carry handle Stitch length adjustor Thread guide Bobbin winding thread guide Thread take-up lever Thread tension dial Face plate Sewing table &... -
Page 5: Preparing To Sew
PreparingToSew Step 1 Connecting the machine to power supply - Please read the important safety instructions before use. - Before connecting to the mains make sure that the rated voltage show on the rear panel matches your mains voltage supply. - Make sure your local voltage is 230V/240V, 50Hz. -
Page 6: Sewing Table
PreparingToSew Step 2 Sewing table The Sewing Table provides added sewing surface and can be easily removed for free arm sewing. Free-arm sewing is used when sewing tubular and hard-to-reach areas on a garment such as the hem of pant legs or sleeves. -
Page 7: Changing The Presser Foot
PreparingToSew Step 4 Changing the presser foot Important: Ensure the Power Switch is turned off when changing the presser foot. Needle Presser foot Groove a:To remove Turn the Hand Wheel toward you to raise the Needle to its highest position. Raise the Presser Foot to its highest position using the Presser... -
Page 8: Changing The Needle
PreparingToSew Step 5 Changing the needle Important: Ensure the power switch is turned off when changing the needle. Needle clamp screw Needle clamp Flat side a:Rasie the Needle to highest position by turning the Hand Wheel counterclockwise, toward you, and lowering the presser foot. -
Page 9: Thread And Needle Chart
PreparingToSew Step 6 Needle Thread and needle chart Thread Fabric Size Caution: Never use a bent or dull 80 to 100 fine silk thread silk, voile, lawn, 9(65) needle. 80 to 100 fine cotton thread thin organdie, georgette, 80 to 100 fine polyster thread fabric warp fabric 11(75) -
Page 10: Bobbin Winding
PreparingToSew Step 8 Bobbin winding a: Pull out the Hand Wheel click. Note: When pull out the Hand Wheel pull it as far as it goes. The “Click” you heard is very important. b: Spool Pin is used for holding the spool of thread in order to feed the thread to the machine. - Page 11 PreparingToSew Step 8 e: Place the Bobbin on the Bobbin Winder Spindle push it the right to the bobbin winding position. f: Turn on the power switch . Press the Foot Controller gently, The bobbin will stop winding when it is full. When finished winding the bobbin, push the bobbin winder spindle back in so that you can...
-
Page 12: Threading The Upper Thread
PreparingToSew Step 9 Threading the upper thread We recommend you remove from the mains power before completing all these procedures. Tension area Check spring holder Thread guide Up position a: Raise the take-up lever to its highest position by turning the Hand Wheel towards you. -
Page 13: Threading The Bobbin Case
PreparingToSew Step 10 Threading the bobbin case Shuttle cover Bobbin case Latch Tension spring Ensure the Power Switch turned off when removing or inserting the bobbin case. a: Remove the sewing table from the machine by pulling it to the left. Open the Shuttle Cove by pulling down the tab on the left of the cover. -
Page 14: Inserting The Bobbin Case
PreparingToSew Step 11 Inserting the bobbin case Shuttle cover Bobbin case Latch a: Raise the needle by turning the hand wheel towards you. Open the Shuttle Cover Hold the Bobbin Case by the hinged Latch Insert the bobbin case fully into the shuttle race and release the latch. -
Page 15: Drawing Up The Bobbin Thread
PreparingToSew Step 12 Drawing up the bobbin thread Needle thread Bobbin thread Note: -Make sure you have correctly completed step 9 before staring this step. -Must rotate the hand wheel anticlockwise, toward you. Otherwise you can not draw the bobbin thread. a: Raise the presser foot. -
Page 16: Thread Tension
PreparingToSew Step 13 Thread tension Note: The bobbin thread tension has been adjusted at the factory and readjustment is not usually required. Lower thread tension: a: To set the bobbin thread tension, remove the bobbin case with the bobbin from the machine and hold the bobbin case suspended by the thread. -
Page 17: Seam Guide Line
PreparingToSew Step 14 Seam guide line The number on the Needle Plate indicate the distance between the center needle position and seam guide line. The number in the front of the needle plate are in millimeters and the ones I the back are in inches. -
Page 18: Basic Sewing
Basic Sewing Step 1 calibration tails Selecting stitch sewing Note: The dial can not repeat rotating 360°. Can not continue to rotate the stitch selector anticlockwise, but reverse rotation when the dial is at “ ” . Can not continue to rotate the stitch selector clockwise, but reverse rotation when the dial is at “L”. -
Page 19: Changing Sewing Directions
Basic Sewing Step 3 calibration tails Changing sewing directions Note: If the needle is not in the fabric, you can rotate the Hand Wheel anticlockwise (toward you) to drop the needle into the fabric. But incorrect the hand wheel rotating direction will cause upper and bobbin thread blockage under the needle plate. -
Page 20: Removing The Work
Basic Sewing Step 5 calibration tails Removing the wok Note: Rotate the Hand Wheel anticlockwise (toward you) to bring the thread take up lever to its highest position. But incorrect the hand wheel rotating direction will cause upper and bobbin thread blockage under the needle plate. -
Page 21: Utility Sewing
Utility Sewing Note: calibration tails - Ensure that the needle higher than needle plate and fabric before rotate the stitch selector. Otherwise will bent the needle. -Rotate the Hand Wheel anticlockwise (toward you) to bring the thread take up lever to highest position. But incorrect the Hand Wheel rotating direction will cause upper and bobbin thread blockage upper... -
Page 22: Blind Seam
Utility Sewing Note: calibration tails - Ensure that the needle higher than needle plate and fabric before rotate the stitch selector. Otherwise will bent the needle. -Rotate the Hand Wheel anticlockwise (toward you) to bring the thread take up lever to highest position. But incorrect the Hand Wheel rotating direction will cause upper and bobbin thread blockage upper... -
Page 23: Sewing Buttonholes
Utility Sewing Note: - Ensure that the needle higher than needle plate and fabric before rotate the stitch selector. Otherwise will bent the needle. -Rotate the Hand Wheel anticlockwise (toward you) to bring the thread take up lever to highest position. But incorrect the Hand Wheel rotating direction will cause upper and bobbin thread blockage upper... - Page 24 Utility Sewing Note: - Ensure that the needle higher than needle plate and fabric before rotate the stitch selector. Otherwise will bent the needle. Step 1 -Rotate the Hand Wheel anticlockwise (toward you) to bring the thread take up lever to highest position. But incorrect the Hand Wheel rotating direction will cause upper and bobbin thread blockage upper...
- Page 25 Utility Sewing Note: - Ensure that the needle higher than needle plate and fabric before rotate the stitch selector. Otherwise will bent the needle. -Rotate the Hand Wheel anticlockwise (toward you) to bring the thread take up lever to highest position. But incorrect the Hand Wheel rotating direction will cause upper and bobbin thread blockage upper...
-
Page 26: Care Of Your Machine
Care Of Your Machine Step 1 Changing light bulb (Model 585 only) Note: Disconnect from supply mains and switch off firstly. Touch bulb after its cooling down to avoid burning of hand. Bulb Screw To dismantle the bulb: Loosen the Screw loosen tighten Remove Face plate... -
Page 27: To Dismantle The Shuttle Race
Care Of Your Machine Step 2 Cleaning shuttle race Turn off the power switch and unplug the machine before cleaning. Do not dismantle the machine other than as explained in this section. To dismantle the hook race Shuttle race cover holder Shuttle race cover Shuttle Shuttle race... -
Page 28: Cleaning The Feed Dogs
Care Of Your Machine Step 2 To assemble the shuttle race h: Hold the Shuttle by the center pin and fit it carefully back into the Shuttle Race , forming a perfect circle with the shuttle driver. i: Attach the Shuttle Race Cover making sure that the bottom pin fits into the notch. -
Page 29: Oiling The Machine
Care Of Your Machine Step 4 Oiling the machine Turn off the power switch and unplug the machine before cleaning. Do not dismantle the machine other than as explained in this section. Apply a few drops of fine quality sewing machine Oil to the points indicated by the arrows in illustrations shown. -
Page 30: Troubleshooting
Troubleshooting Trouble Causes Soulution 1. Improper top threading. Top thread Check or thread the 2. Excessively tight top tension. broken 3. Blunt or bend needle. thread again; 4. Improper fixing of needle. check or change the 5. At start of sewing, top thread and bottom thread are not needle. -
Page 31: Specification
Specifications Specifications Model: Sewing Speed: 650±50 rpm Needle Size: 14# (90#) Power: 70W(motor) + 15W (lamp) 70W(motor) + 1W (led lamp) Voltage: AC220~240V; 50Hz Press Foot Height: 6 ~ 6.5 mm Stitch Width: 4 ~ 4.5 mm Stitch Length: 3.6 mm Weight: G.W.