Table of Contents
Quick Links
Table of Contents

Related Manuals for Dell DL1000


Summary of Contents for Dell DL1000
- Page 1 Dell DL1000 Appliance Deployment Guide...
- Page 2 © 2016 Dell Inc. All rights reserved. This product is protected by U.S. and international copyright and intellectual property laws. Dell and the Dell logo are trademarks of Dell Inc. in the United States and/or other jurisdictions. All other marks and names mentioned herein may be trademarks of their respective companies.
-
Page 3: Table Of Contents
Network requirements ..................12 Recommended network infrastructure ........................13 Setting up the hardware ..................13 Installing the DL1000 appliance in a rack ....................13 Using the system without a rack ........................14 Cabling the appliance ..............14 Connecting the Cable Management Arm (Optional) ....................14... - Page 4 ........................26 Configuration overview ................26 Resetting the operating system to default settings ..........26 Configuring browsers to remotely access the DL1000 Core Console ..........27 Configuring browser settings in Internet Explorer and Chrome ..................27 Configuring browser settings in Firefox ....................
-
Page 5: Introducing Your Dell Dl1000
Introducing your Dell DL1000 Your Dell DL1000 combines backup and replication into a unified data protection product. It provides reliable application data recovery from your backups to protect virtual machines and physical machines. Your appliance is capable of handling up to terabytes of data with built-in global deduplication, compression, encryption, and replication to specific private or public cloud infrastructure. -
Page 6: True Global Deduplication
Dell DL1000 data protection features Dell DL1000 Core The Core is the central component of the DL1000 deployment architecture. The Core stores and manages machine backups and provides services for backup, recovery, retention, replication, archival, and management. The Core is a self-contained network, addressable computer that runs a 64-bit version of Microsoft Windows Server 2012 R2 Foundation and Standard operating systems. -
Page 7: Dell Dl1000 Smart Agent
Snapshot process Your DL1000 protection process begins when a base image is transferred from a protected machine to the Core. In this phase, full copy of the machine is transported across the network under normal operation, followed by incremental snapshots forever. The DL1000 Agent for Windows uses Microsoft Volume Shadow copy Service (VSS) to freeze and quiesce application data to disk to capture a file- system-consistent and an application-consistent backup. -
Page 8: Recovery
Rapid Recovery service provider. In the event of a disaster, the MSPs can instantly spin-up virtual machines for the customer. The DL1000 is not multi-tenant. The MSPs can use the DL1000 at multiple sites and create a multi-tenant environment at their end. - Page 9 DL1000 Core, which consists of the central repository. The Dell software License Portal manages license subscriptions, groups and users for the agents and cores in your environment. The License Portal allows users to log in, activate accounts, download software, and deploy agents and cores per your license for your environment.
-
Page 10: Other Information You May Need
Other information you may need NOTE: For all Dell OpenManage documents, go to Dell.com/openmanagemanuals. NOTE: Always check for updates on Dell.com/support/home and read the updates first because they often supersede information in other documents. NOTE: For any documentation related to Dell OpenManage Server Administrator, see Dell.com/ openmanage/manuals. -
Page 11: Installing Your Dell Dl1000
Dell AppAssure software Installation overview The DL1000 installation involves installing the Rapid Recovery Core and Rapid Recovery Agent services on the systems that have to be protected. If additional cores are set up then Rapid Recovery Central Management Console Services must be installed. -
Page 12: Installation Prerequisites
NIC teaming on any protected machines, when possible, may also increase overall performance. If the core uses iSCSI or Network Attached Storage (NAS), Dell recommends using separate NIC cards for storage and network traffic, respectively. Use network cables with the appropriate rating to obtain the expected bandwidth. Dell recommends testing your network performance regularly and adjusting your hardware accordingly. -
Page 13: Setting Up The Hardware
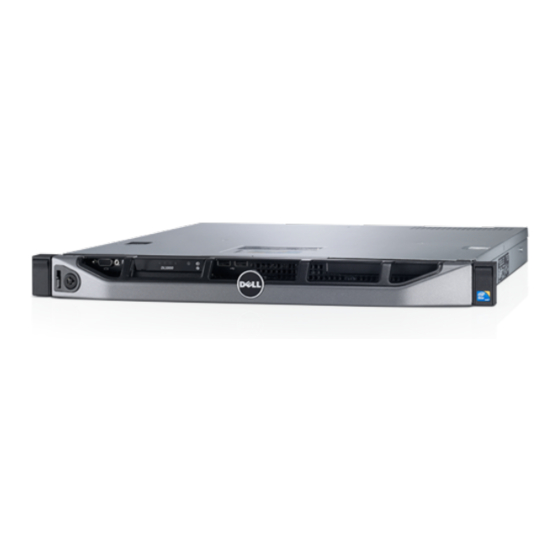
Setting up the hardware The appliance ships with a single DL1000 system. Before setting up the appliance hardware, see the Getting Started Guide for your system that shipped with the appliance. Unpack and set up the DL1000 Appliance hardware. NOTE: The software is pre-installed on the appliance. Any media included with the system must be used only in the event of a system recovery. -
Page 14: Cabling The Appliance
Cabling the appliance Locate the Dell DL1000 Appliance Getting Started Guide that is shipped with the appliance and follow the instructions to attach the keyboard, mouse, monitor, power, and network cables to the DL1000 system. Connecting the Cable Management Arm (Optional) If the appliance includes a Cable Management Arm (CMA), locate the CMA Installation Instructions that shipped with the CMA kit and follow the instructions to install the CMA. -
Page 15: Appassure Appliance Configuration Wizard
AppAssure Appliance Configuration Wizard CAUTION: Make sure you complete all the steps of AppAssure Appliance Configuration Wizard before performing any other task or change any settings on the Appliance. Do not make any changes through the Control Panel, use Microsoft Windows Update, update AppAssure software or install licenses, until the wizard is complete. - Page 16 If you do not want to connect your appliance to a domain, select No in Do you want this appliance to join a domain? NOTE: If your DL1000 is installed with Microsoft Windows Server 2012 Foundation edition, the option to join a domain will be disabled.
-
Page 17: Dl Appliance Configuration Wizard
The Provisioning page displays available storage capacity for provisioning. This capacity is used to create a new AppAssure Repository. NOTE: For the DL1000 3 TB (2 VM) configuration system, you can allocate disk space to the Standby VMs. The disk provisioning for your system is completed and a new repository is created. - Page 18 Exports at the later stages. For more information on performing machine protection, replication, and virtual machine Exports see Rapid Recovery on DL Appliances User’s Guide at www.dell.com/support/home. Configuring the network interface To configure the available network interfaces: On the DL Appliance Configuration Wizard Welcome screen, click Next.
- Page 19 The Registration page is displayed. Registration and Host settings Register your appliance with the appropriate license key to avail the features accordingly. It is recommended that you change the host name before starting backups. By default, the host name is the system name that the operating system assigns.
- Page 20 • To enable system SNMP alerts, select Enable system SNMP alerts. In SNMP Community, enter one or more SNMP community names. Use commas to separate multiple community names. In SNMP Trap destinations, enter trap destinations and click Add. • To enable software SNMP alerts, select Enable software SNMP alerts option. In SNMP Community, enter one or more SNMP community names.
- Page 21 Option Description Monthly Backs your configuration settings every month beginning every Sunday at 12:01 AM Click Next. The Storage Provisioning page is displayed. Storage provisioning Your appliance allows you to provision its internal storage to create Virtual disks (VDs) to host repositories and Virtual Standby, archives or other purposes.
- Page 22 Table 2. Schedule options for default retention policy Text Box Description Keep all recovery Specifies the retention period for the recovery points. points for n [retention Enter a number to represent the retention period and then select the time period. The default is 3 days. time period] You can choose from: Days, Weeks, Months, or Years …and then keep one...
-
Page 23: Rapid Appliance Self Recovery
Remove the RASR USB key created for each DL Appliance, label, and store for future use. Executing RASR NOTE: Dell recommends you to create a RASR USB key after you have set up the appliance. To create RASR USB key, see Creating the RASR USB Key section. -
Page 24: Recovery And Update Utility
If you do not want to upgrade the Core software, do not run the RUU. To install the most recent version of the RUU: Go to the License Portal under the Downloads section or go to support.dell.com and download the RUU installer. - Page 25 To start the RUU process, run launchRUU.exe file in the RUU package. NOTE: Your system may reboot during the RUU update process.
-
Page 26: Configuring Your Dell Dl1000
NOTE: The appliance is configured with a 30–day temporary Rapid Recovery software license. To obtain a permanent license key, log on to the Dell Data Protection | Rapid Recovery License Portal at www.dell.com/DLActivation. For details on changing a license key, see the topic 'Updating or changing a lincense' in the Rapid Recovery 6.0 on DL Appliances User’s Guide at dell.com/support/... -
Page 27: Configuring Browser Settings In Internet Explorer And Chrome
For remote machines, enter the host name or IP address separated by a comma of the appliance system hosting the Core; for example, IP Address, host name. Restart Firefox. Accessing the DL1000 Core Console Ensure that you update trusted sites as discussed in the topic Updating Trusted Sites In Internet... -
Page 28: Updating Trusted Sites In Internet Explorer
The Core can encrypt agent snapshot data within the repository. Instead of encrypting the entire repository, DL1000 allows you to specify an encryption key during the protection of an agent in a repository which allows the key to be reused for different agents. -
Page 29: Adjusting The Number Of Streams
NOTE: You must also configure notification group settings, including enabling the Notify by email option, before email alert messages are sent. For more information on specifying events to receive email alerts, see Configuring Notification Groups For System Events in the Dell DL1000 Appliance User's Guide at Dell.com/support/home. - Page 30 To change the number of concurrent streams: Select the Configuration tab and then click Settings. Select change in Transfer Queue. Change Maximum Concurrent Transfers to a number between 10 and 15 for optimal performance, but if the performance seems unsatisfactory, try tuning it manually.
-
Page 31: Preparing To Protect Your Servers
This option is available for machines that do not already have the Agent software installed. For more information on deploying the Agent software while protecting a machine, see the Rapid Recovery on DL Appliance User’s Guide at Dell.com/support/home. Deploying the agent software when protecting an agent You can download and deploy agents during the process of adding an agent for protection. -
Page 32: Installing The Rapid Recovery Agent Software On Windows Machines
Deploy the Rapid Recovery Agent installer file to the machine you want to protect using one of the methods described in the topic “Installing the Rapid Recovery Agent software” in the Dell Data Protection | Rapid Recovery 6.0 Installation and Upgrade Guide. Then launch the installer program as described below to install or upgrade the software on each Windows machine you want to protect in the Rapid Recovery Core. - Page 33 • Select Allow Agent to automatically send diagnostic and usage information to Dell Inc. to send diagnostic and usage information to Dell. If you do not want to send this information, clear this option. 11. Once you are satisfied with the installation options, click Install.
-
Page 34: Deploying The Rapid Recovery Agent Software To One Or More Machines
• Deploying to machines on a VMware vCenter/ESX(i) virtual host NOTE: Dell recommends limiting the number of machines to which you deploy simultaneously to 50 or fewer, to preclude experiencing resource constraints that may cause the deploy operation to fail. - Page 35 Deploying to machines on an Active Directory domain Use this procedure to simultaneously deploy the Rapid Recovery Agent software to one or more machines on an Active Directory domain. Before you begin this procedure, have the domain information and logon credentials for the Active Directory server on hand.
- Page 36 NOTE: All virtual machines must have VMware Tools installed; otherwise, Rapid Recovery cannot detect the host name of the virtual machine to which to deploy. In lieu of the host name, Rapid Recovery uses the virtual machine name, which may cause issues if the host name is different from the virtual machine name.
-
Page 37: About Installing The Agent Software On Linux Machines
When installing the Agent software on Linux machines that you want to protect, use the following guidance. After installation is complete, configure the Agent as described in the topic “Configuring the Rapid Recovery Agent on a Linux machine” in the Dell Data Protection | Rapid Recovery 6.0 Installation and Upgrade Guide. - Page 38 The uninstall instructions differ, depending on the Linux distribution you are using. For more information on uninstalling AppAssure Agent from a Linux machine, see the topic “Uninstalling the AppAssure Agent software from a Linux machine” in the Dell Data Protection | Rapid Recovery 6.0 Installation and Upgrade Guide.
-
Page 39: Location Of Linux Agent Files
Installing the Agent software on offline Linux machines Before you begin installation of Agent software, see the topics: Downloading the Linux distribution, About security, Location of Linux Agent files, Agent dependencies, Linux scripting information in the Dell Data Protection | Rapid Recovery 6.0 Installation and Upgrade Guide. -
Page 40: Installing The Rapid Recovery Agent Software On Debian Or Ubuntu
For more information about the license portal, see the Dell Data Protection | Rapid Recovery License Portal User Guide. To establish a persistent connection between your Linux machine and the remote Dell repository in which Rapid Recovery software and components are stored, type the following command: dpkg -i <.deb installation file you downloaded>... -
Page 41: Installing The Rapid Recovery Agent Software On Suse Linux Enterprise Server
For more information about the license portal, see the Dell Data Protection | Rapid Recovery License Portal User Guide. To establish a persistent connection between your Linux machine and the remote Dell repository in which Rapid Recovery software and components are stored, type the following command: rpm -ivh <.rpm installation file you downloaded>... -
Page 42: Installing The Agent Software On Offline Linux Machines
Linux machine. If AppAssure Agent is installed on the offline Linux machine, you must first uninstall it before installing Rapid Recovery Agent. For more information, see “Uninstalling the AppAssure Agent software from a Linux machine” section in Dell Data Protection | Rapid Recovery Installation and Upgrade Guide. -
Page 43: Installing The Agent Software On Windows Server Core Edition Machines
/silent to the installer file name on the command line. For example, Agent-X64-6.X.X.xxxxx.exe /silent. Download the Rapid Recovery Agent installer file from the Dell Data Protection | Rapid Recovery License Portal or from the Rapid Recovery Core. - Page 44 The configuration utility offers several configuration options, and provides hints in the numbered steps of the instructions when it detects your specific configuration information. Complete the steps below to configure the Rapid Recovery Agent software on any Linux machine. Some configuration options differ based on the Linux distribution you are installing.
-
Page 45: Protecting A Machine
To enter all kernel modules, enter all and press Enter. After configuring the newly installed Agent software, restart the machine. Restarting ensures that the proper kernel driver version is used to protect your machine. After completing this process, the local repository has been configured on this Linux machine. The Agent software is installed and the kernel module is loaded. - Page 46 Table 8. Machine connection settings Text Box Description Host The host name or IP address of the machine that you want to protect. Port The port number on which the Rapid Recovery Core communicates with the Agent on the machine. The default port number is 8006.
- Page 47 CAUTION: Rapid Recovery uses AES 256-bit encryption in the Cipher Block Chaining (CBC) mode with 256-bit keys. While using encryption is optional, Dell highly recommends that you establish an encryption key, and that you protect the passphrase you define. Store the passphrase in a secure location as it is critical for data recovery.
-
Page 48: Checking Network Connectivity
If the client does not reply to the ping, verify the server’s connectivity and network settings. • If the client replies, check that the firewall settings allow the DL1000 components to run. Checking the firewall settings If the client is connected properly to the network, but cannot be seen by the Core console, check the firewall to ensure that necessary inbound and outbound communications are allowed. -
Page 49: Checking Dns Resolution
In the Broadcom Advanced Control Suite, select Teams → Go to Team View. In the Hosts list on the left side, right-click on the host name of the DL1000 appliance and select Create Team. The Broadcom Teaming Wizard window is displayed. - Page 50 Click Next. Enter a name for the team and click Next. Select the Team Type and click Next. Select an adapter you want to be part of the team, and click Add. Repeat these steps for all other adapters that are a part of the team. When all adapters are selected for the team, click Next.
-
Page 51: Getting Help
To contact Dell for sales, technical support, or customer-service issues, go to software.dell.com/support. Documentation feedback Click the Feedback link in any of the Dell documentation pages, fill out the form, and click Submit to send your feedback.