Table of Contents
Quick Links
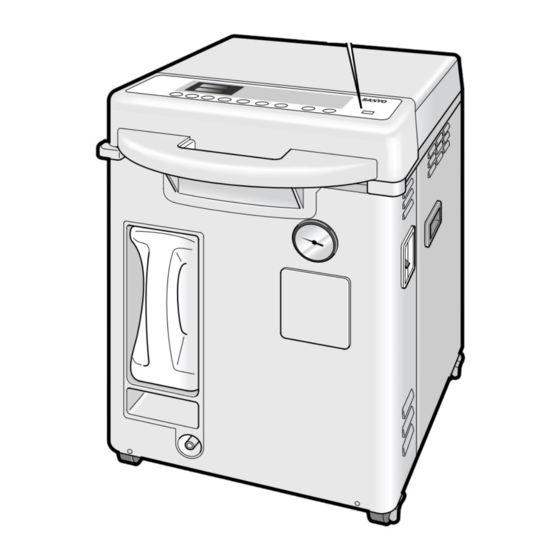
INSTRUCTION MANUAL
High-pressure Steam Sterilizer
Labo Autoclave
MLS - 3751
Model
Nos.
MLS - 3781
Thank you for purchasing a Sanyo Autoclave.
•
Please read this instruction manual carefully
before using the product.
After reading this manual, store it in a readily
accessible place along with the warranty card.
•
Please pay particular attention to the
Safety Precautions
section on page 1 to 6.
Model No. indication
Contents
Precautions in Use . . . . . . . . . . . . . . . . . . . 7
Before Using the Product . . . . . . . . . . . . . . 8
Names and Functions of Part . . . . . . . 9 ~ 10
Explanation of Label . . . . . . . . . . . . . . . . . 11
Sterilization Objects . . . . . . . . . . . . . 12 ~ 13
•
Basic operating procedure . . . . . . 14 ~ 22
•
For continuous use . . . . . . . . . . . . . . . 22
•
To stop the operation . . . . . . . . . . . . . . 23
•
For timer operation . . . . . . . . . . . . . . . . 23
On Power Failure . . . . . . . . . . . . . . . . . . . . 24
On Voice Guide . . . . . . . . . . . . . . . . . . . . . 25
Maintenance . . . . . . . . . . . . . . . . . . . . . . . . 26
Troubleshooting . . . . . . . . . . . . . . . . 27 ~ 28
Specifications . . . . . . . . . . . . . . . . . . . . . . 29
Page
. . . . . . . . . . . . . . . 1 ~ 6
Chapters
Table of Contents

Related Manuals for Sanyo MLS-3751


Summary of Contents for Sanyo MLS-3751
-
Page 1: Table Of Contents
Nos. MLS - 3781 Contents Page Thank you for purchasing a Sanyo Autoclave. • Please read this instruction manual carefully Safety Precautions ....1 ~ 6 before using the product. -
Page 2: Safety Precautions
These precautions must be Safety Precautions observed without fail. • Read these Safety Precautions carefully before use so as to use the product properly. • Be sure to observe the precautions without fail as they are intended to ensure the safe use of the product, protect you and other people against hazards, and prevent loss of and damage to property. - Page 3 WARNING Ground the product without fail. Do not extend the power cord. Ground without fail! Make sure that the product has been properly grounded. Be sure to connect one end of grounding line to the ground and the other end to Do not connect the power cord or plug to an the grounding terminal.
- Page 4 Safety Precautions WARNING Do not sterilize objects in a steam Do not seal the object container tightly. impermeable container or bag. Use a porous cap or loosen the cover sufficiently. Failure to observe this warning may result in accident or incomplete sterilization. Do not place objects on the temperature sensor in the chamber.
-
Page 5
Yellow/Green : Grounding wire Connect the power cord to a dedicated outlet as shown below.
: Single phase, 100V AC, 20A or higher Be sure to wear thermally insulated leather gloves. : Single phase, 200V AC, 20A or higher Note that it takes time until liquid is cooled down. - Page 6 Safety Precautions CAUTION Be careful about the position of the Do not allow children to use or play exhaust hose insertion holes. with the product. Hose in tank Failure to observe this caution may result in burns, Be sure to insert the hose in the tank into the holes electric shock or injury.
- Page 7 CAUTION Do not wet the product. Drain off heating water everyday after use of the product. Insert the attached drain hose in the drain water port and drain water at least 2 hours after operation. If water is drained out in haste, hot water may splatter, resulting in burns or damage to the floor.Repeated use Failure to observe this caution may cause short-circuits of the same heating water may corrode the chamber or...
-
Page 8: Precautions In Use
Precautions in Use Use purified or city water as heating water. Use of well water, saline water, etc. may cause trouble. Purified City water water 翻訳無し Do not use the product for anything other than the intended purposes of sterilization, heat-retention and melting. -
Page 9: Before Using The Product
For 220V units : The 220V versions of the MLS-3751 / 3781 Autoclave are shipped without a plug on the power cord. Use the power-plug when the products is set. The protective grounding conductor of power supply cord must be connected to the contacting member of an attachment plug. -
Page 10: Names And Functions Of Part
Names and Functions of Parts Rear side Safety valve pressure relief port Steam is discharged through this port if pressure in the chamber rises abnormally. Exhaust tank on the rear side Control panel Tank mounting bracket Movable handle Used for unlocking the cover. The cover can be unlocked by pressing this handle down and Cover... - Page 11 Control panel Digital display II Process monitor lamp Cover lock lamp Indicates the set time, remaining Indicates the status of the current Lights up when operation starts time, sterilization cycle, exhaust process with a flickering bar. with the cover locked. rate, cautionary messages, error messages, date and voice guide Object temperature button...
-
Page 12: Explanation Of Label
Explanation of Labels Rating label This label indicates the ratings of the product. Warning labels • Label 1; This label warns of burns if the operator touches the cover, its periphery or sterilized objects immediately after the end of sterilization. •... -
Page 13: Sterilization Objects
121°C Sterilization Setting Time = Sterilization Time + Time Lag 100°C Liquid Volume Time Lag Temperature inside the chamber MLS-3751 MLS-3781 Agar media in 500ml flask x 1~21, or Culture medium temperature Agar media in 1000ml flask x 1~12 8min. - Page 14 Sterilization Objects Sterilization of equipment, etc. WARNING When sterilizing only containers such as beakers, flasks and test tubes, place them with their openings facing downward or lay them on their sides. If the containers are placed with their openings facing upward, it is hard for air to sufficiently escape from the container and for steam to sufficiently penetrate inside, thus resulting in incomplete sterilization.
-
Page 15: How To Use
How to Use Basic operating procedure 1. Liquid sterilization 2. Sterilization/Heat- 3. Melting/Heat- 4. Equipment sterilization Reference cycle retention cycle retention cycle cycle page 1. Install the exhaust tank. 2. Set the power switch to ON. 3. Open the cover. 4. -
Page 16: Install The Exhaust Tank
How to Use 1. Install the exhaust tank. 1) Take out the exhaust tank from the product and remove the packings. Advisory note Do not pull out the exhaust tank by force from the product with the exhaust hose being connected. Otherwise, trouble may be caused. -
Page 17: Set The Power Switch To On
2. Set the power switch to ON • The digital display of the control panel lights up. (The boiling point setting temperature appears on the digital display I and - - - appears on the digital display II for the first 2 seconds.) The figure shown above is for the case when the boiling point set temperature is 100°C. -
Page 18: Pour The Heating Water
How to Use 4. Pour the heating water. Drain valve • Make sure that the drain valve is closed. • Set the heater cover in the chamber. Drain outlet • Pour the water until the tip of the water level bracket of the heater cover is immersed in the water. -
Page 19: Press The Cycle/Program Selector Button
7. Press the cycle/program selector button • 4 cycles of sterilization can be selected according to the purpose of use. 3 settings can be memorized for each cycle according to the condition of use. The settings can be changed by button. -
Page 20: Change The Settings
How to Use 8. Change the settings • It is possible to change the settings (sterilization temperature, sterilization time, melting temperature, melting time, heat-retention temperature, exhaust temperature and exhaust rate) according to need. The settings that have been changed are saved in memory even when the power switch is turned OFF. -
Page 21: Press The Start Button
9. Press the button. In the case when the operation is started after selection of liquid sterilization cycle, sterilization/heat-retention cycle or equipment sterilization cycle • When the sterilization setting time is longer than • When the sterilization setting time is shorter the heat-retention time shown in the table below, than the heat-retention time shown in the table below,... -
Page 22: Operation Is Completed
How to Use To stop operation To change the settings during operation See page 22 The settings of sterilization time, melting time, heat- retention temperature, exhaust temperature, exhaust rate, exhaust fan operation start/stop can be changed. To check the settings during operation However, the changes will not be saved in memory. -
Page 23: For Continuous Use
12.Take out the sterilization objects. • Take out the sterilization objects when steam has been purged completely from the chamber. CAUTION When taking out the sterilization objects, wear heat-resistant leather gloves for prevention of burn. When taking out the sterilization objects (objects to be melted) during heat-retention. -
Page 24: To Stop The Operation
How to Use To stop the operation Beep 1) Press the button. •The product is in standby status. 2) Check the following points before opening the cover. • Pressure is lowered to 0MPa. • COVER LOCK lamp goes out. When the COVER LOCK lamp is lit, the temperature or pressure inside the chamber rises to make it impossible to pull the movable handle toward you.sterilization objects, wear heat-resistant leather gloves for prevention of scald. -
Page 25: On Power Failure
3) Similarly, set the hour and minute in turn. 4) Press the button. (Timer operation starts.) The sterilization temperature appears on the digital display I and the date and time appear alternately on the digital display II. To cancel the timer operation, press the button. -
Page 26: On Voice Guide
On Voice Guide The voice guide of the product is nothing but an auxiliary function. For safe use this function, please read the precautions and instructions for use in this manual. The voice guide of this product can be set to either Standard Mode Warning Mode . -
Page 27: Maintenance
Maintenance CAUTION • Proceed with maintenance work after the product has been sufficiently cooled down. • Be sure to set the power switch to OFF before starting maintenance work. Do not use thinner, benzene, etc. that may give damage to the product. -
Page 28: Troubleshooting
Troubleshooting If any trouble arises during use, check out the following points and take the suggested remedy. Before asking for servicing Trouble Checking Point Remedy page • • Is the power supply of the dedicated Turn ON the power supply. Power is not connection outlet turned ON? supplied. - Page 29 If any cautionary message or error sign appears and flickers on the digital display. • If any cautionary message appears and flickers during use, check out the following points and take the suggested remedy. Cautionary Meaning Remedy Message page Press down the handle by Force to close the Cover is not closed completely.
-
Page 30: Specifications
Specifications Labo Autoclave (High-pressure Steam Sterilizer) Product Designation Model Designation MLS-3750(N) MLS-3780(N) 120V unit: 120VAC ( 50/60Hz ), 16.7A 220V unit: 220VAC ( 50/60Hz ), 18.2A 220V unit: 220VAC ( 50/60Hz ), 9.1A 230V unit: 230VAC ( 50/60Hz ), 17.4A Power supply 230V unit: 230VAC ( 50/60Hz ), 8.7A Power Consumption... - Page 31 Daily Inspection Check the cover packing for any crack or flaw. If any crack or flaw is found, immediately stop use of the product and ask your dealer for replacement. WARNING Check the cover packing Sterilization of animal oil and fat (e.g.,wastes generated after BSE inspection) causes premature wear, crack or breakage of the cover packings.