Panasonic WJ-SX650 Operating Instructions Manual
Wj-sx650 series matrix switcher operating instructions wj-sx650
Hide thumbs
Also See for WJ-SX650:
- Product catalog (125 pages) ,
- Operating instructions manual (100 pages)
Table of Contents
Quick Links
See also:
Operating Instructions Manual
Table of Contents

Related Manuals for Panasonic WJ-SX650


Summary of Contents for Panasonic WJ-SX650
-
Page 1: Operating Instructions
Matrix Switcher Operating Instructions WJ-SX650 Series Model Nos. Before attempting to connect or operate this product, please read these instructions carefully and save this manual for future use. - Page 2 ON-OFF switches have power supplied to the unit whenever the power cord is inserted into the power source; however, the unit is operational only when the ON-OFF switch is in the ON position. The power cord is the main power disconnect for all units.
-
Page 3: Important Safety Instructions
IMPORTANT SAFETY INSTRUCTIONS 1) Read these instructions. 2) Keep these instructions. 3) Heed all warnings. 4) Follow all instructions. 5) Do not use this apparatus near water. 6) Clean only with dry cloth. 7) Do not block any ventilation openings. Install in accordance with the manufacturer's instructions. 8) Do not use near any heat sources such as radiators, heat registers, stoves, or other apparatus (including amplifiers) that produce heat. -
Page 4: Table Of Contents
■ Installation and Uninstallation ... 40 ■ Starting Up ... 41 ■ Window Details ... 41 ■ Tooltip Details ... 42 ■ Factory Default Settings of WJ-SX650 Series Administrator Console ... 45 SETUP MENU (OSD) ... 48 ■ Basic Operations ... 48 ■... -
Page 5: Limitation Of Liability
AL CO., LTD. BE LIABLE TO ANY PARTY OR ANY PER- SON, EXCEPT FOR CERTAIN WARRANTY PROGRAM OFFERED BY THE LOCAL DEALER OF PANASONIC, FOR THE CASES INCLUDING BUT NOT LIMITED TO BELOW: (1) ANY DAMAGE AND LOSS, INCLUDING WITHOUT LIM-... -
Page 6: Precautions
PRECAUTIONS • Refer all work related to the installation of this appa- ratus to qualified service personnel or system installers. • Do not block the ventilation opening or slots on the cover. To prevent the apparatus from overheating, place it at least 5 cm {2 inches} away from the wall. -
Page 7: About These Operating Instructions
WJ-HD300A Series WJ-HD316A, WJ-HD309A This document uses the following terms for classifica- tion of devices. The (This ) unit: Matrix Switcher WJ-SX650 Video input board: Video Input Board WJ-PB65C32 Video output board: Video Output Board WJ-PB65M16 Recorder: Digital Disk Recorder WJ-HD300/WJ-HD300 A Series Remarks on Model Nos. -
Page 8: Preface
PREFACE Matrix Switcher WJ-SX650 Series (or SX650 Series) are designed for a surveillance control system. WJ-SX650 Series (or SX650 Series) is the general term of following models. Matrix Switcher WJ-SX650 (Video Input Board WJ- PB65C32 x 1 and Video Output Board WJ-PB65M16 x 1 have been installed.) -
Page 9: Major Operating Controls And Their Functions
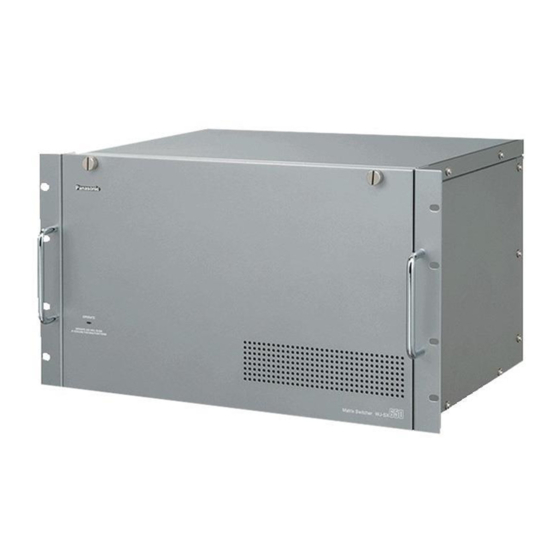
MAJOR OPERATING CONTROLS AND THEIR FUNCTIONS ■ WJ-SX650 Matrix Switcher/WJ-SX650U Card Cage ● Front ViewOPERATE OPERATE LED WILL BLINK IF COOLING FAN MALFUNCTIONS q Operation Indicator (OPERATE) • This indicator is lighting while power is supplied to the unit. -
Page 10: Rear View
● Rear ViewEXTENSION 3 IN EXTENSION 2 IN VIDEO OUT 4 VIDEO OUT 3 VIDEO OUT 2 DATA 4 DATA 3 DATA 2 DATA 1 TERM.ON TERM.OFF Video Output Board 2 HDR4/TMNL8 HDR3/TMNL7 TMNL6 TMNL5 Video Output Board 1... -
Page 11: Video Input Board Wj-Pb65C32
IN X-2 board VIDEO OUT 4 IN X-1 board IN A-3/IN B-3/IN C-3 board Note: These boards are originally installed into WJ-SX650 and WJ-SX650U. (Not supplied to optional video input boards) r Extension Ports 1 (EXTENSION 1: IN, OUT) These ports connect to an optional card cage. -
Page 12: Video Output Board Wj-Pb65M16
● Front View q Output Mode Selection Switches (MODE) Refer to p. Switch Settings for Video Output Board (Main Board) for details. w Reset Switch (RESET) This button is pressed to reset the whole system. (Equivalent to power off and on) ●... -
Page 13: Monitor Display Information
R01 to 16: Recorder number Camera title Displays the registered camera title. Camera title setting is performed in "Camera" – "Camera Title" of WJ-SX650 Series Administrator Console. r Event Information TERMINAL001 to 256: Terminal alarm has occurred. (Example: For TERMINAL001, "001" means the number of alarm input signal accepted by the ALARM IN port of video input board.) -
Page 14: System Controller Display Information
Notes: • During the alarm acknowledgement (ACK) status (refer to p. 31), event information is highlighted. • When two or more alarm events have occurred, "∗" is displayed beside the event. • When an alarm occurs and its display mode setting is OFF (refer to p. - Page 15 ● WV-CU360C/CJ MONITOR CAMERA BUSY PROHIBITED q Monitor number 01 to 32: Monitor number w Camera/recorder/sequence number 001 to 999: Camera number H01 to 16: Recorder number t01 to 32: Tour sequence number r01 to r08: Group sequence number Note: During sequence pause, "P" is displayed instead of "t"...
-
Page 16: Installations
The following is the installation flow of this unit. • Checking Board Composition • Switch Settings for Video Input Main Board (Refer to p. 51.) • Switch Settings for Video Input Main Board (Refer to p. 52.) • Mounting video input and output boards (Refer to p. 53.) •... -
Page 17: Switch Settings For Video Input Main Board
■ Switch Settings for Video Input Main Board With the switch settings of main boards, board numbers are given to all video input boards. To give the board number to each board, rotate the Unit No. switch on the main board. -
Page 18: Switch Settings For Video Output Main Board
SW1, SW2, SW3, SW4 SW4006 SW4004 Note: If the unit has only one Video Output Board, be sure to apply switch settings of Video Output Board 1. When the switch settings are incorrect, the unit may not work properly. TEST... -
Page 19: Mounting Video Input And Output Boards
■ Mounting Video Input and Output Boards To use additional video input or output boards, mount these boards into the expansion slots of the unit after checking the board composition and performing switch settings (refer to p. board composition. Notes: •... -
Page 20: Board Mounting Procedure
■ Board Mounting Procedure The following is the procedure to mount a set of video input or output board into the expansion slot of the unit. Note: Before the procedure, power off the unit. 1. Remove the expansion slot panel from the rear side. TERM TERM .OFF... -
Page 21: Installing The Main Unit
■ Installing the Main Unit Places to avoid • Places exposed to direct sunlight or near a source of heat such as a radiator • Very dirty and dusty places • Places subject to strong vibrations • Near magnetic field sources such as a television or speakers •... -
Page 22: Connections
CONNECTIONS Important: Use only the recommended BNC connectors listed below. RECOMMENDED Tip dimensioins inside the BNC fl 1.32 mm — fl 1.37 mm (inside) fl 0.13 mm — fl 0.69 mm Standards For U.S.A. For Europe For Japan Suffixes attached to the standards may be updated. Other BNC connectors may cause video signal interruption, and damage the BNC receptacles on the rear panel of the unit. -
Page 23: Basic System Connections
1 2 3 4 5 Recorder Monitor 1 to 16 MODE switches WV-CU950/650 1 2 3 4 5 WV-CU360C/CJ 1 2 3 4 5 Terminal mode, Line termination: ON DATA SYSTEM CONTROLLER SYSTEM CONTROLLER SERIAL PC (WJ-SX650 Series Administrator Console) -
Page 24: Expanded System Connections
DATA DATA DATA CAMERA Recorder DATA DATA Recorder Recorder Recorder MONITOR OUT Camera 1 to 150 CAMERA IN Monitor 1 to 32 MONITOR OUT System controller DATA SYSTEM CONTROLLER SYSTEM CONTROLLER SERIAL Recorder PC (WJ-SX650 Series DATA Administrator Console) Recorder... - Page 25 Recorder Recorder DATA DATA Recorder Recorder DATA DATA Recorder Recorder DATA DATA Recorder Recorder Camera 1 to 240 Monitor 1 to 32 System controller DATA SYSTEM CONTROLLER SYSTEM CONTROLLER PC (WJ-SX650 Series Administrator Console) SERIAL Recorder DATA Recorder DATA Recorder...
-
Page 26: Card Cage Connections
The following is a connection example to use additional card cages. • Maximum unit connections: Matrix Switcher WJ-SX650 x 1, Card Cage WJ-SX650U x 3. • Video Output Board 1 and 2 must be mounted into the same unit. -
Page 27: Camera Connections
• Recommended for RS-485 communication is AWG#22 or thicker one. The cable should be shielded, two-wire, twisted pair, and with low impedance. • Conform the 2-wire or 4-wire communication setting of this unit to that of RS-485 cameras. The following is the details on MODE 1 to 4 switch settings. 2-wire communication 4-wire communication... -
Page 28: Daisy Chain Connection
1 2 3 4 (CAMERA) 2 (SW#4: ON) MODE switch settings Note: Do not use unit numbers other than 1 to 8 for individual cameras. ● Daisy Chain Connection Two or more cameras can be connected to one RS-485 (CAMERA) port. Up to 8 cameras are available. -
Page 29: Monitor Connections
TMNL5 TMNL2 TMNL1/PS DATA MODE MODE MODE DATA MODE MONITOR OUT ALARM OUT 2 ALARM OUT 1 Video output rear boards PC (WJ-SX650 Series Administrator Console) DATA 2 DATA 1 TERM.ON TERM.OFF TMNL6 TMNL5 TMNL2 TMNL1/PS DATA MODE MODE MODE... -
Page 30: Recorder Connection
Recorder's unit address Note: To supply video input signals from recorders to video input boards, perform the settings surely in RECORDER of SETUP MENU (refer to p. 87) or "System" – "Recorder" of WJ-SX650 Series Administrator Console. CAMERA IN channel of... - Page 31 When using all the CAMERA IN connectors of video input boards for camera connections, external monitors can be connected directly to recorders. Note: Recorder settings are performed in RECORDER of SETUP MENU (refer to p. 87) or "System" – "Recorder" of WJ-SX650 Series Administrator Console.
- Page 32 13 to 16 Note: You can change data port settings according to the connected devices. Setting changes are performed in "System" – "DATA Port" of WJ-SX650 Series Administrator Console or DATA PORT (refer to p. 90) of SETUP MENU. EXTENSION 2 IN...
- Page 33 Line termination: Recorder LCN (Logical Unit Address S: 8 Camera Number) Unit Address C: 4 : 113 to 128 Line termination: AUDIO IN MODE switch settings (#2: ON) #2: OFF MODE EXTENSION 1 TERM. OUT X-3 OUT X-2 Video Output...
-
Page 34: Recorder Settings
• In the factory default, the DATA 3 and 4 ports are set to HDR1 for recorder connection. To connect system controllers, perform the DATA port settings in SETUP MENU (refer to p. 90) or WJ-SX650 Series Administrator Console. • Both of recorders and system controllers cannot be connected to the same DATA port. - Page 35 • In the factory default, the DATA 1 port is set for the ter- minal mode connection. To apply the PS·Data mode connection, perform the DATA port settings in SETUP MENU (refer to p. 90) or WJ-SX650 Series Administrator Console. • Both of terminal mode and PS·Data system controllers cannot be connected to the same DATA port.
-
Page 36: Alarm Sensor Connections
ALARM IN port details. Note: Perform the setting of each signal polarity and alarm event in TERMINAL ALARM of SETUP MENU (refer to p. 87) and "Alarm" – "Alarm Event" of WJ-SX650 Series Administrator Console. Pin No. -
Page 37: System Status Check
These records can be transmitted between PC and this unit. (Periodical transmission is also available.) For transmission, perform the serial command settings in "Communication" – "Serial Command" of WJ-SX650 Series Administrator Console. • To transmit SYSTEM STATUS records from the PC, refer to Serial (RS-232C) Connector Command Reference (PDF file on the supplied CD-ROM). -
Page 38: Setup Procedure
SETUP PROCEDURE Before operation, setup of this unit is required. Setup is per- formed from WJ-SX650 Series Administrator Console installed on a PC. (Some settings are available from SETUP MENU of this unit.) The following is an example of setup procedure. -
Page 39
5. Perform the RS-485 camera settings. CAM001 to 150: If you use RS-485 cameras, select desired parameters for the RS-485 ports and cam- era unit numbers.
"System" – "RS485 Camera" RS485 CAMERA (Refer to p. 92.) 6. -
Page 40: Wj-Sx650 Series Administrator Console
128 MB or more CD-ROM drive: Required for installation of WJ-SX650 Series Administrator Console Hard drive space: 30 MB or more for installation of WJ-SX650 Series Administrator Console ® Note: If Microsoft .NET Framework 1.1 has not been installed on the PC, 160 MB or more is required. -
Page 41: Starting Up
■ Starting Up 1. Select "Start" – "All Programs" – "Panasonic" – "WJ- SX650 Series" – "WJ-SX650 Series Administrator Console x.xx". (x.xx is the version number.) the program. WJ-SX650 Series Administrator Console will start up, and the login window will be displayed on the PC screen. -
Page 42: Tooltip Details
Note: Do not edit the setup data files by using text editors, etc. You may become unable to open the setup data files. ■ Tooltip Details Reference No. Explanation 1 to 8: Port No. 4800 bps, 9600 bps, 19200 bps, 38400 bps: Transmission speed Character entry limit: 20 characters Available characters: Alphanumeric characters and symbols 1,2: Level 1 to 8: Video input board No. - Page 43 Reference No. Explanation 2005 to 2099: Year 1 to 12: Month 1 to 31: Day [24-h time format] 0 to 23: Time [12-h time format] 1 to 12: Time 00 to 59: Minute AM, PM: Morning, Afternoon DD/MM/YYYY, MM/DD/YYYY, YYYY/MM/DDDD, DD/Mmm/YYYY, Mmm/DD/YYYY: Date Format Japanese, English, French*, Spanish*, German*, Italian*, and Russian*: Language * In the actual display, these parameters are displayed in their own languages.
- Page 44 Reference No. Explanation 1 to 1024: Alarm Output number Alarm output signal is supplied from the ALARM OUT 1/2 port or the SERIAL port. (65 to 1024 are supplied from the SERIAL port only as a serial command.) Note: To activate serial command transmission, set Alarm Output to ON in "Communication" – "Serial Command".
-
Page 45: Factory Default Settings Of Wj-Sx650 Series Administrator Console
■ Factory Default Settings of WJ- SX650 Series Administrator Console In the factory default, each setting item has been set as fol- lows. Items attached with "*" can also be set in SETUP MENU. ● System "Logical Camera Number" • •... - Page 46 Tour Sequence 7: Images of LCN 193 to 224 are sequen- tially switched for two seconds. Tour Sequence 8: Images of LCN 225 to 256 are sequen- tially switched for two seconds. Tour Sequence 9 to 32: No settings "Group Sequence" Group Sequence 1: 4 cameras among LCN 1 to 64 are sequentially switched for 2 seconds on Monitor 1 to 4.
-
Page 47: Setup Menu
● Controller "Monitor Access" DATA Monitor 1 to 8 All the ports are enabled. (Checked) "Auto Login/Logout" Auto Login: All the ports are enabled. (Checked) (User ID: 650) Auto Logout: All the ports are unabled. (Not Checked) "Key Assignment" (Available for WV-CU950/650) DATA 1 to 8 Function Iris Reset... -
Page 48: Setup Menu (Osd)
2. Press the SETUP button while holding down the SHIFT button. SETUP MENU will be displayed on the selected monitor. ● Top Menu When SETUP MENU is opened, the top menu is displayed on the monitor. WJ-SX650 SETUP MENU 100 TIME&DATEO 300 ALARMO 400 RECORDERO 500 SYSTEMO Monitor... -
Page 49: Time & Date
Mmm/DD/YYYY in WJ-SX650 Series Administrator Console) • Day 1 to 31 • Time 0 to 23(When Time Format is set to 24-h in WJ-SX650 Series Administrator Console) 1 to 12(When Time Format is set to 12-h in WJ-SX650 Series Administrator Console) -
Page 50: Recorder
• RECORDER ALARM Select ON or OFF to accept or not accept recorder alarm input signals. ON: Accepts recorder alarm input signals. OFF: Not accepts recorder alarm input signals. • SERIAL ALARM Select ON or OFF to accept or not accept serial alarm input signals. - Page 51 Without LCN settings, recorder selection is unavailable. The channel settings are performed in "System" – "Recorder" of WJ-SX650 Series Administrator Console. • Be sure to connect the recorders to the specified DATA ports in the daisy chain. (Refer to p.
-
Page 52: System
■ SYSTEM You will perform the system settings required to transmit data between the unit and connected devices. When you select SYSTEM on the top menu, the following menu is dis- played. 500 SYSTEM 510 DATA PORTO 520 SERIAL PORT COMMUNICATION STATUS (8/ NONE/1) 530 VD2/DATA/CABLE COMPENSATIONO... - Page 53 ● VD2/DATA/CABLE COMPENSATION Menu 530 VD2/DATA/CABLE COMPENSATION 1 of 2 INPUT BOARD=8 CAM VD2 DATA CABLE CAM VD2 DATA CABLE 225 ON 233 ON 226 ON 234 ON 227 ON 235 ON 228 ON 236 ON 229 ON 237 ON 230 ON 238 ON 231 ON...
-
Page 54: Information
■ INFORMATION You can check whether the connected video input or output boards are working properly. When you select INFORMA- TION on the top menu, the following menu is displayed. 800 INFORMATION OUTPUT BOARD1 V1.00 OUTPUT BOARD2 V1.01 ∗ INPUT BOARD1 ∗... -
Page 55: Login And Logout
LOGIN AND LOGOUT ■ Operator Registration Before logging into the system, operator registration is required. Operator registration is performed in "Operator" – "Operator" of WJ-SX650 Series Administrator Console. The factory default of operator information is as follows. Operator No. User ID... -
Page 56: Power-On/Off
• To activate auto login or auto logout, the setting is required in advance. • The auto login and auto logout settings is performed in "Controller" – "Auto Login/Logout" of WJ-SX650 Series Administrator Console. • Auto login and auto logout are set for each DATA port. -
Page 57: Monitor Control
MONITOR CONTROL The following is the procedure examples for monitor selec- tion. Refer to p. Lists of Functions and Operations for other monitor control procedures not described here. ■ Monitor Selection In the following procedure, you can display camera images or perform setup procedures on a desired monitor. -
Page 58: Camera Control
CAMERA CONTROL The following is the procedure examples for camera selec- tion. Refer to p. Lists of Functions and Operations for other camera control procedures not described here. ■ Camera Selection In the following procedure, you can display the image of desired camera on the selected monitor. -
Page 59: All Cameras Control
■ All Cameras Control All cameras connected to the unit can be controlled at a time. • All home positions: All cameras will be moved to the home positions. • All auxiliaries OFF: AUX 1 and 2 outputs of cameras will become OFF. -
Page 60: Recorder Control
RECORDER CONTROL • The following is the procedure examples for recorder control. Refer to p. Lists of Functions and Operations for other recorder control procedures not described here. • The following procedures are available when a recorder is selected. ■ Playback In the following example, you will play back the recorded image of Camera 3. -
Page 61: Recorder Control End
● WV-CU360C/CJ This operation is not available. ■ Recorder Control End Before this operation, stop playback or surely. To finish recorder control, select a camera. The monitor display will become the status before recorder control. ■ Recorder Selection Before recorder control procedures not described in this chapter, you need to select a recorder in advance. -
Page 62: Running Sequence
RUNNING SEQUENCE ■ Descriptions of Sequence Sequence is the function to switch camera images automatically. There are two sequences: • Tour sequence • Group sequence ● Tour Sequence Camera images are displayed on a selected monitor, and they are sequentially switched according to the setting. - Page 63 ● Sequence Setting Sequence setting is performed in "Sequence" of WJ-SX650 Series Administrator Console. The following settings are available for each sequence step. Setting item LCN (Logical Camera Number) Preset AUX1/2 Dwell Note: Preset and AUX1/2 will not be activated for cameras selected by operators with higher priority or restricted by the cam-...
-
Page 64: Tour Sequence
■ Tour Sequence ● WV-CU950/650 1. Enter the desired sequence number by pressing the numeric buttons. The entered number will appear on the LCD. 2. Press the TOUR SEQ button. The tour sequence will be activated. ● WV-CU360C/CJ 1. Enter the desired sequence number by pressing the numeric buttons. -
Page 65: Sequence Pause
■ Sequence Pause You can pause an active tour or group sequence. When a group sequence is paused on a monitor, all sequences will be simultaneously paused on other monitors. 1. Press the SEQ PAUSE (or PAUSE) button. Sequence will be paused. 2. -
Page 66: Alarm Descriptions
(The setting activates the alarm input signal and alarm event.) Up to 1 024 alarm event settings are available. The alarm event setting is performed in "Alarm" – "Alarm Event" of WJ-SX650 Series Administrator Console. By performing the settings of "Alarm Event", the following events will be activated when this unit accepts an alarm input signal. -
Page 67: Alarm Modes
(Regardless of alarm modes, alarms occur to all the associated cameras.) The alarm mode setting is performed in "Alarm" – "Alarm Mode" of WJ-SX650 Series Administrator Console or "ALARM" of SETUP MENU. • Sequence mode Alarm pictures are sequentially displayed on the associated monitor. -
Page 68: Alarm Control
ALARM CONTROL ■ Alarm Acknowledgement (ACK) By acknowledging an alarm occurrence on an associated monitor, you can control alarm pictures. ● WV-CU950/650 While a monitor in the alarm mode status is selected, press the ACK button. (During the alarm mode status, "Alarm" sign is blinking on the LCD.) The alarm event will be acknowledged. -
Page 69: Return To Alarm Mode Status
Notes: • Alarm all reset will also be conducted when setting changes are performed in SETUP MENU or WJ-SX650 Series Administrator Console. • To reset the alarms occurred to recorders, perform alarm all reset. Alarm all reset is available even while no alarms are occurring. - Page 70 T01 to 32: Tour Sequence 1 to 32 was activated. G01 to 32: Group sequence (or Group preset) 1 to 32 was activated. Notes: • User ID and Controller No. is displayed for an alarm reset or suspended by an operator. (They are not displayed for auto reset.) •...
-
Page 71: Timer Descriptions
Up to 128 timer events can be scheduled to acti- vate weekly or on specified dates. Priority setting is also available for each timer event. The timer event setting is performed in "Schedule" – "Timer Event" of WJ-SX650 Series Administrator Console. The following timer events are available. - Page 72 • ALARM IN (Camera) – Not Use Select this setting to activate auto tracking at the specified preset position. (Starting preset position) Auto tracking is performed during the specified time. (The camera becomes the auto tracking standby mode.) Note: Auto tracking ends when an operator controls the camera.
-
Page 73: Terminal Mode Operation
TERMINAL MODE OPERATION This chapter includes operation list, function list, and function menu flow of the terminal mode. Operators can be given restrict levels for each operation and function according to the user level settings. ■ Lists of Operations and Functions •... - Page 74 Function list of WV-CU950/650 and WV-CU360C/CJ Function Login q Enters the user ID. w Enters the password. Logout Monitor selection Monitor lock Camera selection • Selects the next camera channel. • Selects the previous camera channel. Selects a camera position. Camera selection recall •...
- Page 75 Function WV-CU950/650 SETUP MENU Open "System Setup" main menu. → • Opens SETUP MENU. [F1] • Closes SETUP MENU. [F2] On-screen display (OSD) Open "OSD On/Off" main menu. → ON/OFF • All the information [SHIFT] + [F1] • Time and date information [F1] •...
-
Page 76
Function System Status Display • Opens System Status Display. • Closes System Status Display. Alarm History Display
• Goes to the next or previous page. • Skips to 10 pages forward. • Skips to 10 pages back. Alarm Acknowledgement (ACK) ... - Page 77 Lens iris will keep closing down while this button is held down. [IRIS OPEN] + [IRIS CLOSE] WV-CU950/650: You can assign another func- tion to this button. The setting is performed in "Controller" – "Key Assignment" of WJ-SX650 Series Administrator Console. Operation list...
- Page 78 WV-CU950/650: You can assign another func- tion to these buttons . The setting is performed in "Controller" – "Key Assignment" of WJ-SX650 Series Administrator Console. WV-CU950/650: Lens zooming level will keep going down while zoom wheel controller is being moved to the left.
- Page 79 AUTO mode, press this but- ton. Not available WV-CU950/650, WV- CU360C/CJ: • Mode setting is determined by the DIP switch settings of [SHIFT] + [AUX1 (or 2) ON] camera or auxiliary device (receiver, etc.). [SHIFT] + [AUX1 (or 2) OFF] • To activate events (sequence, etc.), set the...
- Page 80 Function Defroster • ON • OFF All cameras control • All home positions • All auxiliaries OFF Activates a camera function Recorder control Function Recorder setup menu • Opens the recorder setup menu. • Closes the recorder setup menu. Selects a disk. (1) •...
- Page 81 Function WV-CU950/650 Recorder On-screen display [OSD] (OSD) ON/OFF Multiscreen display [0] → [MULTI SCREEN] • 4 segments [1] → [MULTI SCREEN] • 7 segments [2] → [MULTI SCREEN] • 9 segments [3] → [MULTI SCREEN] • 10 segments [4] → [MULTI SCREEN] •...
-
Page 82
Function List/Thumbnail Switching Text information display ON Displays the DATA COPY menu. Playback
• Pause playback • Fast-forward • Fast-reverse • Skips to the next frame. • Skips to the previous frame. JogDial counterclockwise • Skips to the next record. •... - Page 83 Function WV-CU950/650 A – B repeat playback Open "HD300 A - B Repeat" menu. → • Marks the start point for the [F1] A - B repeat playback. • Marks the end point for the [F2] A - B repeat playback. •...
-
Page 84: Menu Flow (Wv-Cu950/650)
■ Menu Flow (WV-CU950/650) If you press the MENU button without selecting a recorder If you select a recorder, and then press the MENU button If you select a recorder, and then press the SEARCH button Keep pressing the SHIFT button. Keep pressing the SHIFT button. -
Page 85: Operation (Other Than Terminal Mode)
Log into the system by entering the user ID and password registered in the system controller. After login, you can control the unit as a PS·Data operator. PS·Data operator setting is performed in "Operator" – "Operator" of WJ-SX650 Series Administrator Console. • Logout Auto logout is not available. -
Page 86: Connections Of Matrix Switchers (Wj-Sx650 Series) And A Ps·data System Controller
If a recorder is connected to the unit, you can control cameras using a web browser installed on a PC accessing the recorder. You can set priority for web browser control. Priority setting is performed in "Operator" – "Operator" of WJ-SX650 Series Administrator Console. -
Page 87: Glossary
System Status Display: Refer to p. Timer event: Refer to p. Camera event: Refer to p. VD2: Timing pulse to display the images of Panasonic cam- eras on the monitor. If VD2 is set to ON, image switch- ing unconformity can be prevented. (Depending on monitors, the unconformity may not be solved com- pletely.) - Page 88 Export: Function to save the settings of tour sequence or group sequence in export files (csv format). This func- tion available when Administrator Console. Export is performed separately for each sequence program. Import: Function to read export files (csv format) into WJ- SX650 Series Administrator Console. using WJ-SX650 Series...
-
Page 89: Troubleshooting
TROUBLESHOOTING Check the following before requesting repair. If a trouble cannot be corrected even after checking and trying remedy, contact your dealer. ■ Matrix Switcher WJ-SX650 Series Problem Power is not turned on. OPERATE indicator is blink- ing. Cannot control a system con- troller. - Page 90 • Check if the LCN is set for the camera channel connecting the recorder. Without the LCN setting, recorder selection is unavailable. Check the setting in “System” – “Recorder” of WJ-SX650 Series Administrator Console. • Check the connection and settings between the recorder and the unit.
- Page 91 Problem Cannot control a recorder. "RECORDER ERROR" is dis- played on the monitor, and recorder control is unavail- able. During sequence, black screen and "NOT ASSIGNED" are displayed on the monitor. Auxiliary control does not become OFF even after the sequence, timer event, or alarm event ends.
- Page 92 Problem Auto tracking ended before the end time of camera event setting. Alarm event does not occur. The image of camera associ- ated with the alarm event was not recorded. The status before the alarm occurrence is not recovered, even though the alarm event is reset.
-
Page 93: Wj-Sx650 Series Administrator Console
■ WJ-SX650 Series Administrator Console Problem "!" mark is displayed in the LCN entry field. "!" mark is displayed in the CAM-P (camera position) entry field. Cannot set Control to ON in "System" – "Recorder". Cannot set the RS-485 port number of camera input chan- nel. -
Page 94: Power Cord, Connectors, And Power Plug
■ Power Cord, Connectors, and Power Plug Check the power cord, connectors, and power plug regularly. Problem The power cord insulation is damaged. The power cord, plug and connectors get hot during use. The power cord gets hot when bent or stretched. Check item and remedy The power cord, plug and connectors are worn out. -
Page 95: Specifications
Time Adjust Output* : Open collector output x 32, Max. 24 V DC, 100 mA : 6-conductor modular jack x 2 (With a termination switch (TERM: ON, OFF)) VS Input*3: 1 V [P-P]/75 Ω (VS IN) VS Output*3 (VS OUT (THRU)): VS loop-thru output (VS OUT): 1 V {P-P}/75 Ω... - Page 96 When this unit is powered off, this signal will not be output even with the acceptation of video input signal. 6-conductor modular jack x 12 (2-wire or 4-wire communication, With termination switches (MODE 1 to 4))* 6-conductor modular jack x 2 (With a termination switch (TERM: ON, OFF)) 37-pin D-sub connector x 2 37-pin D-sub connector x 2 420 mm (W) X 265 mm (H) X 372 mm (D) {16-9/16"...
-
Page 97: Standard Accessories
Operating Instructions (This Document) ... 1 pc. CD-ROM* ... 1 pc. * The following files are included on the CD-ROM. • WJ-SX650 Series Administrator Console (Application) • Serial (RS-232C) Connector Command Reference (PDF file) The following parts are used during installation procedures. - Page 98 Unit Company of Panasonic Corporation of North America Security Systems www.panasonic.com/security For customer support, call 1.877.733.3689 Executive Office: Three Panasonic Way 2H-2, Secaucus, New Jersey 07094 Zone Office Eastern: Three Panasonic Way, Secaucus, New Jersey 07094 Central: 1707 N. Randal Road, Elgin, IL 60123 Southern: 1225 Northbrook Parkway, Suwanee, GA 30024 Western: 6550 Katella Ave., Cypress, CA 90630...