Samsung BD-P1400 User Manual
Blu-ray disc player
Hide thumbs
Also See for BD-P1400:
- User manual (67 pages) ,
- Service manual (94 pages) ,
- User manual (68 pages)
Table of Contents

Related Manuals for Samsung BD-P1400


Summary of Contents for Samsung BD-P1400
- Page 1 Blu-ray Disc Player User’s Manual BD-P1400 AK68-01456F...
- Page 2 Blu-ray Disc Player User’s Manual BD-P1400...
-
Page 3: Key Features Of Your New Blu-Ray Disc Player
key features of your new Blu-ray Disc Player Player Features Digital Photo Viewer (JPEG) You can enjoy digital photos on your TV. MP3 Playback This unit can play mp3 fi les from CD-R/-RW, DVD-R/-RW discs. HDMI (High Defi nition Multimedia Interface) HDMI reduces picture noise by allowing a pure digital video/audio signal path from the player to your TV. -
Page 4: What's Included
Graphic planes PLAY MOVIE LANGUAGES SCENE SELECTIONS PREVIEWS Two individual, full HD resolution (1920x1080) video layers are available, on top of the HD video layer. Graphic One layer is assigned to video-related graphics (like Planes subtitles), and the other layer is assigned to interactive elements, such as buttons or menus. -
Page 5: Safety Information
safety information WARNING TO REDUCE THE RISK OF ELECTRIC SHOCK, DO NOT REMOVE THE COVER(OR BACK). NO USER-SERVICEABLE PARTS ARE INSIDE. REFER SERVICING TO QUALIFIED SERVICE PERSONNEL. This symbol indicates “dangerous voltage” inside the product that presents a risk of CAUTION electric shock or personal injury. -
Page 6: Important Safety Instructions
The product unit accompanying this user manual is licenced under certain intellectual property rights of certain third parties. This licence is limited to private non-commercial use by end-user consumers for licenced contents. No rights are granted for commercial use. The licence does not cover any product unit other than this product unit and the licence does not extend to any unlicenced product unit or process conforming to ISO/IEC 11172-3 or ISO/IEC 13818-3 used or sold in combination with this product unit. -
Page 7: Safety Information
This player also operates differently than a standard DVD player or other AV equipment. Please contact the SAMSUNG customer care center if you have questions or encounter diffi culty in playing BD, DVD or CD discs in this player. Also, refer to the rest of this Manual for additional information on playback restrictions. -
Page 8: Table Of Contents
Channel Amplifi er) Connecting to an Audio System (Dolby Digital, DTS Amplifi er) Connecting to an Audio System (HDMI supported Amplifi er) Connecting to Samsung's FTP/Internet site for Software Upgrades BASIC FUNCTIONS OF YOUR Before Playing BLU-RAY DISC PLAYER On-Screen Menu Navigation... - Page 9 contents SYSTEM SETUP Setting up the Language Options Setting up the Audio Options Setting up the Speaker Options Setting up the Video display/output Options Setting up the HDMI setup options Setting up the Parental Lock SYSTEM UPGRADE Firmware Upgrade System Information Network Setup Using the Display Function WATCHING A MOVIE...
-
Page 10: Getting Started
If a problem occurs, check the Troubleshooting. (See pages 60~61) Copyright ©2007 Samsung Electronics Co.,Ltd. All rights reserved; No part or whole of this user’s manual may be reproduced or copied without the prior written permission of Samsung Electronics Co.,Ltd. English _9... -
Page 11: Disc Type And Characteristics
getting started DISC TYPE AND CHARACTERISTICS Disc types that can be played Disc Types Disc Logo Recorded content Disc Shape Max. Playing minute Playing time depends BD-ROM AUDIO + VIDEO Single sided (25GB/50GB) on the Title Single sided(12 cm) Double sided(12 cm) DVD-VIDEO AUDIO + VIDEO Single sided(8 cm) -
Page 12: Blu-Ray Disc Player
Compliance and Compatibility Notice section of this Manual. If you encounter compatibility problems, please contact the SAMSUNG customer care center. This Samsung Blu-ray Disc Player (BD-P1400) supports only the BD-ROM Profi le 1 version 1.0 specifi cation. If you want to play later version discs, you may need to update player's fi... -
Page 13: Disc Types
Once a DVD-R recorded in Video Mode is fi nalized, it becomes DVD-Video. • This unit can play back DVD-R discs recorded and fi nalized with a Samsung DVD video recorder. It may not be able to play some DVD-R discs depending on the disc and the condition of the recording. -
Page 14: Disc Handling
❖ Using JPEG disc • CD-R/-RW, DVD-RW/-R recorded with UDF, ISO9660 or JOLIET format can be played back. • Only JPEG fi les with the ".jpg", ".JPG", ".jpeg" or "JPEG" extension can be displayed. • Progressive JPEG is supported. ❖ DVD-RW/-R (V) •... -
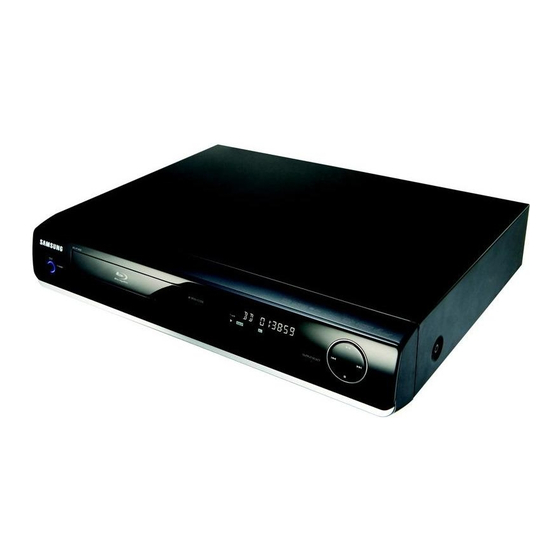
Page 15: Description
description FRONT PANEL DISC TRAY Opens to accept a disc. OPEN/CLOSE BUTTON Opens and closes the disc tray. Remote Control Sensor PLAY/PAUSE BUTTON Plays a disc or pauses playback. STOP BUTTON Stops disc playback. SEARCH/SKIP BUTTONS Goes to the next title/chapter/track or goes back to the previous title/chapter/track. DISPLAY Displays the playing status, time, etc. -
Page 16: Rear Panel
REAR PANEL The fan always revolves when the power is on. Ensure a minimum of 10 cm of clear space on all sides of the fan when installing the product. 5.1CH ANALOG Connect to a 5.1CH analog input on an A/V amplifi er AUDIO OUT AUDIO OUT Connects to the audio input of external equipment using audio cables. -
Page 17: Remote Control
remote control TOUR OF THE REMOTE CONTROL 16_ remote control... - Page 18 English _17...
-
Page 19: Setting The Remote Control
remote control SETTING THE REMOTE CONTROL You can control certain functions of your TV with this remote control. Control function buttons include : TV STANDBY/ON, TV PROG ,., TV VOL + –, TV MUTE, TV INPUT SEL.. To determine whether your television is compatible, follow the instructions below. Switch your television on. -
Page 20: Controllable Tv Codes
CONTROLLABLE TV CODES Brand Code SAMSUNG TV STANDBY/ON+01, +02, +03, +04, +05, +06, +07, +08, +09 AIWA TV STANDBY/ON+82 ANAM TV STANDBY/ON+10, +11, +12, +13, +14, +15, +16, +17, +18 BANG & OLUFSEN TV STANDBY/ON+57 TV STANDBY/ON+71 BLAUPUNKT BRANDT TV STANDBY/ON+73... -
Page 21: Connections
connections This section involves various methods of connecting the Blu-ray Disc Player to other external components. CONNECTING TO A TV WITH AN HDMI CABLE Using an HDMI-HDMI cable (not included) connect the HDMI OUT terminal on the rear of the Blu-ray Disc Player to the HDMI IN terminal of your TV. -
Page 22: Hdmi Auto Detection Function
If you connect a Samsung TV to the Blu-ray Disc Player using an HDMI cable, the player can be easily operated using the TV remote control. (This is only available with Samsung TVs that support the Anynet+ feature.) (See pages 41~42) •... -
Page 23: Connecting To A Tv With Dvi Cable
connections CONNECTING TO A TV WITH DVI CABLE Using the HDMI-DVI cable (not included), connect the HDMI OUT terminal on the rear of the Blu-ray Disc Player to the DVI IN terminal of your TV. Using the audio cables, connect the AUDIO (red and white) OUT terminals on the rear of the Blu-ray Disc Player to the AUDIO (red and white) IN terminals of your TV. -
Page 24: Connecting To A Tv (Component)
CONNECTING TO A TV (COMPONENT) Connecting to your TV using Component video cables. You will enjoy high quality and accurate color reproduction images. Component video separates the picture element into black and white(Y), blue(P ), red(P ) signals to present clear and clean images. (Audio signals are delivered through the audio output.) Using component video cables (not included), connect the COMPONENT VIDEO OUT terminals on the rear of the Blu-ray Disc Player to the COMPONENT IN terminals of your TV. -
Page 25: Connecting To A Tv (S-Video)
connections CONNECTING TO A TV (S-VIDEO) Connecting to your TV using an S-Video cable. You will enjoy high quality images. S-Video separates the picture element into black and white(Y) and color(C) signals to present clearer images than regular video input mode. (Audio signals are delivered through the audio output.) Using an S-Video cable (not included), connect the S-VIDEO OUT terminal on the rear of the Blu-ray Disc Player to the S-VIDEO IN terminal of your TV. -
Page 26: Connecting To A Tv(Video)
CONNECTING TO A TV(VIDEO) Using video/audio cables, connect the VIDEO (yellow) / AUDIO (red and white) OUT terminals on the rear of the Blu-ray Disc Player to the VIDEO (yellow) / AUDIO (red and white) IN terminals of your TV. Turn on the Blu-ray Disc Player and TV. -
Page 27: Connecting To An Audio System
connections CONNECTING TO AN AUDIO SYSTEM (2 CHANNEL AMPLIFIER) Using the audio cables, connect the AUDIO (red and white) OUT terminals on the rear of the Blu-ray Disc Player to the AUDIO (red and white) IN terminals of your Amplifi er. Using the video signal cable(s), connect the HDMI, COMPONENT, S-VIDEO, or VIDEO OUT terminals on the rear of the Blu-ray Disc Player to the HDMI, COMPONENT, S-VIDEO, or VIDEO IN terminal of your TV as described on pages 20 to 25. -
Page 28: 5.1 Channel Amplifi Er
CONNECTING TO AN AUDIO SYSTEM (5.1 CHANNEL AMPLIFIER) Using the audio cables, connect the 5.1 ANALOG AUDIO OUT (Front R, Front L, CENTER, SUBWOOFER, Surround L, Surround R) terminals on the rear of the Blu-ray Disc Player to the 5.1 Channel ANALOG AUDIO IN (Front R, Front L, CENTER, SUBWOOFER, Surround L, Surround R) terminals of your Amplifi... -
Page 29: Connecting To An Audio System (Dolby Digital, Dts Amplifi Er)
connections CONNECTING TO AN AUDIO SYSTEM (DOLBY DIGITAL, DTS AMPLIFIER) If using an optical cable (not included), connect the DIGITAL AUDIO OUT (OPTICAL) terminal on the rear of the Blu-ray Disc Player to the DIGITAL AUDIO IN (OPTICAL) terminal of your Amplifi er. If using a coaxial cable (not included), connect the DIGITAL AUDIO OUT (COAXIAL) terminal on the rear of the Blu-ray Disc Player to the DIGITAL AUDIO IN (COAXIAL) terminal of the Amplifi... -
Page 30: Connecting To An Audio System (Hdmi Supported Amplifi Er)
CONNECTING TO AN AUDIO SYSTEM (HDMI SUPPORTED AMPLIFIER) Using the HDMI-HDMI cable (not included), connect the HDMI OUT terminal on the rear of the Blu-ray Disc Player to the HDMI IN terminal of your Amplifi er. Using the HDMI-HDMI cable, connect the HDMI OUT terminal of the Amplifi er to the HDMI IN terminal of your Turn on the Blu-ray Disc Player, TV, and Amplifi... -
Page 31: Connecting To Samsung's Ftp/Internet Site For Software Upgrades
CONNECTING TO SAMSUNG'S FTP/INTERNET SITE FOR SOFTWARE UPGRADES Using the Direct LAN Cable (UTP cable), connect the LAN terminal on the rear of the Blu-ray Disc Player to the LAN terminal of your modem. - Connect to the Internet for future software upgrades. -
Page 32: Basic Functions Of Your Blu-Ray Disc Player
Not all discs are compatible and not every disc will playback. For additional information, refer to the Disc Type and Characteristics and Compliance and Compatibility Notice sections of this Manual. If you encounter compatibility problems, please contact SAMSUNG customer care center. -
Page 33: On-Screen Menu Navigation
basic functions of your Blu-ray Disc Player ON-SCREEN MENU NAVIGATION Video Language Setup Audio Subtitle Music Disc Menu Photo Menu Setup Audio Setup Digital Output PCM Down Sampling Dynamic Compression Speaker Setup Display Setup TV Aspect Movie Frame (24 Fs) Resolution Screen Message Front Display... -
Page 34: Using The Search And Skip Functions
USING THE SEARCH AND SKIP FUNCTIONS During play, you can search quickly through a chapter or track, and use the skip function to jump to the next selection. hZCV Searching through a Chapter or Track During playback, press the SEARCH ( ) button. -
Page 35: System Setup
system setup For your convenience, confi gure proper settings for the external device to connect or any other environment before using the player. SETTING UP THE LANGUAGE OPTIONS If you set the audio, subtitle, disc menu and player menu, in advance, they will come up automatically every time you watch a movie. -
Page 36: Setting Up The Audio Options
SETTING UP THE AUDIO OPTIONS Allows you to set up the Audio device and sound status depending on the audio system being used with the player. With the unit in Stop mode, press the MENU button. Press the ▲▼ buttons to select Setup, then press the OK Photo Language Setup or ►... - Page 37 system setup PCM Down Sampling • On : Select this when the Amplifi er connected to the player is not 96KHz compatible. 96KHz signals will be down Language Setup Digital Output : PCM Photo converted to 48KHz Audio Setup PCM Down Sampling : On On Setup No Disc No Disc...
-
Page 38: Setting Up The Speaker Options
SETTING UP THE SPEAKER OPTIONS If you have connected this player to an Amp/Receiver or Home theater via the 5.1 channel Analog outputs you need to set the Speaker Options for the best sound. With the unit in Stop mode, press the MENU button. Language Setup Photo Press the ▲▼... -
Page 39: Setting Up The Video Display/Output Options
system setup SETTING UP THE VIDEO DISPLAY/OUTPUT OPTIONS This function allows you to setup the TV screen settings. This function Language Setup depends on the disc or TV type. It may not work with some discs or TVs. Photo Audio Setup With the unit in Stop mode, press the MENU button. - Page 40 Movie Frame (24 Fs) Movies are usually fi lmed at 24 frames per second. Some Blu- Language Setup ray Discs have the capability of playing back at this frame rate. Photo Audio Setup TV Aspect : 16:9 Wide Setting the Movie Frame (24Fs) feature to ON allows you to Display Setup Movie Frame (24 Fs) : Off...
- Page 41 system setup ❖ Resolution according to the output mode • BD playback Output HDMI Component VIDEO/S-Video Setup 1080p, Movie Frame(24Fs) off 1080p@60F 1080i 576i/480i 1080p/1080i, Movie Frame (24Fs) on 1080p@24F 1080i 576i/480i 1080i, Movie Frame (24Fs) off 1080i 1080i 576i/480i 720p 720p 720p...
-
Page 42: Setting Up The Hdmi Setup Options
Anynet+ is a convenient function that offers linked operations with other Samsung products with the Anynet+ feature. You can operate this unit using a Samsung TV remote control or power on the Samsung TV and Home theater and start disc playback simply by pressing the PLAY button on the Blu-ray player's remote. - Page 43 • Available buttons on the Samsung TV remote: These buttons work the same as this player's remote control. - Playback control buttons : - Menu operation button : - Numeric buttons : - Color buttons : TV Anynet+ Menu...
-
Page 44: Setting Up The Parental Lock
SETTING UP THE PARENTAL LOCK The Parental Lock function works in conjunction with BD/DVDs that have been assigned a rating which helps you control the types of BD/DVDs that your family watches. There are up to 8 rating levels on a disc. With the unit in Stop mode, press the MENU button. - Page 45 system setup Setting the Rating Level Press the ▲▼ buttons to select Rating Level, then press Display Setup the OK or ► button. HDMI Setup Parental Lock : Off Photo Parental Setup Rating Level : 8 (Adults) 8 (Adults) Setup No Disc No Disc System Upgrade...
-
Page 46: System Upgrade
Samsung may offer upgrades to your Blu-ray player's fi rmware in the future. To upgrade this fi rmware you must : Go to samsung.com and refer to 'SUPPORT' page to download the fi rmware and burn an update CD. - Page 47 system upgrade To perform the system upgrade, press the ◄► buttons to HDMI Setup System Information Parental Setup Network Setup select Start and then press the OK button. Photo System Upgrade Upgrade Start Setup No Disc No Disc System Upgrade The new update data was found.
-
Page 48: System Information
SYSTEM INFORMATION When the fi rmware upgrade is done, check the fi rmware details by following the steps below. With the unit in Stop mode, press the MENU button. HDMI Setup Press the ▲▼ buttons to select Setup, then press the OK Photo Parental Setup or ►... - Page 49 system upgrade Press the ▲▼ buttons to select a desired item, then press the OK button. • If DHCP is set to Off and DNS is set to Manual HDMI Setup Parental Setup System Information Photo Network Setup System Upgrade Network Setup Setup DHCP...
-
Page 50: Watching A Movie
watching a movie USING THE DISPLAY FUNCTION hZCV During playback, press the INFO button on the remote Info control. Title : 001/006 Chapter : 001/016 Press the ▲▼ buttons to select the desired item. Playing Time : 00:04:17 Audio : ENG Multi CH Subtitle : Off Press the ◄►... -
Page 51: Using The Disc Menu & Popup/Title Menu
watching a movie USING THE DISC MENU & POPUP/TITLE MENU Using the Disc Menu During playback, press the DISC MENU button on the PLAY MOVIE LANGUAGES SCENE SELECTIONS PREVIEWS remote control. Press the ▲▼◄► buttons to make the desired setup, then press the ►... -
Page 52: Repeat Play
REPEAT PLAY Repeat the current chapter or title. hZCV Repeat playback During playback, press the REPEAT button on the remote Repeat control. Repeat screen appears. Press the ▲▼ buttons to select Chapter or Title. • BD/DVD repeats play by chapter or title. To return to normal play, press the REPEAT button again, then press the ▲▼... -
Page 53: Selecting The Subtitle Language
watching a movie Using the INFO button During playback, press the INFO button on the remote control. Press the ▲▼ buttons to select Audio language. Press the ◄► buttons on the remote control to select the desired audio. This function depends on what audio languages are encoded on the disc and may not be available. ... -
Page 54: Changing The Camera Angle
CHANGING THE CAMERA ANGLE When a BD/DVD contains multiple angles of a particular scene, you can use the ANGLE function. Using the ANGLE function During playback, press the INFO button on the remote control. Press the ▲▼ buttons to select Angle. Info Title : 001/006... - Page 55 watching a movie Playing back a bookmark During playback, press the MARKER button on the Marker ► 00:12:21 / 01:53:26 remote control. 00:12:17 00:12:27 a DELETE § MOVE s Play e EXIT Press the ◄► buttons to select a bookmarked scene. Press the OK or PLAY/PAUSE( ) button to start playing from the selected scene.
-
Page 56: Listening To Music
listening to music PLAYING AN AUDIO CD(CD-DA) Insert an Audio CD(CD-DA) into the disc tray. TRACK 001 01/12 ► For an audio CD, the fi rst track will be played 00:01:29 / 00:04:06 automatically. To move to the Music List, press the STOP or RETURN button. -
Page 57: Buttons On The Remote Control Used For
listening to music BUTTONS ON THE REMOTE CONTROL USED FOR AUDIO CD (CD-DA)/ MP3 DISC PLAYBACK SKIP ( ) button: During playback, plays the next track. Moves to the next page in the Music List or the Playlist. PLAY/PAUSE ( ) button: Plays the currently selected track. If pressed during playback, the current track is paused. - Page 58 Playlist You can create a playlist with up to 99 tracks. To setup, follow steps 1 to 2 in page 55. Video TRACK 006 00:03:20 Press the GREEN(B) button. Music TRACK 007 00:03:32 TRACK 008 00:04:36 Photo TRACK 009 00:04:17 Setup TRACK 010 00:04:11...
-
Page 59: Viewing A Picture
Viewing a Picture VIEWING A PICTURE Insert a JPEG disc into the disc tray. • The Menu screen is displayed. Music Root ▲▼ Photo Press the buttons to select Photo, then press the OK 176.JPG 08 Feb 2003 127 KB button. -
Page 60: Zoom
ZOOM To setup, follow steps 1 to 3 in "Viewing a Picture" on page 58. KE.JPG 04/07 Press the OK button. Press the YELLOW(C) button. ar90 b u90 c Zoom d Speed © Slide Show Use the RED(A) and GREEN(B) buttons to zoom in/out the image. -
Page 61: Troubleshooting
troubleshooting Before requesting service, please check the following. PROBLEM SOLUTION No operations can be performed with • Check the batteries in the remote control. They may need replacing. the remote control. • Operate the remote control at a distance of no more than 6.1m. •... - Page 62 • Go to the contents and fi nd the section of the instruction book that contains the explanations regarding the current problem, and follow the procedure once again. • If the problem still cannot be solved, please contact your nearest Samsung authorized service center. The picture is noisy or distorted •...
-
Page 63: Appendix
96 kHz Sampling : 4 Hz to 44 kHz *S/N Ratio 120 dB *Dynamic Range 103 dB *Total Harmonic Distortion 0.003% *: Nominal specifi cation - Samsung Electronics Co., Ltd reserves the right to change the specifi cations without notice. - Weight and dimensions are approximate. 62_ appendix... -
Page 64: Copy Protection
HD DVD discs cannot be played in this player. content protection system for BD format, which • Samsung cannot assure that this player will play every imposes certain restrictions including playback disc bearing the BD-ROM, DVD-Video, DVD-RW / DVD- restrictions for BD-ROM Mark and/or BD+ R and CD-RW / CD-R logos, and this player may not protected contents. - Page 65 Contact SAMSUNG WORLD WIDE If you have any questions or comments relating to Samsung products, please contact the SAMSUNG customer care centre. Region Country Customer Care Center Web Site CANADA 1-800-SAMSUNG(726-7864) www.samsung.com/ca North America MEXICO 01-800-SAMSUNG(726-7864) www.samsung.com/mx U.S.A 1-800-SAMSUNG(726-7864) www.samsung.com/us...
- Page 66 Blu-ray Disk Oynatıcı Kullanım Kılavuzu BD-P1400...
- Page 67 yeni Blu-ray Disk Oynatıcınızın özellikleri Oynatıcı Özellikleri Dijital Fotoğraf Görüntüleyici (JPEG) Televizyonunuzda dijital fotoğrafl arınızın keyfi ni çıkarabilirsiniz. MP3 Çalma Bu cihaz CD-R/-RW, DVD-R/-RW disklerinden mp3 dosyalarını çalabilir. HDMI (Yüksek Tanımlı Çoklu Ortam Arabirimi) HDMI, oynatıcıdan televizyonunuza temiz bir dijital video/ses sinyali yolu sağlayarak görüntü parazitini azaltır. Blu-ray Disklerinin Özellikleri Blu-ray Diskleri, tek yönlü...
- Page 68 Grafi k düzlemleri PLAY MOVIE LANGUAGES SCENE SELECTIONS PREVIEWS HD video katmanı üzerinde iki farklı tam HD çözünürlüklü (1920x1080) video katmanı Grafik mevcuttur. Düzlemleri Katmanlardan biri video ile ilgili grafi klere ayrılmıştır (alt yazılar gibi), diğer katman da düğmeler ve ▼...
- Page 69 emniyet bilgileri UYARI ELEKTRİK ÇARPMASI RİSKİNİ AZALTMAK İÇİN, KAPAĞI (VEYA CİHAZIN ARKASINI) AÇMAYIN. İÇİNDE, KULLANICI TARAFINDAN ONARILABİLECEK PARÇA BULUNMAMAKTADIR SERVİS İÇİN YETKİLİ SERVİS PERSONELİNE BAŞVURUN. Bu sembol, cihazın içinde elektrik çarpması veya yaralanma riski teşkil eden tehlikeli DİKKAT voltaj bulunduğunu ifade eder. ELEKTRİK ÇARPMASI RİSKİ...
- Page 70 Bu kullanıcı kılavuzu ile birlikte verilen ürün, belirli üçüncü tarafl arın belirli telif hakları altında tescil edilmiştir. Bu ruhsat son kullanıcı niteliğindeki tüketiciler tarafından lisanslı içerikler için özel, ticari olmayan kullanım ile sınırlandırılmıştır. Ticari kullanım için hiçbir hak verilmemiştir. Bu ruhsat bu üründen başka bir ürünü kapsamaz; bu ruhsat bu ürünle birlikte satılan ya da kullanılan ISO/IEC 11172-3 ya da ISO/IEC 13818-3 standardına uygun lisanslı...
- Page 71 Bu oynatıcıdan kaynaklanan bir sorun değildir. • Samsung bu oynatıcının BD, DVD ve CD logosu taşıyan her disk formatını oynatacağına garanti veremez çünkü disk biçimleri değişiklik gösterebilir ve BD, DVD ve CD disklerin yazılımı ve/veya üretimi esnasında sorunlar ve hatalar meydana gelebilir.
- Page 72 Bir ses sistemine bağlanmasi (5.1 Kanalli amplifi katör) Bir ses sistemine bağlanmasi(DOLBY Dijital, DTS Amplifi katör) Bir ses sistemine bağlanmasi(HDMI Destekli Amplifi katör) Yazilim güncellemesi için samsung’un FTP/ İNTERNET sitesine bağlanma BLU-RAY DISK OYNATICINIZIN Oynatmadan önce TEMEL IŞLEVLERI Ekran menülerini dolaşma Disk oynatma Arama ve atlama işlevlerinin kullanilmasi...
- Page 73 içindekiler SISTEM AYARLARI Dil seçeneklerinin ayarlanmasi Ses seçeneklerinin ayarlanmasi Hoparlör seçeneklerinin ayarlanmasi VİDEO Görüntüsünün/çikiş seçeneklerinin ayarlanmasi HDMI Kurulum seçeneklerinin ayarlanmasi Ebeveyn kilidinin ayarlanmasi SISTEMIN GÜNCELLENMESI Yazilim güncelleme Sistem bilgisi Ağ kurulumu FILM IZLEME Görüntü işlevinin kullanilmasi Disk menüsünün ve açilir menünün/bölüm menüsünün kullanilmasi Tekrar oynatma Konuşma dilinin seçilmesi...
- Page 74 Bu cihazı kullanmadan önce Güvenlik Talimatlarına aşina olduğunuzdan emin olun. (Bkz. sayfa 4-6.) Sorun çıkarsa Sorun Giderme bölümüne bakın. (Bkz. sayfa 60-61) Telif hakkı ©2007 Samsung Electronics Co.,Ltd. Tüm hakları saklıdır. Bu kullanım kılavuzunun hiçbir bölümü ya da tamamı, Samsung Electronics Co.Ltd. şirketinin önceden yazılı izni olmadan çoğaltılamaz ve kopyalanamaz. Türkçe _9...
- Page 75 başlarken DİSK TİPLERİ VE ÖZELLİKLERİ Oynatılabilen disk tipleri Disk Disk Tipleri Kayıtlı içerik Disk Şekli Maks. Oynatma süresi Logosu Oynatma süresi Parçaya BD-ROM SES + VIDEO Tek tarafl ı (25GB/50GB) göre değişir Tek tarafl ı (12 cm) Çift tarafl ı (12 cm) DVD-VIDEO SES + VIDEO Tek tarafl...
- Page 76 Tüm diskler uyumlu olmadığı gibi her disk de oynatılamaz. Daha fazla bilgi için bu Kılavuzun Uyumluluk Uyarısı bölümüne bakın. Uyumluluk sorunları yaşarsanız, lütfen SAMSUNG müşteri hizmetleri merkezine başvurun. Bu Samsung Blu-ray Disk Oynatıcı (BD-P1400) sadece BD-ROM Profi l 1 sürüm 1.0 özelliğine sahip diskleri destekler. Daha sonraki sürümlere sahip diskleri oynatmak isterseniz, oynatıcınızın sürümünü...
- Page 77 DVD-R Disk Oynatma • Video Modunda kaydedilen bir DVD-R sonlandırıldığında, DVD-Video halini alır. • Bu cihaz, bir Samsung DVD video kaydediciyle kaydedilen ve sonlandırılan DVD-R disklerini oynatabilir. Diskin ve kaydın durumuna göre bazı DVD-R disklerini oynatamayabilir. ❖ DVD-RW Disk Oynatma •...
- Page 78 ❖ JPEG disklerinin kullanımı • UDF, ISO9660 veya JOLIET formatında kaydedilen CD-R/-RW, DVD-RW/-R diskleri oynatılabilir. • Sadece “.jpg”, “.JPG”, “.jpeg” veya “JPEG” uzantıları olan JPEG dosyaları gösterilebilir. • Sürekli JPEG desteklenmektedir. ❖ DVD-RW/-R (V) • Bu, DVD-RW ve DVD-R disklerine veri kaydetmek için kullanılan bir biçimdir. Disk sonlandırıldıktan sonra, Blu-ray Disk Oynatıcınızda oynatılabilir.
- Page 79 açıklama ÖN PANEL DİSK TEPSİSİ Diski almak için açılır. AÇ/KAPAT DÜĞMESİ Disk tepsisini açar ve kapatır.. Uzaktan Kumanda Sensörü OYNAT/BEKLET DÜĞMESİ Bir diski oynatır veya oynatmayı duraklatır. DURDUR DÜĞMESİ Diski oynatmayı durdurur.. ARA/ATLA DÜĞMELERİ Sonraki veya önceki bölüm/alt bölüm/parçaya gider. EKRAN Oynatma durumunu, saati vs.
- Page 80 ARKA PANEL Güç açıkken fan daima çalışır. Ürünü kurarken, fanın her tarafında en az 10 cm’lik boş alan olduğundan emin olun. 5.1CH ANALOG A/V amplifi katörün 5.1CH analog girişine bağlayın AUDIO OUT AUDIO OUT Ses kablolarıyla harici cihazın ses girişine bağlanır. VIDEO OUT Harici cihazın girişine video kablosu ile bağlanır.
- Page 81 uzaktan kumanda UZAKTAN KUMANDANIN TANITILMASI 16_ uzaktan kumanda...
- Page 82 Türkçe _17...
-
Page 83: Tv Standby/On
uzaktan kumanda UZAKTAN KUMANDANIN AYARLANMASI Televizyonunuzun bazı işlevlerini bu uzaktan kumanda ile yönetebilirsiniz. Kumanda işlev düğmeleri şunlardır : TV STANDBY/ON, TV PROG ,., TV VOL + –, TV MUTE, TV INPUT SEL.. Televizyonunuzun uyumluluğunu belirlemek için aşağıdaki talimatları takip edin. Televizyonunuzu açın. -
Page 84: Tv Standby/On
KUMANDA EDİLEBİLEN TELEVİZYONLARIN KODLARI Marka SAMSUNG TV STANDBY/ON+01, +02, +03, +04, +05, +06, +07, +08, +09 AIWA TV STANDBY/ON+82 ANAM TV STANDBY/ON+10, +11, +12, +13, +14, +15, +16, +17, +18 BANG & OLUFSEN TV STANDBY/ON+57 TV STANDBY/ON+71 BLAUPUNKT BRANDT TV STANDBY/ON+73... - Page 85 bağlantılar Bu bölüm Blu-ray Disk Oynatıcının diğer harici cihazlara bağlanmasına ilişkin çeşitli yöntemleri anlatır. HDMI KABLOSU İLE BİR TELEVİZYONA BAĞLAMA Bir HDMI-HDMI kablosunu kullanarak (dahil değildir), Blu-ray Disk Oynatıcının arkasındaki HDMI OUT terminalini televizyonunuzun HDMI IN terminaline bağlayın. TV ekranında Blu-ray Disk Oynatıcının HDMI sinyali belirene kadar televizyonunuzun uzaktan kumandasındaki giriş...
- Page 86 Oynatıcıyı HDMI kablosu ile televizyona ilk kez bağladığınızda, HDMI çıkış çözünürlüğü otomatik olarak televizyonun desteklediği en yüksek seviyeye ayarlanır. Blu-ray Disk oynatıcıyı HDMI kablosu ile bir Samsung televizyona bağlarsanız, oynatıcı, televizyonunun uzaktan kumandası ile kolayca çalıştırılabilir. (Bu sadece Anynet+ özelliğini destekleyen Samsung televizyonlarda geçerlidir.) (Bkz. sayfa 41-42.) •...
- Page 87 bağlantılar DVI KABLOSU İLE TELEVİZYONA BAĞLANMASI Bir HDMI-DVI kablosunu kullanarak (dahil değildir), Blu-ray Disk Oynatıcının arkasındaki HDMI OUT terminalini televizyonunuzun DVI IN terminaline bağlayın. Ses kablolarını kullanarak Blu-ray Disk Oynatıcının arkasındaki AUDIO (kırmızı ve beyaz) OUT terminallerini televizyonunuzun AUDIO (kırmızı ve beyaz) IN terminallere bağlayın. Blu-ray Disk Oynatıcıyı...
- Page 88 EK CİHAZ KABLOSU İLE TELEVİZYONA BAĞLANMASI Ek cihaz video kablolarıyla televizyonunuza bağlama. Yüksek kalitede ve doğru renklere sahip görüntüler elde edersiniz. Ek cihaz video, net ve temiz görüntüleri sunmak için, resim öğesini siyah-beyaz(Y), mavi (Pb), kırmızı (Pr) sinyallere ayırır. (Ses sinyalleri ses çıkışından sağlanır.) Ek cihaz video kablolarını...
- Page 89 bağlantılar S-VİDEO KABLOSU İLE TELEVİZYONA BAĞLANMASI S-Video kablosuyla televizyonunuza bağlama. Yüksek kalitede görüntüler elde edersiniz. S-Video, normal video giriş modundan daha net görüntüler sunmak için, resim öğesini siyah-beyaz(Y) ve renk(C) sinyallerine ayırır. (Ses sinyalleri ses çıkışından sağlanır.) Bir S-Video kablosunu kullanarak (dahil değildir), Blu-ray Disk Oynatıcının arkasındaki S-VIDEO OUT terminalini televizyonunuzun S-VIDEO IN terminaline bağlayın.
- Page 90 VİDEO KABLOSU İLE TELEVİZYONA BAĞLANMASI Video/ses kablolarını kullanarak Blu-ray Disk Oynatıcının arkasındaki VIDEO (sarı) / AUDIO (kırmızı ve beyaz) OUT terminallerini televizyonunuzun VIDEO (sarı) / AUDIO (kırmızı ve beyaz) IN terminallere bağlayın. Blu-ray Disk Oynatıcıyı ve televizyonu açın. TV ekranınızda Blu-ray Disk Oynatıcının video sinyali belirene kadar televizyonunuzun uzaktan kumandasındaki giriş...
- Page 91 bağlantılar BİR SES SİSTEMİNE BAĞLANMASI (2 KANALLI AMPLİFİKATÖR) Ses kablolarını kullanarak Blu-ray Disk Oynatıcının arkasındaki AUDIO (kırmızı ve beyaz) OUT terminallerini Amplifi katörünüzün AUDIO (kırmızı ve beyaz) IN terminallere bağlayın. Video sinyal kablosunu(kablolarını) kullanarak, Blu-ray Disk Oynatıcının arkasındaki HDMI, COMPONENT, S- VIDEO veya VIDEO OUT terminallerini, sayfa 20’den 25’e kadar anlatıldığı...
- Page 92 BİR SES SİSTEMİNE BAĞLANMASI (5.1 KANALLI AMPLİFİKATÖR) Ses kablolarını kullanarak Blu-ray Disk Oynatıcının arkasındaki 5.1 ANALOG AUDIO OUT (Front R, Front L, CENTER, SUBWOOFER, Surround L, Surround R) terminallerini, Amplifi katörünüzün 5.1 Channel ANALOG AUDIO IN (Front R, Front L, CENTER, SUBWOOFER, Surround L, Surround R) terminallerine bağlayın. Video sinyal kablosunu(kablolarını) kullanarak, Blu-ray Disk Oynatıcının arkasındaki HDMI, COMPONENT, S-VIDEO veya VIDEO OUT terminallerini, sayfa 20’den 25’e kadar anlatıldığı...
- Page 93 bağlantılar BİR SES SİSTEMİNE BAĞLANMASI (DOLBY DİJİTAL, DTS AMPLİFİKATÖR) Bir optik kablo kullanarak (dahil değildir), Blu-ray Disk Oynatıcının arkasındaki DIGITAL AUDIO OUT (OPTICAL) terminalini amplifi katörünüzün DIGITAL AUDIO IN (OPTICAL) terminaline bağlayın. Bir koaksiyel kablo kullanıyorsanız (dahil değildir), Blu-ray Disk Oynatıcının arkasındaki DIGITAL AUDIO OUT (COAXIAL) terminalini amplifi...
- Page 94 BİR SES SİSTEMİNE BAĞLANMASI (HDMI DESTEKLİ AMPLİFİKATÖR) Bir HDMI-HDMI kablosunu kullanarak (dahil değildir), Blu-ray Disk Oynatıcının arkasındaki HDMI OUT terminalini Amplifi katörünüzün HDMI IN terminaline bağlayın. HDMI-HDMI kablosunu kullanarak Amplifi katörünüzün HDMI OUT terminalini, televizyonunuzun HDMI IN terminaline bağlayın. Blu-ray Disk Oynatıcıyı, Televizyonu ve Amplifi katörü açın. Amplifi...
- Page 95 YAZILIM GÜNCELLEMESİ İÇİN SAMSUNG’UN FTP/İNTERNET SİTESİNE BAĞLANMA Bir Doğrudan LAN Kablosunu kullanarak (UTP kablosu), Blu-ray Disk Oynatıcının arkasındaki LAN terminalini modeminizin LAN terminaline bağlayın. - - Daha sonraki yazılım güncellemeleri için internete bağlanın. Yazılım Güncelleme prosedürü için sayfa 45-48’e bakın.
-
Page 96: English
çıkabilir. Tüm diskler uyumlu olmadığı gibi her disk de oynatılamaz. Daha fazla bilgi için bu Kılavuzun Disk Tipi ve Özellikleri ile Uyumluluk Uyarısı bölümlerine bakın. Uyumluluk sorunları yaşarsanız, lütfen SAMSUNG müşteri hizmetleri merkezine başvurun. Bu cihaz divx, avi, mpg, mov, wma gibi CD-R/-RW ve DVD-RW/-R içeriklerini oynatmaz. - Page 97 Blu-ray Disk Oynatıcınızın temel işlevleri EKRAN MENÜLERİNİ DOLAŞMA Video Language Setup Audio Subtitle Music Disc Menu Photo Menu Setup Audio Setup Digital Output PCM Down Sampling Dynamic Compression Speaker Setup Display Setup TV Aspect Movie Frame (24 Fs) Resolution Screen Message Front Display HDMI Setup Anynet+ (HDMI-CEC)
- Page 98 ARAMA VE ATLAMA İŞLEVLERİNİN KULLANILMASI Oynatma sırasında, bir bölüm veya parça içinde hızlıca arama yapabilir ve atlama işlevini kullanarak bir sonraki bölüme geçebilirsiniz. hZCV Bir Alt Bölüm veya Parça içinde Arama Oynatma sırasında ARA ( ) düğmesine basın. • BD/DVD’de daha hızlı bir arama yapmak isterseniz bu düğmeye basın. •...
- Page 99 sistem ayarları Kolaylığınız için, oynatmaya başlamadan önce bağlayacağınız harici cihazların ve diğer ortamların ayarlarını doğru olarak yapın. DİL SEÇENEKLERİNİN AYARLANMASI Sesi, altyazıyı, disk menüsünü ve oynatıcı menüsünü önceden ayarlarsanız, her fi lm izleyişinizde bunlar otomatik olarak çıkar. Cihaz, Durma modundayken MENU düğmesine basın. Photo Setup öğesini seçmek için ▲▼...
- Page 100 SES SEÇENEKLERİNİN AYARLANMASI Bu oynatıcıyla kullanılan ses sistemine göre, ses cihazını ve ses durumunu ayarlamanızı sağlar. Cihaz, Durma modundayken MENU düğmesine basın. Photo Language Setup Setup öğesini seçmek için ▲▼ düğmelerine, sonra da OK Audio Setup Setup veya ► düğmesine basın. No Disc No Disc Display Setup...
- Page 101 sistem ayarları PCM Down Sampling • On : Oynatıcıya bağlanan Amplifi katör 96KHZ uyumlu değilse bunu seçin. 96KHz sinyalleri düşürülerek 48KHz’e Photo Language Setup Digital Output : PCM dönüştürülür Audio Setup PCM Down Sampling : On On Setup No Disc No Disc •...
- Page 102 HOPARLÖR SEÇENEKLERİNİN AYARLANMASI Bu oynatıcıyı 5.1 kanallı Analog çıkışlardan bir Amplifi katöre/Alıcıya veya Ev sinema sistemine bağladığınızda, en iyi sesi elde etmek için Hoparlör Seçeneklerini ayarlamanız gerekir. Cihaz, Durma modundayken MENU düğmesine basın. Language Setup Photo Setup öğesini seçmek için ▲▼ düğmelerine, sonra da OK Audio Setup Setup veya ►...
- Page 103 sistem ayarları VİDEO GÖRÜNTÜSÜNÜN/ÇIKIŞ SEÇENEKLERİNİN AYARLANMASI Bu işlev TV ekranı ayarlarını yapmanızı sağlar. Bu işlev, diskin veya televizyonun Language Setup tipine bağlıdır. Bu özellik bazı disklerde veya televizyonlarda çalışmayabilir. Photo Audio Setup Cihaz, Durma modundayken MENU düğmesine basın. Setup Display Setup No Disc No Disc Setup öğesini seçmek için ▲▼...
- Page 104 Film Karesi (24 Fs) (Movie Frame (24 Fs)) Filmler genellikle saniyede 24 kare şeklinde çekilir. Bazı Bluray Language Setup Disklerinin bu kare oranında oynatma özelliği vardır. Photo Audio Setup TV Aspect : 16:9 Wide Movie Frame (24Fs) özelliğini ON olarak ayarladığınızda, Blu- Display Setup Movie Frame (24 Fs) : Off...
- Page 105 sistem ayarları ❖ Çıkış moduna göre çözünürlük • BD oynatma Çıkış HDMI Component (Ek cihaz) VIDEO/S-Video Ayarlar 1080p, Film Karesi(24Fs) kapalı 1080p@60F 1080i 576i/480i 1080p/1080i, Film Karesi (24Fs) açık 1080p@24F 1080i 576i/480i 1080i, Film Karesi(24Fs) kapalı 1080i 1080i 576i/480i 720p 720p 720p 576i/480i...
- Page 106 : TV System Upgrade Anynet+ Nedir? Anynet+, bu cihazın Anynet+ özelliği olan diğer Samsung cihazlarıyla birlikte kullanılmasını sağlayan bir kolaylık işlevidir. Bu cihaza, bir Samsung televizyonunun uzaktan kumandasını kullanarak kumanda edebilirsiniz ya da bir Samsung televizyonunu veya Ev Sinema sistemini açıp, sadece Blu-ray oynatıcının uzaktan kumandasından PLAY düğmesine basarak kolayca disk oynatımına başlayabilirsiniz.
- Page 107 • Samsung televizyonunun uzaktan kumandasındaki düğmeler: Bu düğmeler, oynatıcının uzaktan kumandasındaki düğmelerle aynı şekilde çalışır. - Oynatma kumanda düğmeleri : - Menü kullanım düğmesi : - Numara düğmeleri : - Renkli düğmeler : Televizyon Anynet+ Menüsü Samsung televizyonunuzun uzaktan kumandasındaki Anynet+ düğmesine bastığınızda, aşağıdaki ekran menüsü...
- Page 108 EBEVEYN KİLİDİNİN AYARLANMASI Ebeveyn Kilidi işlevi, ailenizin seyredeceği BD/DVD’lerin türünü belirleyebilmeniz için sınıfl andırılmış BD/DVD’lerle birlikte çalışır. Diskte 8’e kadar sınıfl andırma seviyesi bulunur. Cihaz, Durma modundayken MENU düğmesine basın. Display Setup Photo HDMI Setup Setup öğesini seçmek için ▲▼ düğmelerine, sonra da OK Parental Setup Setup veya ►...
- Page 109 sistem ayarları Sınıfl andırma Düzeyinin Ayarlanması Rating Level öğesini seçmek için ▲▼ düğmelerine ve ardından OK veya ► düğmesine basın. Display Setup Photo HDMI Setup Parental Lock : Off Parental Setup Rating Level : 8 (Adults) 8 (Adults) Setup No Disc No Disc System Upgrade New Password...
- Page 110 Samsung ileride Blu-ray oynatıcınızın yazılımı için güncelleme sunabilir. Yazılımı güncellemek için yapmanız gereken: samsung.com internet sitesine girin, ‘SUPPORT’ sayfasına girerek yazılımı indirin ve bunu bir CD’ye yazdırarak bir güncelleme CD’si oluşturun. ya da Oynatıcınızın LAN terminalini, modeminizdeki LAN terminaline bağlayın (bkz. sayfa 30) ve aşağıdaki adımları...
- Page 111 sistemin güncellenmesi Sistemi güncellemek için ◄► düğmelerini kullanarak Start HDMI Setup System Information öğesini seçin ve OK düğmesine basın. Parental Setup Network Setup Photo System Upgrade Upgrade Start Setup No Disc No Disc System Upgrade The new update data was found. Current Version : XXXXX New Version : XXXXX Start...
- Page 112 SİSTEM BİLGİSİ Yazılımın güncellenmesi tamamlandıktan sonra, aşağıdaki adımları takip ederek yazılım bilgilerini kontrol edin. Cihaz, Durma modundayken MENU düğmesine basın. HDMI Setup Setup öğesini seçmek için ▲▼ düğmelerine, sonra da OK Photo Parental Setup veya ► düğmesine basın. Setup System Upgrade No Disc No Disc System Upgrade öğesini seçmek için ▲▼...
- Page 113 sistemin güncellenmesi ▲▼ düğmelerini kullanarak istediğiniz öğeyi seçin ve OK düğmesine basın. • DHCP Off olarak ayarlanırsa, DNS Manual olarak ayarlanırsa HDMI Setup Parental Setup System Information Photo Network Setup System Upgrade Network Setup Setup DHCP : Off No Disc No Disc IP Address : 000 .
- Page 114 fi lm izleme GÖRÜNTÜ İŞLEVİNİN KULLANILMASI hZCV Oynatma sırasında, uzaktan kumanda üzerindeki INFO Info düğmesine basın. Title : 001/006 Chapter : 001/016 ▲▼ düğmelerini kullanarak istediğiniz öğeyi seçin. Playing Time : 00:04:17 Audio : ENG Multi CH Subtitle : Off ◄...
- Page 115 fi lm izleme DİSK MENÜSÜNÜN VE AÇILIR MENÜNÜN/BÖLÜM MENÜSÜNÜN KULLANILMASI Disk Menüsünün Kullanılması Oynatma esnasında, uzaktan kumandadaki DISC MENU PLAY MOVIE LANGUAGES SCENE SELECTIONS PREVIEWS düğmesine basın. ▲▼◄► düğmelerini kullanarak istediğiniz ayarı yapın ►ve OK düğmesine basın. • Disk menüsünün ayar öğeleri diskten diske değişebilir. ▼...
- Page 116 TEKRAR OYNATMA Geçerli bölümü veya parçayı tekrarlar. hZCV Tekrar oynatma Oynatma sırasında, uzaktan kumanda üzerindeki REPEAT Repeat düğmesine basın. Tekrar ekranı görünecektir. Chapter veya Title öğesini seçmek için ▲▼ düğmelerine basın. • BD/DVD bölümü veya parçayı tekrar oynatır. Normal oynatmaya geri dönmek için REPEAT düğmesine tekrar basın ve ▲▼ düğmelerini kullanarak Off öğesini seçin.
- Page 117 fi lm izleme INFO düğmesinin kullanılması Oynatma sırasında, uzaktan kumanda üzerindeki INFO düğmesine basın. ▲▼ düğmelerini kullanarak Audio language öğesini seçin. İstenilen ses dilini seçmek için uzaktan kumandadaki ◄► düğmelerine basın. Bu işlev, diskte hangi ses dillerinin kodlandığına bağlı olarak değişir ve kullanılamayabilir. ...
- Page 118 KAMERA AÇISININ DEĞİŞTİRİLMESİ Bir BD/DVD’de belli bir sahnenin birden fazla açısı bulunuyorsa AÇI işlevini kullanabilirsiniz. ANGLE işlevinin kullanılması Oynatma sırasında, uzaktan kumanda üzerindeki INFO düğmesine basın. Info Angle öğesini seçmek için ▲▼ düğmelerini kullanın. Title : 001/006 Chapter : 003/016 Playing Time : 00:11:14 Audio...
- Page 119 fi lm izleme Yer iminin oynatılması Oynatma sırasında, uzaktan kumanda üzerindeki Marker ► 00:12:21 / 01:53:26 MARKER düğmesine basın. 00:12:17 00:12:27 a DELETE § MOVE s Play e EXIT ◄► düğmelerini kullanarak yer imi ile işaretlenmiş bir sahneyi seçin. Seçilen sahneden oynatmayı başlatmak için OK veya PLAY/PAUSE( ) düğmesine basın.
- Page 120 müzik dinleme BİR SES CD’Sİ (CD-DA) ÇALMA Disk tepsisine bir Ses CD’si (CD-DA) yerleştirin. TRACK 001 01/12 ► Ses CD’sinde ilk parça otomatik olarak çalmaya başlar. 00:01:29 / 00:04:06 Müzik Listesine gitmek için STOP veya RETURN düğmesine basın. Müzik Listesi ekranı görünür a Play Mode Çalmak istediğiniz parçayı...
- Page 121 müzik dinleme SES CD’Sİ (CD-DA)/MP3 DİSKİ ÇALMAK İÇİN KULLANILAN UZAKTAN KUMANDA DÜĞMELERİ ATLA ( ) düğmesi : Oynatma sırasında, bir sonraki parçayı çalar. Müzik Listesinde veya Oynatma Listesinde bir sonraki sayfaya geçer. PLAY/PAUSE ( ) düğmesi : Seçilmiş olan parçayı çalar. Çalma sırasında basılırsa, çalınan parça duraklatılır.
- Page 122 Oynatma Listesi (Playlist) En fazla 99 parçalık bir oynatma listesi oluşturabilirsiniz. Ayarlamak için sayfa 55’teki 1. ve 2. adımları uygulayın. Video TRACK 006 00:03:20 YEŞİL (B) düğmeye basın. Music TRACK 007 00:03:32 TRACK 008 00:04:36 Photo TRACK 009 00:04:17 Setup TRACK 010 00:04:11 TRACK 011...
- Page 123 Resim Görüntüleme RESİM GÖRÜNTÜLEME Disk tepsisine bir JPEG diski yerleştirin. • Menü ekranı görünür. Music Root Photo öğesini seçmek için ▲▼ düğmelerine, sonra da OK Photo 176.JPG 08 Feb 2003 127 KB düğmesine basın. Setup BEACH.JPG 17 Feb 2004 27 KB KE.JPG 10 Apr 2003 194 KB...
- Page 124 YAKINLAŞTIRMA (ZOOM) Ayarlamak için sayfa 58’deki “Resim Görüntüleme” bölümünün 1 ila KE.JPG 04/07 3. adımlarını uygulayın. OK (Tamam) düğmesine basın. SARI (C) düğmeye basın. ar90 b u90 c Zoom d Speed © Slide Show Görüntüyü yakınlaştırmak/uzaklaştırmak için KIRMIZI(A) veya YEŞİL(B) düğmelere basın.
- Page 125 sorun giderme Servis çağırmadan önce lütfen aşağıdakileri kontrol edin. SORUN ÇÖZÜM Uzaktan kumandayla hiçbir işlem • Uzaktan kumandanın pillerini kontrol edin. Değiştirilmeleri gerekebilir. yapılamıyor. • Uzaktan kumandayı 6,1 metreden uzak mesafeden kullanmayın. • Pilleri çıkarın ve uzaktan kumandanın içindeki mikroişlemciyi boşaltmak ve sıfırlamak için kumandanın düğmelerini birkaç...
- Page 126 Farklı sorunlar yaşarsanız. • Kullanma kılavuzunun İçindekiler bölümüne bakın, mevcut sorunla ilgili işlemleri anlatan kısmı inceleyin ve ilgili prosedürü tekrar uygulayın. • Problem yine de çözülemezse, lütfen en yakın Samsung yetkili servis merkezine başvurun. Görüntü parazitli veya bozuk • Diskin kirli veya çizik olmadığından emin olun.
- Page 127 *S/N Oranı 120 dB *Dinamik Aralık 103 dB *Toplam Harmonik Bozulma 0.003% *: Nominal spesifi kasyon - Samsung Electronics Co., Ltd bu spesifi kasyonları önceden bildirim yapmadan değiştirme hakkını saklı tutar. - Ağırlık ve ebatlar yaklaşık olarak verilmiştir. 62_ eK...
- Page 128 - bu oynatıcı, standart bir DVD oynatıcıdan ve diğer AV yükümlülük altında bırakabilir. cihazlarından farklı çalışır; ve/veya • SÜREKLİ TARAMA ÇIKIŞLARI (525p/625p) - bu Kılavuz boyunca bahsedilen ve SAMSUNG tarafından fark “TÜKETİCİLER, TÜM YÜKSEK TANIMLI edilerek müşteri hizmetleri merkezine bildirilen diğer TELEVİZYONLARIN BU ÜRÜNLE TAMAMEN sebeplerden ötürü.
- Page 129 DÜNYANIN HER YERİNDEN SAMSUNG’a Ulaşın Samsung ürünleri ile ilgili olarak herhangi bir yorum ya da sorunuz varsa lütfen SAMSUNG mü teri hizmetleri merkezi ile temas kurun. Bölge Ülke Müşteri Hizmetleri Merkezi Web Sitesi CANADA 1-800-SAMSUNG(726-7864) www.samsung.com/ca North America MEXICO 01-800-SAMSUNG(726-7864) www.samsung.com/mx...