Fujitsu LIFEBOOK NH532 User Manual
Hide thumbs
Also See for LIFEBOOK NH532:
- User manual (280 pages) ,
- Getting started (13 pages) ,
- Operating manual (82 pages)
Table of Contents
Available languages
Available languages
Quick Links
See also:
Operating Manual
Chapters
Table of Contents
Troubleshooting

Related Manuals for Fujitsu LIFEBOOK NH532


Summary of Contents for Fujitsu LIFEBOOK NH532
- Page 1 User’s Guide Learn how to use your Fujitsu LIFEBOOK NH532 notebook Guide Découvrez comment utiliser votre ordinateur portable d’utilisation Fujitsu LIFEBOOK NH532...
- Page 2 User’s Guide Learn how to use your Fujitsu LIFEBOOK NH532 notebook...
- Page 3 All other trademarks mentioned herein are the property of their respective owners. © Copyright 2012 Fujitsu America, Inc. All rights reserved. No part of this publication may be copied, reproduced, or translated, without prior written consent of Fujitsu. No part of this publication may be stored or transmitted B5FK-0111-01ENZ0-00...
- Page 4 Telephone: (408) 746-6000 Declares that product: Base Model Configuration: LIFEBOOK NH532 notebook Complies with Part 15 of the FCC Rules. This device complies with Part 15 of the FCC rules. Operations are subject to the following two conditions: (1) This device may not cause harmful interference, (2) This device must accept any interference received,...
-
Page 5: Recycling Your Battery
* To order a new battery for your Fujitsu mobile computer, go to the Fujitsu shopping site at www.shopfujitsu.com in the US or www.fujitsu.ca/products/notebooks in Canada. ** RBRC is an independent third party to which Fujitsu provides funding for battery recycling; RBRC is in no way affiliated with Fujitsu. -
Page 6: Table Of Contents
Conventions Used in the Guide ....... . 7 Fujitsu Contact Information ........8... - Page 7 Touchpad Pointing Device........25 Clicking .
- Page 8 Power Management ......... . 40 Power and Suspend/Resume Button .
- Page 9 Using ExpressCards™ ......... . 60 Installing ExpressCards .
- Page 10 Chapter 6 System Specifications Specifications ..........97 Microprocessor .
- Page 11 Troubleshooting the WLAN........126 Troubleshooting Table .
-
Page 12: About This Guide
Preface About This Guide The LIFEBOOK® NH532 notebook from Fujitsu America provides desktop performance with the Intel® Core™ Processor family. The 17.3" HD+ high-definition screen displays vibrant colors with pinpoint sharpness. The LIFEBOOK NH532 comes with Microsoft® Windows 8 64-Bit pre-installed. -
Page 13: Fujitsu Contact Information
OR YOUR FILES LEASE READ ALL WARNING INFORMATION CAREFULLY Fujitsu Contact Information Service and Support You can contact Fujitsu Service and Support in the following ways: • Toll free: 1-800-8Fujitsu (1-800-838-5487) • Website: USA: us.fujitsu.com/solutions Canada: www.fujitsu.ca Before you place the call, you should have the following information ready so that the customer support representative can provide you with the fastest possible solution: •... - Page 14 Fujitsu Software Download Manager (FSDM) utility. The FSDM utility is available to allow you to download the latest drivers, utilities, and applications from the Fujitsu Support site. If you have a Windows 8 or Windows 7 operating system, you will need to go to the Support Site at: http://support.fujitsupc.com/CS/Portal/support.do?srch=DOWNLOADS).
-
Page 15: Getting To Know Your Lifebook
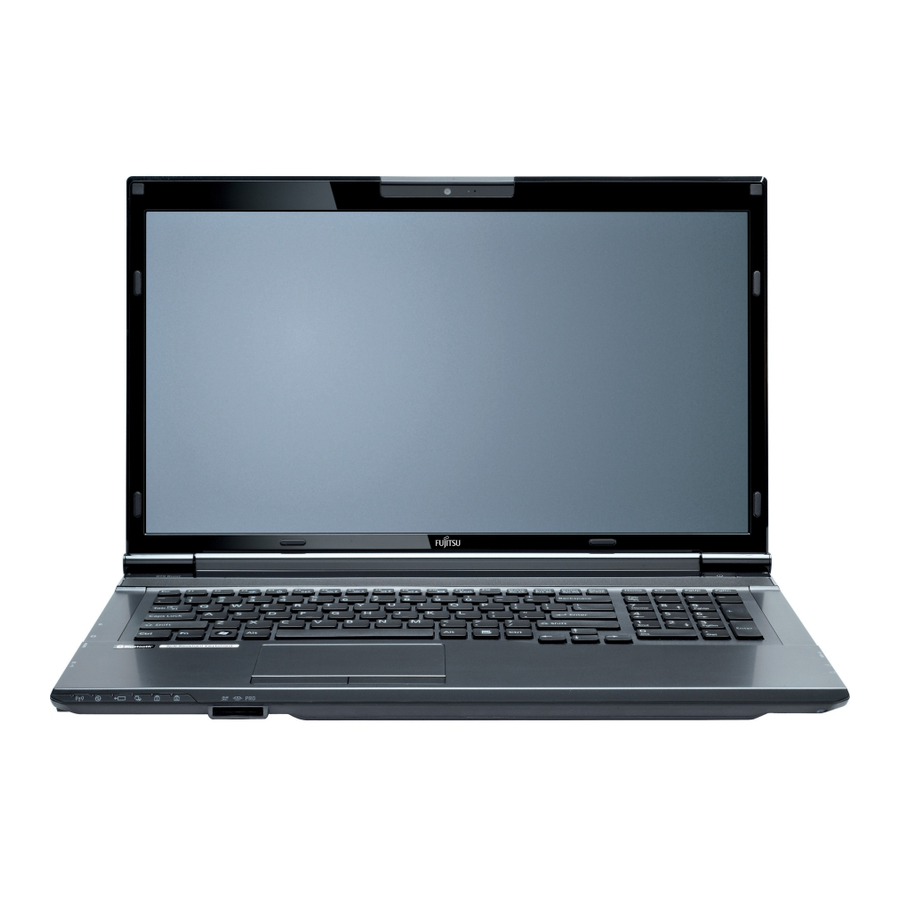
Getting to Know Your LIFEBOOK Overview This section describes the components of your Fujitsu LIFEBOOK NH532 notebook. We strongly recommend that you read it before using your notebook – even if you are already familiar with notebook computers. Figure 1. Fujitsu LIFEBOOK NH532 notebook... -
Page 16: Locating The Controls And Connectors
Locating the Controls and Connectors Web Camera Digital Microphone Touchpad Pointing Device Display Panel Status Indicator Panel Power/Suspend/ SD Card Slot Resume Button Keyboard w/ 10-key keypad Figure 2. LIFEBOOK NH532 notebook with display open 11 - Locating the Controls and Connectors... -
Page 17: Top And Front Components
Top and Front Components The following is a brief description of your LIFEBOOK notebook’s top and front components. Web Camera The web camera allows you to take pictures of yourself to send over the internet. For information on using the web camera, see the documentation associated with the CyberLink YouCam application. -
Page 18: Left-Side Panel Components
Air Vents External Video Port USB 3.0 Ports USB 3.0 Port with Anytime Charge Figure 3. LIFEBOOK NH532 notebook left-side panel Left-Side Panel Components Following is a brief description of your LIFEBOOK notebook’s left-side components. DC Power Jack The DC power jack allows you to plug in the AC adapter to power your LIFEBOOK notebook and charge the internal Lithium ion battery. -
Page 19: External Video Port
USB 3.0 Ports The four USB ports (three USB 3.0 on the left side, and one eSATA/USB 2.0 Combo port on the right) allow you to See “Universal Serial Bus (USB) Ports” on page 46. connect Universal Serial Bus (USB) devices. Note that the USB port on the left side that is closest to the front of the system has Anytime Charge capability, meaning you can charge an external device from this port, even when the system is powered down. -
Page 20: Right-Side Panel Components
Headphone Jack eSATA/USB 2.0 Optical Drive Anti-theft Lock Slot Combo Port Figure 4. LIFEBOOK NH532 notebook right-side panel Right-Side Panel Components The following is a brief description of your LIFEBOOK notebook’s right-side components. Microphone Jack See “Microphone Jack” on page 46. - Page 21 E-SATA/USB 2.0 Combo Port E-SATA (External Serial Advanced Technology Attachment) is an external version of SATA, which connects your computer to the hard drive. SATA is an interface that is much faster than typical IDE interfaces (E-SATA is six times faster than USB 2.0).
-
Page 22: Bottom Components
Air Vents (multiple locations) Memory Upgrade Compartment Lithium ion Battery Battery Latch (hold) Battery Latch (unlock) Figure 5. LIFEBOOK notebook bottom panel Bottom Components The following is a brief description of your LIFEBOOK notebook’s bottom panel components. Battery Latches The battery latches secure the Lithium ion battery in the battery bay. 17 - Locating the Controls and Connectors... - Page 23 Lithium ion Battery Bay The battery bay contains the internal Lithium ion battery. It can be opened for the removal of the battery when stored See “Lithium ion over a long period of time or for swapping a discharged battery with a charged Lithium ion battery. Battery”...
-
Page 24: Status Indicator Panel
Batt. Charging/DC In Wireless Device NumLock Indicator Hard Drive/Optical Power Indicator CapsLock Drive Access Figure 6. Status Indicator Panel Status Indicator Panel The Status Indicator panel is located at the top of the keyboard, to the left of the power/suspend/resume button. Within this panel are symbols that correspond to specific components of your notebook. -
Page 25: Power Indicator
Power Indicator The Power indicator displays whether the system is on, sleeping, or off. LED Condition Charging Status of Battery Blue, solid System is on and running. Blue, blinking System is in Sleep state. System is in Hibernation or Off. Battery Charging / DC In Indicator This indicator shows how much charge is available within the installed battery. -
Page 26: Hard Drive/Optical Drive Access Indicator
Hard Drive/Optical Drive Access Indicator The Hard Drive/Optical Drive Access indicator is solid blue when the internal hard drive or optical drive are being accessed. NumLk Indicator The NumLk indicator is solid blue when the integral keyboard is set in ten-key numeric keypad mode. To set the Num Lock, press the [Num Lock] key;... -
Page 27: Keyboard
Figure 7. Keyboard Using the Keyboard Your Fujitsu LIFEBOOK notebook has an integrated 103-key keyboard. The keys perform all the standard functions of a keyboard, including the Windows keys and other special function keys. This section describes the following keys. - Page 28 Numeric Keypad The right-hand section of the keyboard serves as a numeric keypad. To activate the 10-key keypad functions, press the [NumLk] button. Using the keypad keys, you can enter numerals 0 through 9, perform addition ( + ), subtraction ( - ), multiplication ( * ), or division ( / ), and enter decimal points ( .
-
Page 29: Function Keys
[Fn+F9] Pressing [F9] repeatedly while holding [Fn] will increase the volume of your system. [Fn+F10] Pressing [F10] while holding [Fn] opens the Fujitsu Display Manager, which allows you to select the display devices. [Fn+F11] Pressing [F11] while holding [Fn] will enable and disable ECO mode. ECO mode is designed to mini- mize notebook power consumption by reducing the LCD brightness, shutting down the optical drive and ExpressCard functionality and enabling the hard disk drive’s auto power off mode. -
Page 30: Touchpad Pointing Device
Figure 8. Touchpad pointing device The Touchpad pointing device comes built into your Fujitsu LIFEBOOK notebook. It is used to control the movement of the pointer to select items on your display panel. The Touchpad is composed of a cursor control, a left button and a right button. -
Page 31: Clicking
Clicking Clicking means pushing and releasing a button. To left-click, move the cursor to the item you wish to select, press the left button once, and then immediately release it. To right-click, move the mouse cursor to the item you wish to select, press the right button once, and then immediately release it. -
Page 32: Dragging
Dragging Dragging means pressing and holding the left button, while moving the cursor. To drag, move the cursor to the item you wish to move. Press and hold the left button while moving the item to its new location and then release it. -
Page 33: Touchpad Control Adjustment
Toggling the charms To toggle the charm swipe one finger from the right edge of touch pad (Figure 17) Toggling the application commands bar To toggle the application commands bar swipe one finger down from the top edge of the touchpad (Figure 18) Switching to last application To switch to last application swipe in one finger from the left edge.place two fingers in a pinch position and open the... -
Page 34: Volume Control
Volume Control Your Fujitsu LIFEBOOK notebook has multiple volume controls which interact with each other. NY SOFTWARE THAT CONTAINS AUDIO FILES WILL ALSO CONTAIN A VOLUME CONTROL OF ITS OWN F YOU INSTALL AN EXTERNAL AUDIO DEVICE THAT HAS AN INDEPENDENT VOLUME CONTROL... -
Page 35: Getting Started With Your Lifebook
Getting Started with Your LIFEBOOK DC Power Jack AC Adapter Figure 20. Connecting the AC Adapter Power Sources Your Fujitsu LIFEBOOK notebook has three possible power sources: a primary Lithium ion battery, an AC adapter, or an optional Auto/Airline adapter. -
Page 36: Connecting The Power Adapters
Connecting the Power Adapters The AC adapter or optional Auto/Airline adapter provides power for operating your notebook and charging the batteries. Connecting the AC Adapter Plug the DC output cable into the DC power jack of your LIFEBOOK notebook. Plug the AC adapter into an AC electrical outlet. Connecting the Optional Auto/Airline Adapter Plug the DC output cable into the DC power jack on your notebook. -
Page 37: Display Panel
Display Cover Figure 21. Opening the Display Panel Display Panel Your Fujitsu LIFEBOOK notebook contains a display panel that is backlit for easier viewing in bright environments and maintains top resolution through the use of active-matrix technology. Opening the Display Panel While holding the base of the system with one hand, lift the display backwards without touching the screen. -
Page 38: Using The Keyboard
Using the Keyboard Adjusting the brightness using the keyboard changes the setting only temporarily. • [Fn+F6]: Pressing repeatedly will lower the brightness of your display. • [Fn+F7]: Pressing repeatedly will increase the brightness of the display. Using the Power Options To change the brightness using the Power Options utility, open the Control Panel and select either Large icons or Small icons in the View by: Double-click Power Options. -
Page 39: Closing The Display Panel
• HEN USING POWER YOUR BRIGHTNESS SETTING IS SET TO ITS HIGHEST LEVEL BY DEFAULT HEN USING BATTERY POWER YOUR BRIGHTNESS SETTING IS SET TO APPROXIMATELY MID LEVEL BY DEFAULT • HE HIGHER THE BRIGHTNESS THE MORE POWER THE NOTEBOOK WILL CONSUME AND THE FASTER THE BATTERY WILL DISCHARGE OR MAXIMUM BATTERY LIFE BE SURE THE BRIGHTNESS IS SET AS LOW AS POSSIBLE... -
Page 40: Starting Your Lifebook Notebook
Starting Your LIFEBOOK Notebook Power On Power/Suspend/Resume Button The Power and Suspend/Resume button is used to power on your LIFEBOOK notebook, to resume from Sleep or Save- to-Disk mode or to place your notebook in Sleep or Save-to-Disk mode. (You can also use the button to power down the system by holding it down for approximately five seconds. -
Page 41: Boot Sequence
This information is in the BIOS program. Each time you power up or restart your notebook, it goes through a boot sequence which displays a Fujitsu logo until the operating system is found. During booting, your notebook is performing a standard boot sequence including a Power On Self Test (POST). When the boot sequence is completed without a failure and without a request for the BIOS Setup Utility, the system displays the operating system’s opening... -
Page 42: Hard Disk Drive Passwords
Turn on or restart your LIFEBOOK notebook. To enter the BIOS Setup Utility, press the [F2] key once the Fujitsu logo appears on the screen. This will open the main menu of the BIOS Setup Utility with the current settings displayed. -
Page 43: Booting The System
When you turn on your LIFEBOOK notebook for the first time, it will display a Fujitsu logo on the screen. If you do nothing the system will load the operating system, and then the Windows Welcome will begin. - Page 44 Registering your LIFEBOOK with Fujitsu You can register your notebook by going to our website at: http://www.us.fujitsu.com/computers. You will need to be set up with an Internet Service Provider (ISP) to register online. 39 - Starting Your LIFEBOOK Notebook...
-
Page 45: Power Management
Power Management Your LIFEBOOK notebook has many options and features for conserving battery power. Some of these features are automatic and need no user intervention. However, others depend on the parameters you set to best suit your operating conditions, such as those for the display brightness. Internal power management for your LIFEBOOK notebook may be controlled from settings made in your operating system. -
Page 46: Hibernation (Save-To-Disk) Feature
• Timing out from lack of activity. • Allowing the battery to reach the Dead Battery Warning condition. Your notebook’s system memory typically stores the files on which you are working, open application information, and any other data required to support the operations in progress. When you resume operation from Sleep mode, your notebook will return to the point where it left off. -
Page 47: Windows Power Management
From the Modern Start screen, press [Windows]+[X].Select Control Panel from the menu, then select Power Options. Select “Choose what the power button does” or “Choose what closing the lid does”, then make your selections (Do Nothing, Sleep, Hibernate, or Shut Down). Windows Power Management The Power Options icon located in the Windows Control Panel allows you to configure some of the power management settings. -
Page 48: Power Off
Power Off Before turning off the power, check that the hard drive/optical drive access indicator is off. If you turn off the power while accessing a disk there is a risk of data loss. To ensure that your notebook shuts down without error, use the Windows shut down procedure. -
Page 49: Energy Star® Compliance
Energy saving benefits: Fujitsu ENERGY STAR qualified mobile PCs use about half as much electricity as standard equipment – saving half in utility costs. But more than that, ENERGY STAR also makes a difference for the environment. Did you know that the average house can be responsible for twice the greenhouse gas emissions as the average car? That’s because every... -
Page 50: Device Ports
Device Ports Your LIFEBOOK notebook comes equipped with multiple ports to which you can connect an external device including disk drives, keyboards, modems, printers, etc. LAN Jack Your LIFEBOOK has a LAN jack (RJ-45) to accommodate external communications. This jack allows you to connect a LAN (RJ-45) cable for high- speed network or broadband connections (e.g., DSL, cable modem). -
Page 51: Universal Serial Bus (Usb) Ports
Universal Serial Bus (USB) Ports Universal Serial Bus (USB) ports allow you to connect USB devices such as pointing devices, keyboards and speakers. There are four USB ports (three USB 3.0 on the left side and one eSATA/USB 2.0 Combo port on the right side on the right side). Note that the USB 3.0 port on the left side closest to the front of the system has Anytime USB Charge* capability, meaning you can charge an external device from this port, even when the system is powered... -
Page 52: External Video Port
External Video Port ] + [F10] RESSING THE KEYS ALLOWS YOU TO CHANGE YOUR SELECTION OF WHERE TO SEND YOUR DISPLAY VIDEO ACH TIME YOU PRESS THE KEY COMBINATION YOU WILL STEP TO THE NEXT CHOICE STARTING WITH THE BUILT IN DISPLAY PANEL ONLY MOVING TO THE EXTERNAL DEVICE ONLY... -
Page 53: Esata Port
eSATA Port eSATA (External Serial Advanced Technology Attachment) is an external version of SATA, which connects your computer to the hard drive. E-SATA is ideal for backing up large files on an external hard drive. To connect an eSATA device: Align the connector with the port opening. -
Page 54: User-Installable Features
Chapter 3 User-Installable Features Lithium ion Battery Your LIFEBOOK notebook has a Lithium ion battery that provides power for operating your notebook when no external power source is available. The rechargeable battery is durable and long lasting, but should not be exposed to extreme temperatures, high voltages, chemicals, or other hazards. -
Page 55: Recharging The Batteries
LIFEBOOK • O NOT LEAVE A FAULTY BATTERY IN YOUR NOTEBOOK T MAY DAMAGE YOUR ADAPTER OR YOUR NOTEBOOK ITSELF T MAY ALSO PREVENT OPERATION OF YOUR NOTEBOOK BY DRAINING ALL AVAILABLE CURRENT INTO THE BAD BATTERY • NDER FEDERAL STATE OR LOCAL LAW IT MAY BE ILLEGAL TO DISPOSE OF BATTERIES BY PUTTING THEM IN THE TRASH LEASE TAKE CARE OF... -
Page 56: Low Battery State
DVD/CD-RW/CD-ROM SING HEAVY CURRENT DEVICES SUCH AS THE DRIVE MAY PREVENT CHARGING COMPLETELY Low Battery State When the battery is running low, a low battery notification message will appear. If you do not respond to the low battery message, the batteries will continue to discharge until they are too low to operate. When this happens, your LIFEBOOK notebook will go into Sleep mode. -
Page 57: Replacing The Battery
Shorted Batteries The Status Indicator panel displays the battery status via the Battery Status indicator to show the charge level available in that battery. If the display is flashing red, it means that the battery is damaged and must be replaced so it does not damage any other parts of your LIFEBOOK notebook. - Page 58 Battery latch #2 (hold) Battery Pack Battery latch #1 (unlock) Figure 28. Unlocking the Battery Figure 29. Removing the Battery 53 - Lithium ion Battery...
-
Page 59: Optical Drive
Emergency Tray Release Media Holder Tray Media Tray Eject Button Figure 30. Optical Drive Optical Drive There is a variety of media available to use with your system, depending upon the system configuration you have selected. The following optical drive is installed in your system: •... -
Page 60: Removing Media
Gently pull the tray out until a media disc can easily be placed in the tray. Place the media into the tray, label side up, with the hole in the center of the disc. Snap the disc onto the raised circle in the center of the tray. -
Page 61: Emergency Optical Drive Tray Release
Emergency Optical Drive Tray Release If for some reason the eject button fails, you can open the media tray with a paper clip inserted into the eject hole in the far right side of the front of the tray. Straighten one side of a paper clip and push it gently into the hole. - Page 62 Opening the DVD/CD-RW Drive Control Panel With most DVD-ROMs, you have the option of altering how the movie should play and what you wish to view. You can do this by using the optical drive control panel and the mouse. To open a dropdown menu for options, right-click on the movie screen.
-
Page 63: Using The Drive On Battery Power
Using the Drive on Battery Power Since optical drives consume a lot of power, your overall battery life will be shorter when operating the optical drive continuously (such as watching a DVD movie). Many movie run-times are longer than your LIFEBOOK notebook can support on a single battery. -
Page 64: Autoplay Notification Function
OME SHORTER MOVIES MAY NOT REQUIRE YOU TO SWAP BATTERIES OR ATTACH POWER TO COMPLETE THEM OWEVER IT IS BEST TO BE PREPARED SINCE ACTUAL BATTERY LIFE WHILE OPERATING THE OPTICAL DRIVE CANNOT BE GUARANTEED AutoPlay Notification Function The AutoPlay Notification function allows your LIFEBOOK notebook to automatically start a DVD/CD as soon as it is inserted in the optical drive and the tray is closed. -
Page 65: Using Expresscards
Using ExpressCards™ Your LIFEBOOK notebook supports ExpressCards in a dedicated slot. With these cards you can perform a variety of functions depending on which type of card you install. ExpressCards should be installed in the slot on the left side of the system. - Page 66 ExpressCards are installed in the ExpressCard slot (Figure 34) See your ExpressCard manual for instructions on the installation of your card. Some cards may require that your notebook is off while installing them. ExpressCard Slot ExpressCards Figure 34. Installing/Removing ExpressCards ’...
-
Page 67: Removing Expresscards
To install an ExpressCard, follow these steps: Make sure there is no ExpressCard currently in the slot. If there is, see Removing ExpressCards. Insert your ExpressCard into the slot with the product label facing up. If you are inserting a 34 mm card, be sure to align it with the left side of the slot when inserting it. -
Page 68: Secure Digital Card Slot
Secure Digital (SD) Card SD Card Slot Figure 35. Installing an SD Card Secure Digital Card Slot Your LIFEBOOK notebook supports the following memory cards, on which you can store and transfer data to and from a variety of digital devices. These cards use flash memory architecture, which means they don’t need a power source to retain data. -
Page 69: Inserting Sd Cards
Secure Digital (SD) is a flash memory technology that allows portable storage among a variety of devices, such as cell phones, GPS systems, digital cameras, and PDAs. SD Cards transfer data quickly, with low battery consumption. Inserting SD Cards SD Cards are inserted in the SD Card slot (Figure 36). To insert an SD Card, follow these steps: Figure 36. -
Page 70: Memory Upgrade Module
Memory Upgrade Module Your notebook has two memory slots. If you have a module installed in only one slot, you can increase your memory capacity by installing another memory module in the empty slot or by increasing the size of the single installed module. - Page 71 Align the memory upgrade module with the component side up. Align the connector edge of the memory upgrade module with the connector slot in the compartment. The connector will be pointing toward the rear of the notebook. Insert the memory upgrade module at a 45° angle. Press the connector edge of the module firmly down and into the connector until it lodges under the retaining clip.
-
Page 72: Checking The Memory Capacity
Removing a Memory Upgrade Module Perform steps 1 through 5 of Installing a Memory Upgrade Module. Pull the clips sideways away from each side of the memory upgrade module at the same time. Memory Clip While holding the clips out, remove the module from the slot by lifting it up and pulling towards the rear of your LIFEBOOK notebook. - Page 73 Check the memory capacity : from Modern Start screen press [Windows]+[X], then select Control by doing the following Panel> System. The amount of memory is displayed next to Installed Memory (RAM): The amount of memory displayed should be approximately the total of all memory modules installed. There may be a discrepancy which is allocated for fixed video memory.
-
Page 74: Troubleshooting Your Lifebook
Chapter 4 Troubleshooting Your LIFEBOOK Troubleshooting There may be occasions when you encounter setup or operating problems that you can solve on the spot, or problems with peripheral devices that can be solved by replacing the device. The information in this section helps you isolate and resolve some straightforward issues and identify failures that require service. - Page 75 If you have tried the solutions suggested in the Troubleshooting Table without success, contact your support representative: Toll free: 1-800-8Fujitsu (1-800-838-5487) E-mail: [email protected] Web site: http://solutions.us.fujitsu.com/www/content/support/contact/index.php Before you place the call, you should have the following information ready so that the customer support representative can provide you with the fastest possible solution: •Product name...
-
Page 76: Specific Problems
Specific Problems Using the Troubleshooting Table When you have problems with your LIFEBOOK notebook, try to find the symptoms under the Problem column of the troubleshooting table for the feature giving you difficulty. You will find a description of common causes for that symptom under the column Possible Cause and what, if anything, you can do to correct the condition under Possible Solutions. -
Page 77: Audio Problems
Plugging in headphones disables the built-in speakers. Remove the headphones. your notebook. Software driver is not The Audio Driver may be installed or reinstalled by using the Fujitsu Software configured correctly. Download Manager (FSDM). Refer to “Downloading Driver Updates” on page 89. -
Page 78: Hard Drive Problems
Problem Possible Cause Possible Solutions The drive access indicator on the The Windows AutoPlay func- This is normal. However, you may disable this feature by going to Control Panel > Status Indicator Panel blinks at tion is active and is checking AutoPlay. -
Page 79: Memory Problems
Problem Possible Cause Possible Solutions Memory Problems See “Memory Upgrade Your System Properties screen Your memory module is not Remove and re-install your memory upgrade module. Module” on page 65. does not show the correct amount properly installed. of installed memory. You have a memory Check for Power On Self Test (POST) messages. -
Page 80: Power Failures
Problem Possible Cause Possible Solutions Power Failures You turn on the system and noth- The power adapter is faulty. Try a different Power adapter or install a charged optional second battery. ing seems to happen. The main battery is com- Check the Status Indicator Panel to determine the presence and condition of the pletely discharged or there is batteries. -
Page 81: Shutdown And Startup Problems
Boot sequence settings of the Set the operating source by pressing the [ESC] key while the Fujitsu logo is on setup utility are not compati- screen or use the [F2] key and enter the setup utility and adjust the source set- See “BIOS Setup Utility”... -
Page 82: Video Problems
Video Problems The built-in display is blank when The notebook is set for an Pressing [F10] while holding down the [Fn] key opens the Fujitsu Display Man- you turn on your notebook. external monitor only. ager, which allows you to change display devices. -
Page 83: Miscellaneous Problems
Problem Possible Cause Possible Solutions Your display won’t turn on when The system may be password- Check the status indicator panel to verify that the Security icon is blinking. If it is the system is turned on or when it protected. -
Page 84: Power On Self Test Messages
*Real time clock error - Check date and time settings Real-time clock fails BIOS test. May require board repair. Contact your support representative. *Fan error, system shutdown in 30s. Contact Fujitsu tech support Fan error occurred. Please contact your support representative. -
Page 85: Restoring Your System Image And Software
Restoring Your System Image and Software It is very important that you create DVD copies of your Factory Image and Bootable Disc before beginning to use your system. To do so, follow the instructions in the “Saving Your Factory Image” and “Creating Backup Images of Factory Image and Discs”... - Page 86 Creating Backup Images of Factory Image and Bootable Disc Using the [Manage/Change] button, you can create backup images of the Factory Image and/or Bootable Disc. LL USER CREATED DATA WILL BE DELETED FROM YOUR SYSTEM WHEN THE FACTORY IMAGE IS RESTORED Launch System Backup and Restore from the desktop icon and click [Yes] on the User Account Control dialog.
-
Page 87: Backing Up A System Image
Backing Up a System Image Optional Step: Launch the Fujitsu Bonus Apps utility from your desktop, and select the components you wish to install. (Alternatively, you can access Bonus Apps by opening Charms panel from Modern Start screen and searching for "Fujitsu BonusApps".) - Page 88 On the “Step 2: Name your backup images” screen that appears, you can enter up to 300 characters of information about the backup file. This information will help you to identify the image at a later date. On “Step 3: Backup the entire C: drive image” verify your backup settings and click [Next]. Click [OK] on “Step 4: Please confirm the following before starting your backup”...
- Page 89 Selecting “Delete” option On “Step 1: Please select your target data” screen select location of a backup file. A list of backup files will appear. Select the file(s) you wish to delete and click [Next]. Click [Start] on “Step 2: Delete backup data” screen. Click [OK] to the confirmation message.
- Page 90 To verify/change the boot-up priority (rather than booting-up from the hard drive or an external floppy disk drive), perform the following steps: Power on your system. When the Fujitsu logo appears on the screen. press the [F12] key. Highlight the CD/DVD option from the Boot menu, then press [Enter].
-
Page 91: Recovery And Utility Tools
Select CD/DVD boot mode: UEFI Mode) and press [Enter]. While the files are being loaded from the disc, the Fujitsu logo screen will appear followed by a progress bar screen at the bottom of the screen. Recovery and Utility tools Diagnostics tool: The Diagnostics tool is designed for use by IT professionals. - Page 92 To recover from D: drive or external storage device: Click [User System Backups] The progress bar screen is followed by EULA screen. Click [Agree] to accept the EULA. On “Select an image to restore” screen select the image to restore from the list of images and click [Next]. Click [Start] on the “Confirm before restoration”...
-
Page 93: Recovering Your Factory Image Using Recovery And Utility
Insert the bootable disc in your DVD drive, then click [OK]. Select CD/DVD boot mode: UEFI Mode and press [Enter]. While the files are being loaded from the disc, Fujitsu logo screen will appear followed by a progress bar screen at the bottom of the screen. -
Page 94: Downloading Driver Updates
The Fujitsu Software Download Manager (FSDM) utility is available to allow you to download the latest drivers, utilities, and applications from the Fujitsu Support site. If you have a Windows 8 or Windows 7 operating system, you will need to go to the Support Site (http://support.fujitsupc.com/CS/Portal/support.do?srch=DOWNLOADS). -
Page 95: Care And Maintenance
Chapter 5 Care and Maintenance Caring for your LIFEBOOK Notebook If you use your Fujitsu LIFEBOOK notebook carefully, you will increase its life and reliability. This section provides some tips for looking after the notebook and its devices. (ESD). T •... -
Page 96: Cleaning Your Lifebook Notebook
If your notebook will not boot after it has dried out, call your support representative. • Do not use your Fujitsu LIFEBOOK notebook in a wet environment (near a bathtub, swimming pool). • Always use the AC adapter and batteries that are approved for your notebook. -
Page 97: Cleaning Guidelines Using Recommended Off-The-Shelf Cleaners
Cleaning guidelines using recommended off-the-shelf cleaners Computer exterior, computer keyboard To clean the exterior and keyboard, use one of the following off-the-shelf products: • Office Depot® #154-616 Notebook Cleaning Kit • Meridrew Enterprises Klear_Screen® Wipes • 3M CL563 Cleaner Wipes Note: After cleaning with one of these products, gently polish with a dry, soft, lint-free cloth until the solution is no longer visible. -
Page 98: Storing Your Lifebook Notebook
• Store your notebook and batteries separately. If you store your LIFEBOOK with a battery installed, the battery will discharge, and battery life will be reduced. In addition, a faulty battery might damage your LIFEBOOK. • Store your Fujitsu LIFEBOOK in a cool, dry location. Temperatures should remain between 13ºF (-25ºC) and 140ºF (60ºC). -
Page 99: Batteries
• Take the necessary plug adapters if you're traveling overseas. Check the following diagram to determine which plug adapter you'll need or ask your travel agent. Outlet Type Location Outlet Type Location Russia and the Commonwealth of Independent States (CIS), most United States, Canada, parts of Latin America, of Europe, parts of Latin America, the Middle East, parts of Africa, Mexico, Japan, Korea, the Philippines, Taiwan... -
Page 100: Media Care
Increasing Battery Life • Power your LIFEBOOK notebook through the AC or optional auto/airline adapter whenever possible. • If your notebook is running on battery power all day, connect it to the AC adapter overnight to recharge the battery. • Keep brightness to the lowest level comfortable. •... -
Page 101: Expresscards
Caring for your Optical Drive Your optical drive is durable but you must treat it with care. Please pay attention to the following points: • The drive rotates the compact disc at a very high speed. Do not carry it around or subject it to shock or vibration with the power on. -
Page 102: System Specifications
This section provides the general hardware and environmental specifications for your LIFEBOOK notebook. Specific details about your system may vary from those referenced here. For an updated list of current configurations, please go to the Fujitsu America Website at: us.fujitsu.com/computers. Microprocessor Intel®... -
Page 103: Video
Video Built-in 17.3" high definition (16:9) HD+ TFT (high contrast: 300:1 contrast ratio; high brightness: 220 nits) LCD display with LED backlight Video Color and Resolution • Main Internal: 1600 x 900 pixel resolution, 16M colors max • External (CRT): 1920 x 1200 pixel resolution, 16M colors •... -
Page 104: Device Ports
Optical Drive Dual-Layer Multi-Format DVD Writer: This drive lets you access movies, audio DVD/CDs, and software, and read and write to CD-R, CD-RW, DVD-R, DVD+R, DVD-RW, DVD+RW, and DVD RAM discs. The dual-layer architecture allows you to record up to 8.5 GB of data on DVD+R discs. Integrated Pointing Device Gesture-enabled touchpad, with left and right buttons. -
Page 105: Keyboard
Keyboard Built-in full-size keyboard with all functions. • Total number of keys: 103 • Function keys: 12, [F1] through [F12] • Feature extension key: [Fn] • Windows keys: 2 (Start key and Application key) • Key pitch: 19 mm • Key stroke: 1.8 mm External Keyboard and Mouse Support USB-compatible Management Standard... -
Page 106: Environmental Requirements
Altitude Operating: 10,000 feet (3,048 m) maximum Popular Accessories To order Fujitsu accessories, please visit our Website at: www.shopfujitsu.com or call 1-800-8FUJITSU. Included Software Depending on your pre-installed operating system, your notebook comes with software for playing audio and video files of various formats. -
Page 107: Learning About Your Software
Learning About Your Software Tutorials All operating systems and most application software have tutorials built into them upon installation. We highly recommend that you step through the tutorial before you use an application. Manuals Included with your notebook you will find manuals for your installed operating system and other pre-installed software. - Page 108 Norton Internet Security Your system includes a free 60-day trial version of Symantec’s Norton Internet Security™. Internet Security is a suite of tools designed to protect your notebook from computer viruses, hackers, spyware, and spam. It assists in the protection of data currently on your hard disk from destruction or contamination. The trial version is activated upon your acceptance of software license agreement.
-
Page 109: Glossary
Glossary AC Adapter A device which converts the AC voltage from a wall outlet to the DC voltage needed to power your LIFEBOOK notebook. Access point Wireless network device used to bridge wireless and wired network traffic. ACPI Advanced Configuration and Power Interface Active-Matrix Display A type of technology for making flat-panel displays which has a transistor or similar device for every pixel on the screen. - Page 110 Accelerated Graphics Port. Graphics port specifically designed for graphics-intensive devices, such as video cards and 3D accelerators. Auto/Airline Adapter A device which converts the DC voltage from an automobile cigarette lighter or aircraft DC power outlet to the DC voltage needed to power your LIFEBOOK notebook. BIOS Basic Input-Output System.
- Page 111 CardBus A faster, 32-bit version of the PC Card interface which offers performance similar to the 32-bit PCI architecture. CD-ROM Compact disk read only memory. This is a form of digital data storage which is read optically with a laser rather than a magnetic head.
- Page 112 Default Value A pre-programmed value to be used if you fail to set your own. DHCP Dynamic Host Configuration Protocol. A protocol used to automatically acquire parameters required for the communication, such as IP address. The sender of IP address is called a DHCP server, and the receiver is called a DHCP client.
- Page 113 Driver A computer program which converts application and operating system commands to external devices into the exact form required by a specific brand and model of device in order to produce the desired results from that particular equipment. DVMT Dynamic Video Memory Technology. A video memory architecture that increases the efficiency of the motherboard by using innovative memory utilization and direct AGP.
- Page 114 Hard drive A spinning platter of magnetic data storage media where the platter is very stiff. Input/Output. Data entering and leaving your notebook in electronic form. I/O Port The connector and associated control circuits for data entering and leaving your notebook in electronic form. Intelligent Drive Electronics.
- Page 115 Infrastructure A name of a wireless LAN configuration. This type of communication uses an access point. Another type of communication is called Ad Hoc. IP Address An identifier for a computer or device on a TCP/IP network. Networks using the TCP/IP protocol route messages based on the IP address of the destination.
- Page 116 Kilobyte. One thousand bytes. Local Area Network. An interconnection of computers and peripherals within a single limited geographic location which can pass programs and data amongst themselves. Liquid Crystal Display. A type of display which makes images by controlling the orientation of crystals in a crystalline liquid.
- Page 117 Memory A repository for data and applications which is readily accessible to your LIFEBOOK notebook’s CPU. Megahertz. Maximum Transmission Unit The maximum data size that can be transferred at a time through the Internet or other networks. You can set a smaller MTU size to obtain successful communication, if you have difficulty transferring data due to the fact that the maximum size is too large.
- Page 118 Operating System A group of control programs that convert application commands, including driver programs, into the exact form required by a specific brand and model of microprocessor in order to produce the desired results from that particular equipment. Partition A block of space on a hard drive which is set aside and made to appear to the operating system as if it were a separate disk, and addressed by the operating system accordingly.
- Page 119 Protocol Procedures and rules use to send and receive data between computers. - Method of sending and receiving data - Process used to handle communication errors Conditions required for communication are organized in procedures for correct transfer of information. Random Access Memory. A hardware component of your LIFEBOOK notebook that holds binary information (both program and data) as long as it has the proper power applied to it.
- Page 120 Shared key authentication 802.11 network authentication method in which the AP sends the client device a challenge text packet that the client must then encrypt with the correct WEP key and return to the AP. If the client has the wrong key or no key, authentication will fail and the client will not be allowed to associate with the AP.
- Page 121 TCP/IP Transmission Control Protocol/Internet Protocol. A standard Internet protocol that is most widely used. Thin Film Transistor – A technology for flat display panels which uses a thin film matrix of transistors to control each pixel of the display screen individually. Underwriters Laboratories –...
-
Page 122: Regulatory Information
Regulatory Information Notice Changes or modifications not expressly approved by Fujitsu could void this user’s authority to operate the equipment. FCC Notices Notice to Users of Radios and Television This equipment has been tested and found to comply with the limits for a Class B digital device, pursuant to part 15 of the FCC Rules. -
Page 123: Appendix A: Wlan User's Guide
Appendix A: WLAN User’s Guide FCC Regulatory Information Please note the following regulatory information related to the optional wireless LAN device. Regulatory Notes and Statements Wireless LAN, Health and Authorization for use Radio frequency electromagnetic energy is emitted from Wireless LAN devices. The energy levels of these emissions, however, are far much less than the electromagnetic energy emissions from wireless devices such as mobile phones. - Page 124 Regulatory Information/Disclaimers Installation and use of this Wireless LAN device must be in strict accordance with the instructions included in the user documentation provided with the product. Any changes or modifications made to this device that are not expressly approved by the manufacturer may void the user’s authority to operate the equipment.
- Page 125 NMB 003 B. Operation is subject to the following two conditions: (1) this device may not cause harmful interference, and (2) this device must accept any interference received, including interference that may cause undesirable operation. Modifications not expressly authorized by Fujitsu America, Incorporated, may invalidate the user's right to operate this equipment. Canadian Notice The device for the 5150-5250 MHz band is only for indoor usage to reduce the potential for harmful interference to co-channel mobile satellite systems.
-
Page 126: Before Using The Wireless Lan
Before Using the Wireless LAN This manual describes the procedures required to properly set up and configure the integrated Wireless LAN Mini-PCI device (referred to as "WLAN device" in the rest of the manual). Before using the WLAN device, read this manual carefully to ensure its correct operation. -
Page 127: Wireless Lan Modes Using This Device
Wireless LAN Modes Using this Device Ad Hoc Mode (See Figure A-1) "Ad Hoc Mode" refers to a wireless network architecture where wireless network connectivity between multiple computers is established without a central wireless network device, typically known as Access Point(s). Connectivity is accomplished using only client devices in a peer-to-peer fashion. - Page 128 Access Point (Infrastructure) Mode (See Figure A-2) Infrastructure mode refers to a wireless network architecture in which devices communicate with wireless or wired network devices by communicating through an Access Point. In infrastructure mode, wireless devices can communicate with each other or with a wired network. Corporate wireless networks operate in infrastructure mode because they require access to the WLAN in order to access services, devices, and computers (e.g., file servers, printers, databases).
-
Page 129: How To Handle This Device
How to Handle This Device The WLAN device comes pre-installed in your mobile computer. Under normal circumstances, it should not be necessary for you to remove or re-install it. The Operating System that your mobile computer comes with has been pre-configured to support the WLAN device. -
Page 130: Configuring The Wlan
Configuring the WLAN The WLAN device can be configured to establish wireless network connectivity using the software that is built into Windows Vista. Support for most industry standard security solutions is contained in this software. Pre-defined parameters will be required for this procedure. Please consult with your network administrator for these parameters: From the Modern Start screen, press [Windows]+[X], then select Control Panel from the menu. -
Page 131: Troubleshooting The Wlan
Troubleshooting the WLAN Troubleshooting Table Causes and countermeasures for troubles you may encounter while using your wireless LAN are described in the following table. Problem Possible Cause Possible Solution Unavailable Incorrect network name Ad hoc connection: verify that the network names (SSID’s) and network keys (WEP) network (SSID) or network key of all computers to be connected have been configured correctly. - Page 132 Problem Possible Cause Possible Solution Unavailable Wireless network Re-check your Network Authentication, Encryption, and Security settings. Incorrectly network authentication has failed configured security settings such as an incorrectly typed WEP key, a misconfigured connection LEAP username, or an incorrectly chosen authentication method will cause the LAN device to associate but not authenticate to the wireless network.
-
Page 133: Wlan Specifications
WLAN Specifications Item Specification Type of network The integrated Intel® Centrino Wireless-N 2230 device conforms to IEEE 802.11b/g, and 802.11n, Wi-Fi based* Transfer rate (Automatic switching) 54 Mbps maximum data rate. • 802.11n: 2.4 GHz Active frequency • 802.11b/g: 2400~2473 MHz •... -
Page 134: Using The Bluetooth Device
Using the Bluetooth Device The integrated Bluetooth V4.0 module is a wireless device installed in selected Fujitsu mobile computers. What is Bluetooth? Bluetooth technology is designed as a short-range wireless link between mobile devices, such as laptop computers, phones, printers, and cameras. Bluetooth technology is used to create Personal Area Networks (PANs) between devices in short-range of each other. - Page 135 Users are not authorized to modify this product. Any modifications invalidate the warranty. This equipment may not be modified, altered, or changed in any way without signed written permission from Fujitsu. Unauthorized modification will void the equipment authorization from the FCC and Industry Canada and the warranty.
-
Page 136: Appendix B: Using Intel® Wireless Display
Using the Wireless Display technology Intel® Wireless Display (WiDi) is a new technology that is available as an option on selected Fujitsu LIFEBOOK computers. If you have Intel WiDi on your system, please read these instructions and information regarding its use. -
Page 137: Starting The Widi Application
• F YOU PURCHASED A SYSTEM WITH AN NTEL WIRELESS AND OPTIONAL NTEL I TECHNOLOGY I APPLICATION MAY OR ). S MAY NOT BE PRE INSTALLED DEPENDING UPON YOUR SYSTEM CONFIGURATION YSTEMS WITH NTEL I PRE INSTALLED WILL HAVE A ICON LOCATED ON THEIR DESKTOP LAN. -
Page 138: Index
Index BIOS Bluetooth About This Guide Boot Sequence Built-in Speakers adapter plug adapters Air Vents CapsLock Anti-theft lock slot Clicking Audio Color Resolution Auto Insert Notification Connecting the Power Adapters Auto/Airline Adapter Controls and Connectors Conventions Used in the Guide Cursor Battery Cursor Keys... - Page 139 ExpressCard installing Eject Button problems problems removing removing upgrade module slot Microphone Jack External Monitor Port NumLk Fujitsu Contact Information Optical Drive Hard Disk Drive care access indicator loading problems removing media Headphone Jack tray release Hibernation Feature using Integrated Pointing Device...
- Page 140 Registration Universal Serial Bus Port Restarting Restoring Your Pre-installed Software USB 2.0 Ports Save-to-Disk Video SD Card Video RAM Installing Volume control installing slot Sleep Mode Warranty Specifications Windows keys Status Indicator Panel Wireless Display Wireless LAN Before Using the Wireless LAN Theft Prevention Lock Slot Connection using Wireless Zero Tool Touchpad...
- Page 141 Guide d’utilisation Découvrez comment utiliser votre ordinateur portable Fujitsu LIFEBOOK NH532...
- Page 142 La société Fujitsu America Incorporated a fait tous les efforts possibles pour vérifier l’exactitude des informations figurant dans ce document et s’assurer qu’il n’y manque rien. Cependant, puisque nos produits font continuellement l’objet d’améliorations, nous ne pouvons garantir l’exactitude de tout le contenu de ce document.
- Page 143 © Copyright 2012 Fujitsu America, Inc. Tous droits réservés. Aucune partie de cette publication ne peut être copiée, reproduite ou traduite sans le consentement préalable de Fujitsu. Aucune partie de cette publication ne peut être enregistrée ou transmise électroniquement sans le consentement écrit de Fujitsu.
- Page 144 * Pour commander une nouvelle batterie compatible avec votre ordinateur portable Fujitsu, allez sur www.shopfujitsu.com (États-Unis) ou www.fujitsu.ca/products/notebooks (Canada). ** La RBRC est une organisation indépendante dont Fujitsu finance une partie des activités de recyclage ; la RBRC n’est en aucune façon affiliée à Fujitsu.
- Page 145 Conventions utilisées dans ce guide ......7 Coordonnées pour contacter Fujitsu ......8 Chapitre 1 Présentation de votre ordinateur LIFEBOOK...
- Page 146 Cliquer ........... . 26 Double-cliquer.
- Page 147 Mode veille prolongée (enregistrement sur le disque)....42 Gestion de l’alimentation dans Windows......42 Redémarrage du système.
- Page 148 Module de mémoire additionnelle ......65 Vérification de la capacité de mémoire ......67 Retrait d’un module de mémoire additionnelle .
- Page 149 Couleur et résolution Vidéo ........104 Carte graphique .
- Page 150 Dépannage de la carte réseau sans fil......133 Tableau de dépannages ........133 Utilisation de Bluetooth .
-
Page 151: À Propos De Ce Guide
Le texte contient plusieurs renvois vers des pages contenant des informations supplémentaires sur un sujet quelconque. Exemple : (« Voir Procédure d’installation en page 43 »). Les éléments des menus à l’écran sont indiqués en caractères gras. Exemple : « Cliquez sur Menu Fujitsu, puis faites votre sélection. »... -
Page 152: Coordonnées Pour Contacter Fujitsu
EUILLEZ LIRE ATTENTIVEMENT TOUS LES AVERTISSEMENTS Coordonnées pour contacter Fujitsu Service et assistance Plusieurs façons s’offrent à vous pour contacter l’équipe de service et assistance de Fujitsu : • Appel sans frais : 1-800-8Fujitsu (1-800-838-5487) • Site Internet : USA : us.fujitsu.com/solutions... - Page 153 à jour Fujitsu Software Download Manager (FSDM). L’utilitaire FSDM est à votre disposition pour télécharger les plus récentes versions des pilotes, utilitaires et applications depuis le site d’assistance Fujitsu. Si vous avez un système d'exploitation Windows 7 ou Windows 8, vous devez vous connecter au site d'assistance (http://support.fujitsupc.com/CS/Portal/support.do?srch=DOWNLOADS).
-
Page 154: Présentation De Votre Ordinateur Lifebook
Cette section décrit les composants de votre ordinateur portable Fujitsu LIFEBOOK NH532. Nous vous suggérons de la lire avant de commencer à utiliser l’ordinateur, même si vous avez déjà utilisé des ordinateurs de ce type. Figure 1. Ordinateur portable Fujitsu LIFEBOOK NH532... -
Page 155: Emplacement Des Commandes Et Des Connecteurs
Caméra Web Microphone numérique Pavé tactile Touchpad Écran Tableau de voyants d’état Bouton Fente pour d’alimentation/ carte SD veille/reprise Clavier avec pavé 10 touches Figure 2. Ordinateur portable LIFEBOOK NH532 avec écran ouvert 11 - Emplacement des commandes et des connecteurs... -
Page 156: Composants Sur Le Dessus Et À L'avant De L'ordinateur
Composants sur le dessus et à l’avant de l’ordinateur Les pages suivantes décrivent brièvement les composants sur le dessus et à l’avant de votre ordinateur LIFEBOOK. Caméra Web La caméra web vous permet de transmettre sur Internet des images de vous-même. Pour de plus amples informations concernant l’utilisation de la caméra web, consultez la documentation accompagnant l’application CyberLink YouCam. -
Page 157: Composants Sur Le Côté Gauche De L'ordinateur
Ports USB 3.0 Port USB 3.0 avec charge en tout tem Figure 3. Côté gauche de l’ordinateur portable LIFEBOOK NH532 Composants sur le côté gauche de l’ordinateur Voici une courte description des composants se trouvant sur le côté gauche de votre ordinateur LIFEBOOK. - Page 158 Ports USB 3.0 Les quatre ports USB (trois ports USB 3.0 sur le côté gauche et un port mixte eSATA/USB 2.0 sur le côté droit) vous Voir « Ports USB 2.0 » en page 46. permettent de brancher des périphériques USB. Veuillez prendre note que le port USB situé...
-
Page 159: Composants Sur Le Côté Droit De L'ordinateur
Lecteur optique Fente pour dispositif antivol eSATA/USB 2.0 Figure 4. Côté droit de l’ordinateur portable LIFEBOOK NH532 Composants sur le côté droit de l’ordinateur Voici une courte description des composants se trouvant sur le côté droit de votre ordinateur LIFEBOOK. - Page 160 Port mixte E-SATA/USB 2.0 Le port E-SATA (External Serial Advanced Technology Attachment) est la version externe du système SATA, lequel connecte votre ordinateur au disque dur. L’interface SATA est beaucoup plus rapide que les interfaces IDE (six fois plus rapide que les USB 2.0).
-
Page 161: Composants Sous L'ordinateur
Grilles de ventilation (plusieurs emplacements) Compartiment du module de mémoire Batterie au lithium Loquet de la batterie (fermé) Loquet de la batterie (déverrouillé) Figure 5. Dessous de l’ordinateur portable LIFEBOOK Composants sous l’ordinateur Voici une courte description des composants se trouvant sous votre ordinateur LIFEBOOK. Loquets de la batterie Les loquets servent à... - Page 162 Compartiment de batterie au lithium Le compartiment de batterie contient la batterie interne au lithium. Le couvercle de ce compartiment peut être ouvert pour enlever la batterie lorsque l’ordinateur doit être entreposé pendant une longue période ou pour remplacer une Voir « Batterie au lithium »...
-
Page 163: Tableau De Voyants D'état
Batt. charge/entrée c.c. Dispositif Verr num sans fil Accès au disque dur/ Voyant d’alimentation Verr maj optique/disque dur Figure 6. Tableau de voyants d’état Tableau de voyants d’état Le tableau de voyants d’état est situé au-dessus du clavier, à gauche du bouton d’alimentation/veille/reprise. Les symboles s’affichant sur ce tableau correspondent à... -
Page 164: Voyant D'état De L'alimentation
Voyant d’état de l’alimentation Le voyant d’alimentation indique si le système est en marche, en veille ou éteint. État du voyant Niveau de charge de la batterie Bleu continu Le système est sous tension, en cours d’utilisation. Bleu clignotant Le système est au mode veille (sommeil). Éteint Le système est en veille prolongée, ou éteint. -
Page 165: Voyant D'accès Au Disque Dur/Lecteur Optique
Voyant d’accès au disque dur/lecteur optique Le voyant d’accès au disque dur/lecteur optique s’allume en bleu continu lorsque le disque dur interne ou le lecteur optique est en cours d’utilisation. Voyant de verrouillage du pavé numérique Le voyant Verr num s’allume en bleu continu lorsque le clavier intégré est en mode de pavé numérique à dix touches. -
Page 166: Clavier
Figure 7. Clavier Utilisation du clavier Votre ordinateur portable Fujitsu LIFEBOOK est doté d’un clavier intégré de 103 touches. Ce clavier exécute toutes les fonctions d’un clavier standard, y compris les touches Windows et diverses touches de fonction spéciales. Cette section décrit les touches suivantes. - Page 167 • Touches de fonction : Les touches [F1] à [F12] s’utilisent avec la touche [Fn] pour exécuter des actions spéciales, selon le programme en cours d’utilisation. Pavé numérique La partie droite du clavier fonctionne comme un pavé numérique. Pour activer les fonctions du pavé numérique 10 touches, appuyez sur la touche [Verr.
-
Page 168: Touches De Fonction
Appuyez sur la touche [F10] en maintenant la touche [Fn] enfoncée pour ouvrir le Gestionnaire [Fn+F10] d’affichage Fujitsu ; celui-ci vous permet de sélectionner les dispositifs d’affichage. [Fn+F11] Maintenez [Fn] enfoncée et appuyez sur [F11] pour activer ou désactiver le mode ECO. Le mode ECO est conçu pour réduire au minimum la consommation de votre ordinateur : la luminosité... -
Page 169: Pavé Tactile Touchpad
Pavé tactile Touchpad Bouton gauche Bouton droit Commande du curseur Figure 8. Pavé tactile Touchpad Votre ordinateur portable LIFEBOOK possède un pavé tactile Touchpad intégré. Ce dispositif permet de commander le déplacement du pointeur et de sélectionner des éléments affichés à l’écran. Le pavé tactile Touchpad est composé d’une commande de curseur, d’un bouton gauche et d’un bouton droit. -
Page 170: Cliquer
Cliquer Cliquer signifie enfoncer et relâcher un bouton. Pour cliquer à gauche, placez le curseur sur l’élément que vous désirez sélectionner, puis enfoncez et relâchez immédiatement le bouton gauche. Pour cliquer à droite, placez le curseur sur l’élément que vous désirez sélectionner, puis enfoncez et relâchez immédiatement le bouton droit. Vous pouvez également cliquer en frappant une fois le pavé... -
Page 171: Glisser
Glisser Glisser signifie enfoncer le bouton gauche, sans le relâcher, en déplaçant le curseur. Pour faire glisser un élément, placez d’abord le curseur sur cet élément. Ensuite, enfoncez et tenez le bouton gauche tout en déplaçant l’élément à son nouvel emplacement, puis relâchez. Vous pouvez également glisser un élément avec le pavé tactile Touchpad. Premièrement, placez le curseur sur l’élément que vous désirez déplacer et frappez légèrement le pavé... -
Page 172: Réglage Des Commandes Du Pavé Touchpad
Passage d'un charme à l'autre Pour passer d'un charme à l'autre, faites glisser un droit vers la gauche à partir du bord droit du pavé tactile (Voir Figure 17). Passage d'une application à l'autre Pour passer d'une application à l'autre, faites glisser un droit vers le bas à partir du bord supérieur du pavé tactile (Voir Figure 18). -
Page 173: Réglage Du Volume
Réglage du volume Votre ordinateur LIFEBOOK Fujitsu est doté de plusieurs commandes de volume fonctionnant en interaction. ES APPLICATIONS POUVANT REPRODUIRE DES FICHIERS AUDIO PROPOSENT ÉGALEMENT LEUR PROPRE COMMANDE DE ). S ’ VOLUME COMMANDE LOGICIELLE I VOUS INSTALLEZ UN PÉRIPHÉRIQUE AUDIO EXTERNE DOTÉ D UNE COMMANDE DE ’... -
Page 174: Première Mise En Marche De Votre Ordinateur Portable Lifebook
Première mise en marche de votre ordinateur portable LIFEBOOK Prise d’alimentation c.c. Adaptateur secteur Figure 20. Connexion de l’adaptateur secteur Sources d’alimentation Votre ordinateur portable LIFEBOOK Fujitsu peut utiliser trois sources d’alimentation différentes : une batterie au lithium principale, un adaptateur secteur et un adaptateur auto/avion. -
Page 175: Connexion Des Adaptateurs
Connexion des adaptateurs L’adaptateur secteur et l’adaptateur auto/avion disponible en option permettent tous deux de faire fonctionner votre ordinateur portable et de charger les batteries. Connexion de l’adaptateur secteur Branchez le câble de sortie c.c. dans la prise d’alimentation c.c. de votre ordinateur LIFEBOOK. Branchez l’adaptateur secteur sur une prise électrique secteur (c.a.). -
Page 176: Écran
Figure 21. Ouverture de l’écran Écran Votre ordinateur portable LIFEBOOK Fujitsu comporte un écran à rétro-éclairage permettant une lecture facile dans les environnements à forte luminosité. Cet écran offre également une excellente résolution grâce à une technologie de matrice active. -
Page 177: Utilisation Du Clavier
Utilisation du clavier Lorsque vous réglez la luminosité avec le clavier, le réglage n’est valide que temporairement. • [Fn+F6] : Appuyez plusieurs fois sur cette combinaison de touches pour diminuer la luminosité de votre écran. • [Fn+F7] : Appuyez plusieurs fois sur cette combinaison de touches pour augmenter la luminosité de votre écran. Utilisation des options d’alimentation Pour changer la luminosité... -
Page 178: Fermeture De L'écran
• ’ ORSQUE VOUS EMPLOYEZ UNE ALIMENTATION SECTEUR ÉCRAN UTILISE PAR DÉFAUT LE NIVEAU DE LUMINOSITÉ LE PLUS ÉLEVÉ ORSQUE VOUS ’ EMPLOYEZ UNE ALIMENTATION SUR BATTERIE ÉCRAN UTILISE PAR DÉFAUT UN NIVEAU DE LUMINOSITÉ MOYEN • ’ ’ ’ LUS LA LUMINOSITÉ... -
Page 179: Démarrage De Votre Ordinateur Portable Lifebook
Démarrage de votre ordinateur portable LIFEBOOK Mise sous tension Bouton d’alimentation/veille/reprise Le bouton d’alimentation/veille/reprise permet d’allumer votre ordinateur LIFEBOOK, de le mettre en sommeil ou en veille prolongée et de le réveiller s’il est en sommeil ou en veille prolongée. (Vous pouvez également vous servir de ce bouton pour mettre le système hors tension lorsque vous l’enfoncez pendant environ cinq secondes. -
Page 180: Séquence D'amorçage
Ces informations se trouvent dans le programme BIOS. Chaque fois que vous démarrez ou redémarrez votre ordinateur, il exécute une procédure d’amorçage et l’écran affiche le logo Fujitsu jusqu’à ce que le système d’exploitation soit chargé. Cette procédure comporte diverses opérations dont un auto-test de mise sous tension. -
Page 181: Mots De Passe D'accès Au Disque Dur
Pour ouvrir l’utilitaire de configuration du BIOS, exécutez les opérations suivantes : Allumez ou redémarrez votre ordinateur portable LIFEBOOK. Pour accéder à l’utilitaire, appuyez sur la touche [F2] lorsque le logo Fujitsu apparaît à l’écran. Le menu principal de l’utilitaire de configuration du BIOS s’affichera avec les paramètres courants. -
Page 182: Amorçage Du Système
Guide d’information sur le BIOS Un guide sur le BIOS du LIFEBOOK est accessible en ligne sur le site Internet de support et d’assistance de Fujitsu, à l’adresse : http://solutions.us.fujitsu.com/www/content/support/contact/index.php. Une fois sur le site, sélectionnez « User’s Guides » (Guides d’utilisation) sous « Online Support » (Assistance en ligne). Sélectionnez votre produit, sa série et son modèle, puis cliquez sur [Go]. - Page 183 Vous pouvez aussi accéder aux Applications bonus en ouvrant le panneau Charms à partir de l'écran Modern Start, et en recherchant les applications bonus Fujitsu. Les applications déjà installées sont affichées en gris et celles que vous pouvez installer sont affichées en bleu.
-
Page 184: Gestion De L'alimentation
Gestion de l’alimentation Votre portable LIFEBOOK possède plusieurs dispositifs permettant d’économiser l’énergie de la batterie. Certains d’entre eux sont automatiques et ne nécessitent donc aucune intervention. Cependant, d’autres dépendent de paramètres que vous pouvez configurer en fonction de vos conditions d’utilisation, notamment en ce qui concerne la luminosité de l’écran. - Page 185 • En cliquant sur l’icône d’alimentation du menu de verrouillage. • Vous pouvez aussi accéder aux Applications bonus en ouvrant le panneau Charms à partir de l'écran Modern Start, et en recherchant les applications bonus Fujitsu. • Lorsque le délai d’inactivité est atteint.
-
Page 186: Mode Veille Prolongée (Enregistrement Sur Le Disque)
Mode veille prolongée (enregistrement sur le disque) Le mode veille prolongée enregistre le contenu de la mémoire du système sur le disque dur dans le cadre du mode veille/reprise. Cette fonction peut être activée et désactivée. Activation et désactivation de la fonction de veille prolongée Pour activer ou désactiver la fonction de veille prolongée, exécutez les opérations suivantes : À... -
Page 187: Mise Hors Tension
Mise hors tension Avant de mettre l’ordinateur hors tension, assurez-vous que le voyant d’accès au disque dur/lecteur optique est éteint. Si vous arrêtez l’ordinateur alors qu’un disque est en cours d’utilisation, vous risquez de perdre des données. Pour vous assurer que l’ordinateur s’arrête sans erreur, utilisez la procédure d’arrêt Windows. •... -
Page 188: Conformité Energy Star
Pour de plus amples informations sur cet important programme ENERGY STAR, visitez : www.energystar.gov. Pour en apprendre plus sur la façon dont Fujitsu soutient la Gestion durable et d’autres activités de protection de l’environnement, visitez la page Internet de Fujitsu Corporate Citizenship à : http://www.computers.us.fujitsu.com/www/content/aboutus/environmental/environment.php... -
Page 189: Ports De Périphériques
Ports de périphériques Votre ordinateur portable LIFEBOOK est équipé de plusieurs ports auxquels vous pouvez brancher des périphériques, notamment : lecteurs externes, claviers, modems, imprimantes, etc. Port de réseau local Votre LIFEBOOK est doté d’une prise de réseau local (RJ-45) vous permettant d’y brancher des dispositifs de communication externe. -
Page 190: Ports Usb 2.0
Ports USB 2.0 Les ports Universal Serial Bus 2 (USB) vous permettent de connecter divers périphériques USB tels que des dispositifs de pointage, des claviers et des haut-parleurs. L’ordinateur est doté de quatre ports USB (trois ports USB 3.0 sur le côté gauche et un port mixte eSATA/USB 2.0 sur le côté... -
Page 191: Port Vidéo Externe
Port vidéo externe ] + [F10], ’ ’ ORSQUE VOUS APPUYEZ SUR LES TOUCHES VOUS POUVEZ CHANGER L EMPLACEMENT DE L AFFICHAGE VIDÉO HAQUE FOIS QUE ’ VOUS APPUYEZ SUR LA COMBINAISON DE TOUCHES VOUS PASSEREZ AU CHOIX SUIVANT EN COMMENÇANT PAR L ÉCRAN INTÉGRÉ... -
Page 192: Port Esata
Port eSATA Le port eSATA (External Serial Advanced Technology Attachment) est la version externe du système SATA, lequel connecte votre ordinateur au disque dur. Le porte E-SATA est idéal pour la sauvegarde de fichiers volumineux sur un disque dur externe. Pour brancher un périphérique eSATA : Alignez le connecteur avec l’ouverture du port. -
Page 193: Options Installables Par L'utilisateur
Chapitre 3 Options installables par l’utilisateur Batterie au lithium Votre ordinateur portable LIFEBOOK possède une batterie au lithium qui en permet le fonctionnement lorsque vous n’avez pas accès à une source d’alimentation externe. Cette batterie est robuste et durable, mais elle ne doit pas être exposée à... -
Page 194: Recharge Des Batteries
• LIFEBOOK. V ’ ’ E LAISSEZ JAMAIS UNE BATTERIE DÉFECTUEUSE DANS VOTRE ORDINATEUR OUS RISQUERIEZ D ENDOMMAGER L ADAPTATEUR ’ ’ SECTEUR OU L ORDINATEUR NE BATTERIE ENDOMMAGÉE PEUT ÉGALEMENT NUIRE AU FONCTIONNEMENT DE L ORDINATEUR EN UTILISANT TOUT LE COURANT DISPONIBLE •... - Page 195 L’ DVD/CD-RW/CD-ROM UTILISATION DE PÉRIPHÉRIQUES ÉNERGIVORES COMME LES LECTEURS DE PEUVENT EMPÊCHER LE CHARGEMENT COMPLET DE LA BATTERIE Batterie faible Lorsque la batterie est faible, le système affiche un avis de batterie faible. Si vous ne prêtez pas attention à cet avis de batterie faible, la batterie continuera à...
-
Page 196: Remplacement De La Batterie
Batteries court-circuitées Le tableau de voyants d’état affiche l’état de charge de la batterie par l’intermédiaire du voyant du niveau de charge de la batterie. Si ce symbole clignote en rouge, la batterie est endommagée et doit être remplacée pour éviter qu’elle ne nuise à... - Page 197 Loquet de la batterie nº 2 (fermé) Batterie au lithium Loquet de la batterie nº 1 (ouvert) Figure 28. Déverrouillage de la batterie Figure 29. Retrait de la batterie 53 - Batterie au lithium...
-
Page 198: Lecteur Optique
Ouverture d’urgence du plateau Plateau du lecteur multimédia Touche d’éjection du lecteur multiédia Figure 30. Lecteur optique Lecteur optique Différents supports sont disponibles pour être utilisés avec votre système, selon la configuration de système que vous avez sélectionnée. Le lecteur optique suivant est installé sur votre système : •... -
Page 199: Retrait D'un Disque
Tirez doucement le plateau de chargement jusqu’à ce qu’un disque puisse y être déposé facilement. Placez le disque dans le plateau de chargement, l’étiquette vers le haut, avec l’orifice au milieu du disque. Enfoncez le disque dans le cercle surélevé situé au centre du plateau. Fermez le plateau de chargement en le poussant doucement jusqu’à... -
Page 200: Ouverture D'urgence Du Plateau Du Lecteur Optique
Ouverture d’urgence du plateau du lecteur optique Si le bouton d’éjection ne fonctionne pas, vous pouvez ouvrir le plateau de chargement du lecteur multimédia en insérant un trombone ou un outil similaire dans le trou d’éjection situé tout à droite sur le devant du plateau. Redressez une extrémité du trombone et insérez-la doucement dans le trou. - Page 201 Ouverture du tableau de commande du lecteur de DVD/CD-RW La plupart des DVD-ROM vous permettent de modifier la façon dont le film est visionné et ce que vous aimeriez voir. Pour cela, il suffit d’utiliser le panneau de configuration du lecteur multimédia et la souris. Pour accéder aux options d’un menu déroulant, cliquer du bouton droit de la souris sur l’écran.
-
Page 202: Utilisation Du Lecteur Avec Alimentation Par Batterie
VOUS POUVEZ EN ACHETER UNE EN LIGNE À SHOPFUJITSU COM OU APPELEZ 1-800-FUJITSU. Pour regarder un film avec une alimentation par batterie : Ayez à votre disposition une batterie supplémentaire chargée à fond ou votre adaptateur secteur prêt à l’emploi. -
Page 203: Fonction Avis De Lecture Automatique
Redémarrez votre lecteur optique, sautez le début que vous avez vu et reprenez le visionnement à l’endroit où vous avez laissé le film. Poursuivez la lecture du film DVD. ’ ERTAINS FILMS PLUS COURTS PEUVENT ÊTRE ENTIÈREMENT VUS SANS NÉCESSITER DE BATTERIE SUPPLÉMENTAIRE OU LE BRANCHEMENT D ’... -
Page 204: Utilisation Des Cartes Expresscards
Utilisation des cartes ExpressCards™ Votre LIFEBOOK prend en charge les cartes ExpressCard (une fente spéciale est pourvue). Avec ces cartes, vous pouvez effectuer une variété de fonctions selon le type de carte que vous installez. Ces cartes doivent être installées dans la fente située sur le côté... - Page 205 Les cartes ExpressCard sont insérées dans la fente prévue à cet effet (Figure 34) Le guide d’utilisation de votre carte ExpressCard vous indiquera comment l’installer. Certaines cartes pourraient nécessiter que votre portable soit éteint pendant que vous les installez. Fente pour carte ExpressCa Cartes ExpressCard Figure 34.
-
Page 206: Retrait D'une Carte Expresscard
Pour installer une carte ExpressCard, suivez les étapes ci-après : Avant d’insérer votre carte, assurez-vous qu’aucune autre carte n’est déjà installée dans la fente. Si c’est le cas, consultez la rubrique Retrait d’une carte ExpressCard. Enfoncez la carte ExpressCard dans la fente, étiquette vers le haut. Si vous insérez une carte de 34 mm, alignez-la avec le côté... -
Page 207: Fente Pour Carte Secure Digital
Memory Stick ou Memory Stick PRO Carte Secure Digital (SD) Fente pour carte MemoryStick/SD Figure 35. Installation d’une carte Memory Stick ou SD Fente pour carte Secure Digital Votre ordinateur portable LIFEBOOK peut accueillir les cartes de mémoire suivantes, sur lesquelles vous pouvez stocker et transférer des données vers et à... -
Page 208: Insérer Une Carte Sd
Le carte SD utilisent une technologie de mémoire flash permettant un stockage mobile sur plusieurs types de dispositifs, tels que des téléphones cellulaires, des systèmes de positionnement mondial, des appareils photo numériques et des assistants numériques personnels. Insérer une carte SD Le carte SD doivent être insérées dans la fente prévue à... -
Page 209: Module De Mémoire Additionnelle
Module de mémoire additionnelle Votre ordinateur portable possède deux fentes de mémoire. Si vous avez un module installé dans une seule fente, vous pouvez augmenter votre taille de mémoire en installant un autre module mémoire dans la fente vide ou en augmentant la taille du module unique installé. - Page 210 Retirez le module de mémoire additionnelle de sa gaine protectrice antistatique. Alignez le module de mémoire additionnelle avec la pièce vers le haut. Alignez le bord du connecteur du module de mémoire additionnelle avec la fente du connecteur dans le compartiment. Le connecteur pointera vers l’arrière de l’ordinateur.
-
Page 211: Vérification De La Capacité De Mémoire
Retrait d’un module de mémoire additionnelle Exécutez les étapes 1 à 5 de la section « Installation d’un module de mémoire additionnelle ». Tirez les attaches latérales en les orientant vers les côtés pour les éloigner du module. Ergots En maintenant les ergots écartés, retirez la barrette en le tirant vers l’arrière du portable LIFEBOOK. -
Page 212: Dépannage De Votre Lifebook
Chapitre 4 Dépannage de votre LIFEBOOK Dépannage Il est possible que vous rencontriez parfois des problèmes simples de configuration ou d’exploitation pouvant être résolus sur le champ, ou des problèmes au niveau d’un périphérique pouvant être résolus en remplaçant l’équipement. Les informations contenues dans cette section vous aideront à... - Page 213 Appel sans frais : 1-800-8Fujitsu (1-800-838-5487) Courriel : [email protected] Site Web : Web site: http://solutions.us.fujitsu.com/www/content/support/contact/index.php. Avant de nous contacter, veuillez avoir les informations suivantes à portée de main pour que notre préposé du service à la clientèle puisse vous venir en aide le plus rapidement possible : •...
-
Page 214: Problèmes Spécifiques
Problèmes spécifiques Utilisation du tableau de dépannage Lorsque vous éprouvez des problèmes avec votre ordinateur portable LIFEBOOK, essayez de trouver les symptômes sous la colonne Problème du tableau suivant pour la fonction qui vous cause des problèmes. Vous trouverez une description des causes communes pour ce symptôme sous la colonne Cause possible ;... - Page 215 Le lecteur de logiciel n’est pas Le pilote audio peut être installé ou réinstallé à l'aide du logiciel Fujitsu Software bien configuré. Download Manager (FSDM). Reportez-vous à « Téléchargement des mises à jour de pilotes » en page 94.
- Page 216 Problème Cause possible Solutions possibles Le portable LIFEBOOK n’arrive L’indicateur de pays pourrait Sélectionnez le logiciel de lecture de DVD dans la liste de programmes et cliquez à pas à lancer automatiquement un être mal configuré. l’aide du bouton droit de la souris. Sélectionnez Propriétés et vérifiez que la région film DVD.
- Page 217 Problème Cause possible Solutions possibles Vous avez connecté un clavier Votre système d’exploitation Consultez la documentation du périphérique et du système d’exploitation, puis externe ou une souris et il/elle n’utilise pas le bon pilote. installez le pilote approprié. semble bloquer le système. Votre système s’est planté.
- Page 218 Problème Cause possible Solutions possibles Problèmes de carte ExpressCard Voir « Utilisation des cartes ExpressCards™ » en page 60. Une carte insérée dans la fente de La carte est mal installée. Retirez et réinstallez la carte. carte ExpressCard ne fonctionne L’adresse d’E/S sélectionnée Consultez la documentation de la carte pour connaître l’adresse appropriée.
- Page 219 Problème Cause possible Solutions possibles Lorsque vous allumez l’ordinateur La batterie ou les batteries Vérifiez le tableau de voyants d’état pour déterminer la présence et l’état de la portable rien ne semble se produire. sont faibles. batterie. Utilisez un adaptateur de courant en attendant que la batterie se charge (suite) ou installez une batterie chargée.
- Page 220 Problème Cause possible Solutions possibles Le LIFEBOOK ne fonctionne pas Aucune batterie Installez une batterie chargée. lorsqu’il est alimenté uniquement n’est installée. par batterie. (suite) La batterie n’a pas été Vérifiez si la ou les batteries sont bien connectées en les réinstallant. correctement installée.
- Page 221 Configurez la source d’exploitation en appuyant sur la touche [Échap] pendant de l’utilitaire de configuration que le logo Fujitsu est affiché sur l’écran ou utilisez la touche [F2], accédez à du BIOS sont incompatibles l’utilitaire de configuration et ajustez les paramètres de source à partir du avec votre configuration.
- Page 222 Problème Cause possible Solutions possibles L’écran d’affichage intégré Les temporisations de gestion Appuyez sur une touche du clavier ou déplacez la souris. Si cela ne fonctionne pas, demeure vide lorsque vous mettez de l’alimentation peuvent être appuyez sur le bouton d’alimentation/veille/reprise (L’écran d’affichage peut avoir en marche votre ordinateur.
- Page 223 Problème Cause possible Solutions possibles L’écran affiche des zones claires Si les zones sont de taille Ne faites rien. ou sombres. réduite et peu nombreuses, cela est normal pour un écran ACL grand format. Si les zones sont nombreuses L’écran est défectueux : communiquez avec le service d’assistance. ou suffisamment grandes pour perturber vos besoins d’exploitation.
-
Page 224: Messages De L'auto-Diagnostic De Mise Sous Tension
Messages de l’auto-diagnostic de mise sous tension Voici une liste des messages d’erreur et d’état que le BIOS Phoenix et/ou votre système d’exploitation peuvent générer ainsi qu’une explication pour chacun d’eux. Les messages d’erreurs sont marqués d’un *. Si un message d’erreur est affiché et ne se trouve pas dans la liste, prenez-le en note et vérifiez-le dans la documentation du système d’exploitation (à... - Page 225 *Erreur de ventilateur, le système s’arrêtera dans 30 secondes. Contactez le service de support technique Fujitsu. Une erreur de ventilateur s’est produite. Communiquez avec votre représentant d’assistance technique. *Une erreur de ventilateur s’est produite durant l’amorçage. Une erreur de ventilateur s’est produite durant l’amorçage. Communiquez avec votre représentant d’assistance technique.
-
Page 226: Restauration De Votre Image De Système Et De Vos Logiciels
Restauration de votre image de système et de vos logiciels Avant de commencer à utiliser votre ordinateur, il est très important de copier sur DVD l’image d’origine de votre système et votre disque d’amorçage. Pour ce faire, suivez les instructions données dans les sections « Sauvegarde de l'image d'origine »... - Page 227 Pour créer une copie de sécurité de l’image d’origine sur des DVD, quatre ou cinq disques vierges (les DVD-R ou DVD+R sont recommandés) vous seront nécessaires. Lorsque vous avez terminé la copie, assurez-vous d’étiqueter clairement les disques et de les conserver en lieu sûr. Création d’images de sauvegarde de l’image d’origine et d'un disque d'amorçage Le bouton [Gérer/Changer] permet également de créer des copies de sauvegarde de l’image d’origine et/ou un disque d’amorçage.
- Page 228 Sous « Step 3: Making Recovery Disc » (Étape 3 : Création du disque de Restauration), cliquez sur [Démarrer]. Le système vous demandera d'insérer les disques. Une fois le processus terminé et lorsque l'écran « Step 4: Making Recovery Disc process has been completed » (Étape 4 : La création du disque de restauration est terminée) apparaît, cliquez sur [Terminer].
-
Page 229: Création D'une Image De Système
Restauration et Utilitaires à partir du disque dur ». Création d’une image de système Étape facultative : Depuis votre bureau Windows, lancez l’utilitaire Applications Fujitsu en prime, puis sélectionnez les composants que vous désirez installer. (Vous pouvez aussi accéder aux Applications bonus en ouvrant le panneau Charms à... - Page 230 Sous « Step 1: Select a backup destination » (Étape 1 : Sélectionnez une destination de sauvegarde), sélectionnez le disque de destination. Par défaut, le lecteur de destination est le D. Vous pouvez aussi sélectionner l’option [Autre lecteur] pour faire la sauvegarde sur un disque externe. Indiquez si vous souhaitez que le système s’arrête ou redémarre une fois le processus terminé...
- Page 231 Sélection de l’option [Copier] (Notez que vous devez avoir un disque externe branché pour que le bouton [Copier] fonctionne, sinon une erreur se produira.) Sous « Step 1: Select a backup file that you wish to copy » (Étape 1 : Sélectionnez un fichier de sauvegarde que vous souhaitez copier.), sélectionnez l’emplacement du fichier de sauvegarde désiré.
- Page 232 Sous « Step 2: Add comment » (Étape 2 : Ajouter un commentaire), saisissez au maximum 300 caractères dans la zone « Commentaire », puis cliquez sur [Ajouter]. Sous « Step 3: Adding comment has been completed » (Étape 3 : Ajout du commentaire terminé), cliquez sur [Terminer].
- Page 233 Si vous désirez vérifier/changer la priorité d'amorçage (plutôt que de démarrer à partir du disque dur ou d'un lecteur de disquette externe), exécutez les opérations suivantes : Mettez le système sous tension. Lorsque le logo Fujitsu apparaît à l’écran, appuyez sur la touche [F12]. Dans le menu d’amorçage, sélectionnez avec le curseur l’option CD/DVD, puis appuyez sur [Entrée].
-
Page 234: Restauration Et Utilitaires
Sélectionnez le mode d’amorçage CD/DVD. (mode UEFI), puis appuyez sur [Entrée]. Le logo Fujitsu suivi d’une barre de progression, apparaîtra en bas de l'écran pendant le transfert des fichiers à partir du disque. Restauration et Utilitaires Outil Diagnostics : L'outil de diagnostic est conçu pour être utilisé par des informaticiens professionnels. Il y a peu de chances que vous ayez besoin de l'utiliser. - Page 235 Pour une restauration à partir du disque D: ou d’un support externe : Cliquez sur [User System Backup] (Sauvegarde de l’image système configurées par l’utilisateur). Un écran avec une barre de progression s’affiche, suivi par l’écran avec l’accord de licence. Cliquez sur [Accepter] pour accepter l’accord de licence.
- Page 236 Outil Utilitaires : L'outil Utilitaires comprend deux options : « Supprimer les données sur le disque dur » et « Créer des partitions ». • L'utilitaire Supprimer les données sur le disque dur permet de supprimer toutes les données sur votre disque dur et d'en empêcher leur réutilisation.
- Page 237 Mettez le système sous tension. Lorsque le logo Fujitsu apparaît à l'écran, appuyez sur la touche [Entrée]. Dans le menu d’amorçage, sélectionnez avec le curseur l’option CD/DVD, puis appuyez sur [Entrée]. Insérez le disque amorçable dans le lecteur de DVD, puis cliquez sur [OK].
-
Page 238: Téléchargement Des Mises À Jour De Pilotes
L’utilitaire FSDM (Fujitsu Software Download Manager) est à votre disposition pour télécharger les plus récentes versions des pilotes, utilitaires et applications depuis le site d’assistance Fujitsu. Si vous avez un système d'exploitation Windows 8 ou Windows 7, vous devez vous connecter au site d'assistance (http://support.fujitsupc.com/CS/Portal/support.do?srch=DOWNLOADS). -
Page 239: Entretien
Entretien de votre ordinateur portable LIFEBOOK Si vous prenez soin de votre ordinateur portable LIFEBOOK Fujitsu, vous augmenterez sa durée de vie et sa fiabilité. Cette section fournit certains conseils relatifs à l’entretien de votre ordinateur portable et de ses dispositifs. - Page 240 S’il ne démarre pas une fois sec, contactez le service d’assistance. • N’utilisez pas votre ordinateur portable LIFEBOOK Fujitsu dans un environnement très humide (à proximité d’une baignoire, d’une piscine). • Utilisez toujours l’adaptateur secteur d’origine et des piles homologuées pour votre ordinateur portable.
-
Page 241: Nettoyage De Votre Ordinateur Portable Lifebook
Nettoyage de votre ordinateur portable LIFEBOOK • Débranchez toujours la prise électrique (tirez la fiche, pas le cordon). • Nettoyez votre ordinateur avec un chiffon humide, non pelucheux. N’utilisez pas de solvant ou d’abrasif. • Utilisez un tissu doux pour enlever la poussière de l’écran. N’utilisez jamais de liquide lave-vitre. •... -
Page 242: Rangement De Votre Ordinateur Portable Lifebook
De plus, une batterie défectueuse pourrait endommager votre ordinateur. • Rangez votre Fujitsu LIFEBOOK dans un endroit frais et sec. Les températures doivent être maintenues entre -25ºC et 60ºC (13°F et 140°F). -
Page 243: Voyager Avec Votre Ordinateur Portable Lifebook
Voyager avec votre ordinateur portable LIFEBOOK • Ne transportez pas votre ordinateur portable pendant qu’il est en marche. • Il est recommandé de transporter votre ordinateur portable en cabine au lieu de l’enregistrer comme bagage. • Lorsque vous partez en voyage, apportez toujours avec vous le ou les disques de remise en état du système. Si vous éprouvez des problèmes de logiciel d’exploitation pendant votre voyage, vous pourriez en avoir besoin pour trouver la solution au problème. -
Page 244: Batteries
Batteries Entretien de vos batteries • Manipulez toujours les batteries avec soin. • Ne court-circuitez pas les terminaux des batteries (c’est à dire, ne touchez pas les deux terminaux avec des objets métalliques). Ne transportez pas des batteries dans votre poche ou sac à main car elles pourraient entrer en contact avec de la monnaie, des clés ou d’autres objets métalliques. -
Page 245: Entretien De Votre Lecteur Multimédia
Entretien de votre lecteur multimédia Entretien de votre lecteur multimédia (DVD/CD/CD-R) Les disques multimédias sont des dispositifs précis qui fonctionneront de manière fiable si vous en prenez bien soin. • Rangez toujours vos disques multimédias dans leurs étuis lorsqu’ils ne sont pas utilisés. •... -
Page 246: Cartes Expresscard
Cartes ExpressCard Entretien de vos cartes Les cartes ExpressCard sont durables, mais vous devez en prendre soin. La documentation fournie avec votre carte vous donnera des renseignements spécifiques, mais vous devriez aussi faire attention aux points suivants : • Pour les protéger de la poussière et de la saleté, rangez vos cartes dans leurs étuis de protection lorsqu’elles ne sont pas installées sur votre ordinateur portable LIFEBOOK. -
Page 247: Spécifications Techniques
Cette section présente les spécifications techniques générales du matériel et de l'environnement de votre ordinateur portable LIFEBOOK. Certains détails spécifiques de votre système peuvent différer des informations présentées ici. Pour obtenir une liste récente de configurations, allez sur le site Internet de la société Fujitsu America à : us.fujitsu.com/computers. Microprocesseur Processeur Intel®... -
Page 248: Vidéo
• Prend en charge une mémoire double canal Vidéo Écran haute définition de 17,3 po (16:9) HD + TFT (contraste élevé : rapport de contraste 300/1, luminosité élevée : 220 nits) de l’écran ACL et rétro-éclairage des DEL Couleur et résolution Vidéo •... -
Page 249: Supports De Stockage Massif
Supports de stockage massif Unités de disque dur Capacité selon la configuration, Serial-ATA, 5400 tr/m. Pour connaître la capacité de votre disque dur, vérifiez l’étiquette de configuration ou les informations générales de votre système. Lecteur optique Graveur de DVD multiformat double couche : Ce lecteur vous permet d’accéder à des films, des DVD/CD audio, des logiciels, ainsi que de lire et d’écrire sur des disques CD-R, CD-RW, DVD-R, DVD+R, DVD-RW, DVD+RW et DVD-RAM. -
Page 250: Clavier
• Une microphone stéréo (voir spécifications audio) • Une prise écouteurs stéréo/prise SPDIF (voir spécifications audio) • Une prise réseau modulaire (RJ-45) (notez que ce système ne comporte pas de modem) • Un port eSATA (peut également être utilisé à titre de port USB 2.0). Clavier Clavier intégré... -
Page 251: Dimensions
Dimensions Dimensions générales Avec pieds en caoutchouc : Environ 410 mm de largeur x 270 mm de profondeur x 37 mm d’épaisseur (16,14 po x 10,63 po x 1,46 po) Sans pied en caoutchouc : Environ 410 mm (larg.) x 270 mm (prof.) x 35 mm (haut.) (16,14 po x 10,63 po x 1,38 po) Poids 3,0 kg (6,6 livres) Environnement d’exploitation... -
Page 252: Accessoires Préférés Des Utilisateurs
1-800-FUJITSU. Logiciels préinstallés Selon votre système d’exploitation préinstallé, votre portable Fujitsu Lifebook est livré avec des logiciels inclus afin de vous permettre d’écouter des fichiers audio et de visionner des fichiers vidéo de formats divers. De même, l’ordinateur portable est fourni avec des logiciels de transfert de fichiers, de protection contre les virus et de gestion de l’alimentation. -
Page 253: Apprendre À Utiliser Vos Logiciels
Apprendre à utiliser vos logiciels Tutoriaux Tous les systèmes d'exploitation et la plupart des logiciels d’application ont des didacticiels intégrés dès leur installation. Nous vous recommandons vivement de passer en revue ces didacticiels avant d'utiliser une application. Guides d'utilisation Sont compris dans votre portable, les guides d'utilisation pour votre système d'exploitation et les autres applications préinstallées. - Page 254 Norton Internet Security Votre système est préinstallé avec une version Norton Internet Security™ d'essai de Symantec valable 60 jours. La gamme d’outils Norton Internet Security est conçue pour protéger votre ordinateur portable contre les virus, les pirates, les logiciels espions et les pourriels. Il aide à la protection des données actuellement sur votre disque dur contre toute infection ou destruction.
-
Page 255: Glossaire
Glossaire Affichage à cristaux liquides. Type d’écran produisant des images par contrôle de l’orientation de cristaux dans un liquide cristallin. ACPI (Advanced Configuration and Power Interface) Interface avancée de configuration et de gestion de l’énergie. Adaptateur auto/avion Un dispositif qui convertit le courant continu d’un allume-cigare de voiture ou une prise c.c. d’avion en courant continu à... - Page 256 Au sein d’un réseau isolé, vous pouvez attribuer des adresses IP au hasard tant que chacune d’elles reste unique. Toutefois, la connexion d’un réseau privé à Internet exige l’utilisation d’adresses IP enregistrées (appelées adresses Internet) afin d’éviter les doublons. Les quatre numéros dans une adresse IP sont utilisés de différentes façons pour identifier un réseau particulier et un serveur hôte.
- Page 257 Authentification à clé partagée Méthode d’authentification réseau établie par la spécification 802.11, selon laquelle le point d’accès transmet au client un paquet texte que le client doit crypter avec la bonne clé de réseau et renvoyer au point d’accès. Si le client possède la mauvaise clé...
- Page 258 Canal Plage de fréquences à bande étroite utilisée par la carte réseau sans fil pour transmettre des données. IEEE 802.11b/g : 11 canaux dans la bande de 22 MHz. CardBus Version 32 bits plus rapide de l’interface PC Card dont les performances sont similaires à celles de l’architecture PCI 32 bits.
- Page 259 Configuration Éléments matériels et logiciels qui composent le système et en définissent son fonctionnement. Décharge électrostatique. Décharge électrostatique soudaine provenant d’une charge statique qui s’est accumulée lentement. Exemple : la décharge reçue d’une poignée de porte ou les étincelles générées par un brossage des cheveux par temps sec.
- Page 260 DMI (Desktop Management Interface) Interface de gestion du mode bureau. Norme qui permet aux applications de gestion d’ordinateur d’interroger et de configurer, localement ou à distance, des systèmes informatiques, des composants matériels et logiciels, ainsi que des périphériques. DNS (Domain Name System) Système d’adressage par domaines Fonction qui contrôle la correspondance entre l’adresse IP et le nom attribué...
- Page 261 Giga-octet. Un milliard d’octets. Horloge système Oscillateur à fréquence précise qui synchronise le fonctionnement du système et établit l’heure et la date. IDE (Intelligent Drive Electronics) Interface IDE L’interface IDE se caractérise par le fait que le contrôleur électronique du disque dur est intégré dans le même boîtier que ce dernier.
- Page 262 Abréviation de « infrarouge ». IrDA (Infrared Data Association) Association pour le transfert de données par infrarouge. Une organisation de constructeurs qui développe les normes de communication utilisant l’infrarouge pour transmettre les données. IRQ (Interrupt Request) Demande d’interruption. Il s’agit d’un signal envoyé par le matériel à l’unité centrale indiquant qu’il y a nécessité de traiter un évènement externe qui vient de se produire.
- Page 263 Mémoire Dépôt de données et d’applications auquel l’unité centrale de votre ordinateur portable LIFEBOOK a directement accès. Mémoire cache Bloc de mémoire intégré au microprocesseur, auquel il est beaucoup plus rapide d’accéder qu’à la mémoire vive et utilisé de manière spéciale pour accélérer le débit global des données. Méga-hertz.
- Page 264 NTSC (National TV Standards Commission) Commission nationale des normes TV. Norme de diffusion et de réception télévisuelle aux États-Unis. Octet Unité d’information comprenant 8 bits d’informations binaires parallèles. Partition Bloc d’espace réservé sur un disque dur, que le système d’exploitation considère comme étant un disque distinct et qu’il gère en conséquence.
- Page 265 Port LPT (Line Printer Port) Port d’imprimante par ligne. Expression désignant les ports d’interface parallèle, car les imprimantes par ligne ont été les premiers types, et plus tard les types les plus communs, de périphériques connectés aux ports parallèles. POST (Power On Self Test) Auto-diagnostic (ou auto-test) de mise sous tension.
- Page 266 Réinitialisation Le fait de charger à nouveau le système d’exploitation. Une réinitialisation efface toutes les informations stockées dans la mémoire vive. Reprise Continuer après une interruption. Dans le cas de votre portable, ceci signifie la reprise des activités normales à partir de l’un des modes de veille.
- Page 267 TFT (Thin Film Transistor) Abréviation de « Thin Film Transistor ». Technologie d’écrans plats qui utilise une mince matrice de transistors pour commander individuellement chaque pixel de l’écran. UL (Underwriters Laboratories) L’« Underwriters Laboratories » est un organisme indépendant qui effectue les tests de sécurité électrique des appareils et accorde les homologations correspondantes.
-
Page 268: Renseignements Sur La Réglementation
Renseignements sur la réglementation Avis Les changements ou modifications qui ne sont pas expressément approuvés par Fujitsu pourraient interdire aux utilisateurs d’utiliser le matériel. AVIS DE LA FCC Avis aux utilisateurs de postes radio et de téléviseurs. Cet appareil a été testé et reconnu conforme aux limites établies pour le matériel numérique de classe B, selon la Partie 15 des règlements de la FCC. -
Page 269: Renseignements Sur La Réglementation De La Fcc
Annexe A : Guide d’utilisation de la carte de réseau local sans fil Renseignements sur la réglementation de la FCC Veuillez prendre note des renseignements suivants sur la réglementation relative à la carte réseau sans fil en option. Remarques et déclarations réglementaires Santé... - Page 270 Renseignements sur la réglementation et avis de non-responsabilité Cette carte réseau sans fil doit être installée et utilisée conformément aux instructions de la documentation livrée avec le produit. Toute modification apportée sans l’approbation expresse du fabricant peut annuler le droit de l’utilisateur de s’en servir. Le fabricant n’est pas responsable des interférences avec la réception des ondes de radio ou de télévision causées par une modification non autorisée ou par le remplacement ou le raccord de câbles et de matériel de connexion autres que ceux prescrits par le fabricant.
- Page 271 (2) cet appareil doit accepter toutes les interférences reçues, y compris celles pouvant causer un mauvais fonctionnement de l’appareil. Toute modification n’ayant pas été expressément approuvée par la société Fujitsu America Incorporated peut annuler le droit de l’utilisateur de se servir du matériel. Avis pour le Canada Le matériel destiné...
-
Page 272: Avant D'utiliser La Carte Réseau Sans Fil
Avant d’utiliser la carte réseau sans fil Ce guide explique comment configurer la carte réseau sans fil mini-PCI intégrée, ci-après désignée sous le nom de « carte réseau sans fil ». Avant d’utiliser la carte réseau sans fil, lisez attentivement le présent guide afin de bien comprendre son fonctionnement. -
Page 273: Modes De Réseau Sans Fil Compatibles Avec Cette Carte
Modes de réseau sans fil compatibles avec cette carte Mode Ad Hoc (Voir Figure A-1) « Le mode Ad hoc » désigne une topologie de réseau sans fil dans laquelle la connectivité entre les divers ordinateurs est établie sans périphérique central de réseau sans fil, ou point d’accès. La connectivité est établie uniquement à... - Page 274 Mode point d’accès (Infrastructure) (Voir Figure A-2) Le mode Infrastructure désigne une topologie de réseau sans fil dans laquelle les appareils communiquent par réseau sans fil ou câblé par l’intermédiaire d’un point d’accès. En mode Infrastructure, les appareils sans fil peuvent communiquer directement entre eux ou sur un réseau câblé.
-
Page 275: Manipulation De La Carte Réseau Sans Fil
Manipulation de la carte réseau sans fil La carte réseau sans fil est déjà installée dans l’ordinateur. Normalement, vous ne devriez pas avoir besoin de la retirer ou de la réinstaller. Le système d’exploitation de l’ordinateur est déjà configuré pour utiliser la carte réseau sans fil. •... -
Page 276: Configuration De La Carte Réseau Sans Fil
Configuration de la carte réseau sans fil La carte réseau sans fil peut être configurée pour établir la connectivité du réseau sans fil en utilisant le logiciel intégré dans Windows Vista. Il prend également en charge la plupart des solutions de sécurité standard. Certains paramètres prédéfinis seront requis pour cette procédure. -
Page 277: Dépannage De La Carte Réseau Sans Fil
Dépannage de la carte réseau sans fil Tableau de dépannage Le tableau ci-dessous présente les causes possibles et les mesures correctives pour différents problèmes de réseau sans fil. Problème Cause possible Solution possible Réseau Nom de réseau (SSID) Connexion en mode Ad hoc : Assurez-vous que le SSID et la clé WEP de tous les indisponible ... - Page 278 Problème Cause possible Solution possible Réseau Échec de l’authentification Vérifiez les paramètres d’authentification réseau, de chiffrement et de sécurité. Si les indisponible de la carte réseau sans fil. paramètres de sécurité sont mal configurés, en raison, par exemple, d’une clé WEP connexion comportant une faute de frappe, d’un nom d’utilisateur LEAP incorrect ou d’un mauvais choix de méthode d’authentification, la carte réseau sans fil s’associera au réseau...
- Page 279 Spécifications de la carte de réseau local sans fil Élément Spécification Type de réseau La carte Intel® Centrino Wireless-N 2230 intégrée est conforme aux normes IEEE 802.11b/g et 802.11n ; elle est aussi certifiée Wi-Fi* Débit (Commutation automatique) débit maximum de 54 Mbit/s. •...
-
Page 280: Utilisation De Bluetooth
Utilisation de Bluetooth Le module Bluetooth V4.0 intégré est un composant offert en option pour les ordinateurs portables Fujitsu. Qu’est-ce que le Bluetooth? La technologie Bluetooth est conçue pour assurer la liaison sans fil à faible portée entre divers appareils mobiles, tels que téléphones, ordinateurs portables, imprimantes et caméras. - Page 281 Les utilisateurs ne sont pas autorisés à modifier ce produit. Toute modification annule la garantie. Cet équipement ne peut être modifié, altéré ou changé en aucune façon sans l’autorisation écrite de Fujitsu. Toute modification non autorisée annulera les autorisations d’équipement de la FCC et d’Industrie Canada, de même que la garantie.
-
Page 282: Annexe B : Utilisation De L'affichage Intel® Wireless Display
Wireless Display Utilisation de la technologie Wireless Display La nouvelle technologie Intel® Wireless Display (WiDi) est offerte en option sur certains ordinateurs Fujitsu LIFEBOOK. Si votre système est doté de la technologie Intel WiDi, veuillez lire ces informations sur son utilisation. -
Page 283: Démarrer L'application Widi
• I VOUS AVEZ ACHETÉ UN SYSTÈME AVEC CARTE RÉSEAU LOCAL SANS FIL NTEL ET TECHNOLOGIE NTEL I EN OPTION IL EST POSSIBLE ’ ). L APPLICATION I SOIT PRÉ INSTALLÉE SELON LA CONFIGURATION DE VOTRE SYSTÈME ES SYSTÈMES AYANT LA FONCTION NTEL PRÉ... -
Page 284: Index
Index faible mode veille À propos de ce guide problèmes Adaptateur remplacement secteur Voyant de charge de batterie/entrée c.c. Adaptateur auto/avion Batterie au lithium adaptateurs BIOS de fiches Guide Alimentation utilitaire de configuration Adaptateur auto/avion Bluetooth Adaptateur secteur Informations supplémentaires allumer Bouton d'alimentation/veille/reprise défectuosité... - Page 285 Commandes et connecteurs Compartiment de mémoire Lecteur de carte Connexion des adaptateurs d'alimentation MemoryStick/SD Conventions utilisées dans ce guide Lecteur de disquette Coordonnées pour contacter Fujitsu Lecteur de DVD problèmes Lecteur optique Dépannage chargement Dispositif de pointage intégré entretien Dispositif de pointage Touchpad...
- Page 286 Messages d’erreurs Mode ECO Spécifications Mode sommeil (veille) Tableau de voyants d'état Ordinateur Fujitsu LIFEBOOK Touches de défilement voyager Touches de défilement du Ouverture clavier de l'écran Touches de fonction du Ouverture d'urgence du plateau clavier Touches Windows Touche d’application Pavé...