
Related Manuals for Samsung DV40J3000EG Series


Summary of Contents for Samsung DV40J3000EG Series
-
Page 1: User Manual
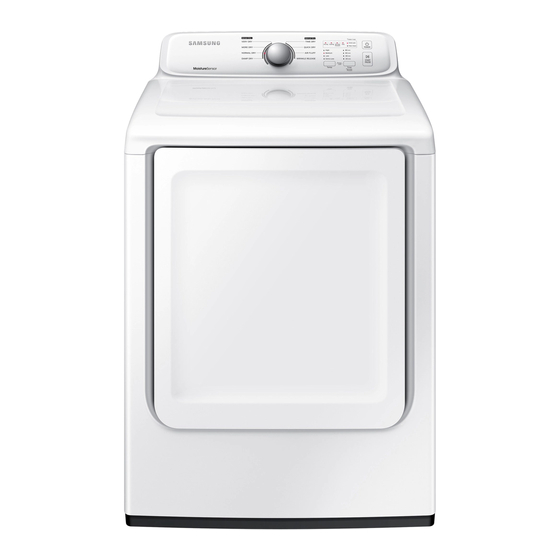
DV40J3000E(G)* Gas and Electric Dryer user manual This manual is made with 100% recycled paper. Imagine the possibilities Thank you for purchasing this Samsung product. DV3000J_DV40J3000EW_USER MANUAL_DC68-03170N_EN.indd 1 2014/12/30 15:14:40... -
Page 2: Table Of Contents
contents insTalling your dryer Unpacking your dryer Basic requirments Ducting requirements Important to installer Location considerations Alcove or closet installation Exhausting Gas requirements Commonwealth of Massachusetts installation instructions Electrical requirements Grounding Electrical connections Installation - General procedure Final installation check list Dryer Exhaust Tips Door Reversal operaTing insTrucTions, Tips... - Page 3 Congratulations on your new Samsung Dryer. This manual contains valuable information on the installation, use, and care of your appliance. Please take the time to read this manual to take full advantage of your dryer’s many benefits and features.
- Page 4 safety instructions Warning: To reduce the risk of fire, electric shock, or injury to persons when using your appliance, follow basic precautions, including the following: Warning 1. Read all instructions before using this appliance. 2. Do not dry articles that have been previously cleaned in, washed in, soaked in, or spotted with gasoline, dry-cleaning solvents, or other flammable or explosive substances, as they give off vapors that could ignite or explode.
- Page 5 Warning - risk of Fire • Clothes dryer installation must be performed by a qualified installer. • Install the clothes dryer according to the manufacturer’s instructions and local codes. • D o not install a clothes dryer with flexible plastic venting materials. If flexible metal (foil type) duct is installed, it must be of a specific type identified by the appliance manufacturer as suitable for use with clothes dryers. Flexible venting materials are known to collapse, be easily crushed, and trap lint.
- Page 6 safety instructions Do not allow children or pets to play on, in, or in front of the appliance. Close supervision is necessary when the appliance is used near children and pets. Before discarding or removing your dryer from service, remove the door to the drying compartment to prevent children or animals from becoming trapped inside.
-
Page 7: Installing Your Dryer
Unpack your dryer and inspect it for shipping damage. Make sure you have received all of the items shown below. If your dryer was damaged during shipping, or you do not have all of the items, contact 1-800-SAMSUNG (726-7864). To prevent personal injury or strain, wear protective gloves whenever lifting or carrying the dryer. -
Page 8: Ducting Requirements
installing your dryer DuctInG rEquIrEmEntS • Use a 4-inch (10.2 cm) diameter rigid aluminum or rigid galvanized steel duct. • Do not use a smaller duct. • Ducts larger than 4 inches (10.2 cm) in diameter can cause increased lint accumulation. Lint accumulation should be cleaned regularly. -
Page 9: Important To Installer
If the new dryer is being installed into an existing exhaust system, you must make sure: • The exhaust system meets all local, state, and national codes. • That a flexible plastic duct is not used. • To Inspect and clean all lint buildup from inside the existing duct. • The duct is not kinked or crushed. -
Page 10: Exhausting
installing your dryer ExhauStInG The dryer shall not be exhausted into a chimney, a wall, a ceiling, an attic, a crawl space, or a concealed space of a building. Exhausting the dryer to the outside will prevent large amount of lint and moisture from being blown into the room. -
Page 11: Gas Requirements
GaS rEquIrEmEntS Use only natural or LP (liquid propane) gases. thE InStallatIon muSt conform WIth local coDES, or In thE abSEncE of local coDES, WIth thE natIonal fuEl GaS coDE anSI/Z223.1, latESt rEVISIon (for thE unItED StatES), or WIth thE can/cGa-b149 InStallatIon coDES (for canaDa). Gas dryers are equipped with a burner vent for use with natural gas. -
Page 12: Electrical Requirements
installing your dryer ElEctrIcal rEquIrEmEntS The Wiring diagram is located on the plate below the control panel or frame back. • Improperly connecting the equipment grounding conductor can result in a risk of electric shock. Check with a qualified electrician or serviceman if you are in doubt as to whether your dryer is Warning properly grounded. -
Page 13: Electrical Connections
ElEctrIcal connEctIonS Before operating or testing, follow all grounding instructions in the Grounding section. An individual branch (or separate) circuit serving only your dryer is recommended. DO NOT USE AN EXTENSION CORD. Gas models – U.S. and Canada A 120 volt, 60 Hz AC approved electrical service, with a 15-ampere fuse or circuit breaker is required. -
Page 14: Installation - General Procedure
installing your dryer InStallatIon - GEnEral procEDurE For proper installation, we recommend that you hire a qualified installer. Read these instructions completely before you begin the installation. To install the dryer, follow these steps: 1. Move your dryer to an appropriate location for installation. Consider installing the dryer and washer side- by-side so you have easy access to both appliances. - Page 15 6. Review the Electrical Requirements section, then follow the 3 Wire system connection instructions (Step 7) or 4 Wire system instructions (Step 8) below. 7. Three Wire system instructions: a. External ground connector b. Neutral grounding wire (white or green/yellow) c.
- Page 16 installing your dryer u.S. moDElS: Risk Of Electric Shock Warning All U.S.models are designed for a 3-WIRE SYSTEM CONNECTION. The dryer frame is grounded to the neutral conductor at the terminal block. A 4-WIRE SYSTEM CONNECTION is required for new or remodeled construction, mobile homes, or if local codes do not permit grounding through neutral.
-
Page 17: Final Installation Check List
fInal InStallatIon chEck lISt The dryer is plugged into an electrical outlet and grounded properly. The exhaust ductwork is hooked up and the joints are taped. You have used rigid or stiff-walled flexible metal duct material, not plastic flexible duct. ... -
Page 18: Dryer Exhaust Tips
installing your dryer DryEr ExhauSt tIpS Plastic or non-metal flexible duct presents a potential fire hazard. Warning 1. Make sure your dryer is installed properly so it exhausts air Wall easily. dryer ducT exhausT 2. Use 4” diameter rigid metal duct. Tape all joints, including at Tape the dryer. -
Page 19: Door Reversal
Door rEVErSal If you want to reverse the direction of the door, it is recommended calling a qualified service technician. 1. Unplug the power cord. 2. Remove the four hinge screws from the door 3. Remove the door by lifting it 4. - Page 20 installing your dryer 10. Remove the holder-glass. 11. Exchange the positions of: : The cover-hinge and handle door : The holder-hinge and guider- holder glass 12. Remove the Lever-Door, and then install it on the opposite side. Refer to the illustrations on the right to aid you in the assembly process.
-
Page 21: Operating Instructions, Tips
operating instructions, tips To reduce the risk of fire, electric shock, or injury to persons, read the IMPORTANT SAFETY INSTRUCTIONS before operating this appliance. Warning oVErVIEW of thE control panEl To select dryness level in Sensor Dry cycle. Very Dry, More Dry, Normal Dry and Damp Dry are dryness level in Sensor Dry cycle. - Page 22 operating instructions, tips To select the temperature for the load, press the Temp button. An indicator light will illuminate next to the temperature you selected. Press the button repeatedly to scroll through the settings. high – For heavy fabrics such as jeans, corduroys, or work clothes with high Temp selection temperature heat.
-
Page 23: Child Lock
operating instructions, tips chIlD lock Prevents children from playing with your dryer. Setting/Releasing If you want to set or release the Child Lock, press the Temp. and Time buttons simultaneously for 3 seconds. Child Lock Details You can turn Child Lock on while your dryer is running. Once you turn Child Lock on, no button, except for the Power button, will respond until you turn off the Child Lock function. -
Page 24: Clean The Lint Filter
operating instructions, tips clEan thE lInt fIltEr • After each load. • To shorten drying time. • To operate more energy efficiently. Do not operate your dryer without the lint filter in place. Filter Frame Front door loaD thE DryEr propErly • Place only one washload in your dryer at a time. -
Page 25: Care And Cleaning
care and cleaning control panEl Clean with a soft, damp cloth. Do not use abrasive substances. Do not spray cleaners directly on the panel. The control panel finish may be damaged by some laundry pre-treatment soil and stain remover products. Apply such products away from your dryer and wipe up any spills or overspray immediately. -
Page 26: Special Laundry Tips
special laundry tips SpEcIal launDry tIpS Please follow the care label or manufacturer’s instructions for drying special items. If care label instructions are not available, use the following information as a guide. • Follow the care label instructions. bedspreads & comforters • Make sure the item is thoroughly dry before using or storing. -
Page 27: Troubleshooting
troubleshooting chEck thESE poIntS If your DryEr… probleM soluTion Doesn’t run. • Make sure the door is latched shut. • Be sure the power cord is plugged into a live electrical outlet. • Check your home’s circuit breakers or fuses. • Press the Start/Pause button again if the door is opened during the cycle. -
Page 28: Information Codes
Electronic Control Problem Call for service. (Invalid Communication). Invalid door. Call for service. Electronic Control Problem Call for service. (Button Key Input Check). For any codes not listed above, call 1–800–726–7864 (1–800–SAMSUNG). English - 28 DV3000J_DV40J3000EW_USER MANUAL_DC68-03170N_EN.indd 28 2014/12/30 15:14:49... -
Page 29: Appendix
appendix fabrIc carE chart The following symbols provide garment care directions. The Clothing care labels include symbols for washing, bleaching, drying and ironing, or dry cleaning when necessary. The use of symbols ensures consistency among garment manufacturers of domestic and imported items. Follow care label directions to maximize garment life and reduce laundering problems. -
Page 30: Protecting The Environment
appendix protEctInG thE EnVIronmEnt This appliance is manufactured from recyclable materials. If you decide to dispose of this appliance, please observe local waste disposal regulations. Cut off the power cord so that the appliance cannot be connected to a power source. Remove the door so that animals and small children cannot get trapped inside the appliance. -
Page 31: Cycle Chart
cyclE chart cycle recommended item Max load size Temp control option Heavy Fabrics such as Wrinkle Prevent jean, corduroys, heavy High Child Lock work clothes Cottons, Work clothes, Medium Wrinkle Prevent VERY DRY Linen, Mixed Loads (default) Child Lock MORE DRY sensor dry NORMAL DRY Shirts, Synthetic Fabrics,... - Page 32 Warranty service can only be performed by a SAMSUNG authorized service center. The original dated bill of sale must be presented upon request as proof of purchase to SAMSUNG or SAMSUNG’s authorized service center. SAMSUNG will provide in-home service during the warranty period at no charge, subject to availability within the contiguous United States.
- Page 33 SAVINGS OR OTHER BENEFITS, OR ANY OTHER SPECIAL, INCIDENTAL OR CONSEQUENTIAL DAMAGES CAUSED BY THE USE, MISUSE, OR INABILITY TO USE THIS PRODUCT, REGARDLESS OF THE LEGAL THEORY ON WHICH THE CLAIM IS BASED, AND EVEN IF SAMSUNG HAS BEEN ADVISED OF THE POSSIBILITY OF SUCH DAMAGES.
- Page 34 Warranty service can only be performed by a SAMSUNG authorized service center. The original dated bill of sale must be presented upon request as proof of purchase to SAMSUNG or SAMSUNG’s authorized service center. SAMSUNG will provide in-home service during the warranty period at no charge, subject to availability within the Canada.
- Page 35 SAVINGS OR OTHER BENEFITS, OR ANY OTHER SPECIAL, INCIDENTAL OR CONSEQUENTIAL DAMAGES CAUSED BY THE USE, MISUSE, OR INABILITY TO USE THIS PRODUCT, REGARDLESS OF THE LEGAL THEORY ON WHICH THE CLAIM IS BASED, AND EVEN IF SAMSUNG HAS BEEN ADVISED OF THE POSSIBILITY OF SUCH DAMAGES.
- Page 36 Scan this with your smartphone QUESTIONS OR COMMENTS? counTry call or VisiT us online aT U.S.A 1-800-SAMSUNG (726-7864) www.samsung.com/us/support www.samsung.com/ca/support (English) CANADA 1-800-SAMSUNG (726-7864) www.samsung.com/ca_fr/support (French) MEXICO 01-800-SAMSUNG (726-7864) www.samsung.com/mx/support DC68-03170N-00 DV3000J_DV40J3000EW_USER MANUAL_DC68-03170N_EN.indd 36 2014/12/30 15:14:51...