Table of Contents
Available languages
Available languages
Table of Contents

Related Manuals for RCA RACE1202-B


Summary of Contents for RCA RACE1202-B
-
Page 1: Air Conditioner
AIR CONDITIONER (WINDOW TYPE) OWNER'S MANUAL MODEL:RACE1202 Please read this owner’s manual carefully and thoroughly before installing and operating your room air conditioner. Please retain this owner’s manual for future reference after reading it thoroughly. KC-E5... -
Page 2: Table Of Contents
CONTENTS Contents…………………………………………………………………………………………..1 Important Safety Instructions…………………………………………………………..2 Product Registration………………………………………………………………………..4 Packaging………………………………………………………………………………………..4 Normal Sounds……………………………………………………………………..…………….4 Air Conditioner Features……………………………………………………….…………5 Operating Instructions………………………………………………………………………..6 Care and Cleaning……………………………………………………………………………11 Energy Saving Ideas………………………………………………………………………..12 Trouble Shooting…………………………………………………………………………..13 Installation Instructions……………………………………………………………………14 French Manual…………………………………………………………………………………20 ... -
Page 3: Important Safety Instructions
Important Safety Instructions NOTE: This USE & CARE MANUAL provides specific operating instructions for your model. Use the room air conditioner only as instructed in this USE & CARE MANUAL. These instructions are not meant to cover every possible condition and situtation that may occur. Common sense and caution must be practiced when installing, operating, and maintaing any appliance. -
Page 4: Operation Of Current Device
Important Safety Instructions SAFETY PRECAUTIONS DANGER! Avoid Injury or damage to the unit or other property Provide occasional ventilation during use. Do not direct aif flow at fireplaces or other heat related sources as this could cause flare ups or make units run excessively. Do not climb on or place objects on outdoor part of the unit. -
Page 5: Product Registration
Product Registration, Packaging & Normal Sounds Product Registration Record Your Model and Serial Numbers Record in the space provided below the model and serial numbers. On all models, the serial plate is located on the outside of the cabinet. Model Number Serial Number Packaging Remove all packaging from inside the carton,... -
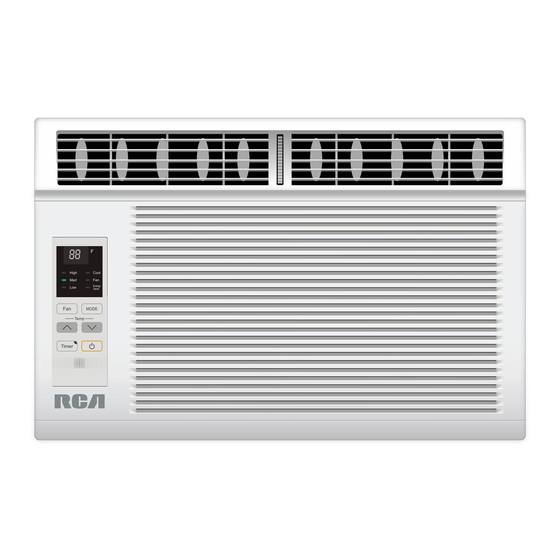
Page 6: Air Conditioner Features
Air Conditioner Features Air Conditioner Features ELECTRONIC CONTROL Before you begin, thoroughly familiarize yourself with the control panel and remote as shown below and all its functions, then follow the symbol for the functions you desire. The unit can be controlled by the touch pad alone or with the remote. -
Page 7: Operating Instructions
Operating Instructions Operating Instructions NOTE The following instructions represent the Touch Pad, the same instructions can be used for the Remote Control. TO TURN UNIT ON: YOU WILL SEE: Energy saver indicator lamp lights Note: When unit is turned on it defaults energy saver mode and the temperature Low speed indicator lamp... - Page 8 Operating Instructions Operating Instructions (continued) TO CHANGE TEMPERATURE SETTING: YOU WILL SEE: Cool mode indicator lamp lights Note: Tap or hold either up ( ) Low speed indicator lamp or down ( ) button until the lights desired temperature is seen on the display.
- Page 9 Operating Instructions Operating Instructions (continued) TO OPERATE ON FAN ONLY: YOU WILL SEE: Medium speed indicator Fan mode indicator lamp lights lamp lights Note:Use this function only when cooling is not desired, DO THIS: such as for room air circulation. PRESS You can choose any fan speed MODE BUTTON...
- Page 10 Operating Instructions Operating Instructions (continued) Note: For Delay Stop , the unit must be in the On position. First, press TIMER button, then adjust timer setting, tap or hold the UP ( ) or the DOWN arrow ( ) to change delay timer at 1 hour increments, up to 24 hours.
- Page 11 Operating Instructions Operating Instructions (continued) FAULT CODES: Note:If the display reads Note:If the display reads F8,i indicates malfunction F7,i indicates malfunction of the pipe temperature of the room temperature resistance. resistance.1. Check whether the sensor is abnormal. 2. Check whether the components of the electrical control board are abnormal and whether the capacitor is...
-
Page 12: Care And Cleaning
Operating Instructions,Care and Cleaning ADDITIONAL THINGS YOU SHOULD KNOW Now that you have mastered the operating procedure, here are more features in your control that you should become familiar with. The cool circuit has an automatic 3 minutes time delayed start if the unit is turned off and on quickly. -
Page 13: Energy Saving Ideas
Energy Saving Ideas Energy Saving Ideas Do not block air flow inside with blinds, curtains or furniture, or outside with shrubs, enclosures, or other buildings. The capacity of the room air conditioner must fit the room size for efficient and satisfactory operation. -
Page 14: Trouble Shooting
Trouble Shooting BEFORE CALLING FOR SERVICE Check the following list to be sure a service call really necessary. A quick reference to this manual may help you avoid an unneeded service call. THE AIR CONDITIONER WILL NOT OPERATE Then... Check if... Wall plug disconnected. -
Page 15: Installation Instructions
Installation Instructions READ BEFORE INSTALLING UNIT Window Mounting (5,000~12,000BTU) INSTALLATION WARNINGS AND CAUTION The unit is for window mounting only. Carefully read the installation manual before beginning. Follow each step as shown. Observe all local,state,and national electrical codes and by qualified,licensed, authorized personnel only. - Page 16 Installation 2. The top rail must be assembled on the unit. A. Remove the air conditioner from the carton and place on a flat surface as shown in B. Align the hole in the top rail with those on the top of the unit as shown in C.
- Page 17 Installation FIG.4A FIG.4B Offset Offset Inner sill Inner sill Interior Interior wall wall Exterior Exterior wall wall Wooden Windows Vinyl-clad Windows Storm Window: FIG.5 Board thickness as 1-1/2min (38mm) required, for proper If the air conditioner is blocked by Storm Window, add wood pitch to rear, along entire sill.Fasten as shown in FIG.5, or remove storm window before air...
- Page 18 Installation B: For Vinyl-Clad windows: Drive (ST4X16FT) locking screws through the frame and into the window sash (FIG.8B). NOTE: Before driving the screws, use a drill to drill 5 holes through the holes in the frame and frame extensions into the window sash as shown (FIG.8B). FIG.8A FIG.8B After the completion of the installation, please check the machines lean as shown...
- Page 19 Installation Cut foam strip and insert it into the space between the upper and lower sashes (FIG.9). FIG.9 FOAM SEAL...
-
Page 20: Quick Reference Guide
QUICK REFERENCE GUIDE Only install unit according to the supplied Installation Instructions. When plugging unit in, always press the RESET button on the Current Device. To Get Cool 1.Press On/Off button FAN SPEED MODE POWER 2.Press Mode to select cool 3.Press Fan Speed to change speed(Fan runs continuously) To Save Energy... -
Page 21: French Manual
CLIMATISEUR D'AIR — CONSIGNES DE SÉCURITÉ Votre sécurité et celle des autres est très importante. Nous donnons de nombreux messages de sécurité importants dans ce guide et sur votre appareil. Assurez-vous de toujours lire tous les messages de sécurité et de vous y conformer. Voici le symbole d'alerte de sécurité. - Page 22 8) Ne placez aucun objet sur le dessus de l'appareil. 9) Ne faites jamais fonctionner un climatiseur d'air dont les filtres ne sont pas installés. 10) Ne vous servez pas du climatiseur d'air près d'un bain, d'une douche ou d'un lavabo. CONSERVEZ CES INSTRUCTIONS ATTENTION! Si le climatiseur d'air a été...
- Page 23 Instructions importantes Veuillez conserver ce guide dans un endroit sûr. N'utilisez aucun liquide ou produit de nettoyage en aérosol pour nettoyer cet appareil. Servez-vous d'un linge humide. Ne déversez jamais de liquide sur le panneau de commande. Cela pourrait entraîner une commotion électrique aux pièces électroniques internes et les mettre hors d'état ou entraîner leur mauvais fonctionnement.
- Page 24 Exigences concernant le lieu d'installation Exigences en matière d'électricité IMPORTANT : Conformez-vous à l'ensemble des codes et des ordonnances en vigueur. Inspectez l'endroit où l'installation sera AVERTISSEMENT effectuée. Assurez-vous d'avoir en main tout le nécessaire pour mener à bien l'installation. Recommandations concernant l'endroit choisi pour faire l'installation : Une prise électrique mise à...
- Page 25 Cordon d'alimentation AVERTISSEMENT REMARQUE : Votre climatiseur d'air peut différer du modèle illustré. Risque d'électrocution Branchez l'appareil à une fiche tripolaire mise à la terre. Ne retirez pas la broche de mise à la terre. N'utilisez pas d'adaptateur. N'utilisez pas de rallonge électrique. A.
- Page 26 REMARQUE : Votre climatiseur peut différer du modèle illustré. Préparez la fenêtre pour l'installation Côté le plus haut Mesurez la largeur de l'ouverture de la fenêtre. Tracez une ligne de démarcation du centre sur l'appui de fenêtre intérieur. A. Vis Largeur de l'ouverture de fenêtre A.
-
Page 27: Positionnement Du Climatiseur
Positionnement du climatiseur Fixation des panneaux extensibles à la fenêtre AVERTISSEMENT Déployez le panneau gauche jusqu'à ce qu'il s'emboîte dans la glissière latérale. Risque de poids excessif Utilisez une mèche de po pour percer un avant-trou par le Le déplacement et l'installation de l'appareil doivent se trou supérieur du panneau extensible dans le châssis de la faire à... - Page 28 Installation des ferrures de DANS LE CAS OÙ CLIMATISEUR EST blocage des panneaux BLOQUÉ PAR UN CONTRE-CHÂSSIS extensibles Ajoutez des pièces de bois comme le montre la figure 6, ou ôtez le contre-châssis avant d'installer le climatiseur. Si le cadre du contre-châssis doit demeurer en place, assurez-vous que les orifices d'évacuation ne soient ni calfatés, ni bouchés par de la peinture.
-
Page 29: Entretien Du Climatiseur
ENTRETIEN DU CLIMATISEUR Votre nouveau climatiseur est conçu pour vous procurer de nombreuses années de service dévoué. Cette partie vous enseigne comment nettoyer et entretenir votre climatiseur adéquatement. Nettoyage du filtre à air Le filtre à air est amovible, ce qui facilite le nettoyage. La propreté... - Page 30 DÉPANNAGE Avant d'appeler pour de l'entretien, essayez de mettre en pratique les conseils suggérés suivants pour voir si vous pouvez régler le problème sans l'aide d'un tiers. Le cordon d'alimentation s'est déclenché (le bouton Reset s'est déclenché). Appuyez sur RESET, puis Le climatiseur ne fonctionne pas relâchez-le (attendez d'entendre un déclic;...
- Page 31 Vous utilisez une rallonge électrique. N'utilisez pas de Le climatiseur passe trop souvent de la marche à rallonge sur cet appareil ou sur tout autre appareil. l'arrêt et ne refroidit pas la pièce en mode refroidissement. Vous essayez de redémarrer le climatiseur trop tôt après l'avoir mis à...