Table of Contents
Available languages
Available languages
Quick Links
Original instructions
GB
Generator
Übersetzung der
D
Originalbetriebsanleitung
Generator
Traduzione delle istruzioni originali
I
Generator
Vertaling van de oorspronkelijke
NL
gebruiksaanwijzing
Generator
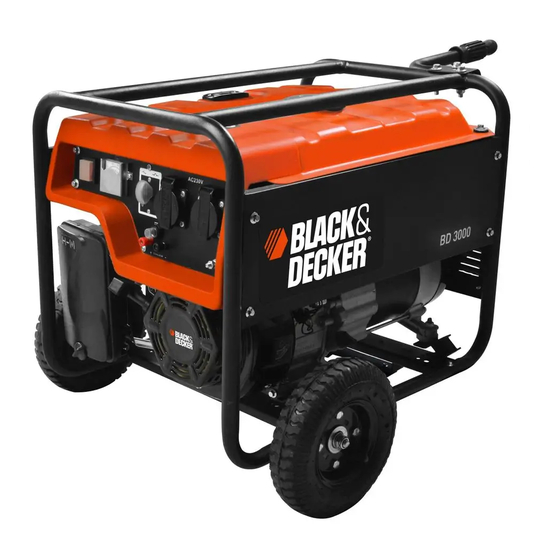
BD 3000
FIN
Art.-Nr.: 160.100.550
GR
Alkuperäisten ohjeiden käännös
Generaattori
CZ
Generátor
Traducción del manual original
ES
Generador eléctrico
TR
Jeneratör
Table of Contents

Related Manuals for Black & Decker BD 3000


Summary of Contents for Black & Decker BD 3000
- Page 1 Original instructions Generator Übersetzung der Originalbetriebsanleitung Alkuperäisten ohjeiden käännös Generator Generaattori Traduzione delle istruzioni originali Generator Generátor Traducción del manual original Vertaling van de oorspronkelijke Generador eléctrico gebruiksaanwijzing Generator Jeneratör BD 3000 Art.-Nr.: 160.100.550...
- Page 2 Black & Decker and the Black & Decker logo are REGISTERED trademarks of The Black & Decker Corporation. Used under license by: Black & Decker und das Black & Decker-Logo sind EINGETRAGENE Marken der Black & Decker Corporation. Black & Decker e il marchio Black & Decker sono marchi di fabbrica registrati della The Black &...
- Page 6 Important! the engine to cool before performing maintenance storage and refueling. Do not complete operating instructions and safety in a safe place, so that the information is The generator must not be supply. In case of improper connection there is a risk of accept any liability for damage or accidents including electrocution to instructions and the safety instructions.
-
Page 7: General Safety Instructions
- Do not refuel or empty the tank near open transporting and refueling the generator. generator, No fuel is spill on the engine or Fuel gauge position. Do not turn, tip or change the Voltmeter - Secure the generator against shifting and toppling during transport. -
Page 8: Technical Data
- Important: Danger of poisoning, do not inhale emissions. appliance. The machine is to be used only for its prescribed purpose. Any other use is caused as a result of this. buildings and the equipment connected to it. source for 230V. 4. -
Page 9: Parts Layout
Important: 5. Parts Layout 5. Parts Layout 1. Fuel gauge 2. Fuel cap into the frame and the hole in the foot and 3. 230 V~ socket out lets. 5. Earth connection 6. Circuit breaker 7. Voltmeter through the hole into the frame and the hole procedure. -
Page 10: Operation
6.6 Connecting to earth 7.3 Connecting appliances to the generator earth in order to discharge static electricity. To do this, connect one end of a cable to the Important! an earth rod). in damage to the generator itself or to other electrical appliances in your home. -
Page 11: Cleaning, Maintenance And Storage
cloth and some soft soap. Do not use cleaning plastic parts of the equipment. Ensure that - Close the petrol cock. 8.2 Air filter (B10-11) In this connection, please also read the Important! replace it if necessary. can restart the sockets by reset the circuit Important! Important! to clean the elements. - Page 12 8.5 Oil shortage cut-out system. The oil shortage cut-out responds if there is 8.4.1 Fill up Oil. (B12) cut out automatically after a short period of time. It cannot be started again until the 8.4.2 Checking Oil level. (B13) If the generator is going to stop used for long surface so that the dip stick is at proper position.
- Page 13 ATTENTION! Slipping or falling unit can crush hands and feet. - Carry the generator on transportation handles: - Carry the generator to the operating place.
-
Page 14: Troubleshooting
10. Troubleshooting 10. Troubleshooting Fault Cause Remedy Engine does not start Oil shortage cut-out has not responded Clean or replace spark plug Spark plug fouled No fuel Charge the battery Generator has too little or no Contact your dealer Actuate the circuit-breaker and reduce the consumers 11. - Page 15 Funken und Zigaretten befüllen. Verschütteter kommt. Bitte lesen Sie die gesamte Bedienungsanleitung nebst den und Lagerung gründlich Anleitung an einem sicheren Ort auf, abkühlen lassen. Verbrennungs- und diese Bedienungsanleitung und die Der Generator darf entstehen. Bei falschem Anschluss 1. Hinweise zu den Warn- und 1.
- Page 16 - Reparatur- und Einstellungsarbeiten Chokehebel offenen Flammen, Feuer oder Funken nachfüllen oder leeren. Nicht rauchen! Voltmeter Ablaufschlauches niemals auf brennbare Sie den Generator transportieren oder - Beim Nachfüllen darauf achten, dass kein Abschaltung bei Überlastung - Generator auf einer sicheren, ebenen Unterlage aufstellen.
- Page 17 niemals mit Regen, Schnee oder sonstiger und angeschlossener Ausrüstung entfernt Feuchtigkeit in Berührung kommt. aufstellen. - Generator niemals mit feuchten oder gar darf bei 1,5 mm² Querschnitt 50 m, bei 2,5 dar. Zu den Faktoren, die sich auf den mm² Querschnitt 100 m nicht überschreiten. und Motor nicht berühren.
- Page 18 der angegebenen Leistungsabgabe. 3. Bestimmungsgemäßer Einsatz 3. Bestimmungsgemäßer Einsatz bleiben. Antriebsausführung: Fremdbelüfteter anhand der Dokumentation des Herstellers Schallleistung, L 5. Aufbau 5. Aufbau Hersteller. 2. Tankdeckel 3. 230 V-Steckdosen 5. Erdungsanschluss 7. Voltmeter 4. Technische Daten 4. Technische Daten Generatortyp: Synchron 11.
-
Page 19: Betrieb
Ausgangsspannung des Generators übereinstimmen. 2. Den Anschluss durch das andere Ende Unterlegscheibe anbringen und mit der 3. Montieren Sie das Rad an der linken Seite und Betriebsstoffe bei einer geeigneten Sammelstelle abgeben. - Verpackungsmaterialien, Metalle und 6.6 Erdungsanschluss Sie ein Ende des Erdungskabel an den Erdungsstab) an. - Page 20 kommen. Generator trennen. - Von Feuchtigkeit und Staub fernhalten. - Bei offensichtlichen Überlastungen oder bringen. Das mitgelieferte DC-Verbindungskabel für bringen. starten. Falls der Motor nicht anspringen Der DC-Ausgang des Generators ist nicht für Beim Starten kann das Startseil beim Anspringen des Motors ruckartig 7.3Verbraucher an den Generator Moment ohne angeschlossene Verbraucher abkühlen.
- Page 21 Der Generator ist mit einer Überlastsicherung ausgestattet. Dieser tauschen Sie ihn bei Bedarf aus. - Entfernen Befestigungsschraube an der Stromaufnahme angeschlossener - Nehmen Sie die Filterelemente heraus identischer Ausführung mit denselben - Reinigen Sie die Elemente durch Sicherheitseinrichtungen, einem sauberen Tuch ab oder reinigen bei Bedarf mit einer Drahtbürste reinigen.
- Page 22 Auffangschale ablaufen. Betriebstemperatur erreicht hat. Untergrund. einfüllen. Füllstandmelder. aufschrauben. Den Generator auf eine leicht geneigte - Sicherstellen, dass der Treibstofftank leer ist. führen, dass sich die Treibstoffeigenschaften liegen. - Sicherstellen, dass sich kein Treibstoff im Zum Leeren des Vergasers die Auslassschraube des Vergasers abschrauben.
- Page 23 Den Generator nicht im Freien lagern. 9. Transport 9. Transport VORSICHT! - Den Generator an den Transportgriffen tragen.
-
Page 24: Problemlösung
10. Problemlösung 10. Problemlösung Fehler Ursache Abhilfe Motor startet nicht auffüllen 0,6 mm) prüfen defekt Filter reinigen oder austauschen 11. Wartungsplan Erster Alle 3 Alle 6 Erster Monat oder Monate Monate oder oder nach 20 Stunden oder 50 100 Stunden abgelaufen ist. - Page 25 Importante! incandescente. Lasciare infortuni o Danni. Si prega di leggere raffreddare il motore prima il generatore. Non toccare questo manuale con cura, in modo che le rischio di ustioni. collegato alla rete elettrica pubblica. In caso di collegamento improprio esiste il rischio di incendio e di danni alla proprietà...
-
Page 26: Indicazioni Generali Di Sicurezza
effettuate esclusivamente da personale autorizzato. -Importante: la benzina e i suoi fumi sono altamente combustibili ed esplosivi. -Rischio di esplosione: non utilizzare il generatore in ambienti dove siano presenti materiali combustibili. -Non rifornire o svuotare il serbatoio vicino a fiamme libere o scintille. Non fumare durante l’operazione! carburante Importante: i gas di scarico tossici possono... - Page 27 prolunghe o le spine elettriche). di lavoro. Poiché c’è una correlazione tra emissioni e livelli di immissione, questi -Quando si lavora all’esterno, utilizzare valori non sono un parametro sufficiente esclusivamente prolunghe elettriche per decidere quali precauzioni aggiuntive approvate per l’uso esterno e che siano potrebbero essere necessarie.
-
Page 28: Utilizzo Corretto
temporaneo) 3. Utilizzo corretto 3. Utilizzo corretto ridotto il carico indicato. Dopo questo tempo, progettato per alimentare surriscaldamento. Caratteristica del motore: mono cilindro, raffreddamento ad aria, 4 tempi OHV Quando si usa l’apparecchio per alimentare Candela: LG F6TC elettrodomestici assicurarsi che questo sia Cilindrata: 196 cm Capacità... - Page 29 siano conformi alla tensione di uscita del generatore. -Mai collegare il generatore alla rete elettrica. dado. 2. Fissare gli altri elementi usando la stessa procedura. possibile. 3. Assemblare l’altra ruota seguendo la stessa procedura. punti di raccolta. Riciclare il materiali di imballaggio. 6.6 Connessione a terra quello nel piedino quindi fermarlo l’altro capo ad una messa a terra esterna.
- Page 30 L'uscita DC del generatore non è adatto per raccomanda di tenere lontano il generatore. Importante! qualche minuto in modo da lasciarlo raffreddare. 7.3 Collegare utensili al generatore prese Importante! Importante: -Non collegare il generatore alla rete di elettrodomestici presenti in casa. -spegnere immediatamente il generatore e collegati al generatore.
- Page 31 acqua pulita e asciugare con aria. dall’alloggiamento prima di effettuare con aria compressa a bassa pressione. un oggetto appuntito. -Raccomandiamo di pulire il generatore raffreddare prima di toccarlo) potrebbero danneggiare le parti in plastica del generatore. facilità quando il motore è a temperatura di seguenti.
- Page 32 - Assicurarsi che non ci sia carburante nel carburatore. Importante: in un contenitore. Richiudere il tappo di Residui di carburante possono intasare il carburatore - Assicurarsi che non ci siano residui di olio nel motore. e lasciare chiudere il tappo intasare il sensore dell' olio.
-
Page 33: Risoluzione Problemi
10. Risoluzione problemi 10. Risoluzione problemi Causa Il motore non parte Contatto nel sensore di Controllare e rabboccare l’olio motore Candela danneggiata Tensione della batteria troppo bassa Rifornire di carburante o aprire Cambiare la batteria Il generatore eroga una tensione Capacità difettosa Filtro dell’aria sporco 11. - Page 34 Gemorste brandstof apparatuur aan een andere persoon geeft, u onderhoud, opslag en de uitlaat niet aan, ter De generator mag niet op het 1. Verklaring van de 1. Verklaring van de openbare stroomnet waarschuwingstekens waarschuwingstekens en symbolen op de machine en symbolen op de machine bestaat het risico op brand en beschadiging aan eigendom,...
- Page 35 toebehoren. motor of generator. of aangesloten apparatuur kan beschadigd Chokehendel mogen enkel door geautoriseerd en in kamers met ontbrandbare materialen. Brandstofmeter Niet roken! Voltmeter ondanks de uitlaatslang ontsnappen. Met 2. Algemene veiligheidsinstructies 2. Algemene veiligheidsinstructies - Uitsluitend originele onderdelen mogen...
- Page 36 - Bedien de generator nooit in niet - Bedien de generator nooit in de regen of gebruikt, moeten de uitlaatgassen een uitlaatslang. - Raak de generator nooit met natte handen aan. - Gebruik nooit defecte of beschadigde stekkeraansluitingen). aan. risico’s maken. niet.
-
Page 37: Technische Gegevens
gebruik. 3. Geëigend gebruik 3. Geëigend gebruik generator is bedoeld om elektrische gereedschappen en lichtbronnen Aandrijfmotorontwerp: 1 cilinder, persluchtgekoeld, 4-slags kopklep u het apparaat met huishoudtoestellen Bougie: LG F6TC gebruikt, controleer dan de geschiktheid Uitslag: 196 cm³ Tankcapaciteit: 18 l Motorolie: Ongev. - Page 38 - Elektrische stroomkabels en aangesloten - De generator dient enkel met apparatuur - Sluit de generator nooit op de 6.5 Milieubescherming plastic. 6.6 Aarding gat in het frame en het gat in de poot en de andere drie bouten en moeren de generator en het andere uiteinde met een 7.
- Page 39 bougie is aangesloten. de generator. - Ontkoppel alle elektrische apparatuur die geluiden. - Stel de gereedschappen niet aan op: sommige elektrische toestellen positie I te draaien. Indien de motor niet start, trekt u nogmaals niet behandeld door een precies elektrisch aan de hendel.
- Page 40 - Reinig de apparatuur geregeld met een De generator is uitgerust met een aangesloten toestellen. - Reinig de elementen door er op een plat hem indien nodig schoon met een koperen de bougie uit na elke 50 uur bediening. Veeg de apparatuur met een schone doek draaien.
- Page 41 tobbe. - Nadat de oude olie gedraineerd is, sluit u de de peilstok. schroef aan te brengen. - Zorg dat de brandstoftank leeg is. schroef de markeerstick niet naar binnen om in tot aan de draad. - Zorg dat er geen brandstof in de carburator De carburator legen: draai de aftapschroef Door resten brandstof kan de carburator motorolie naar buiten druppelen in een...
- Page 42 olie. raken. Sla de generator nooit in de buitenlucht op. - Draag de generator met transporthendels: gebruik.
- Page 43 10. Probleemverhelping 10. Probleemverhelping Fout Remedie Motor start niet reageert niet Geen brandstof Controller of condensator kapot geen spanning Start de circuitonderbreker en ingeschakeld 11. Onderhoudsplanning 11. Onderhoudsplanning Eerste Elke drie Na elk maand of 20 maanden of maanden of 200 uur.
- Page 45 On/Off...
- Page 53 1. Koneessa olevien varoitusmerkkien 1. Koneessa olevien varoitusmerkkien ja symbolien selitys ja symbolien selitys Varoitus: generaattorin Sammuta generaattori aina ennen kunnossapitoa. generaattoria ainoastaan Irrota kaikki laitteet pistorasioista, kun suoritat sammutettuna ilman...
- Page 54 esiasetusta ei saa muuttaa. Generaattori tai Bensiinihana tupakoi! ilmaan pakokaasuletkusta huolimatta. moottorille tai pakoputkelle. 2. Yleiset turvallisuusohjeet 2. Yleiset turvallisuusohjeet - Generaattoriin ei saa tehdä mitään muutoksia. - Vain alkuperäisosia saa käyttää kunnossapidossa ja lisävarusteina. - Moottorin tai generaattorin asetuksiin ei tai lumisateessa.
-
Page 55: Oikea Käyttö
kaapelilla. VAARA! 3. Oikea käyttö 3. Oikea käyttö seurauksena. 4. Tekniset tiedot 4. Tekniset tiedot Generaattorityyppi: Synkroninen Suojaustyyppi: IP 23M Nimellisjännite (Urated): 230 V ~/12 V d.c. Jatkuva nimellisteho (Prated) (S1): 2,5 kW Maksimiteho (Pmax) 2,7 kW Nimellisvirta (Irated): 10.9 A... - Page 56 Taajuus (Frated): 50 Hz Tehokerroin cos : Teholuokka: 21. Sytytystulppa antoteholla. 6. Ennen koneen käyttöönottoa 6. Ennen koneen käyttöönottoa antoteholla. Sytytystulppa: LG F6TC mutterilla. 1000 m 5. Maadoitus 12. Vetonaru Toista sama toiselle pultille. 13. Bensiinihana...
- Page 57 maksimikorkeus 1000 m merenpinnan - Toimita likaantunut kunnossapitomateriaali uudelleen. 6.6 Maadoitus 7. Käyttö 7. Käyttö 7.1 Ennen generaattorin huoltokeskukseen, kun: tuuletus. sytytystulppaan.
- Page 58 sen sytytys katkoo. Huomautus: Joillakin laitteilla 8. Puhdistus, kunnossapito ja 8. Puhdistus, kunnossapito ja varastointi varastointi irti sytystulpasta ennen laitteen puhdistusta HUOM! generaattoriin, aseta se tarpeeksi kauas generaattorista. matalapaineisella paineilmalla. - Ennen kuin sammutat generaattorin, anna pesuaineliuoksella kostutetulla liinalla.
- Page 59 kantta kiinni. - Irrota sytytystulppa toimitukseen takaisin tasaiselle alustalle. se auki.
- Page 60 - Varmistu, ettei kaasuttimessa ole tukkiutumisen. 9. Kuljetus 9. Kuljetus HUOM! otteestasi.
- Page 61 10. Vianetsintä 10. Vianetsintä Vika Ei polttoainetta bensiinihana Lataa akku Ilmansuodatin likainen 11. Kunnossapitoaikataulu Suorita huolto kaikkina osoitettuina kuukausina tai Jokainen kuukausi tai kuukauden kuukauden 20 tuntia tai 200 tuntia tuntia tuntia Tarkista taso Vaihda Ilmanpuhdistin Tarkista Sytytystulppa Tarkista- Vaihda Tarkista- suodatin Tarkista...
- Page 71 ¡Importante! de que no hay presencia de llamas, chispas o cigarrillos. cuenta algunas precauciones de seguridad Si el combustible se derrama, límpielo inmediatamente. instrucciones de funcionamiento y la para poder disponer de la presente que el motor se enfríe antes Si se hace entrega del presente equipo a alguna persona, facilítela las instrucciones de mantenimiento,...
-
Page 72: Instrucciones Generales De Seguridad
2. Instrucciones generales de 2. Instrucciones generales de seguridad seguridad generador. mantenimiento y como accesorios. el equipo conectado puede resultar dañado. Indicador de combustible - Importante: el combustible y los gases Voltímetro el generador en áreas con materiales luces encendidas, fuegos o chispas. ¡No fume! Importante: a pesar del conducto de salida, Disyuntor contra... - Page 73 protecciones de seguridad. funcionamiento. generador. o caiga durante el transporte. inhalar. - No conecte el generador a la red eléctrica - Nunca utilice el generador en áreas no en el propio generador o en otros aparatos eléctricos del hogar. - Nunca toque el generador con las manos húmedas.
-
Page 74: Información Técnica
Lea las normas e instrucciones de seguridad. Factor de potencia cos : El incumplimiento de las siguientes normas Clase de potencia: e instrucciones de seguridad puede dar lugar a descargas eléctricas, incendios o lesiones continuo) La máquina puede funcionar continuamente seguridad en un lugar seguro para poder con la salida de potencia citada. - Page 75 muestra. 15. Asa de transporte Después, asegúrelo con una tuerca. siguiendo el mismo procedimiento. transporte girada. 6. Antes de poner en marcha la 6. Antes de poner en marcha la máquina máquina equipo conectado deben estar en perfecto estado. salida del generador. - Nunca conecte el generador a una toma de asegúrelo con la tuerca.
- Page 76 7. Funcionamiento 7. Funcionamiento 7.1 Antes de arrancar el generador arrancado. ¡Importante! en marcha el motor. el motor puede retroceder repentinamente cuando se ponga en marcha, lo que puede rellénelo si es necesario. - Asegúrese de que el generador tiene el equipo.
-
Page 77: Limpieza, Mantenimiento Y Almacenamiento
8. Limpieza, mantenimiento y 8. Limpieza, mantenimiento y por un circuito eléctrico concreto. almacenamiento almacenamiento No la utilice nunca para dar corriente a un Al usar el generador para dar corriente a del generador. posible. Limpie el equipo con un paño eléctrico conectado para que se enfríe. - Page 78 aire. ligeramente inclinada de tal manera que adecuada. para montarlo. sin atornillarla al rellenador de aceite. tiene suciedad o mugre cada 50 horas de funcionamiento y, en el caso de que fuese necesario, límpiela con un cepillo de alambre de cobre. Además, es necesario insértela hasta que haga tope.
- Page 79 9. Transporte 9. Transporte aplastar las manos y los pies. - Transporte el generador con asas de transporte: siguiente: - Transporte el generador al lugar de uniforme. no está completamente sellado. Si el combustible se almacena durante mucho tiempo, se puede deteriorar. - Asegúrese de que no quede combustible en el carburador.
-
Page 80: Programa De Mantenimiento
10. Solución de problemas 10. Solución de problemas Error Causa El motor no arranca aceite no ha respondido y rellene el aceite de motor No hay combustible distancia del electrodo debe ser de 0,6 mm) Rellene el combustible y la gasolina Cargue la batería Controlador o condensador defectuoso distribuidor... - Page 87 Madde O (1) O (2) O (2)
- Page 88 Explosive drawing...
- Page 89 Material name Connecting rod parts quantity Recoil starter combination Starting a cup 33-1 Oil ring 33-2 33-3 Bearings 6205 Tabletting ring parts Crankcase paper pad The crankshaft parts Carburetor parts seat Carburetor paper pad Carburetor insulation block Air inlet paper pad Oil foot parts Cylinder head gasket A cylinder head...
- Page 90 Frame cross arm socket Rack combination The circuit breaker Balance bracket Frame suspension rubber gasket Damping bearing A and B Electrical components Motor combination Carbon brush The motor shaft Flat mat bolt bolt bolt bolt Motor bracket bolt bolt bolt bolt Flat mat Voltage regulator...
- Page 91 Reel nut bolt Insert lock nut, not of metal bolt Oil drain bolt Flat mat Reset tension spring...
- Page 92 Konformitätserklärung EU-Richtline und Normen für den Artikel dichiara la seguente conformità secondo declara la conformidad siguiente l‘articolo para el artículo Generator/ BD 3000 Anschrift der beteiligten Stelle: Germany Art.-Nr.: 160.100.550...
-
Page 93: Garantie
GARANTIE products. In the event of interference with of modifications to the This appliance is a quality product. It was designed in compliance with current technical standards and made carefully using normal, good quality appliance by unauthorised persons, the warranty will be rendered void. Damages that are attributable to improper handling, over loading, or materials. - Page 94 GARANZIA ricambio e accessori che non rientrano nel nostro assortimento. Interventi Questo apparecchio è un prodotto di qualità, costruito accuratamente o modiche all‘apparecchio apportati da persone che non ne hanno secondo lo stato attuale della tecnica e utilizzando un materiale comune di l‘autorità, causano l‘annullamento della garanzia.
- Page 95 Takuu Tämä laite on laatutuote. Se on suunniteltu voimassa olevien teknisten valtuuttamaton henkilö tekee laitteeseen muutoksia, takuu mitätöityy. Takuun ulkopuolelle jäävät sellaiset vahingot, jotka ovat seurausta standardien mukaisesti ja valmistettu huolellisesti käyttämällä tavallisia, vääränlaisesta hyvälaatuisia materiaaleja. käsittelystä, ylikuormituksesta tai luonnollisesta kulumisesta. Takuuaika on 24 kuukautta, ja se alkaa ostopäivästä, joka voidaan todistaa Valmistajasta tai materiaalivioista johtuvat vahingot korjataan veloituksetta kuitilla, laskulla tai luovutustodistuksella.
- Page 97 Generator/ BD 3000 Εγγύηση Αγορασμένο στο: Διεύθυνση (πόλη, οδός): Name of customer: Όνομα πελάτη: Street address: Διεύθυνση πελάτη: Ταχυδρομικός κώδικας, πόλη: Telephone: Τηλέφωνο: Date, signature: Ημερομηνία, υπογραφή: Fault description: Περιγραφή βλάβης: GARANTIE TAKUU gekauft bei: Ostopaikka: in (Ort, Straße): Kaupunki, katuosoite: Name d.