Miele KF 1801 Vi Operating And Installation Instructions
Fridge-freezer combination
Hide thumbs
Also See for KF 1801 Vi:
- Operating and installation instructions (96 pages) ,
- Specification (3 pages) ,
- Operating and installation manual (88 pages)

Related Manuals for Miele KF 1801 Vi


Summary of Contents for Miele KF 1801 Vi
- Page 1 Operating and Installation Instructions Fridge-Freezer Combination KF 1801 Vi KF 1811 Vi KF 1901 Vi KF 1911 Vi en - US, CA To prevent accidents and machine damage read these instructions before installation or use. M.-Nr. 07 155 800...
-
Page 2: Table Of Contents
Using the refrigerator efficiently ........ - Page 3 Contents Changing the light bulb ..........32 Water filter .
-
Page 4: Important Safety Instructions
IMPORTANT SAFETY INSTRUCTIONS When using the appliance, follow basic safety precautions, including the following: Read all instructions before installation and use to prevent accidents and machine damage. This appliance is intended for residential use only. Use only as described in this Operating manual. Only use the appliance for its intended purpose. - Page 5 This appliance must be installed and connected in compliance with the installation instructions. Installation and repair work should be performed by a Miele authorized service technician. Work by unqualified persons could be dangerous and may void the warranty. Installation must comply with local plumbing regulations and state laws.
-
Page 6: Disposal Of Your Old Appliance
Splashes of refrigerant can damage the eyes. Your old refrigerator may have a cooling system that used CFC's (chlorofluorocarbons). CFC's are believed to harm stratospheric ozone. If you intentionally release this CFC... -
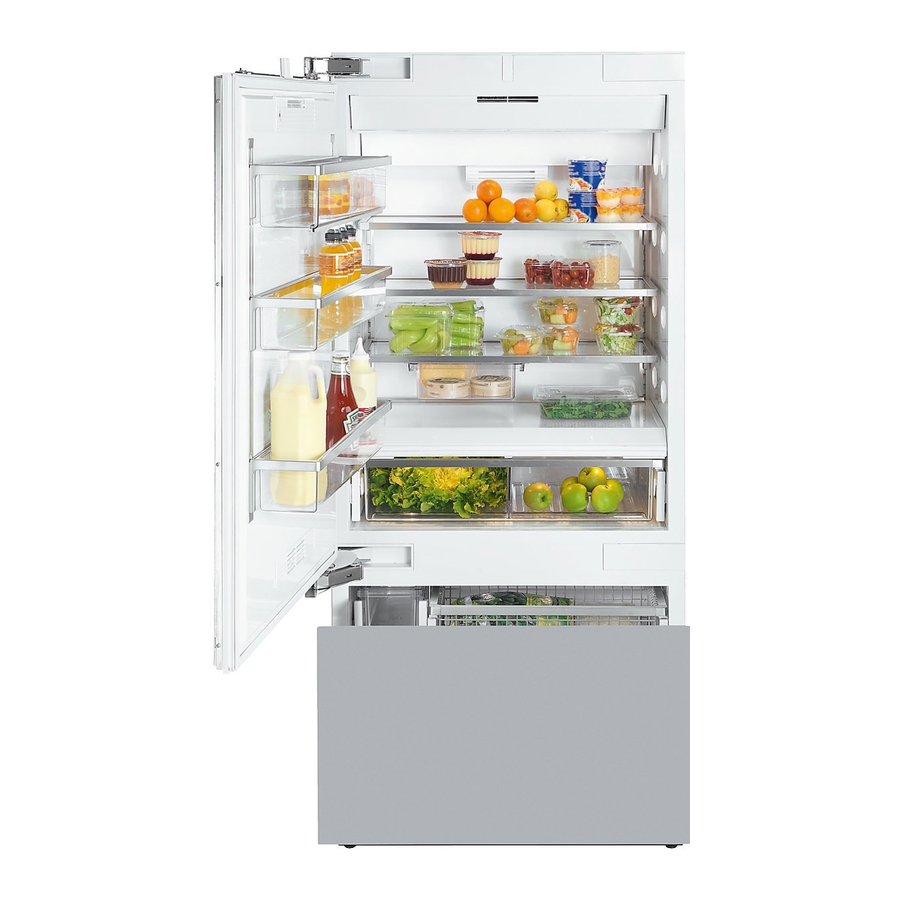
Page 7: Guide To The Fridge-Freezer Combination
Guide to the Fridge-Freezer combination a Hinged door shelf b Shelves (height adjustable) c Door shelves (height adjustable) d Floating drawer e Control panel f Humidity filter g Main switch to turn the appliance On/Off h SmartFresh drawer i Water filter j Small freezer basket k Large freezer basket l Ice cube container... - Page 8 Right SmartFresh drawer e Freezer fTemperature display X colder; Y warmer Allows you to set the desired temperature in the refrigerator or freezer section g Food type(s) to be stored in the SmartFresh drawer h On/Off sensor button for the...
-
Page 9: Before Use
Before using for the first time ^ Clean the inside of the appliance and the accessories with a mild solution of warm water and liquid dish soap. Dry with a soft cloth. After installing the appliance, wait at least 30 minutes before turning the appliance on. -
Page 10: Settings
Settings Using the settings When a sensor button has been selected with a finger touch, it will appear yellow. A de-selected button will appear white. ^ Touch the access button "p" so it turns yellow. On the control panel you will now see the sensor buttons of the four appliance zones. -
Page 11: Turning The Button Sound On/Off
Display text turns yellow. † ^ Touch the sensor button for the refrigerator section so it turns yellow. ^ Note the position of the X button, but do not touch. ^ Touch the access button "p" again so it turns white. -
Page 12: Turning Off For Longer Periods Of Time
Settings ^ By touching the X button, you can choose between: = 0 : Button sound is off = 1 : Button sound is on = – : Return to menu. ^ Touch the access button "p" to confirm the setting. ^ Tap the X button until you see ;... -
Page 13: Alarm
The appliance is equipped with an alarm system, to ensure that the temperature does not rise unnoticed because of energy loss or open doors. The alarm system is always operational, it does not need to be turned on. Temperature alarm If the temperature becomes too warm, an alarm sounds, the "alarm"... -
Page 14: Setting The Temperature
^ Touch the access button "p" so it turns yellow. ^ Touch the sensor button for the refrigerator or freezer section so it turns yellow. ^ Use the X and Y buttons next to the temperature display to set the temperature warmer or colder. - Page 15 ^ Touch the access button "p" so it turns yellow. ^ Touch the sensor button for the refrigerator section so it turns yellow. ^ Note the position of the button X, but do not touch. ^ Touch the access button "p" again so it turns white.
-
Page 16: Smartfresh Drawers
32° - 37°F (0° - 3°C). This helps to keep the food fresh considerably longer than in the rest of the refrigerator, spoiling is minimal. The temperature is set to approx. 35°F (1.5°C). - Page 17 For optimal storage conditions, it is always best to store similar foods together in one crisper. Foods that are best stored under dry conditions – fresh fish and shellfish, meats, poultry, sausage, dairy products and deli salads. Foods that are best stored under moist conditions –...
-
Page 18: Using The Refrigerator Efficiently
(storage shelf). Use this area to store items such as butter and cheese. Coldest area The coldest area in the refrigerator is directly above the SmartFresh drawers. The temperature in the drawers themselves is even colder. Use these cold areas in the refrigerator for all highly perishable foods, such as: –... -
Page 19: Using The Freezer Efficiently
Freezing food Fresh food should be frozen as quickly as possible. This helps maintain the nutritional value, vitamin content, appearance and taste of the food. Never refreeze partially or fully defrosted food. Consume defrosted food as soon as possible, it will lose its nutritional value and spoil if left for too long. -
Page 20: Defrosting
Frozen food can be defrosted in different ways: – in a microwave oven, – at room temperature, – in the refrigerator (the cold given off by the frozen food helps to keep the other food cold), – in a steam oven. -
Page 21: Supercool
This helps food to freeze quickly and retain its nutrients, vitamins, flavor and appearance. Switching on SuperCool ^ Touch the sensor for the refrigerator or freezer (as desired) so it turns yellow. ^ Touch the SuperCool sensor button so it turns yellow. -
Page 22: Ice Cube Maker
Ice cube maker For the automatic ice cube maker to operate, it must be connected to the household water supply. See "Plumbing". Turning on the ice cube maker Make sure that the ice cube container is under the ice cube maker, as far as possible. -
Page 23: Automatic Defrost
Refrigerator section and SmartFresh drawers The refrigerator and SmartFresh drawers defrost automatically. During normal operation, condensate and frost can form on the rear wall of the refrigerator and drawers. You do not need to remove this build-up, it will defrost and evaporate automatically with the heat generated by the appliance. -
Page 24: Adjusting The Interior Fittings
^ Using a suitable object, e.g., coin, turn the safety lock to a horizontal position a. ^ On both sides of the drawer, pull the latches b upward and lift the drawer out of the refrigerator. Push the tracks back into the refrigerator to avoid injury. - Page 25 The divider in the drawer can also be removed for cleaning. ^ Remove the drawer. ^ Lift the divider upward and out. To re-insert the divider, slide it back down along the tracks. Important: If the divider is not in place, the SmartFresh drawer will not work properly.
-
Page 26: Removing The Storage Shelf From Above The Drawer
Adjusting the interior fittings Adjusting the door shelves For easier loading, unloading, and cleaning, the door shelves can be shifted or completely removed. ^ Using both hands, grasp the door shelf by the frame and tip it slightly forward. ^ Slide the tipped shelf up or down along the slide-rails, and click it into place with the lower hooks. -
Page 27: Ice Cube Container
Ice cube container The ice cube container is set on telescopic tracks, and can be removed for loading, unloading and cleaning. ^ Slide the container forward until resistance is felt. ^ On both sides of the container, pull the latches (see arrow) upward and lift the container out of the freezer. -
Page 28: Large Freezer Basket With Partition
Adjusting the interior fittings Large freezer basket with partition The large freezer basket can be removed for cleaning. ^ Lift the freezer basket out of the freezer. The partition in the basket can also be removed for cleaning: ^ Using a suitable object, e.g., coin, turn the safety locks to a horizontal position, 1. -
Page 29: Cleaning And Care
To reduce the risk of electrical shock, disconnect the appliance from the power supply by shutting off the power main, tripping the circuit breaker or unplugging the power cord before maintenance. Never use cleaning agents containing abrasive substances such as sand, soda, acids, chlorides or chemical solvents. -
Page 30: Humidity Filters
Cleaning and care Aluminum frames The shelf frames are made of aluminum. ^ Clean the frames with a mild solution of warm water and liquid dish soap. Aluminum is susceptible to scratches and nicks, treat with care. The aluminum frames may become discolored or otherwise altered if soiling is not cleaned away promptly. -
Page 31: Ventilation Slits
Cleaning and care After cleaning ^ Return all shelves and accessories. ^ Place food back in the refrigerator section, close the appliance doors, insert the plug in the power outlet and turn the appliance on. ^ Switch on the SuperCool function for the freezer section. -
Page 32: Changing The Light Bulb
Cleaning and care Changing the light bulb The lighting automatically switches off after the door has been open for approx. 5 minutes. This is not a fault. After the bulb has cooled for a short time it will turn on again. If the light does not come on when the door is opened briefly, the light bulb should be changed. - Page 33 Side lighting ^ Turn the light cover counterclockwise and pull out. Never touch a halogen bulb with bare fingers. When inserting a glass halogen bulb always hold it with a soft cloth. ^ Pull the defective light bulb from the socket.
-
Page 34: Water Filter
6 months. – When the filter indicator turns red, the filter will need to be changed soon. Replacement filters can be ordered from Miele. – When the red filter indicator flashes, it is time to change the filter. -
Page 35: Exchanging The Water Filter
Exchanging the water filter ^ Push in and rotate the filter cap on the base panel of your appliance counterclockwise 180°, 1. ^ Pull the used filter cartridge out of the appliance, 2. ^ Remove the cap from the used filter, ^ Take a new filter cartridge out of the packaging and remove the protective cap. - Page 36 The various appliance zones are now visible. ^ Touch the sensor button for the refrigerator so it turns yellow. ^ Note the position of the X button, but do not touch. ^ Touch the access button "p" again so it turns white.
- Page 37 If you choose this option, it is important to insert a bypass cartridge. Only then can the performance of the appliance be ensured. To purchase a bypass cartridge, contact Miele. Water filter...
-
Page 38: Filter Performance Data Sheet
Filter Performance Data Sheet T rademark /M odel D esignation 9000 077095 Miele 07134220 M anufacturer : Cuno, Incorporated T he water treatment device ( s ) listed on this certificate have met the testing requirements pursuant to S ection... - Page 39 Performance Data Sheet For Filter Model 07134220 Using Replacement Cartridge 07134220 This system has been tested according to NSF/ANSI Standards 42 and 53 for the reduction of the substances listed below. The concentration of the indicated substances in water entering the system was reduced to a concentration less than or equal to the permissible limit for water leaving the system, as specified in NSF/ANSI 42 and 53.
-
Page 40: Frequently Asked Questions
Reset the circuit breaker. Check the display. See "Selecting the correct temperature". SuperCool automatically shuts off after: 6 hours for refrigerator; 52 hours for freezer. Check that the doors have been closed properly. This makes the compressor run longer, causing the temperature in the freezer section to fall automatically. - Page 41 The door is not closed. Power is not reaching the appliance or there has been a power failure. Solution Contact Miele Technical Service. Contact a plumber. Self-tapping valves and " (4.76 mm) saddle valves reduce the water pressure and can block the pipe.
- Page 42 Once the alarm condition has been corrected, the alarm will turn off and the "alarm" indicator will stop flashing. The temperature indicator will indicate the highest temperature reached during the alarm. Order replacement filters from Miele. See "Replacing the water filter".
- Page 43 Solution Check that the appliance is connected to the power supply. Check that the appliance is switched on. Contact Miele. See "Ice Cube Maker" and/or "Plumbing" for more information. Self-tapping valves and " (4.76 mm) saddle valves reduce the water pressure and can block the pipe.
- Page 44 Frequently asked questions Problems with the ice maker Issue The ice cubes are small. The ice cubes have an unpleasant odor/flavor. Possible fault Other domestic appliances that use water are in operation. Check whether the water filter needs changing. Check the water pressure. The water pressure must be between 25 and 120 psi (1.72-8.25 bar).
- Page 45 Problems with the ice maker Issue The ice maker is not producing enough ice or the ice cubes are misshapen. Ice is forming in the supply hose to the ice maker. Frequently asked questions Possible fault Check the water pressure. The water pressure must be between 25 and 120 psi (1.72-8.25 bar).
- Page 46 Frequently asked questions The appliance is making noises. Issue Brrrrr... Blubb, blubb... Click... Sssrrrrr... Rattling, vibrating Possible fault Humming noise made by the compressor. This noise can get louder for brief periods when the motor is switching A gurgling noise can be heard when coolant is circulating through the pipes.
-
Page 47: After Sales Service
Miele appliance. Please note that unless expressly approved in writing by the Miele Ser- vice department, Extended Service Contracts offered by other providers for Miele products will not be recognized by Miele. -
Page 49: Installation Instructions
Installation instructions To prevent accidents and machine damage read these instructions before installation or use. -
Page 50: Caring For The Environment
Caring for the environment Disposal of packing materials The cardboard box and packing materials are biodegradable and recyclable. Please recycle. Ensure that any plastic wrappings, bags, etc., are disposed of safely and kept out of the reach of babies and young children. -
Page 51: Installation
Have the appliance installed by a qualified technician, according to the enclosed installation instructions. The manufacturer is not liable for damage to property due to an incorrect installation or water connection. WARNING This appliance is top-heavy and must be secured to prevent it from tipping forward. -
Page 52: Installation Niche
To ensure that the appliance is installed securely and functions properly, the base must be flat, level and made of a hard, rigid material. If in doubt, contact Miele. Furniture/fixtures The new appliance will be mounted securely to adjacent and overhead furniture/fixtures. -
Page 53: Custom Door Panels
This appliance can be installed "side-by-side" with another fridge/freezer using a "Merging Kit". The "Merging Kit" can be obtained from Miele. Contact Miele or your dealer for specific information about which combinations will work with your appliance..without partition... -
Page 54: Side Panels
"Merging Kit". The "Merging Kit" can be obtained from Miele. Side panels If one side of the appliance is visible, a side panel must be used. The side panel must be firmly secured... - Page 55 To connect these furniture doors, a metal strip can be purchased as an optional accessory. Contact Miele. When attaching the metal strip to the furniture doors, observe the maximum length of the screws and the position of the drill holes.
-
Page 56: Dimensions
Dimensions Niche dimensions Niche width (A) KF 1801 Vi, KF 1811 Vi KF 1901 Vi, KF 1911 Vi 30" (762 mm) 36" (915 mm) - Page 57 1. Power supply 2. Water connection KF 1801 Vi, KF 1811 Vi KF 1901 Vi, KF 1911 Vi Door dimensions (open min. 90°) KF 1801 Vi, KF 1811 Vi KF 1901 Vi, KF 1911 Vi 15" (381 mm) 18" (458 mm) "...
-
Page 58: Installing The Appliance
Installing the appliance Before you begin Read these instructions completely and carefully. Have the appliance installed by a qualified technician, according to the enclosed installation instructions. To reduce the risk of injury or damage to the product, two people should be used for installation. These installation instructions are intended for use by qualified installers. -
Page 59: Before Installation
Check the installation niche To ensure a safe, trouble-free installation and the best possible cosmetic result, check to be sure that the installation space complies with the installation requirements. ^ Check the base (see "Installation"). ^ Check the dimensions of the cavity. ^ Check that the cavity is square. -
Page 60: Remotevision Module Installation
Installing the appliance ^ Loosen the bracket that holds the appliance to the pallet. Caution! The appliance is no longer secured and may be unstable. ^ From the rear of the appliance carefully lift it from the pallet. Once the appliance is on the ground it can be wheeled around. -
Page 61: Preparing The Installation Niche
In that case, repeat the process. If that does not correct the problem, contact Miele. ^ Pull the antenna d straight out. ^ Guide the cover b over the antenna d and screw on the cover. - Page 62 Installing the appliance Anti-tip brackets The anti-tip brackets help keep the appliance safely secured to the installation niche to prevent tipping. Two anti-tip brackets are recommended for each appliance or appliance combination (side-by-side). The distance "D" between the anti-tip brackets b is the width of the appliance.
- Page 63 Securing an alternative anti-tip device If the anti-tip brackets cannot be attached securely, an alternative anti-tip device can be used. Ensure that there is no "give" between the appliance and the anti-tip device. If possible, always screw the wooden beam to existing studs. ^ Cut a wooden beam (cross section min.
-
Page 64: Sliding The Appliance Into The Installation Niche
Installing the appliance Sliding the appliance into the installation niche ^ Unscrew the plinth. ^ To protect the corners of the installation space, attach the supplied edge protector a on both sides with adhesive tape. ^ Plug the appliance into the power outlet b. -
Page 65: Aligning The Appliance
Aligning the appliance ^ Align the appliance with the custom front. The installation aids e have been designed for the following total thicknesses of custom doors: – " (19 mm) – 1 ½" (38 mm). Be sure to take into account the possible differing thicknesses of the custom doors that are to be fitted subsequently. -
Page 66: Attaching The Appliance To The Installation Niche
Installing the appliance Note: – Do not twist or jam the appliance inside the niche. When unscrewing the height-adjustable feet, proceed gradually, alternating between left and right. – The adjustment of the rear feet is aided if the appliance is lifted at the rear (tipped forward slightly). - Page 67 For a side-by-side combination the filler strips from both appliances are put together to form one long filler strip: ^ Take the peg from the "side-by-side merging kit" and insert it halfway into the filler strip rail on the left-side appliance.
-
Page 68: Preparing The Custom Door
Installing the appliance Preparing the custom door For best results, it is important to mount the upper door before the lower door. ^ Open the appliance door. ^ Unscrew the installation supports n from the appliance door. ^ Loosen the remaining screws from the strips o on each side of the door, then remove. - Page 69 ^ Mark the distance X on the back-side of the custom door. ^ Also calculate and mark the center of the custom door Y. ^ Remove the mounting frame from the appliance door and position it according to the markings on the custom door.
-
Page 70: Attaching And Aligning The Custom Door Front
Installing the appliance Attaching and aligning the custom door front ^ Fit the door handle to the custom door. Note that the screws are applied from the reverse side. ^ Open the door and hang the custom door with the adjusting rail over the double-threaded bolts p. -
Page 71: Attaching The Lower Bracket
^ Measure the distance Y between the adjusting rail from the lower door and the upper door. ^ Be sure to leave a distance of (3 mm) from the upper cabinetry door. Installing the appliance Attaching the lower bracket (Only for appliances using the "Front panel gap kit".) ^ Open the lower appliance door. -
Page 72: Attaching The Covers
Installing the appliance The lower bracket corrects the side position of the door. ^ Loosen the screw. ^ Check the side position of the door. ^ Thread the wood screw. ^ Tighten the screw. ^ Place the cover on the brackets. The number of lower brackets will depend on the width and design of the custom door. - Page 73 ^ Insert the cover strip into the space between the appliance and the side panel. For side-by-side combinations, the cover strips (on both sides of the appliance) are applied to the outermost spaces only. ^ Attach the light switch cover. Installing the appliance ^ Insert the cover plate on the freezer compartment door.
- Page 74 Installing the appliance ^ Put the included covering plate in place. ^ Attach the toe-kick panel to the plinth. Mounting the air separator The air separator keeps the supply and exhaust air separate. This prevents warm exhaust air from flowing into the machine, optimizing the energy performance of the unit.
-
Page 75: Plumbing
All plumbing work should be carried out by a suitably qualified and competent person, in accordance with all applicable local and national regulations. The manufacturer is not liable for damage to property due to an incorrect installation or water connection. The water quality must conform to country requirements for drinking water. - Page 76 Plumbing Preparing the water connection The connection to the household water supply must be installed before the appliance is installed. ^ Turn off the main water valve to prevent damage caused by leaking water. ^ Attach the connecting pipe to the shut-off valve, according to the instructions supplied by the manufacturer of the ice cube maker...
-
Page 77: Connecting The Water Supply
Connecting the water supply When connecting the water pipe to the solenoid valve of the appliance, follow the instructions supplied by the manufacturer of the ice cube maker installation kit. When bending the water pipe, be sure not to kink it, otherwise there is a risk of leaks and water damage. -
Page 78: Electrical Connection
If there are any questions regarding the electrical connection of this appliance to the power supply, please consult a licensed electrician or call the Miele Technical Service. U1-800-999-1360 V1-800-565-6435 The appliance comes with a UL-listed, 3-wire power supply cord. -
Page 79: Remotevision
The Miele RemoteVision system is designed to send messages directly to Miele and/or your PC. For information on set-up and installation of the RemoteVision module see the "Installation" section of this manual. RemoteVision Be sure your wireless system meets the following requirements ®... -
Page 80: Accessing The Remotevision Control Panel
^ Touch the access button "p" so it turns yellow. ^ Touch the sensor button for the refrigerator section so it turns yellow. ^ Note the position of the button X, but do not touch. ^ Touch the access button "p" again so it turns white. - Page 81 MasterCool control panel options for RemoteVision Selectable Description of function options Back Reboot the module Reset the module to factory settings Enter Ad-Hoc Mode Note: If you cannot select any option (other than ; - "back"), the module has not been installed correctly.
- Page 84 Alteration rights reserved / 3408 M.-Nr. 07 155 800 / 05 For the most updated manual see the Miele web site.