Asus Audio Card Xonar D2 User Manual
Asus xonar d2 audio card user manual
Hide thumbs
Also See for Audio Card Xonar D2:
- Test manual (17 pages) ,
- Installation manual (80 pages) ,
- Installation manual (71 pages)
Table of Contents
Table of Contents

Related Manuals for Asus Audio Card Xonar D2


Summary of Contents for Asus Audio Card Xonar D2
-
Page 1: Audio Card
ASUS Xonar D2 ® audio card User Manual... - Page 2 Product warranty or service will not be extended if: (1) the product is repaired, modified or altered, unless such repair, modification of alteration is authorized in writing by ASUS; or (2) the serial number of the product is defaced or missing.
-
Page 3: Table Of Contents
Contents Contents ... -iii Notices ... v Safety information ... vi Trademarks ... vi License ... vi Introduction ... 1 Package Contents ... 1 System Requirements ... 1 Specifications summary ... 2 About Hardware ... 4 Xonar D2 Audio Processing Card ... 4 MIDI Board/Cable ... -
Page 4: Contents
Contents Effects ... 42 Karaoke/Magic Voice ... 44 FlexBass ... 45 Smart Volume Normalization ... 46 DSP Modes ... 48 ASIO 2 Driver ... 49 Portable Music ProcessorTM Software Guide ... 52 Introduction ... 52 Converting music in “Main Setting” Page ... 54 Find Converted Music in “PMP Music”... -
Page 5: Notices
Notices Federal Communications Commission Statement This device complies with Part 15 of the FCC Rules. Operation is subject to the following two conditions: • This device may not cause harmful interference, and • This device must accept any interference received including interference that may cause undesired operation. -
Page 6: Safety Information
Trademarks Xonar and ASUS logo are trademarks of ASUSTek Computer Inc. “Dolby” and “Dolby Digital Live”, “Dolby Pro Logic IIx”, “Dolby Virtual Speaker”, “Dolby Headphone” are trademarks of Dolby Laboratories. “DTS” and “DTS CONNECT”, “DTS Interactive”, “DTS Neo: PC”... -
Page 7: Introduction
Ableton Live and > 320MB for Cakewalk package • CD-ROM drive (or DVD-ROM drive) for software installation • High-quality headphones, powered analog speakers, or a Dolby Digital or DTS decoder, to enjoy the Ultra-High Fidelity sounds of the card ASUS Xonar D2... -
Page 8: Specifications Summary
Almost lossless, high-fidelity floating-point filters, which has: -140dB (typical value for 44.1K->48KHz, 24bit) -145dB Dynamic Range (typical value for 44.1K- >48KHz, 24bit) ASUS AV200 High-Definition Sound Processor (Max. 192KHz/24bit) Burr-Brown PCM1796 *4 (123dB SNR, Max. 192kHz/24bit) Cirrus-Logic CS5381* 1 (120dB SNR, Max. - Page 9 Dolby Virtual Speaker (w/ Pro-Logic II), and Smart Volume Normalization processing (Windows Media Player 10 or above is required) Ableton Live; Cakewalk Production Plus Pack (SONAR LE, Dimension LE, and Project5 LE) Software DVD player with Dolby Digital 5.1 decoder ASUS Xonar D2 ® HW & SW...
-
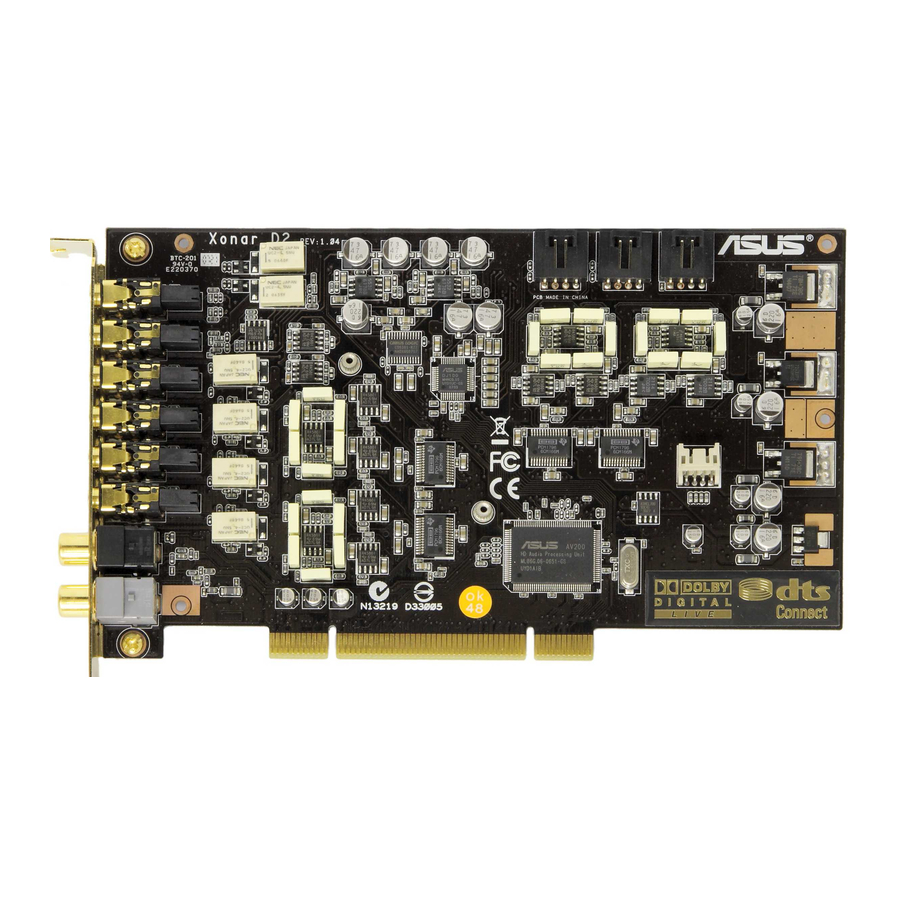
Page 10: About Hardware
About Hardware Xonar D2 Audio Processing Card ASUS Xonar D2... - Page 11 Audio Center software’s recording mixer.) MIDI I/O Header Connects to the additional MIDI board/bracket (available in the package) Main Audio Processor ASUS Xonar AV200 Audio Processing Unit (DuplexHD 192K/24bit) Connects to the PCI slot on your motherboard PCI Bus Golden Fingers...
-
Page 12: Midi Board/Cable
Connects to the 6-pin mini-DIN connector of the MIDI Y cable (adaptor to 5-pin DIN standard MIDI I/O connectors) Connects to the #2 6-pin mini-DIN port on the MIDI board Connects to the input and output DIN male connector of the standard MIDI instrument cable ASUS Xonar D2... -
Page 13: Installing The Xonar Hardware
Power off your computer and disconnect the power cord. Open the computer’s case. Remove the metal brackets from two unused PCI slots (You can just remove one if you don’t need to use the MIDI board in the package). ASUS Xonar D2... -
Page 14: Installing The Audio Processing Card
Installing the MIDI board Secure the MIDI bracket to another slot on the back of your computer case. Connect the 4-pin MIDI header on the audio card to the MIDI bracket with the MIDI cable as the figure below. ASUS Xonar D2... -
Page 15: Connecting Cd/Dvd-Rom Drive (With The Analog Header)
CD playback on Windows. Connect the CD-IN 4-pin header to the analog output on the back of your CD/DVD-ROM drive with the audio CD cable which is usually included with CD/DVD-ROM drive. ASUS Xonar D2... -
Page 16: Connecting Tv Tuner Card
Using this setup, you can even turn on sound effects such as Pro-Logic IIx to expand the stereo TV audio to 5.1 or 7.1 channel surround sound. TV audio on your PC will become even better than on your TV set! ASUS Xonar D2... -
Page 17: Installing Software
“END USER LICENCE AGREEMENT” in the process and make sure you understand and accept it before you continue the installation. When the installation finishes, you may be prompted to restart your computer. You can choose to restart the computer later if desired. ASUS Xonar D2... -
Page 18: Installing The Pmp Software (Portable Music Processor)
Installing the PMP software (Portable Music Processor) From the installation CD menu, select the option to install the PMP software. Follow the instructions on the screen to complete the installation. After the installation is complete, click Finish. ASUS Xonar D2... -
Page 19: 4.3 Installing The Ableton Live
Follow the instructions on the screen to complete the installation. Please read the “END USER LICENCE AGREEMENT” and make sure you understand and accept it before you continue the installation. After the installation is complete, click Finish. ASUS Xonar D2... -
Page 20: Installing The Cakewalk Production Plus Pack
You may be prompted to select the language, installed components, and associated file types, and to run the VST Adapter Configuration Wizard. After the installation is complete, click “Finish”. ASUS Xonar D2... - Page 21 Follow the instructions on the screen to complete the installation. Please read the “SOFTWARE LICENCE AGREEMENT” and make sure you understand and accept it before you continue the installation. You may be prompted to select the language and installed components. After the installation is complete, click “Finish”. ASUS Xonar D2...
-
Page 22: Uninstalling Or Reinstalling Software
“Finish”. Uninstalling or Reinstalling Software 4.5.1 Uninstalling Software Select the corresponding uninstallation program, under the “All Programs” section of the Start menu. Otherwise, you’ll need to use the Windows control panel for uninstallation as follows. ASUS Xonar D2... -
Page 23: Reinstalling Software
4.5.2 Reinstalling Software Before you reinstall any software, it’s recommended to uninstall the existing software first. After you finish the uninstallation of the software, please follow the installation process again to reinstall the same or updated software. ASUS Xonar D2... -
Page 24: Connecting Speakers And Peripherals
RCA male connector to the S/PDIF-Out combo jack and connect the other end into the coaxial S/PDIF input on your decoder. Description Plug the optical TOSLINK adaptor into the S/PDIF-Out combo connector Connect your decoder’s S/PDIF-In port to the optical adaptor with the TOSLINK optical cable ASUS Xonar D2... -
Page 25: Connecting Headphones
Connecting Headphones 5.2.1 Connecting Stereo Headphones Item Front Out/Headphone Jack Description The Front Out jack has a built-in high-quality amplifier to drive headphones. Please connect your stereo headphones directly to this jack. ASUS Xonar D2... - Page 26 Description Connect the front-channel 3.5mm plug of your 5.1 headphones into this jack. Connect the surround-channel 3.5mm plug of your 5.1 headphone into this jack. Connect the Center/Bass-channel 3.5mm plug of your 5.1 headphone into this jack. ASUS Xonar D2...
-
Page 27: 5.3 Connecting Analog Speaker Systems
Connects to the “Center” and “subwoofer” input ports of the analog amplifier with the mini-jack to RCA cable. Connects to the “left back” and “right back” input ports of the analog amplifier with the mini-jack to RCA cable. ASUS Xonar D2... - Page 28 5.3.2 Connecting 2/2.1 Channel Speakers 2 Speakers 2.1 Speakers Item Front Out/Headphone Jack Description Connect the 2/2.1 speaker set’s 3.5mm plug into this Front Out jack. ASUS Xonar D2...
- Page 29 4.1 Speakers Item Front Out Side Surround Out Description Connects to the Front input port of the 4/4.1 speakers with the mini-jack cable. Connects to the Surround input port of the 4/4.1 speakers with the mini-jack cable. ASUS Xonar D2...
- Page 30 Connects to the Front input port of the 5.1 speakers with the mini-jack cable. Connects to the Surround input port of the 5.1 speakers with the mini-jack cable. Connects to the Center/Subwoofer input port of the 5.1 speakers with the mini-jack cable.. ASUS Xonar D2...
- Page 31 Connects to the Surround input port of the 6.1/7.1 speakers with the mini-jack cable. Connects to the Center/Subwoofer input port of the 6.1/7.1 speakers with the mini-jack cable. Connects to the Back Surround input port of the 6.1/7.1 speakers with the mini-jack cable. ASUS Xonar D2...
-
Page 32: Connecting Microphone
Connect the 3.5mm plug of the CD/MP3 Player or any other Line level analog audio sources into this Line-In jack for sound recording or real-time Dolby/DTS sound processing through the Monitoring path (See the “Mixer” section of the driver guide). ASUS Xonar D2... -
Page 33: Connecting Digital Audio Sources
RCA male connector to the S/PDIF-In combo jack and connect the other end into the coaxial S/PDIF output on the player. Description Plug the optical TOSLINK adaptor into the S/PDIF-In combo connector Connect your MD/CD/DVD player’s S/PDIF out port to the optical adaptor with the TOSLINK optical cable ASUS Xonar D2... -
Page 34: Xonar D2 Driver Guide
D2 driver. You can control the functions and features of the Xonar D2 driver on the Audio Center. The following picture shows a basic overview of the Xonar D2 Audio Center. The following sections of this manual will describe its functions in more detail. ASUS Xonar D2... - Page 35 Music, Games, DVD Video, and effect-free (Hi-Fi) modes. Application Links These 4 buttons give quick access to ASUS PMP, PowerDVD, Sonar 6 LE, and Ableton Live. This panel gives access to setting tabs, including Main Setting Menu Panel Settings, Mixer/volume, Effects, Karaoke/MagicVoice, and FlexBass.
-
Page 36: Main Setting
The Xonar D2 audio card supports sample rates up to 192KHz (44.1K, 48K, 96K, 192KHz). Typical values: -Audio CD, MP3, WMA, Wave files are 44.1KHz; -The audio of DVD-Video is 48KHz; -DVD-Audio or other HD media may contain 96KHz or 192KHz high-definition audio content. ASUS Xonar D2... - Page 37 Clicking this button will pop up an advanced setting window to allow you to: –Swap center/bass outputs for 5.1/7.1-speaker set ups -Swap Side/Surroud outputs for 7.1-speaker set ups Check the box if your speakers are outputting the incorrect channel. Otherwise, leave them blank. ASUS Xonar D2...
- Page 38 -DTS Interactive real-time 5.1ch encoding -S/PDIF In Loopback to output (typically useful for coaxial/ optical connection transformation) This advanced setting will automatically upmix stereo (2ch) content to 5.1 channel surround with Dolby Pro-Logic II when using Dolby Digital Live output. ASUS Xonar D2...
- Page 39 Here are some typical suggestions: -MP3, WMA, AAC, CD, VCD, 2D games => 2 channels -DVD-Video with Dolby Digtial or DTS 5.1 => 6 channels -DVD-Video with Dolby Digtial EX or DTS ES => 8 channels -3D games => 8 channels ASUS Xonar D2...
- Page 40 Make all speakers (except Subwoofer) rotate counter- clockwise Make all speakers (except Subwoofer) rotate clockwise Manually drag and rotate all speakers (except Subwoofer) This is the default mode that allows you to manually drag each speaker or the listener with your mouse. ASUS Xonar D2...
- Page 41 Drag to the right side to widen the vocal sound range. The dimension parameter fades sounds to the front or rear of the listener. Reset all settings to the defaults. Movie mode is a preset optimized for movie audio. ASUS Xonar D2...
- Page 42 Drag to the right side to widen the vocal sound range. The dimension parameter fades sounds to the front or rear of the listener. Reset all settings to the defaults. Movie mode is optimized for movie audio. ASUS Xonar D2...
- Page 43 They differ in the sense of the “spatial dimension” they impart. DH1—Reference Room: Small, acoustically damped room. DH2—Livelier Room: More acoustically live than DH1 DH3—Larger Room: Larger room than DH1; more distant and diffused effect. ASUS Xonar D2...
- Page 44 Speaker page for manual adjusting. Dolby Virtual Speaker provides two modes of virtualization: The first is Reference mode, which virtualizes the missing speakers as in the following picture. DH3—Larger Room: Larger room than DH1; more distant and diffused effect. ASUS Xonar D2...
-
Page 45: Mixer/Volume
The tool-tip reveals the percentage number from 1 to 100 in terms of the full scale level. The horizontal slider controls the volume between the left and right channels. Reset all volume controls to the default settings ASUS Xonar D2... - Page 46 A typical benefit is to apply Dolby Pro-Logic IIx 7.1-ch spreading for your TV audio, CD, MP3, or stereo game console audio from Wii, Xbox, PS2/PS3/PSP, etc. To apply Dolby Virtual Speaker is suitable for two-speaker environment. ASUS Xonar D2...
- Page 47 Click this button to open the advanced settings for the Advanced Setting Microphone-In: Enabling “Microphone Boost” will increase a volume gain to boost microphone input signals. For typical low-cost PC microphone, it’s recommended to enable this function. ASUS Xonar D2...
-
Page 48: Effects
Clicking this button will apply the environment effect that you select from the pull-down menu on the right side. There are another 23 options in this menu. There are three size settings for each environment: Large, Medium, and Small. ASUS Xonar D2... - Page 49 Adjust the gain for each band (30~16KHz) Key in a name for your own “User Defined” equalizer setting Click this + button to save the parameters into User Defined list Click this - button to delete the parameters from User Defined list ASUS Xonar D2...
-
Page 50: Karaoke/Magic Voice
4 semitones below, to 4 semitones above. Checkbox to enable or disable the vocal cancellation function and adjust the voice cancellation level from 0 to +100. +100 will eliminate most original vocals (default value is 50). Reset all settings to the default. ASUS Xonar D2... -
Page 51: Flexbass
Large speakers because the subwoofer can redirect the bass signals inside the two channels to the subwoofer speaker automatically. Colors for small/large speakers are different. Orange: large speakers Green: small speakers ASUS Xonar D2... -
Page 52: Smart Volume Normalization
Xonar D2 will filter out the bass signals below the crossover frequency from small speaker channels and forward them to the subwoofer. The higher the crossover frequency, the more bass signals will be subtracted. SVN On ASUS Xonar D2 0dB (Full-scale) -10 dB... - Page 53 When SVN is enabled, the master volume knob will be SVN Blue Light illuminated by a blue light. It will be lit red if the volume is muted. ASUS Xonar D2...
-
Page 54: Dsp Modes
This mode is set for DVD Movie playback. This mode is set for Games. This mode is set for Hi-Fidelity playback, where all effects will be cleared to keep the original digital data and analog output quality as high as possible. ASUS Xonar D2... -
Page 55: Asio 2 Driver
Step 2 is to select “ASIO” as the driver type. (WDM and MME are other Windows driver types) Step 3 is to choose “ASUS Xonar D2 ASIO” as the Audio Device. Step 4 is to click the Hardware Setup to configure the Bit- depth (16/24bit) and latency (1ms~300ms). - Page 56 When Using Sonar LE… ASUS Xonar D2...
- Page 57 (WDM and MME are Windows driver types) The changes will take effect after you restart the program next time. After step 2, Sonar LE will display 4 output drivers: “ASUS Xonar D2 ASIO Out -00~06”. Make sure you are using 00 or another one.
-
Page 58: Portable Music Processortm Software Guide
The Xonar D2 driver has been installed (Xonar D2 audio converter driver is installed for PMP utility) Windows Media Player Ver. 10 or above has been installed on your PC (If it hasn’t, Xonar D2 installer will provide a guide to downloading WMP 10) (referred to as PMP hereafter) ASUS Xonar D2... - Page 59 This page will display the converted music files saved in the “PMP Music” folder This button is used to check online for upgrades to the PMP software and download it for upgrade (make sure your computer is connected to the Internet before you click the button) ASUS Xonar D2...
-
Page 60: Converting Music In "Main Setting" Page
PMP. You can select all or click each check box to choose which file to be converted later. The files that have been converted during the process will show a check mark in the status column. ASUS Xonar D2... - Page 61 This display window will tell you the music being converted, Display for converting status file type, bitrate, spent time, converted percentage, and speed. Information page Clicking the information button will display the version of PMP that you have installed. ASUS Xonar D2...
-
Page 62: Find Converted Music In "Pmp Music" Page
PMP Music page Music Information Description This page shows the converted music library stored in the PMP Music folder. This window will display the song name and its artist, length, and size in the PMP Music folder. ASUS Xonar D2... -
Page 63: Ableton Live Software Guide
Ableton Live Software Guide Please refer to the separate manual for Ableton Live. Cakewalk Production Plus Pack Software Guide Please refer to the Help manual for these Cakewalk programs. ASUS Xonar D2... -
Page 64: Rmaa Test Guide
RMAA stereo signals in the driver) Turn off all sound effects including Dolby, DTS, 7.1 speaker shifter, EQ, Environment, etc. A quick way to do so is to enable “Hi-Fi mode” button in the Audio Center. ASUS Xonar D2... - Page 65 You may also choose to use an external 3.5mm line cable as follows (as short as possible) to connect the Front-Out jack to Line-In jack for loop-back testing. In that case, please select “Line In” as the recording source on the mixer page. 3.5mm Line Cable ASUS Xonar D2...
- Page 66 Click “Reset” on the playback volume mixer page to keep the volume setting on default. Turn the master volume to the MAX level (0dB) ASUS Xonar D2...
-
Page 67: Configuration And Test With Rmaa
Configuration and Test with RMAA Start RMAA and follow the setup procedure below. Select both of the playback/recording devices as “ASUS Xonar D2 Audio”. Select 24bit and 48KHz for the test signals. (If you change the format here, remember to go back to set the same sample rate output in the Xonar D2 Audio Center) Click “Test options”... - Page 68 Go to the Sound Card tab and select “DirectSound” as the Driver Model (because Windows MME mode doesn’t support high-resolution 24bit and192KHz audio playback.) Click loop-back mode test button ASUS Xonar D2...
- Page 69 If the recording volume level is not enough, check and make the WAVE and Master volume have been at the maximum level; Instead, if the recording volume level is too high, lower the WAVE and Master volume gradually until the level is ok. ASUS Xonar D2...
- Page 70 Begin the test by clicking the “Done” button. If you cannot get the level to be “ok” anyway, click “Done” anyway and proceed. Enter “Xonar D2 Audio Card” in the New slot name and select one Empty slot. Then click “OK”. ASUS Xonar D2...
- Page 71 10. RMAA will pop up the Test results window. You can click “Select” checkbox and click to make an HTML report. 11. Check and key in the report name/options as follows. Then click “OK”. ASUS Xonar D2...
-
Page 72: Rmaa Testing Results
Xonar D2 audio card is for both output and input (one of the world’s finest sound cards, it has higher quality than most CE devices.) You can also try to test the performance for other sample rates and bit-depths with the same procedure. ASUS Xonar D2... - Page 73 From 20 Hz to 20 kHz, dB From 40 Hz to 15 kHz, dB Summary +0.04, -0.03 -116.6 -116.6 0.0004 0.0008 -116.5 0.0007 Frequency response Response -0.10, +0.04 -0.03, +0.04 ASUS Xonar D2 Excellent Excellent Excellent Excellent Excellent Excellent Excellent...
- Page 74 Parameter RMS power, dB: RMS power (A-weighted), dB: Peak level, dB FS: DC offset, %: Noise level Left Right -115.5 -115.2 -116.7 -116.5 -92.9 -92.4 -0.00 -0.00 Dynamic range ASUS Xonar D2...
- Page 75 Dynamic range (A-weighted), dB: THD + Noise (at -3 dB FS) Parameter THD, %: THD + Noise, %: THD + Noise (A-weighted), %: Left Right +115.4 +115.3 +116.6 +116.4 0.00 -0.00 Left Right 0.0004 0.0005 0.0006 0.0007 0.0007 0.0008 ASUS Xonar D2...
- Page 76 Parameter IMD + Noise, %: IMD + Noise (A-weighted), %: Intermodulation distortion Left 0.0009 0.0005 Stereo crosstalk ASUS Xonar D2 Right 0.0007 0.0005...
- Page 77 IMD + Noise at 10 kHz, %: IMD + Noise at 15 kHz, %: *This report was generated by RightMark Audio Analyzer 5.6 Left -113 -116 -114 IMD (swept tones) Left 0.0006 0.0006 0.0008 ASUS Xonar D2 Right -114 -115 -113 Right 0.0008 0.0006 0.0006...
-
Page 78: Troubleshooting And Faqs
Panel and double click the “Xonar D2 Audio Center” icon to make it visible in the system tray again. After the driver installation is complete, it’s recommended that you reboot your computer to complete the setup. If the icon still doesn’t appear, please try installing the driver package again. ASUS Xonar D2... - Page 79 If you are using Windows Vista, please also go to system audio control panel to see the current default recording/input device is right. Remember to turn on the digital monitoring button for that recording source. ASUS Xonar D2...
- Page 80 Currently PMP only support common 16 bit audio sources. If you have 24 bit sources, please try converting it into 16bit formats first with some software editing tool (Ableton Live, Cakewalk, CoolEdit, Soundforge, etc.) ASUS Xonar D2...
- Page 81 XBOX360, PS3, and Wii. Dolby and DTS can provide the best gaming sound experience and compatibility with home theater or TV systems. 2. Dolby Headphone and Dolby Virtual Speaker are the best 3D sound positioning, spatial modeling and 5.1-channel virtualization technology for regular stereo headphones and speakers ASUS Xonar D2...
- Page 82 PMP will convert the signal back to the normal speed with very high-quality (118dB SNR), low distortion (-108dB) time-scaling algorithm. ALT technology can shorten the total conversion process. Please refer to the graph below: Original Digital Data Playback 2X Analog Output Signal Record ASUS Xonar D2 Converted Digital Data...
- Page 83 For attaining 5.1 channel surround sounds, you can select Dolby Digital Live or DTS Interactive encoding output from the S/PDIF out menu, which will allow the Xonar D2 to deliver 5.1 surround sound for games, DVD movies, and even stereo music. ASUS Xonar D2...
- Page 84 ASUS Xonar D2...