D-Link DNS-313 User Manual
D-link 1-bay network storage enclosure
Hide thumbs
Also See for DNS-313:
- User manual (92 pages) ,
- Quick installation manual (41 pages) ,
- Technical specifications (2 pages)

Related Manuals for D-Link DNS-313


Summary of Contents for D-Link DNS-313
-
Page 2: Table Of Contents
Clck n’ Connect for New Hard Dsk Install ......10 BtTorrent ..................53 Easy Search Utlty ..............16 BtTorrent Settngs..............54 Mappng the Network Drve ...........22 Configure the DNS-313 ............24 LAN Setup ................25 Devce ..................26 Tme and Date ..............27 Advanced Setup ..............28 Users / Groups ..............29 FTP Server Setup ..............30... -
Page 3: Product OvervEw
If any of the above items are missing, please contact your reseller. System Requrements Note: The DNS-313 requires installation of a hard drive before it can be used. The hard disk must be a 3.5” SATA Hard Drive of any capacity. -
Page 4: IntroductOn
DNS-313 on the network and map drves to your computer. Backup software s also ncluded on the CD. Ths software allows you to backup your files from a computer to the DNS-313 manually, by a schedule, or n real-tme. -
Page 5: Features
3. D-Lnk cannot guarantee full compatblty or proper playback wth all codecs. Playback capablty depends on the codec support of the UPnP™ AV meda player. 4. When usng the DNS-313 as a USB 2.0 port portable drve, the Network Storage functonalty wll be dsabled. To re-enable Network Storage functonalty, please power off the DNS-313 and unplug USB cable. -
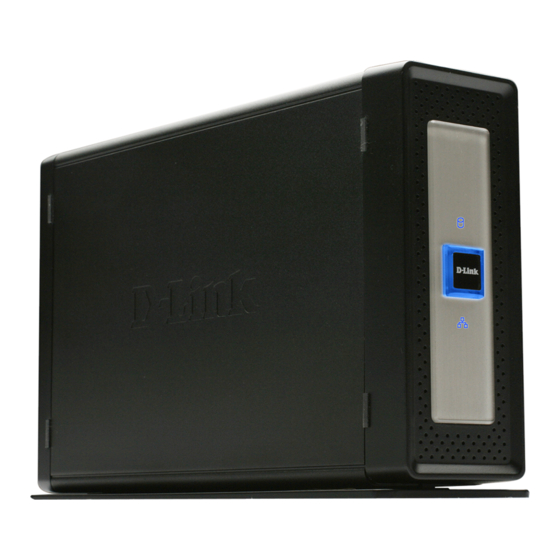
Page 6: Hardware OvervEw
5%. It will illuminate RED if the drive has failed. Power Button Push in to power-on the DNS-313. The edges of the button will be illuminated with BLUE back lighting when the device is powered on. Press again to turn off. There is a few seconds delay during both power on and power off. -
Page 7: Rear Panel (ConnectOns)
It remains idle if not needed. Do not block this opening. Reset Button Use this to reset the DNS-313 to factory Cooling Fan default settings. To reset, insert a ballpoint pen and hold the recessed button down for a few seconds. -
Page 8: InstallatOn
DNS-313 and carefully remove and unwrap its contents. Follow the instructions below to setup the DNS-313. If this is the first time using the DNS-313 or if a new hard disk is installed, use the Easy Search utility located on the Installation CD and follow the instructions for setting up, configuring and formatting the new drive. - Page 9 Make sure to align the drive connector to the SATA connector on the bottom edge inside the drive bay of the DNS-313. Gently push the drive in until it connects. 4. Attach the faceplate to the front of the device.
- Page 10 Note: When a hard disk is installed, the hard disk must first be formatted in the DNS-313 before it can be used. Insert the Installation CD into your computer’s CD-ROM or DVD-ROM drive and follow the instructions below to use the Easy Search Utility to establish a network link to the DNS-313.
-
Page 11: Setup UtLTEs
Setup Utltes The Setup Utility on the Installation CD is used for first time setup of the DNS-313 or, after the hard disk has been formatted, use the Setup Utilities to establish a configure IP settings and map the drive to your Windows computer. -
Page 12: ClCk N' Connect For New Hard DSk Install
Clck n’ Connect for New Hard Dsk Install To use the D-Link Click n’ Connect utility, choose the preferred language, then click on the Quick Installation - Start button in the menu. The button appears green when the cursor is placed cursor over it. - Page 13 Click on the Next button to proceed. Connect the DNS-313 to the Ethernet port on your computer or router and click on the Next button to proceed to the last hardware setup illustration.
- Page 14 Secton 3 - Configuraton Connect the power and turn the DNS-313 on as shown. Click on the Next button to begin searching for the drive. It might take a few seconds to detect the DNS-313 depending on network conditions. After the unformatted DNS-313 installation has been detected, a new menu appears.
- Page 15 The hard disk is now ready to be formatted. To format the hard drive, click on the Next button. Remember that any data on the disk will be erased during the formatting. Formatting might take several minutes if the drive is very large. D-Lnk DNS-313 User Manual...
- Page 16 Next button. If there are other D-Link DNS Network Storage devices connected to the network, they will also appear in the list. Note: If the DNS-313 has an IP address that does not allow your computer to connect to it, it will be necessary to change the IP address of the device.
- Page 17 Secton 3 - Configuraton The DNS-313 is now ready to be mapped to your computer where it will appear as a network storage device. Choose a Drive Letter from the pull-down list and type a Name for the drive that will appear listed in My Computer with other storage devices.
-
Page 18: Easy Search UtLTy
DHCP server is present, the IP address 192.168.0.32 is used. Note: When first powered on, during the initial boot sequence, the DNS-313 will wait to be assigned an IP address via DHCP. If it does not receive a DHCP assigned IP address, by default it will have a self- assigned IP address of 192.168.0.32. - Page 19 HTTPS, simply use HTTPS in the browser address bar and login with the User Name and Password for either Configurations or Applications menus. If the web browser is unable to connect to the web manager of the DNS-313, check to make sure your computer is on the same subnet as the DNS-313.
- Page 20 Wizard now. To launch the Wizard, click on the Run Wizard button and follow the instructions. The first Wizard pop-up menu lists a summary of the setup steps. Click Next to proceed. D-Lnk DNS-313 User Manual...
- Page 21 Create a password used to access the web manager. Type a New Password in the space provided and type again in Confirm Password. Click Next to continue. Choose the Time Zone used for your network from the pull-down menu. Click Next to continue. D-Lnk DNS-313 User Manual...
- Page 22 If the hard disk has not yet been formatted, use the web manager to format the hard disk. If the disk has been previously formatted in the DNS-313, the drive is now ready to be mapped to your computer. See below for instructions.
- Page 23 If the hard disk has not yet been formatted, use the web manager to format the hard disk. If the disk has been previously formatted in the DNS-313, the drive is now ready to be mapped to your computer. See below for instructions.
-
Page 24: MappNg The Network DrVe
Mappng the Network Drve The Easy Search Utility located on the Installation CD is used to map the DNS-313 to your Windows computer where it appears as a Network Storage Drive. Follow these steps to map the drive to your computer. - Page 25 “Z” as the default. The pull-down menu lists drive letter options in reverse alphabetical order (Z to A). If you add more DNS-313s the next default will be “Y” then “X” and so on. D-Lnk DNS-313 User Manual...
-
Page 26: Configure The Dns-313
Device menu used for naming the drive, and the Time and Date menu for changing the system time and configuring NTP. These menus and the menus found in the Advanced, Maintenance and Status menu directories are described in this section. D-Lnk DNS-313 User Manual... -
Page 27: Lan Setup
The LAN Settings menu is used to configure IP settings and DHCP client status of the network storage device. The default IP settings for the DNS-313 are initially as a DHCP Client. However, if no DHCP server is detected, the device will default to a Static IP address (192.168.0.32). -
Page 28: DevCe
The Workgroup is used to by Microsoft Windows Network to organize networks groups. Click on the Save Settings button to apply and save the new settings. D-Lnk DNS-313 User Manual... -
Page 29: TMe And Date
Tme and Date The system time and date can be set from your computer, manually or configured from an NTP server. Use the System Time Settings menu to configure the time, date and time zone for the DNS-313. D-Lnk DNS-313 User Manual... -
Page 30: Advanced Setup
Secton 3 - Configuraton Advanced Setup Use the Advanced directory menus to setup access privileges, FTP service, configure UPnP AV and iTunes server and DHCP server. D-Lnk DNS-313 User Manual... -
Page 31: Users / Groups
<Page 32: Ftp Server Setup
FTP requests from the Internet. The next section provides an example of how to configure a router to allow FTP connection requests. D-Lnk DNS-313 User Manual...Page 33: Ftp Server BehNd A Router
FTP Server Behnd A Router If you are behind a router, you will need to forward the FTP port from the router to the DNS-313. Additional filtering and firewall settings may need to be modified on your router to allow FTP Access to the DNS-313 from the Internet. Once the port has been forwarded on the router, users from the internet will access the FTP server through the WAN IP address of the router.Page 34: Secure Ftp ConnectOns
Secure FTP Connectons The DNS-313 supports secure FTP connection using SSL or TLS. Follow the instructions here to set up a secure FTP connection using FireFTP with the Firefox browser. An add on for the Mozilla Firefox browser, FireFTP, supports FTP connection over SSL and TLS.- Page 35 In the Main tab of the Account Manager menu enter the IP address of the DNS-313 in the Host entry field and enter an Account Name for the connection. Enter the user name and password of an existing FTP user account on the DNS-313 in the Login and Password fields.
- Page 36 C l i c k o n C o n n e c t n e x t t o t h e c o n n e c t i o n n a m e i n t h e F i r e f o x b r o w s e r w i n d o w . D-Lnk DNS-313 User Manual...
- Page 37 LAN, you can make an exception to the normal security certification. Click the buttons to add an exception. Click the Or you can add an exception… button. Click the Add exception… button. Click the Get Certificate button. D-Lnk DNS-313 User Manual...
- Page 38 The browser is now ready for a secure FTP connection. Click on Connect to establish the connection. Note: A user account must also be created on the DNS-313 and the FTP server started in the FTP Server menu for the connection to succeed.
- Page 39 Secton 3 - Configuraton Depending on the Read/Write capabilities configured for the User associated with the connection, select the files to be transferred to or from the DNS-313. D-Lnk DNS-313 User Manual...
Page 40: Upnp Av Server
When content is added or deleted from the available folders, click the Refresh button and the DNS-313 will scan for file updates. While the update scan is underway, the AV media will not be available for use by clients on the network.Page 41: Tunes Server
Secton 3 - Configuraton Tunes Server The DNS-313 supports iTunes Server for use on the local network. Use the iTunes Server menu to select the media content to be made available. By default the iTunes Server is enabled. The root check box specifies access to media content on all volumes and folders on the drive.Page 42: Dhcp Server
Secton 3 - Configuraton DHCP Server The DNS-313 is capable of providing DHCP service to the local network. The DHCP server is disabled by default. This should only be used on networks that do not already have a functioning DHCP server.Page 43: Add Ons
BitTorrent downloading. The files needed for these add-on features are located on the Installation CD shipped with the DNS-313. The file is zipped and located in a folder named Apkg on the CD. Copy this file to your computer and unzip the file apkg.Page 44: MaNtenance
Dynamic DNS (DDNS) and perform a scan disk to check the physical hard drive for errors. This is also where the previously discussed format disk function is located. D-Lnk DNS-313 User Manual...Page 45: AdmNStrator's Password
Admnstrator’s Password The Admin menu allows you to set a password for the admin account. It is recommended to set an admin account password when first configuring the DNS-313. The administrator user name is admin, and this cannot be changed.Page 46: System
Save or load configuration setting to local hard drive Once the DNS-313 is configured it is a good idea to back up the configuration settings file to your local hard disk. To back up the configuration settings file of the DNS-313, click on the Save button under Configuration Settings and choose a location on your computer to store the file.Page 47: FRmware Upgrade
Secton 3 - Configuraton Frmware Upgrade To upgrade the DNS-313 firmware to the latest available firmware, go the D-Link website and download the latest version. When the download is completed, use the Browse button to locate the firmware file on your computer and click the Apply button to begin loading the firmware.Page 48: E-MaL Alerts
Use the Alert Types section to choose what alerts to send. The System Temperature alert will shut down the device if the chosen temperature is exceeded and send an alert. Click Save Settings to apply and save the new alert settings. D-Lnk DNS-313 User Manual...Page 49: Power Management
Choose to Enable or Disable power management (default = Enable) and, if enabled, the period of idle time allowed before the drive goes into hibernation mode. Click Save Settings to apply and save the new settings. D-Lnk DNS-313 User Manual...Page 50: Format
Microsoft disk file format NTFS. Scan Dsk To perform a standard Scan Disk check for errors on the hard disk, click the Scan Disk button. Any errors found will be listed along with a description and the available repair options. D-Lnk DNS-313 User Manual...Page 51: DynamC Dns
Secton 3 - Configuraton Dynamc DNS The DNS-313 supports DDNS (Dynamic Domain Name Service). The Dynamic DNS service allows a dynamic public IP address to be associated with a static host name in any of the many domains, allowing access to a specified host from various locations on the Internet.Page 52: Status
Secton 3 - Configuraton Status The Status display lists basic network information and device information including hard drive capacity and available space as well as system temperature about the DNS-313. D-Lnk DNS-313 User Manual...Page 53: Schedule Downloads
In the URL entry field, enter the URL of the site or server you are initiating a transfer from. E.g. ftp://123.456.789/Test ftp://123.456.789/test.txt http://www.test.com/test.txt Click the Refresh button to refresh the Schedule list. D-Lnk DNS-313 User Manual...- Page 54 Click Local to set the source file or folder from one of the internal drive volumes. Browse to the file or folder, and click OK to accept the network path. Enter a valid destination drive on the DNS-313 in the Save To field, or click Browse and browse to the destination.
Page 55: BTtorrent
Click Stop to pause the download and sharing. To remove a partial or complete file from active downloading Note: The DNS-313 BitTorrent downloading application and sharing, click the Remove icon for the file to be has been tested to function properly with Windows Internet Explorer and Mozilla Firefox web browser software.Page 56: BTtorrent SettNgs
Secton 3 - Configuraton BtTorrent Settngs Use the Settings menu to change the port used for BitTorrent, seeding preferences and bandwidth allocation. Click Save to apply and save the BitTorrent settings. D-Lnk DNS-313 User Manual...